
Related Manuals for Philips Norelco SmartTouch-XL 9160XL


Summary of Contents for Philips Norelco SmartTouch-XL 9160XL
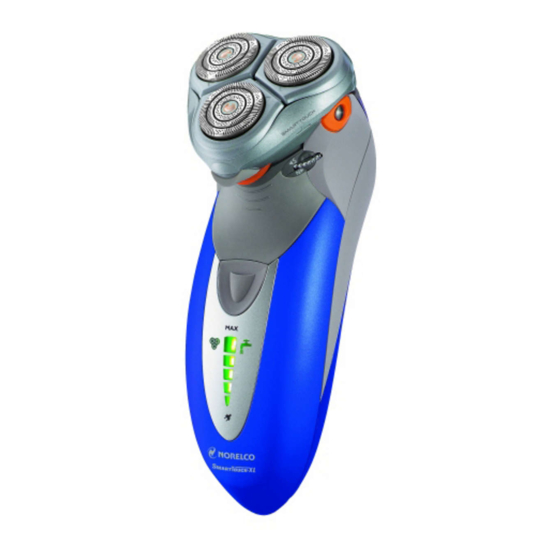
- Page 1 9160XLDFU_060705.qxd 6/9/05 1:59 PM Page 1 (Zwart plate) 9160XL Rechargeable Tripleheader ® Cordless/Cord Razor...
- Page 2 9160XLDFU_060705.qxd 6/9/05 1:59 PM Page 2 (Zwart plate)
- Page 3 9160XLDFU_060705.qxd 6/9/05 1:59 PM Page 3 (Zwart plate) ENGLISH 4 ESPAÑOL 28...
- Page 4 2. Use this razor for its intended household use as described in this manual. Do not use attachments not recommended by Philips Electronics North America Corporation. 3. Never operate this razor/charging stand if it has a damaged cord or charging plug, if it is not working properly, if it has been dropped or damaged, or dropped into water while plugged in.
- Page 5 9160XLDFU_060705.qxd 6/9/05 1:59 PM Page 5 (Zwart plate) ENGLISH 4. Keep the razor, charging stand, cord and charging plug away from heated surfaces. 5. Never drop or insert any object into any opening. 6. Do not charge or plug in razor/charging stand outdoors or operate where aerosol (spray) products are being used or where oxygen is being administered.
- Page 6 Send dated sales slip, your complete name and address as indicated below, and the razor, prepaid to: Philips Domestic Appliances and Personal Care Company A Division of Philips Electronics North America Corporation 450 North Medinah Rd, Dock 16 Roselle, IL 60172-2329 Please allow 4-6 weeks for delivery of check.
-
Page 7: Table Of Contents
9160XLDFU_060705.qxd 6/9/05 1:59 PM Page 7 (Zwart plate) ENGLISH Table of Contents Features............8-9 5 LED Battery Level Indicators ..10-11 Charging Stand Clock ......11-12 Before First Use..........13 Charging ...........13-15 Recharging............15 Quick Charge..........16 Put It To The Test & Shaving Tips ....16 Personal Comfort Control......17 How To Shave With An Electric Razor..........17-18... -
Page 8: Features
9160XLDFU_060705.qxd 6/9/05 1:59 PM Page 8 (Zwart plate) ENGLISH Features SmartTouch Contour Following System Personal Comfort Control Dial Razor Head Assembly Protective Razor Head Cap Individually Floating Heads Razor Head Release Button • Hair Chamber captures shaven hair Electronic ON/OFF HQ9160 Button 5 LED Charge Indicators... - Page 9 9160XLDFU_060705.qxd 6/9/05 1:59 PM Page 9 (Zwart plate) ENGLISH Spring-Release Trimmer Automatic Worldwide Voltage100V to 240V AC Cleaning Brush Storage/Travel Pouch Charging Stand Rechargeable - Initial 4 hour full charge for up to 90 minutes of cordless shave time HQ9160 HQ9160 1-Hour Quick Charge Cordless/Cord - To shave...
-
Page 10: Led Battery Level Indicators
9160XLDFU_060705.qxd 6/9/05 1:59 PM Page 10 (Zwart plate) ENGLISH 5 LED Battery Level Indicators The meter provides the following information: ◗ LED Battery Charge Meter The Lights on the display indicate approximately how much power is left in the batteries. ◗... -
Page 11: Charging Stand Clock
9160XLDFU_060705.qxd 6/9/05 1:59 PM Page 11 (Zwart plate) ENGLISH ◗ Low Battery Indicator When the battery is running low, the bottom light on the display lights up red. When you turn the razor OFF, the bottom light will blink a few times. - Page 12 9160XLDFU_060705.qxd 6/9/05 1:59 PM Page 12 (Zwart plate) ENGLISH To replace clock battery Turn clock module counterclockwise (1) and remove from stand (2). Remove battery cover and then use a flat- bladed screwdriver to lift out the battery. Replace battery with 1.5V button cell watch battery, placing rounded side of battery into battery compartment, flat side (+) facing out.
-
Page 13: Before First Use
9160XLDFU_060705.qxd 6/9/05 1:59 PM Page 13 (Zwart plate) ENGLISH Before first use ◗ Charge the razor before you start using it (see ‘Charging’). Make sure the razor is switched off before you start charging it. Important ◗ Only use the power plug and/or charging stand provided to charge the razor. - Page 14 9160XLDFU_060705.qxd 6/9/05 1:59 PM Page 14 (Zwart plate) ENGLISH Placing or removing razor from charging stand: ◗ Always place razor in stand in an upright position making sure charging contacts in bottom of stand fit into recess in bottom of razor.
-
Page 15: Recharging
9160XLDFU_060705.qxd 6/9/05 1:59 PM Page 15 (Zwart plate) ENGLISH ◗ An adaptor plug may be necessary for charging plug usage in some foreign countries. Use an attachment plug adaptor of the proper configuration for the power outlet. The charging plug will automatically convert to work on 100V to 240V AC systems. -
Page 16: Quick Charge
9160XLDFU_060705.qxd 6/9/05 1:59 PM Page 16 (Zwart plate) ENGLISH Quick Charge When batteries are totally depleted, recharging the razor for approximately 2 minutes gives enough energy for a 3-minute cordless shave. All of the lights on the Charge Meter will blink sequentially when the battery contains enough energy for a 3-minute cordless shave. -
Page 17: Personal Comfort Control
9160XLDFU_060705.qxd 6/9/05 1:59 PM Page 17 (Zwart plate) ENGLISH Personal Comfort Control ◗ Your Smart Touch razor has 3 adjustable settings that allow you to personalize your shave for your specific skin type from sensitive to normal skin. You can select your personal comfort control setting by turning the dial. -
Page 18: Trimming
9160XLDFU_060705.qxd 6/9/05 1:59 PM Page 18 (Zwart plate) ENGLISH Turn razor ON by pressing the on/off button once. Shave against the direction of beard growth using both straight and circular movements. Stretch your skin with your free hand so blades can lift and cut whiskers. Gently press razor to skin so the floating heads can follow the contours of your face. -
Page 19: Cleaning
9160XLDFU_060705.qxd 6/9/05 1:59 PM Page 19 (Zwart plate) ENGLISH Hold trimmer as shown and move in downward strokes with gentle pressure. Close trimmer by pressing trimmer down. Turn razor OFF. Cleaning ◗ The tap symbol on the back of the razor indicates that the razor can be rinsed under running tap water. - Page 20 9160XLDFU_060705.qxd 6/9/05 1:59 PM Page 20 (Zwart plate) ENGLISH Cleaning: Razor Heads The easiest and most hygienic way to clean the razor heads is to rinse them after each use or at least once a week with hot water: Water from the tap should be on a hot setting, BUT BE CAREFUL TO TEST WATER FIRST SO AS NOT TO BURN OR SCALD HANDS.
- Page 21 9160XLDFU_060705.qxd 6/9/05 1:59 PM Page 21 (Zwart plate) ENGLISH Close the Razor Head Assembly and shake off excess water. Open Razor Head assembly again and leave open to air dry. NOTE: Do not wipe or dry the shaving heads with a towel or tissue.This could damage the shaving heads.
- Page 22 9160XLDFU_060705.qxd 6/9/05 1:59 PM Page 22 (Zwart plate) ENGLISH Turn the wheel counterclockwise (1) and remove the retaining frame (2). Remove and clean one set of cutters and combs at a time. Separate the cutter from the comb and rinse clean under hot water. Do not clean more than one cutter and comb at a time, since they are all matching sets.
- Page 23 9160XLDFU_060705.qxd 6/9/05 1:59 PM Page 23 (Zwart plate) ENGLISH Press down (1) and turn wheel clockwise (2) until it locks into place. Close the Razor Head Assembly. Once A Month: Razor Heads For optimum performance, razor cutters and combs should be cleaned in a degreasing liquid (e.g.
-
Page 24: Storage
9160XLDFU_060705.qxd 6/9/05 1:59 PM Page 24 (Zwart plate) ENGLISH Storage ◗ The razor can be placed in the charging stand for safe storage. If storing razor in stand, remove the plug from outlet as soon as the razor is fully charged. ◗... -
Page 25: Accessories
9160XLDFU_060705.qxd 6/9/05 1:59 PM Page 25 (Zwart plate) ENGLISH Accessories ◗ Replacement Heads Model HQ9 - For maximum razor performance, replace your Norelco Smart Touch razor heads once a year or as soon as the replacement head symbol starts blinking. ◗... - Page 26 9160XLDFU_060705.qxd 6/9/05 1:59 PM Page 26 (Zwart plate)
-
Page 27: Warranty
Damage occurring during shipment is not covered by this warranty. NOTE: No other warranty, written or oral, is authorized by Philips Electronics North America Corporation. This warranty gives you specific legal rights, and you may also have other rights which vary from state to state. -
Page 28: Spanish
1. Es necesaria una atenta vigilancia cuando esta afeitadora sea usada por o cerca de niños o inválidos. 2. Utilice esta afeitadora para el uso doméstico para el cual está destinada, tal como se describe en este manual. No utilice accesorios no recomendados por Philips Electronics North America Corporation. - Page 29 9160XLDFU_060705.qxd 6/9/05 1:59 PM Page 29 (Zwart plate) ESPAÑOL 3. No utilice nunca esta afeitadora o soporte de carga si la clavija o el cable cargador de red están deteriorados, si no funciona adecuadamente, si se ha caido o deteriorado, o si se ha caido al agua mientras estaba enchufada.
- Page 30 Envíe el tíquet de compra con la fecha, su nombre y dirección completos tal como se indica más adelante, junto con la afeitadora a portes pagados a: Philips Domestic Appliances and Personal Care Company A Division of Philips Electronics North America Corporation 450 North Medinah Rd, Dock 16 Roselle, IL 60172-2329 Por favor, espere entre 4 y 6 semanas a recibir el cheque.
- Page 31 9160XLDFU_060705.qxd 6/9/05 1:59 PM Page 31 (Zwart plate) ESPAÑOL Indice de Contenidos Características ..........3 2-33 5 LED Indicador De Carga .
-
Page 32: Características
9160XLDFU_060705.qxd 6/9/05 1:59 PM Page 32 (Zwart plate) ESPAÑOL Características Sistema de SmartTouch Contour Following Selector de Control de Comforte Personal Montaje del Cabezal de la Afeitadora Cubierta protectora del Cabezal de la Afeitadora Conjuntos Cortantes que flotan individualmente Botón de apertura del Cabezal de la Afeitadora •... - Page 33 9160XLDFU_060705.qxd 6/9/05 1:59 PM Page 33 (Zwart plate) ESPAÑOL Cortapatillas Adaptación automática a cualquier voltaje de 100V a 240V CA Cepillo de limpieza Bolsa Soporte para guardarla Recargable: Carga completa inicial durante 4 horas, lo que le proporcionará un tiempo HQ9160 HQ9160 de afeitado sin cable...
- Page 34 9160XLDFU_060705.qxd 6/9/05 1:59 PM Page 34 (Zwart plate) ESPAÑOL 5 LED Indicador De Batería El medidor proporciona la siguiente información: ◗ LED Medidor de Carga de la Batería Las luces de la pantalla indica, aproximadamente, cuánto carga queda en las baterías. ◗...
-
Page 35: Reloj De Carga Del Soporte
9160XLDFU_060705.qxd 6/9/05 1:59 PM Page 35 (Zwart plate) ESPAÑOL ◗ Capacidad Restante de la Batería Se demuestra la capacidad restante de la batería cuando usted desenchufa la afeitadora o cuando usted la apaga y enciende o. - Cuando todas las luces se queman verde, la batería es el 100% cargado. -
Page 36: Antes Del Primer Uso
9160XLDFU_060705.qxd 6/9/05 1:59 PM Page 36 (Zwart plate) ESPAÑOL Para cambiar la pila Gire el módulo del reloj en el sentido contrario (1) a las agujas del reloj para sacarlo del soporte (2). Utilice un destornillador de punta plana para extraer la batería. Sustitúyala por una pila de botón de 1,5 V y colóquela con la parte redondeada de la pila dentro del compartimento y la parte... -
Page 37: Carga
9160XLDFU_060705.qxd 6/9/05 1:59 PM Page 37 (Zwart plate) ESPAÑOL Importante ◗ Para cargar la afeitadora,utilice únicamente la clavija del enchufe y el soporte de carga suministrados. ◗ La clavija del enchufe transforma la entrada de 100-240 V de CA a 24 V de CC. Carga ◗... - Page 38 9160XLDFU_060705.qxd 6/9/05 1:59 PM Page 38 (Zwart plate) ESPAÑOL Colocando o quitando la afeitadora de soporte de carga: ◗ La afeitadora del lugar en soporte en una carga que se cerciora de de la posición vertical entra en contacto con siempre en el fondo del ajuste del soporte en hendidura en el fondo de la afeitadora.
-
Page 39: Recarga
9160XLDFU_060705.qxd 6/9/05 1:59 PM Page 39 (Zwart plate) ESPAÑOL para indicar qué nivel de carga se ha alcanzado. ◗ En algunos países puede ser necesario usar un adaptador de la clavija para utilizar el cable cargador de red. Use un adaptor con las correctas configuraciónes para la salida electrica de red. -
Page 40: Carga Rápida
9160XLDFU_060705.qxd 6/9/05 1:59 PM Page 40 (Zwart plate) ESPAÑOL Carga Rapidá Cuando las baterías estén completamente agotadas, recargar la afeitadora durante unos 2 minutos le proporcionará suficiente energía para un afeitado de 3 minutos sin cable. Todas las luces en el metro de carga centelleo secuencialmente cuando la batería contiene bastante energía para un afeitado sin cuerda minucioso 3. -
Page 41: Control De Comforte Personal
9160XLDFU_060705.qxd 6/9/05 1:59 PM Page 41 (Zwart plate) ESPAÑOL Control de Comforte Personal ◗ Su afeitadora Smart Touch tiene 3 posiciones ajustables que permiten personalizar su afeitada para su piel especifica desde sensible a normal. Usted puede seleccionar su control de comforte personal moviendo el selector. -
Page 42: Cortapatillas
9160XLDFU_060705.qxd 6/9/05 1:59 PM Page 42 (Zwart plate) ESPAÑOL Ponga la afeitadora en marcha. Haciendo movimientos tanto rectos como circulares, aféitese en dirección contraria a la del crecimiento del pelo. Con su mano libre estírese la piel para que los conjuntos cortantes puedan levantar y cortar la barba. -
Page 43: Limpieza
9160XLDFU_060705.qxd 6/9/05 1:59 PM Page 43 (Zwart plate) ESPAÑOL Empuje abajo resorte-lanzan el interruptor del condensador de ajuste. El cortapatillas puede ponerse en marcha mientras la afeitadora está en funcionamiento. Sostenga el cortapatillas como se indica y haga pasadas hacia abajo con una suave presión. - Page 44 9160XLDFU_060705.qxd 6/9/05 1:59 PM Page 44 (Zwart plate) ESPAÑOL ◗ No utilice la afeitadora si los cabezales están dañados o rotos. Éstos podrían provocar lesiones faciales. ◗ Desenchufe el soporte de carga. El soporte de carga se puede limpiar limpio con un paño húmedo.
- Page 45 9160XLDFU_060705.qxd 6/9/05 1:59 PM Page 45 (Zwart plate) ESPAÑOL Limpie los conjuntos cortantes y la cámara de recogida del pelo bajo el agua caliente del grifo. Limpie fuera del montaje de la cabeza de la afeitadora funcionando debajo de la agua caliente.
- Page 46 9160XLDFU_060705.qxd 6/9/05 1:59 PM Page 46 (Zwart plate) ESPAÑOL Presione el botón de liberación del cabezal afeitador y abra el bloque del cabezal afeitador. Gire la rueda en sentido antihorario (1) y quite el marco de retención (2). Quite y limpie sólo un conjunto cortante cada vez.
- Page 47 9160XLDFU_060705.qxd 6/9/05 1:59 PM Page 47 (Zwart plate) ESPAÑOL Repita el proceso con los otros dos juegos de conjuntos cortantes. Vuelva a poner el marco. Presione hacia abajo (1) y gire la rueda en sentido horario (2) hasta que quede fijada en su lugar.
-
Page 48: Almacenamíento
9160XLDFU_060705.qxd 6/9/05 1:59 PM Page 48 (Zwart plate) ESPAÑOL Limpie el cortapatillas con el cepillo. Lubrique el cortapatillas con Norelco Razor Lubricant (tipo AL80) o con una gota de aceite mineral. Condensador de ajuste cercano presionando el condensador de ajuste abajo. -
Page 49: Asistencia
9160XLDFU_060705.qxd 6/9/05 1:59 PM Page 49 (Zwart plate) ESPAÑOL ◗ Almacene la cuerda en una localización segura en donde no será cortada ni sera dañada. ◗ No mantenga la afeitadora o el soporte de carga tapado permanentemente en el enchufe. ◗... -
Page 50: Accesorios
9160XLDFU_060705.qxd 6/9/05 1:59 PM Page 50 (Zwart plate) ESPAÑOL Accesorios ◗ Sustitución de los conjuntos cortantes Tipo HQ9 - Para la máxima eficacia de la afeitadora, sustituya sus conjuntos cortantes Smart Touch de Norelco una vez al año o cuando el símbolo de la cabeza del reemplazo comienza a centelleo. - Page 51 9160XLDFU_060705.qxd 6/9/05 1:59 PM Page 51 (Zwart plate)
-
Page 52: Garantia
(con la certificación pagada). Los deterioros producidos durante el envío no están cubiertos por esta garantía. NOTA: Ninguna otra garantía, escrita o de palabra, está autorizada por Philips Electronics North America Corporation. Esta garantía le da derechos legales específicos y también puede tener otros derechos que varían de un estado a otro.
Need help?
Do you have a question about the Norelco SmartTouch-XL 9160XL and is the answer not in the manual?
Questions and answers