Yamaha Clavinova CLP-280 Owner's Manual
Hide thumbs
Also See for Clavinova CLP-280:
- Owner's manual (124 pages) ,
- Installation manual (24 pages) ,
- Data list (44 pages)
Table of Contents
Advertisement
Quick Links
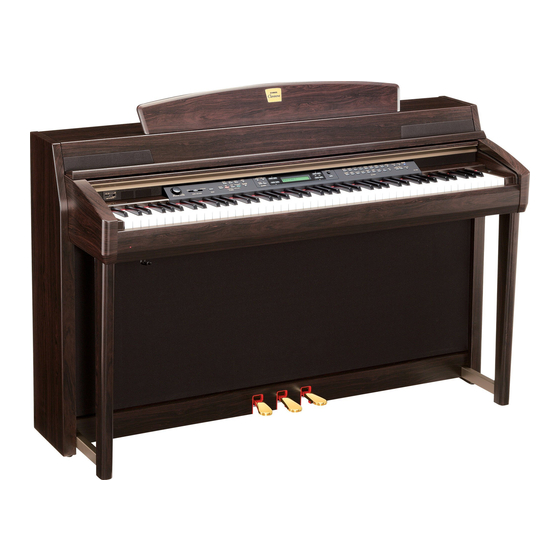
C L P - 2 8 0 / 2 7 0
OWNER'S MANUAL
Before using the Clavinova, be sure to read "PRECAUTIONS„ on pages 3-4.
IMPORTANT
—Check your power supply—
Make sure that your local AC mains voltage matches the voltage specified on the name plate on the bottom panel. In some areas
a voltage selector may be provided on the rear of the main keyboard unit near the power cord. Make sure that the voltage
selector is set for the voltage in your area. The voltage selector is set at 240V when the unit is initially shipped. To change the
setting use a "minus" screwdriver to rotate the selector dial so that the correct voltage appears next to the pointer on the panel.
For information on assembling the keyboard stand, refer to the instructions at the end of this manual.
EN
Advertisement
Table of Contents

Related Manuals for Yamaha Clavinova CLP-280


Summary of Contents for Yamaha Clavinova CLP-280
- Page 1 C L P - 2 8 0 / 2 7 0 OWNER'S MANUAL Before using the Clavinova, be sure to read “PRECAUTIONS„ on pages 3-4. IMPORTANT —Check your power supply— Make sure that your local AC mains voltage matches the voltage specified on the name plate on the bottom panel. In some areas a voltage selector may be provided on the rear of the main keyboard unit near the power cord.
- Page 2 SPECIFICATIONS SUBJECT TO CHANGE: information contained in this manual is believed to be Model correct at the time of printing. However, Yamaha reserves the right to change or modify any of the specifications Serial No. without notice or obligation to update existing units.
- Page 3 Yamaha service personnel. by qualified Yamaha service personnel. CAUTION Always follow the basic precautions listed below to avoid the possibility of physical injury to you or others, or damage to the instrument or other property.
- Page 4 Yamaha cannot be held responsible for damage caused by improper use or modifications to the instrument, or data that is lost or destroyed. Always turn the power off when the instrument is not in use.
-
Page 5: Introduction
COPYRIGHT NOTICE This product incorporates and bundles computer programs and contents in which Yamaha owns copyrights or with respect to which it has license to use others’ copyrights. Such copyrighted materials include, without limitation, all computer software and MIDI files, etc. Any unauthorized use of such programs and contents outside of personal use is not permitted under relevant laws. -
Page 6: Table Of Contents
Table of contents Introduction About this Owner’s Manual and Data List ........................5 Included Accessories ............................... 5 Application Index ........................... 8 Panel Controls and Terminals......................10 Introduction to the Controls........................ 12 Before Using the Clavinova........................14 About the key cover ..............................14 About the music rest .............................. - Page 7 Automatically selecting a song in storage media ... [SongAutoOpen]............... 53 Changing the type of characters on screen ... [CharacterCode]................. 53 Playing Back Recorded Songs and Commercially-available Music Data..........54 Playing back a song ............................... 54 Turning part playback on and off ..........................57 Supported song data type .............................
-
Page 8: Application Index
Application Index Use this index to find reference pages that may be helpful for your application and situation. Listening Listening to demo songs..........“Listening to the Demonstration Tunes” on page 18 “Playing the 50 Piano Preset Songs” on page 20 Listening to demo songs with different voices ....“Listening to the Demonstration Tunes” on page 18 Listening to songs from “50 greats for the Piano”... - Page 9 Application Index Use this index to find reference pages that may be helpful for your application and situation. Settings Making detailed settings for recording and playback ........“Detailed settings for recording and playback [FILE/SONG SETTING]” on page 71 Making detailed settings for the metronome .........
-
Page 10: Panel Controls And Terminals
Panel Controls and Terminals The Yamaha CLP-280/270 Clavinova offers unmatched sonic realism and exceptionally natural grand-piano type playability, and features Yamaha’s original AWM Dynamic Stereo Sampling technology for rich, authentic, musical voices. The CLP-270 utilizes a GH3 (Graded Hammer 3) Keyboard that varies the key weight according to the key range, while the CLP-280 boasts a Natural Wood Keyboard that enhances the GH3 features (including real-wood white keys), to reproduce as closely as possible the experience of playing an actual acoustic grand piano. - Page 11 Panel Controls and Terminals 1 [POWER] switch ....page 15 º BRILLIANCE [MELLOW][BRIGHT] buttons ......page 27 2 [MASTER VOLUME] dial .
-
Page 12: Introduction To The Controls
Introduction to the Controls This instrument has many buttons and controls—so many that you may feel overwhelmed at first. However, once you understand the basic operations, you’ll find the instrument is very easy to use. Press the button corresponding to the function you want to use. The buttons are the means of entrance to the functions. - Page 13 Introduction to the Controls To reset the values or parameters, press the [–][+] buttons simultaneously. If you’ve changed the parameter values or settings, you may wan to reset them to their normal condition. To do this, simply press the [–][+] buttons simultaneously. MetronomeVolume The TEMPO and BRILLIANCE buttons are the same shape as the A [–][+] –...
-
Page 14: Before Using The Clavinova
Before Using the Clavinova About the key cover To open the key cover: Lift the cover slightly, then push and slide it open. To close the key cover: Slide the cover toward you and gently lower the cover over the keys. Be careful to avoid catching your fingers when opening or closing the cover. -
Page 15: Turning The Power On
Use only the AC power cord supplied with the CLP-280/270. If the supplied cord is lost or damaged and needs to be replaced, contact your Yamaha dealer. The use of an inappropriate replacement can pose a fire and shock hazard! The type of AC power cord provided with the CLP-280/270 may be different depending on the country in which it is purchased. -
Page 16: Adjusting The Display Contrast
Optional headphones Clavinova. Install the headphone hanger using included HPE-160 Yamaha headphones. two screws (4 × 10mm) as shown in the figure. CAUTION Do not hang anything other than the headphones on the hanger. Otherwise, the Clavinova or the hanger may be damaged. -
Page 17: Basic Operation
Basic Operation CLP-280/270 Owner’s Manual... -
Page 18: Listening To The Demonstration Tunes
GRAND PIANO1 “Eintritt” Waldszenen Op. 82 R.Schumann HARPSICHORD Gavotte J.S.Bach The demonstration pieces listed above are short rearranged excerpts the original compositions. All other songs are original (©2005 Yamaha Corporation). Voice group buttons EXTRA SONG METRONOME CONTRAST GRAND GRAND E.PIANO E.PIANO... - Page 19 Listening to the Demonstration Tunes Select a tune and start playback. To adjust the volume level of the Press the voice group button for the demo song that you want demo songs, use the [MASTER to hear. VOLUME] dial. The indicator of the voice group button you pressed will light, and the demo song will begin playing.
-
Page 20: Listening To 50 Piano Preset Songs
Listening to 50 Piano Preset Songs The Clavinova provides performance data of 50 piano songs. You can just listen to these songs (page 20) or use them for practice (page 22). You can also refer to the included “50 greats for the Piano” booklet that con- tains the scores for 50 piano preset songs. - Page 21 Listening to 50 Piano Preset Songs Adjusting the tempo You can use the TEMPO [DOWN][UP] buttons to adjust the playback tempo as required. The default tempo (the song’s original tempo) is set when you You can also use the D [–][+] buttons to change the tempo.
-
Page 22: Practicing A One-Hand Part Using 50 Preset Songs
Listening to 50 Piano Preset Songs Practicing a one-hand part using 50 preset songs The 50 preset songs have separate left- and right-hand parts on individual parts. You can turn the left- and right-hand parts on or off as required so you can practice the corresponding part (the part that is turned off) on the keyboard. -
Page 23: Practicing With The Repeat Playback Function And The Preset Songs
Listening to 50 Piano Preset Songs Stop playback. When playback is complete, it automatically stops and the Clavinova locates the top of the song. If you wish to stop playback in the middle Resetting the part playback Both parts are automatically of a song, press the [STOP] button. - Page 24 Listening to 50 Piano Preset Songs Specifying a range of measures and playing them back repeatedly (A-B repeat) Procedure Select the desired song for practicing and play it. Press the [PLAY/PAUSE] button to start playback. Specify the repeat range. Specifying the repeat range Press the [REPEAT] button at the starting point (A) of the range between point A and the end of to be repeated.
-
Page 25: Selecting And Playing Voices
XG is a major enhancement of • For details on XG voices, refer to “XG voice list” (the separate data list booklet). the GM System level 1 format, and was developed by Yamaha If you select XG specially to provide more voices and variations, as well XG voices are categorized and included in separate folders. -
Page 26: Using The Pedals
Selecting and Playing Voices Using the pedals The Clavinova has three foot pedals: damper pedal (right), sostenuto pedal (center), and soft pedal (left) that produce a range of expressive effects similar to those produced by the pedals on an acoustic piano. Damper (right) pedal If the damper pedal doesn’t When you press the damper pedal, the notes... -
Page 27: Adding Variation To The Sound [Brilliance]/[Reverb]/[Chorus]
Selecting and Playing Voices Adding variation to the sound [BRILLIANCE]/[REVERB]/[CHORUS] The Effect function enables you to add expression to the sound. The Clavinova effects include Brilliance, Reverb, and Chorus. [CHORUS] button [REVERB] button EXTRA SONG METRONOME CONTRAST GRAND GRAND E.PIANO E.PIANO HARPSI- E.CLAVI-... - Page 28 Selecting and Playing Voices [REVERB] This control adds reverberation to the sound by simulating the natural reverberation of a concert hall. Procedure Pressing the [REVERB] button repeatedly toggles the reverb on and off. You can select a reverb type via the Reverb Type parameter in Even if the reverb effect is turned off, a “soundboard reverb”...
-
Page 29: Combining Two Voices (Dual Mode)
Selecting and Playing Voices Combining two voices (Dual mode) You can play two voices simultaneously across the entire range of the keyboard. In this way, you can simulate a melody duet or combine two similar voices to create a thicker sound. Refer to “Voice Combination Exam- ples (Dual and Split)”... - Page 30 Selecting and Playing Voices Dual mode using voices in the same voice group Procedure Select a voice group. In normal play mode, press the desired voice group button. Select a voice. Use the A [–][+] buttons to select a voice. Select another voice.
-
Page 31: Splitting The Keyboard Range And Playing Two Different Voices (Split Mode)
Selecting and Playing Voices Splitting the keyboard range and playing two differ- ent voices (Split mode) Split mode enables you to play two different voices on the keyboard — one with the left hand and another with the right hand. For example, you can play a bass part using the [WOOD BASS] or [E. BASS] voice with the left hand, and a melody with the right hand. - Page 32 Selecting and Playing Voices Specify the split point (the border between the right- and left-hand range). A specified “split point” key is included in the left-hand range. The normal setting of the split point is “F 2.” The split point can also be set by the [FUNCTION] parameter [SplitPoint].
-
Page 33: Using The Metronome
Selecting and Playing Voices Using the metronome The Clavinova is built-in metronome (a device that keeps an accurate tempo) is a convenient feature for practice. METRONOME iAFC EXTRA SONG CONTRAST GRAND GRAND E.PIANO E.PIANO HARPSI- E.CLAVI- VIBRA- VOICE PARTS LEFT RIGHT SELECT SETTING... -
Page 34: Recording Your Performance
Recording Your Performance This chapter explains how to record your performance using the Clavinova recording function. You can record your perfor- mance (audio data) to a cas- You can, for example, play back what you have played on the Clavinova key- sette tape recorder or other board for an effective practice aid. -
Page 35: Recording A Performance Without Specifying The Recording Part
Recording Your Performance Recording a performance without specifying the recording part EXTRA SONG METRONOME CONTRAST GRAND GRAND E.PIANO E.PIANO HARPSI- E.CLAVI- VIBRA- VOICE iAFC PARTS LEFT RIGHT SELECT ON/OFF SETTING PIANO 1 PIANO 2 CHORD CHORD PHONE GUITAR SETTING REVERB CHORUS SETTING STOP... - Page 36 Recording Your Performance Start and stop recording. Using the metronome Recording begins automatically as soon as you play a note on You can record data while the keyboard. using the metronome. To do this, turn the metronome on (Optional) Press the [PLAY/PAUSE] button to start recording. before step 4.
- Page 37 Recording Your Performance Re-recording a song partially This section explains how to record part of a song again. Procedure Select a recording method. Press the [FILE/SONG SETTING] button. Press the A [–][+] buttons to display “RecStart” or “RecEnd.” Press the D [–][+] buttons to specify how the recording should start and end.
- Page 38 Recording Your Performance Engage record mode. Press the [REC] button. To stop recording, press the [REC] button again or press the [STOP] button. After pressing the [REC] button again or the [STOP] button when “RecStart” is set to “Normal” (page 37), “Overwrite?” is shown in the display.
-
Page 39: Recording A Performance Of Several Different Parts
Recording Your Performance Recording a performance of several different parts 2 3 2 METRONOME iAFC EXTRA SONG CONTRAST GRAND GRAND E.PIANO E.PIANO HARPSI- E.CLAVI- VIBRA- VOICE PARTS RIGHT REVERB CHORUS SETTING LEFT SELECT ON/OFF SETTING PIANO 1 PIANO 2 CHORD CHORD PHONE GUITAR... -
Page 40: Other Recording Techniques
Recording Your Performance Start and stop recording. Recording begins automatically as soon as you play a note on the keyboard. (Optional) Press the [PLAY/PAUSE] button to start recording. To stop recording, press the [STOP] button. The Clavinova locates the top of the song. To stop recording, press the [STOP] button. - Page 41 Recording Your Performance Changing a voice or tempo after recording You can change the voice and tempo after recording to change a song’s feel or to set a more suitable tempo. You can also change these elements in the middle of a song. Procedure Select a song you wish to change (page 40).
- Page 42 Recording Your Performance Adjusting the volume balance between playback and your performance [SONG BALANCE] While recording multiple parts one by one, you can adjust the volume balance between the playback of the recorded parts and your current performance. Procedure Move the [SONG BALANCE] slider to the left or right to make adjustments.
-
Page 43: Handling Files Such As Deleting Song Files
Handling files such as deleting song files ... [FILE/SONG SETTING] TERMINOLOGY File screens (accessed via the [FILE/SONG SETTING] button) enables you to handle files (e.g., save, delete and rename recorded songs), copy and format File A file contains a group of data. medias and change characters on the screen. - Page 44 U1....External song U1P .....External songs such as Disk Orchestra Collection (DOC) songs or Disklavier Piano Soft songs in a USB storage device. U1S, U1s ..Yamaha-protection-formatted songs in a USB storage device. Limitation of file operations U1 song with the “.SME” exten- Ø: Yes ˛: No...
- Page 45 Handling files such as deleting song files ... [FILE/SONG SETTING] Basic file operation A message (information or confirmation dialog) sometimes appears on the screen to facilitate operation. Refer to the “Message List” on page 93 for an explanation of each message, appropriate actions to take. METRONOME iAFC EXTRA...
-
Page 46: Saving Recorded Songs To A Usb Storage Device
Handling files such as deleting song files ... [FILE/SONG SETTING] Saving recorded songs to a USB storage device ... [Save] Recorded songs are automatically saved to Storage memory from Current memory, so normally you won’t need to save songs using this function. However, if a “MemoryFull” message or “SystemLimit” message appear, save the song to another device using this function. -
Page 47: Deleting A Song From The Clavinova's Storage Memory Or From A Usb Storage Device
Handling files such as deleting song files ... [FILE/SONG SETTING] Deleting a song from the Clavinova’s Storage memory or from a USB storage device ... [Delete] This deletes a song from Storage memory or from a USB storage device. It is not possible to delete a preset song or current song. -
Page 48: Renaming Files
Handling files such as deleting song files ... [FILE/SONG SETTING] Renaming files ... [Rename] You can change a song’s title except for the preset songs and [-----: NewSong]. Procedure CAUTION See page 45 for information on basic operations. The following is a detailed procedure for Step 4. Do not turn off the power or eject the media while “Execut- ing”... -
Page 49: Copying Files
Handling files such as deleting song files ... [FILE/SONG SETTING] Copying files ... [Copy] You can copy songs. However, you cannot copy files to the same root direc- tory or same folder. Please note that the copy fea- tures are intended for your per- sonal use only. - Page 50 Handling files such as deleting song files ... [FILE/SONG SETTING] Procedure See page 45 for information on basic operations. Protected songs cannot be The following is a detailed procedure for Step 4. copied. When you copy a song to/from a USB storage device, Please note that the copy fea- tures are intended for your per- make sure that a USB storage device is connected to...
-
Page 51: Moving Files
Handling files such as deleting song files ... [FILE/SONG SETTING] Moving files ... [Move] You can move (cut and paste) songs. Move Execute?--> U1-001:NewSong001 Procedure See page 45 for information on basic operations. The following is a detailed procedure for step 4. Preset songs and some pro- tected songs cannot be moved. -
Page 52: Making Folders In The Usb Storage Device
C [–][+] buttons to select a For a list of devices whose device. compatibility has been con- firmed by Yamaha, visit the fol- Press the B [+ (YES)] button located next to “Exe- lowing web page: http://music.yamaha.com/CLP- cute?→.”... -
Page 53: Automatically Selecting A Song In Storage Media
Handling files such as deleting song files ... [FILE/SONG SETTING] Automatically selecting a song in storage media ... [SongAutoOpen] Specify whether a song (not contain in a folder) which does not contain to a folder will automatically be opened when you insert the media. When a USB storage device is connected to the instrument, a song in the device will not... -
Page 54: Playing Back Recorded Songs And Commercially-Available Music Data
Playing Back Recorded Songs and Commercially-available Music Data You can play back songs recorded using the Record function (page 34) as well as commercially-available music data. You can also play the keyboard along See page 57 for information on with the playback. the types of song data that can be played on the Clavinova. - Page 55 Playing Back Recorded Songs and Commercially-available Music Data Use the A [–][+] buttons to select the song type: “PRESET,” “MEMORY,” or “USB1.” PRESET ..Stands for Preset song memory. This memory contains 50 piano preset songs. MEMORY...Stands for Storage memory. This memory contains recorded songs or copied songs.
- Page 56 Playing Back Recorded Songs and Commercially-available Music Data Adjusting the tempo You can use the TEMPO [DOWN][UP] buttons to adjust the playback tempo as required before or during playback. The default tempo (the song’s original tempo) is set when you press the [DOWN] and [UP] buttons simul- taneously.
-
Page 57: Turning Part Playback On And Off
Part 1, or [LEFT] to a part other than Part 2. Supported song data type Data formats that can be played on the CLP-280/270 The Clavinova CLP-280/270 plays song data in the following formats: TERMINOLOGY Sequence format Sequence format:... -
Page 58: Connections
Connections Connectors CAUTION Before connecting the Clavinova to other electronic components, turn off the power to all the components. Before turning the power on or off to all components, set all volume levels to minimum (0). Otherwise, electrical shock or damage to the components may occur. - Page 59 Connections 5 AUX IN [L/L+R], [R] jacks The stereo outputs from another instrument can be connected to these jacks, The Clavinova’s [MASTER VOL- UME] dial setting affects the allowing the sound of an external instrument to be reproduced via the input signal from the AUX IN Clavinova’s speakers.
-
Page 60: Connecting To A Usb Storage Device
Before purchasing USB storage devices, please SmartMedia card. consult your Yamaha dealer, or an authorized Yamaha distributor (see list at end of the Owner’s Manual) for advice, or visit the following web page: Number of USB storage http://music.yamaha.com/CLP-280/... - Page 61 Connections Connection to a USB storage device This instrument has two USB [TO DEVICE] terminals; one on the left of the panel and one on the terminal at the front. If you connect USB storage devices to both USB [TO USB [TO DEVICE] terminal A DEVICE] terminals, the devices may not operate properly.
- Page 62 Connections Backing up your data to a computer Backing up the instrument data to a computer Once you’ve saved data to a USB storage device, you can copy the data to the hard disk of your computer, then archive and organize the files as desired. Simply reconnect the device as shown below.
-
Page 63: Connecting A Personal Computer
Connections Connecting a personal computer By connecting a computer to the USB [TO HOST] or MIDI terminals, you can transfer data between the instrument and the computer via MIDI, and take advantage of sophisticated computer music software. Keep in mind that you also need to install an appropriate USB MIDI driver. TERMINOLOGY There are the two methods by which to connect the Clavinova to a personal computer:... - Page 64 Connections CAUTION Precautions when using the USB [TO HOST] terminal When connecting the computer to the USB [TO HOST] terminal, make sure to observe the following points. Failing to do so risks freezing the computer and cor- rupting or losing data. If the computer or the instrument freezes, turn the power to the instrument off and restart the computer.
-
Page 65: Detailed Settings
Detailed Settings CLP-280/270 Owner’s Manual... -
Page 66: Detailed Settings
Detailed Settings You can set various parameters to make the best use of Clavinova functions, such as fine tuning the pitch, selecting a voice for the metronome, repeating playback, etc. For the basic procedure to make these settings, refer to page 91. Parameter List Recording and playback [FILE/SONG SETTING] Settings... - Page 67 Detailed Settings Voices [VOICE SETTING] In Dual mode, parameters with the “ ” mark are set for Voice 1 and Voice 2 individually. Settings Parameter name Reference page Setting the octave* Octave Setting the volume level* Volume Setting the position of right and left channels* Make fine adjustments to the pitch (only in Dual mode) Detune Selecting the reverb type...
- Page 68 Detailed Settings Other settings [FUNCTION] Settings Parameter name Reference page Changing the key Transpose Selecting a touch response TouchResponse Fine tuning the pitch Tune Selecting a tuning curve for a piano voice PianoTuningCurve Selecting a scale Scale Specifying the Split Point SplitPoint Setting the right pedal function RPedalFunc...
-
Page 69: Making Detailed Settings
Detailed Settings Making detailed settings METRONOME iAFC EXTRA SONG CONTRAST GRAND GRAND E.PIANO E.PIANO HARPSI- E.CLAVI- VIBRA- VOICE PARTS LEFT RIGHT SELECT ON/OFF SETTING PIANO 1 PIANO 2 CHORD CHORD PHONE GUITAR SETTING REVERB CHORUS SETTING STOP PLAY/PAUSE FILE/SONG CHURCH JAZZ SYNTH. - Page 70 Detailed Settings Write, execute, or save the data. There are two ways to respond to the messages. → → If “Execute? ” or “Start? ” appears: → Press the B [+(YES)] button to display confirmation (“Sure? ”). To proceed, press the B [+(YES)] button again. The Clavinova displays “Executing”...
-
Page 71: Detailed Settings For Recording And Playback [File/Song Setting]
Detailed settings for recording and playback [FILE/SONG SETTING] For information on the settings “Save” – “CharacterCode,” see “Handling files such as deleting song files ... [FILE/SONG SETTING]” on page 43. You can make detailed settings for the selected song. First, select the desired song from preset songs (“PRE- SET”), memory songs (“MEMORY”), or External songs (“USB1”) (see page 54). - Page 72 Detailed settings for recording and playback [FILE/SONG SETTING] From this display, you can determine how strongly Correcting note timing [Quantize] the notes will be quantized. A setting of 100% pro- You can correct the timing of notes. For example, duces exact timing. If a value less than 100% is you can adjust recorded notes to precise eighth or selected, notes will be moved toward the specified sixteenth notes.
- Page 73 Detailed settings for recording and playback [FILE/SONG SETTING] Auditioning the channels Deleting data from each channel [ChannelListen] [ChannelClear] You can select a single channel to listen to its con- You can delete data from each of 16 channels. tents. Playback starts from the first note. See the procedure on page 69.
-
Page 74: Detailed Settings For The Metronome Metronome [Setting]
Detailed settings for the metronome METRONOME [SETTING] You can set the time signature, volume level, and voice of the Clavinova metronome. Procedure Press the METRONOME [SETTING] button to access the Metronome Setting menu. METRONOME [SETTING] button EXTRA SONG METRONOME CONTRAST GRAND GRAND E.PIANO... -
Page 75: Detailed Settings For The Voices [Voice Setting]
Detailed settings for the voices [VOICE SETTING] This menu enables you to make various detailed settings for the voices in Dual or Split mode and the effects. You can make these settings for each voice (or each combination of voices) individually. You can listen to the notes you play on the keyboard while changing the settings. - Page 76 Detailed settings for the voices [VOICE SETTING] Setting the position of right and left In Dual mode, parameters with the “*” mark are set for Voice 1 and Voice 2 individually. channels [Pan]* You can specify the position in the stereo image Parameter names enclosed in parentheses ( ) are displayed in from which you hear the sound.
- Page 77 Detailed settings for the voices [VOICE SETTING] Setting the reverb type Selecting the chorus type [ReverbType] [Chorus Type] You cannot set this parameter for the voice parts “Left” and You cannot set this parameter for the voice parts “Left” and ×...
- Page 78 Detailed settings for the voices [VOICE SETTING] SoundBoard Simulates the reverberation of a Setting the chorus on/off piano soundboard. [ChorusOnOff] No effect. You can set the [CHORUS] button on or off for each voice. When you select a voice, the chorus on/ Setting the speed of the vibraphone off setting for the voice automatically changes vibrato effect* [VibeRotorSpeed]...
- Page 79 Detailed settings for the voices [VOICE SETTING] Setting the rotation speed of the Adjusting the resonance effect* rotary speaker* [HarmonicContent (Harmonic)] [RotarySpeed (Rot.Speed)] See the procedure on page 69. This will be displayed only if Rotary is selected for the DSP Type parameter explained above.
- Page 80 Detailed settings for the voices [VOICE SETTING] Adjusting the low-range gain Setting the touch sensitivity (amount of boost/cut) of the equal- [TouchSense]* izer* [EQ LowGain] This parameter enables determines the manner and degree to which the volume level changes in See the procedure on page 69.
-
Page 81: Detailed Settings For Iafc [Iafc Setting]
When using iAFC, do not block the speaker located on the rear panel of the Clavinova. The optimal iAFC effect cannot be obtained if this speaker is blocked. iAFC uses Yamaha’s EMR (Electronic Microphone Rotator) technology to ensure stability against acoustic feedback. Turning iAFC on/off [iAFC]... - Page 82 Detailed settings for iAFC [iAFC SETTING] Adjusting the Spatial Effect depth Restoring the default calibration set- [SpatialFX Depth] ting [iAFC Default] Spatial Effect is one type of the iAFC effect. Spatial This sets the calibration function to the default set- Effect creates a sense of reverberation and spa- ting.
-
Page 83: Other Settings [Function]
Other settings [FUNCTION] You can make detailed settings for touch, tuning, scale, etc. Procedure Press the [FUNCTION] button to enter Function mode. METRONOME EXTRA SONG CONTRAST GRAND GRAND E.PIANO E.PIANO HARPSI- E.CLAVI- VIBRA- VOICE iAFC PARTS LEFT RIGHT SELECT ON/OFF SETTING PIANO 1 PIANO 2... - Page 84 Other settings [FUNCTION] Fine tuning the pitch [Tune] Selecting a scale [Scale] You can fine tune the pitch of the entire instru- You can select various scales. ment. This function is useful when you play the Equal Temperament is the most common contem- porary piano tuning scale.
- Page 85 Other settings [FUNCTION] Specifying the Split Point [Split Point] Setting the center pedal function [CPedalFunc] You can specify the split point (the boundary between the right-hand and left-hand keyboard areas). See the procedure on page 69. See the procedure on page 69. CPedalFunc Set?-->...
- Page 86 Select on or off. Select the voice part for which the center pedal on/off setting is to be changed. YAMAHA FC7 foot controller This foot controller is suitable for controlling Expression, Sus- Setting for: tainCont, or PitchBend Up/Down. Main, MLayer (MainLayer), Left, LLayer (LeftLayer)
- Page 87 Other settings [FUNCTION] Turning the auxiliary pedal function Selecting a type of auxiliary pedal on/off [AuxPedalOnOff] [AuxPedalType] This turns the auxiliary pedal function on or off A pedal connected to the [AUX PEDAL] jack may for the relevant voice part. In other words, you can switch on and off differently.
- Page 88 Other settings [FUNCTION] Setting the depth of string resonance Setting the range of pitch bend [StringResonanceDepth] [PitchBendRange] This parameter is effective on the voices, such as This specifies the amount of change that can be “Grand Piano 1.” produced by the pitch bend function which See the procedure on page 69.
- Page 89 Other settings [FUNCTION] Selecting the AUX OUT level Setting the MIDI receive channel [AuxOutLevel] [MidiInChannel] Select the volume level of the signal output from You can specify whether each channel of data from the AUX OUT jacks. When “Fixed” is selected, the MIDI [IN] and USB [TO HOST] will be received.
- Page 90 Other settings [FUNCTION] Turning Local control on/off Selecting a type of data received via [LocalControl] MIDI [ReceiveParameter] “Local Control On” is a state in which the This parameter enables you to specify which MIDI Clavinova produces the sound from its tone gener- data the Clavinova can receive.
- Page 91 Other settings [FUNCTION] Transmitting the initial settings on Setting range: the panel [InitialSetup] On/Off Normal setting: You can transmit the panel data, such as voice The Transpose, Main/LeftVoice, MetronomeSetting, and selection, to a connected sequencer. Before you Function (except for Transpose and SplitPoint setting) record performance data to a sequencer, it is useful parameters are set to Off.
- Page 92 Other method for restoring the normal data [FullBackup] settings For maximum data security Yamaha recommends Press and hold down the white key on the right end that you copy or save your important data to a USB (C7) and press the [POWER] switch to turn on the power to the Clavinova.
-
Page 93: Message List
Message List The messages are listed in alphabetical order. Message Meaning • This message appears when data has failed to be written or loaded AccessError to the Storage memory or USB storage device. When you write or load data via USB storage device, check the USB cable connection AccessError and try again. - Page 94 Check the USB cable connection and try again. If you still see this message, use a drive whose compat- ibility has been confirmed by Yamaha (page 60). The number of drives exceeds the limitation. Two USB storage...
- Page 95 Message List Message Meaning There is a problem with the USB [TO HOST] terminal HostError • When using the CLP-280/270 connected to your personal com- puter: The driver or MIDI application on your computer is not function- ing correctly, perhaps because the computer is turned off, the cable is not connected correctly.
- Page 96 This message appears when a protected song and the drive are not ProtectedDriveError compatible. Use a drive whose compatibility has been confirmed by Yamaha (page 60). You tried to copy or delete data in internally-protected files (such as ProtectedFile commercially available music data). You cannot write to, copy, or delete such files.
- Page 97 Message List Message Meaning This message appears when you record or edit the protected song SongChanged Clear? and select another song. The recorded/edited protected song cannot be saved. The song will be deleted when you select another song. You tried to perform another operation before saving the recorded SongChanged Save? song to storage memory or an external device.
- Page 98 (page 52). This message appears when you connect an unsupported drive. Use UnsupportedDrive a drive whose compatibility has been confirmed by Yamaha (page 60). • The connected drive does not support use of protected songs. Use WrongDrive only drives whose compatibility has been confirmed by Yamaha...
-
Page 99: Questions About Operations And Functions
Questions about Operations and Functions The buttons do not respond. Performance in Dual or Split mode is not recorded. While you are using a function, some buttons not used for the function are disabled. If the song is play- Part data is lost unexpectedly. ing, stop the playback. - Page 100 Questions about Operations and Functions How much data can I record? • Current memory (page 46): About 300KB • Storage memory (page 46): About 1,750KB The on/off setting of the pedal connected to the AUX PEDAL jack is reversed. Some types of pedals may turn on and off in oppo- site fashion.
-
Page 101: Appendix
Appendix CLP-280/270 Owner’s Manual... -
Page 102: Troubleshooting
Troubleshooting Problem Cause Solution The power of the Clavinova does not The power cable is not plugged in Insert the power cable plug firmly turn on. (check at the Clavinova and at the into the Clavinova and into the elec- electrical outlet). - Page 103 The USB storage device has hung The USB storage device is not com- Only use devices whose compatibil- up (stopped). patible with the instrument. ity has been confirmed by Yamaha (page 60). The USB storage device does not Disconnect the device and connect operate properly.
-
Page 104: Data Compatibility
• The CLP-280/270 is compatible with both Format XG is a major enhancement of the GM System Level 1 format, and was developed by Yamaha specifically to pro- 0 and Format 1. vide more voices and variations, as well as greater expres- •... - Page 105 GS was developed by the Roland Corporation. In the same way as Yamaha XG, GS is a major enhance- ment of the GM specifically to provide more voices and drum kits and their variations, as well as greater expres- sive control over voices and effects.
-
Page 106: Preset Voice List
Preset Voice List : Yes ×: No Voice Stereo Touch Dynamic Key-off String Voice name Voice description group sampling Sense sampling samples resonance This sound was sampled from a full concert grand piano. Three stages of dynamics were sampled, and no effort has been spared in making the sound virtually identical to that of an acoustic piano. - Page 107 Preset Voice List Stereo Touch Dynamic Key-off String Voice group Voice name Voice description sampling Sense sampling samples resonance A warm and natural nylon-string guitar sound. × × NylonGuitar Enjoy the atmosphere it adds to a quiet song. GUITAR A bright steel guitar sound. Ideal for popular ×...
-
Page 108: Voice Combination Examples (Dual And Split)
Voice Combination Examples (Dual and Split) Dual MAIN + MAIN GrandPiano1 + E.Piano1 This combination is often used in popular music. GrandPiano1 + E.Piano2 MAIN + MAIN GrandPiano1 + SynthPiano This produces a fantasy, spacious piano sound. MAIN + MAIN GrandPiano2 + GrandPiano2 This combination sounds as if you are playing two notes that are one octave apart. -
Page 109: Clp-280/270: Keyboard Stand Assembly
CLP-280/270: Keyboard Stand Assembly CAUTION • Be careful not to confuse parts, and be sure to install all parts in the correct direction. Please assemble in accor- dance with the sequence given below. • Assembly should be carried out by at least two persons. •... - Page 110 CLP-280/270: Keyboard Stand Assembly Attach B. Mount A. Insert B between E and F as shown in the illus- Assemble the side panel protection (card- tration. board) pad, as shown in the illustration. Then, remove the two backing papers from the adhe- sive tape on the protection pad.
- Page 111 CLP-280/270: Keyboard Stand Assembly Attach A. Align the dimple on side A with the inner side of E and F. Simultaneously lower the left and Secure A using two 6 x 16mm short screws right side of A, and secure with E and F. from the rear.
- Page 112 CLP-280/270: Keyboard Stand Assembly Connect the speaker cord. Attach C. Remove the twist tie attaching the speaker Place on D, the stopper-wood at the bottom cord. edges of C, then secure the top. Insert the speaker cord plug into the connector Secure upper right and left of C using two 4 x so that the tab extends toward the front when 14mm thin screws.
- Page 113 CLP-280/270: Keyboard Stand Assembly Voltage Selector After completing the assembly, please check the following. Before connecting the AC power cord, check the setting of the voltage selector which is provided in some areas. To • Are there any parts left over? set the selector for 110V, 127V, 220V or 240V main volt- Review the assembly procedure and correct any errors.
-
Page 114: Handling The Floppy Disk Drive (Fdd) And Floppy Disks (Optional)
Ask your Yamaha dealer about the avail- ability of proper head cleaning disks. Floppy disks formatted on this device may or may not be use- able as is on other devices. -
Page 115: Installing The Floppy Disk Drive (Optional)
Installing the Floppy Disk Drive (Optional) The optional UD-FD01 floppy disk drive can be installed to the bottom of the instrument by using the included floppy disk drive case and screws. Have a Phillips-head (+) screwdriver ready. Remove the three backing papers Attach the drive and case assembly from the adhesive tape in the case, to the left underside of the instru-... -
Page 116: Specifications
Windows, Accessory CD-ROM for Windows Installation Guide * Specifications and descriptions in this owner’s manual are for information purposes only. Yamaha Corp. reserves the right to change or modify products or specifications at any time without prior notice. Since specifications, equipment or options may not be the same in every locale, please check with your Yamaha dealer. -
Page 117: Index
Index You can search the desired section using not only the terminology in this manual but also commonly-used words. The * mark indicates that the corresponding page includes the terminology explanation in the right column. Numerics [DEMO] button ........18 Demonstration tunes ....... - Page 118 Index Terminals MIDI [IN] [OUT] [THRU] ..58, 64 Other settings ........... 83 Save............46 USB [TO DEVICE] ......58 USB [TO HOST]........ 58 Scale............84 TouchResponse......... 83 Select 50 piano preset songs......20 Transpose ..........83 P ..............44 Demo Songs ........
- Page 119 MEMO CLP-280/270 Owner’s Manual...
- Page 120 MEMO CLP-280/270 Owner’s Manual...
- Page 121 The product dose not operate, exhibits a marked change on the name plate, or specifically recommended by Yamaha. in performance; or e. The product has been dropped, or the enclosure of the WARNING: Do not place this product or any other product has been damaged.
- Page 122 Yamaha Corporation of America or its may cause interference harmful to the operation of subsidiaries. * This applies only to products distributed by YAMAHA CORPORATION OF AMERICA. (class B) COMPLIANCE INFORMATION STATEMENT IMPORTANT NOTICE FOR THE UNITED KINGDOM...
- Page 123 Niederlassung und bei Yamaha Vertragshändlern in den jeweiligen Bestimmungsländern erhältlich. Pour plus de détails sur les produits, veuillez-vous adresser à Yamaha ou au distributeur le plus proche de vous figurant dans la liste suivante. Para detalles sobre productos, contacte su tienda Yamaha más cercana o el distribuidor autorizado que se lista debajo.
- Page 124 Clavinova Web site http://music.yamaha.com/homekeyboard/ Yamaha Manual Library http://www.yamaha.co.jp/manual/ U.R.G., Pro Audio & Digital Musical Instrument Division, Yamaha Corporation © 2005 Yamaha Corporation WE03680 603MWAP1.3-03B0 Printed in China...
Need help?
Do you have a question about the Clavinova CLP-280 and is the answer not in the manual?
Questions and answers