Advertisement
Table of Contents
All about the
Use &Care
of your
Room Air Conditioner
Important Safety Instructions ............................... 2-3
.............................................
...........................................................
Normal Sounds .................................................... 4
.......................................
www.frigidaire.com USA 1-866-208-3616
TA B L E O F C O N T E N T S
Care and Cleaning .............................................. 11
4
Energy Saving Ideas ........................................... 11
4
Before You Call ................................................... 12
5
Major Appliance Warranty ................................... 13
www.frigidaire.ca Canada 1-866-208-3616
.........................................
5-10
Advertisement
Table of Contents

Related Manuals for Frigidaire LRA08PZU1


Summary of Contents for Frigidaire LRA08PZU1
-
Page 1: Table Of Contents
Important Safety Instructions ... 2-3 Product Registration Packaging Normal Sounds ... 4 Air Conditioner Features www.frigidaire.com USA 1-866-208-3616 TA B L E O F C O N T E N T S Operating Instructions Care and Cleaning ... 11 Energy Saving Ideas ... 11 Before You Call ... -
Page 2: Important Safety Instructions
Do not insert or place fingers or objects into the air discharge area in the front of the unit. Do not start or stop the air conditioner by unplugging the power cord or turning off the power at the electrical box. -
Page 3: Important Safety Instructions
Do not place containers with liquids on the unit. Turn off the air conditioner at the power source when it will not be used for an extended period of time. Periodically check the condition of the unit’s installation accessories for any damage. -
Page 4: Product Registration
Serial No. Register Your Product The self-addressed PRODUCT REGISTRATION CARD should be filled in completely, signed and returned to the Frigidaire Company. Remove all packaging from inside the carton, along with any inserts placed into the side louvers. Remove the plastic ties and foam pad that secure the compressor to the fan shroud (where applicable). -
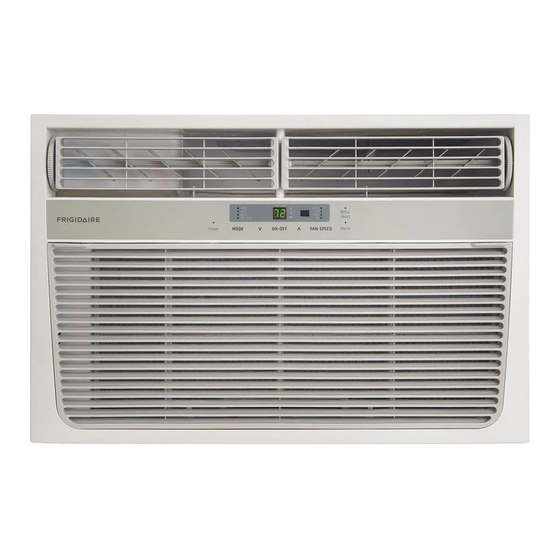
Page 5: Air Conditioner Features
Air Conditioner Features & Operating Instructions Air Conditioner Features ACTIVATES TIMER SETS MODE REMOTE CONTROL Operating Instructions NOTE The following instructions represent the Touch Pad, the same instructions can be used for the Remote Control. TO TURN UNIT ON: PRESS ON/OFF BUTTON 2009 Electrolux Home Products, Inc. -
Page 6: Operating Instructions
Operating Instructions Operating Instructions (continued) TO CHANGE TEMPERATURE SETTlNG: DO THIS: PRESS TO RAISE PRESS TO LOWER TO ADJUST FAN SPEEDS: TO USE AUTO FAN FEATURE: PRESS FAN BUTTON, 2009 Electrolux Home Products, Inc. DO THIS: PRESS TO SELECT DO THIS: CHOOSE AUTO YOU WILL SEE: Note: Tap or hold either up (... - Page 7 Operating Instructions (continued) TO OPERATE ON FAN ONLY: MODE BUTTON TO USE THE ENERGY SAVER (ECON) FEATURE: MODE BUTTON CHOOSE ECON SLEEP FEATURE: SLEEP BUTTON 2009 Electrolux Home Products, Inc. DO THIS: PRESS CHOOSE FAN ONLY DO THIS: PRESS DO THIS: PRESS Operating Instructions YOU WILL SEE:...
- Page 8 Operating Instructions Operating Instructions (continued) TIMER: DELAY STOP / START FEATURE FIRST DO THIS: PRESS TIMER BUTTON UP/DOWN BUTTONS Note: For Delay Stop, the unit must be in the On position. Note: For Delay Start, the unit must be in the Off position. First, Press TIMER button, then adjust timer setting, tap or hold the UP arrow ( timer at 0.5 hour increments, up to 10 hours, then at 1 hour increments up to 24 hours.
- Page 9 Operating Instructions (continued) FAULT CODES: If the display reads "HS", ”AS”, ”ES”, ”CS” or ”OS”, a sensor has failed. Contact your Authorized Frigidaire Service Center. TO CHANGE TEMPERATURE DISPLAY: DO THIS: PRESS AND HOLD THE UP/DOWN BUTTONS TOGETHER FOR 3 SECONDS...
- Page 10 3. Exchange air from the room - Vent Open (see Fig. 3) Figure 3 (VENT OPEN) Air Directional Louvers Air directional louvers control air flow direction. Your air conditioner has the louver type described below. Auger Type The louvers will allow you to direct the air flow Up or Down and Left or Right throughout the room as needed.
-
Page 11: Care And Cleaning
The capacity of the room air conditioner must fit the room size for efficient and satisfactory operation. Install the room air conditioner on the shady side of your home. A window that faces north is best because it is shaded most of the day. -
Page 12: Before You Call
Air movement sound. This is normal. If too loud, set to lower FAN setting. Window vibration - poor installation. Refer to installation instructions or check with installer. Improper installation. Tilt air conditioner slightly to the outside to allow water drainage. Refer to installation instructions or check with installer. -
Page 13: Major Appliance Warranty
Your appliance is covered by a limited one-year warranty and a limited 2-5 year warranty on the sealed system (the compressor, condenser, evaporator and tubing). For one year from your original date of purchase, Electrolux will pay all costs for repairing or replacing any parts of this appliance that prove to be defective in materials or workmanship when such appliance is installed, used and maintained in accordance with the provided instructions.
Need help?
Do you have a question about the LRA08PZU1 and is the answer not in the manual?
Questions and answers