Table of Contents
Advertisement
Quick Links
Advertisement
Table of Contents

Related Manuals for Philips MCM190/33


Summary of Contents for Philips MCM190/33
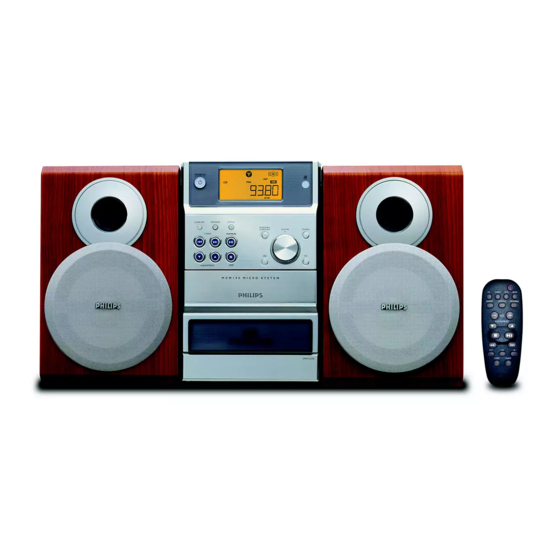
- Page 1 MCM190 Micro Hi-Fi System...
- Page 2 TUNE R TAPE MUT E REPEAT SHUFFLE PROGRA M & ALBUM/PRESE T SLEEP TIMER DISPLAY/BAND...
-
Page 3: Table Of Contents
Contents General Information Tape Operation / Recording Environmental information ........ 4 Tape playback ............12 Supplied accessories ..........4 General information on recording ....12 Safety information ..........4 Synchro start CD recording ..... 12–13 Recording from the radio ......... 13 Preparations Maintenance .......... -
Page 4: General Information
General Information ● Place the system in a location with adequate Environmental Information ventilation to prevent internal heat build-up in All unnecessary packaging has been omitted. We your system. Allow at least 10 cm (4 inches) have tried to make the packaging easy to clearance from the rear and the top of the unit separate into three materials: cardboard (box), and 5 cm (2 inches) from each side. -
Page 5: Preparations
Preparations MW loop antenna FM wire antenna speaker speaker (right) (left) AC power cord Rear connections Antenna Connection MW Antenna The type plate is located at the rear of the system. Connect the supplied MW loop antenna to the “AM aerial” terminal. Adjust the position of the antenna for optimal reception. -
Page 6: Inserting Batteries Into The Remote Control
Preparations FM Antenna Inserting batteries into the It is unnecessary to connect the FM pigtail remote control antenna since it is fixed to the main unit. Insert two batteries (not supplied) type R03 or ● Adjust the FM antenna for optimal FM stereo AAA into the remote control with the correct reception. -
Page 7: Control
Controls (illustrations on page 3) SOURCE Controls on the system and – selects the respective sound source for CD/ remote control TUNER/TAPE. STANDBY ON y – switches on the system. – switches the system to standby/on. VOLUME (VOL -/+ ) –... -
Page 8: Basic Functions
Basic Functions Adjusting volume and sound Turn the VOLUME control anti-clockwise to decrease or clockwise to increase volume on the system (or press VOL -/+ on the remote control). ➜ Display shows the volume level VOL and a number from 0-32. DISPLAY/BAND Press DSC repeatedly to select the desired sound effect: JAZZ / POP / CLASSIC / ROCK. -
Page 9: Cd/Mp3 Operation
CD/MP3 Operation ➜ The current track number and elapsed playing time of the track are displayed during disc playback. To select a different track ● Press TUNING 4 ¢ (on the remote control 4 ¢) once or repeatedly until the DISPLAY/BAND desired track number appears in the display. -
Page 10: Different Play Modes: Shuffle And Repeat
CD/MP3 Operation Press TUNING 4 ¢ (on the remote To return to normal playback, press the respective SHUFFLE or REPEAT button until control 4 ¢) to select a desired track. the various SHUFFLE/ REPEAT modes are no ➜ The album number will change accordingly as longer displayed. -
Page 11: Radio Reception
Radio Reception Note: – If no preset number is selected, default is preset (1) and all your presets will be overridden. Press PROGRAM for more than 2 seconds to activate programming. ➜ AUTO is displayed and available stations are programmed in order of waveband reception DISPLAY/BAND strength. -
Page 12: Tape Operation / Recording
Tape Operation / Recording General information on recording ● Recording is permissible insofar as copyright or other rights of third par ties are not infringed. ● For recording, use only NORMAL (IEC type I) tapes on which the tabs have not yet been broken. -
Page 13: Recording From The Radio
After prolonged use, dir t or dust may accumulate at the disc lens. To ensure good Demagnetising the heads playback quality, clean the disc lens with Philips ● Use a demagnetising tape available at your CD Lens Cleaner or any commercially available dealer. -
Page 14: Clock/Timer
Clock/Timer Activating and deactivating TIMER ● In standby or during playback, press TIMER once. ➜ Display shows if activated, and disappears if deactivated. DISPLAY/BAND Activating and deactivating SLEEP The sleep timer enables the system to switch off by itself after a set period of time. The clock time needs to be set first before the sleep timer can be used. -
Page 15: Specifications
Do not open the system as there is a risk of electric shock. If a fault occurs, first check the points listed below before taking the system for repair. If you are unable to remedy a problem by following these hints, consult your dealer or Philips for help. - Page 16 ✔ Radio reception is poor. If the signal is too weak, adjust the antenna or connect an external antenna for better reception. ✔ Increase the distance between the Mini HiFi System and your TV or VCR. Recording or playback cannot be made. ✔...
- Page 20 Meet Philips at the Internet http://www.philips.com MCM190 YM/JW-05-15...
Need help?
Do you have a question about the MCM190/33 and is the answer not in the manual?
Questions and answers