Whirlpool WED7500GC0 Installation Instructions Manual

Whirlpool WED7500GC0 Installation Instructions Manual

Gas and electric dryer

Advertisement

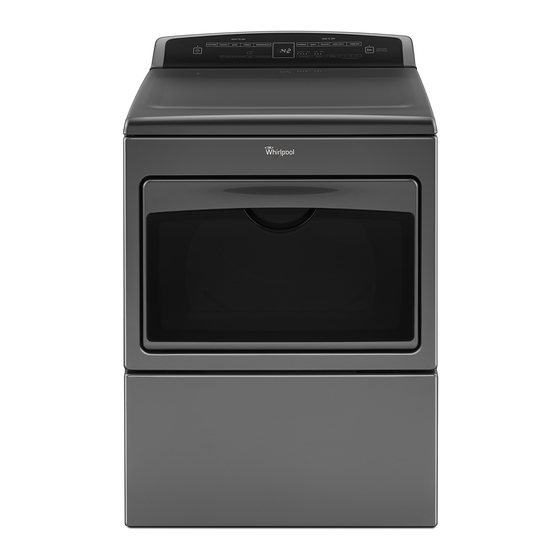
Gas and Electric Dryer
Installation Instructions

Table of Contents

DRYER SAFETY .......................................................................... 2
Tools and Parts .................................................................... 4
LOCATION REQUIREMENTS ..................................................... 5
Installation Clearances ....................................................... 5
Dryer Dimensions ................................................................ 5
ELECTRICAL REQUIREMENTS - U.S.A. ONLY ........................ 6
Grounding Instructions ....................................................... 7
Electrical Requirements ..................................................... 7
Grounding Instructions ....................................................... 7
Electrical Requirements ..................................................... 8
Grounding Instructions ....................................................... 8
Gas Supply Requirements .................................................. 8
Gas Type ............................................................................... 8
Gas Supply Line ................................................................... 8
Gas Supply Connection Requirements ............................. 9
Burner Input Requirements ................................................ 9
Dryer Gas Pipe ..................................................................... 9
INSTALL LEVELING LEGS .......................................................... 9
Electrical Connection........................................................ 10
Power Supply Cord Connection....................................... 10
Direct Wire Connection..................................................... 12
VENTING .................................................................................... 16
Venting Requirements ....................................................... 16
Plan Vent System ............................................................... 17
Install Vent System ............................................................ 18
CONNECT VENT ....................................................................... 19
LEVEL DRYER ........................................................................... 19
COMPLETE INSTALLATION CHECKLIST ............................... 20
REVERSE DOOR SWING .......................................................... 21
TROUBLESHOOTING ............................................................... 23
Para obtener acceso al "Instrucciones de instalación" en español, o para obtener información
Tenga listo su número de modelo completo. Puede encontrar el número de modelo
INSTALLATION NOTES
_________________________________
Date of purchase:
_______________________________
Date of installation:
________________________________________
Installer:
___________________________________
Model number:
___________________________________
Serial number:
W10904260B
W10904262B-SP
.........................................
adicional acerca de su producto, visite: www.whirlpool.com
y de serie dentro de la cavidad superior de la puerta.
Instructions d'installation -
Sécheuse à gaz et électrique
Table des matières
SÉCURITÉ DE LA SÉCHEUSE .................................................. 24
4
EXIGENCES D'INSTALLATION
Outillage et pièces ............................................................. 26
EXIGENCES D'EMPLACEMENT ............................................... 27
Distances de dégagement à respecter pour
l'installation......................................................................... 27
Dimensions de la sécheuse............................................... 27
RACCORDEMENT DE LA SÉCHEUSE
ÉLECTRIQUE - CANADA SEULEMENT ................................... 28
Spécifications électriques ................................................. 28
Instructions de liaison à la terre ....................................... 29
RACCORDEMENT ÉLECTRIQUE DE LA SÉCHEUSE
À GAZ - ÉTATS-UNIS ET CANADA ........................................... 29
Spécifications électriques ................................................. 29
Instructions de liaison à la terre ....................................... 29
Spécifications de l'alimentation en gaz ........................... 30
Type de gaz ......................................................................... 30
Canalisation de gaz ............................................................ 30
Spécifications du raccordement de
l'alimentation en gaz .......................................................... 31
Spécifications de l'alimentation du bruler ....................... 31
INSTALLATION DES PIEDS DE NIVELLEMENT ...................... 31
RACCORDEMENT AU GAZ - ÉTATS-UNIS ET CANADA ........ 32
L'EVACUATION........................................................................... 32
Exigences concernant l'evacuation ................................. 32
Planification des circuits de conduits .............................. 33
Installation du système d'évacuation ............................... 34
RACCORDEMENT DU SYSTÈME D'ÉVACUATION ................. 35
ÉTABLIR L'APLOMB DE LA SÉCHEUSE .................................. 36
ACHEVER L'INSTALLATION LISTE DE VÉRIFICATION .......... 36
INVERSION DU SENS D'OUVERTURE DE LA PORTE ............ 37
DÉPANNAGE .............................................................................. 39
NOTES CONCERNANT L'INSTALLATION
_____________________________________
Date d'achat :
Date d'installation :
______________________________________
Installateur :
Numéro de modèle :
__________________________________
Numéro de série :
............................................
________________________________
________________________________
26

Advertisement

Table of Contents
loading
Need help?

Need help?

Do you have a question about the WED7500GC0 and is the answer not in the manual?

Questions and answers

Summary of Contents for Whirlpool WED7500GC0

  • Page 1: Table Of Contents

    TROUBLESHOOTING ............... 23 Para obtener acceso al “Instrucciones de instalación” en español, o para obtener información adicional acerca de su producto, visite: www.whirlpool.com Tenga listo su número de modelo completo. Puede encontrar el número de modelo y de serie dentro de la cavidad superior de la puerta.
  • Page 2: Dryer Safety

    DRYER SAFETY IMPORTANT: When discarding or storing your old clothes dryer, remove the door.
  • Page 4: Installation Requirements

    INSTALLATION REQUIREMENTS Tools needed for gas installations: TOOLS AND PARTS Gather the required tools and parts before starting installation. Read and follow the instructions provided with any tools listed here. Tools needed for all installations: 8" (203 mm) or 10" 8"...
  • Page 5: Location Requirements

    LOCATION REQUIREMENTS DRYER DIMENSIONS 27" (685 mm) " (1027 mm) " (32 mm) " 53" (1096 mm) (1341 mm) 30" 30" (762 mm) (762 mm) You will need: A location allowing for proper exhaust installation. ■ See “Venting Requirements.” A separate 15 or 20-amp circuit needed for gas dryers and ■...
  • Page 6: Electrical Requirements - U.s.a. Only

    Spacing for recessed area or closet installation ELECTRICAL REQUIREMENTS - The dimensions shown are for the recommended spacing U.S.A. ONLY (SPÉCIFICATIONS allowed. ÉLECTRIQUES – ÉTATS-UNIS Additional spacing should be considered for ease of ■ SEULEMENT) installation and servicing. Additional clearances might be required for wall, door, ■...
  • Page 7: Grounding Instructions

    If your outlet looks like this: ELECTRIC DRYER POWER HOOKUP- Then choose a 4-wire power supply cord with CANADA ONLY ring or spade terminals and UL listed strain ELECTRICAL REQUIREMENTS relief. The 4-wire power supply cord, at least 4 ft. (1.22 m) long, must have 4 10-gauge solid copper wires and match a 4-wire receptacle of NEMA Type 14-30 R.
  • Page 8: Gas Dryer Power Hookup - U.s.a. And Canada

    GAS SUPPLY REQUIREMENTS GAS DRYER POWER HOOKUP - U.S.A. AND CANADA ELECTRICAL REQUIREMENTS 120 Volt, 60 Hz, AC only, 15- or 20- amp fused electrical ■ supply is required. A time-delay fuse or circuit breaker is recommended. It is also recommended that a separate GAS TYPE circuit serving only this dryer be provided.
  • Page 9: Gas Supply Connection Requirements

    Lengths over 20 ft. (6.1 m) should use larger tubing and DRYER GAS PIPE ■ a different size adapter fitting. The gas pipe that comes out through the rear of your dryer ■ has a 3/8" male pipe thread. If your dryer has been converted to use LP gas, 3/8" LP ■...
  • Page 10: Make Electrical Connection - U.s.a. Only

    MAKE ELECTRICAL CONNECTION - Remove terminal block cover U.S.A. ONLY (EFFECTUER LE RACCORDEMENT ÉLECTRIQUE – ÉTATS-UNIS SEULEMENT) ELECTRICAL CONNECTION Power Supply Cord Remove hold-down screws and terminal block cover. POWER SUPPLY CORD CONNECTION Power Supply Cord Strain Relief Attach power supply cord strain relief Electrical Connection Options Remove the screws from a 3/4"...
  • Page 11 If your outlet looks like this: Connect neutral ground wire Power supply cord 4-wire receptacle and neutral wire (NEMA Type 14-30R): Go to “4-Wire Power Supply Cord Connection”. Power supply cord 3-wire receptacle (NEMA Type 10-30R): Go to “3-Wire Power Supply Cord Connection”.
  • Page 12: Direct Wire Connection

    3-wire Power Supply Cord Connection Connect remaining wires Use where local codes permit connecting cabinet-ground conductor to neutral wire. 3-wire receptacle (NEMA 3-prong plug type 10-30R) Connect remaining wires to outer terminal block screws. Tighten screws. Finally, reinsert tab of terminal block cover into slot of dryer rear panel.
  • Page 13 on strain relief). Put the threaded section of the strain relief Prepare to connect neutral (C) through the hole below the terminal block opening (B). Reaching inside the terminal block opening, screw the ground wire and neutral wire removable conduit connector (A) onto the strain relief threads. Attach direct wire cable to strain relief Remove center terminal block screw (B).
  • Page 14 Remove center screw Connect remaining wires Place hooked ends of remaining direct wire cable wires Remove center terminal block screw (B). under outer terminal block screws (hooks facing right). Squeeze hooked ends together and tighten screws. Finally, Connect neutral wire reinsert tab of terminal block cover into slot of dryer rear panel.
  • Page 15 Optional 3-wire Connection Connect remaining wires You must verify with a qualified electrician that this grounding method is acceptable before connecting. Prepare to connect neutral ground wire and neutral wire Connect remaining wires to outer terminal block screws Tighten screws. Connect external ground wire Remove center terminal block screw (B).
  • Page 16: Make Gas Connection - U.s.a. And Canada

    MAKE GAS CONNECTION - VENTING U.S.A. AND CANADA VENTING REQUIREMENTS Connect gas supply to dryer Flared Non-flared male fitting male fitting Remove red cap from gas pipe. Using a wrench to tighten, connect gas supply to dryer. Use pipe-joint compound on threads of all non-flared male fittings.
  • Page 17: Plan Vent System

    Exhaust hoods: PLAN VENT SYSTEM Must be at least 12" (305 mm) from ground or any object ■ Recommended exhaust installations that may obstruct exhaust (such as flowers, rocks, bushes, or snow). Typical installations vent the dryer from the rear of the dryer. Other installations are possible.
  • Page 18: Install Vent System

    Special provisions for mobile homes: INSTALL VENT SYSTEM Exhaust vent must be securely fastened to a noncombustible portion of mobile home and must not terminate beneath the Install exhaust hood mobile home. Terminate exhaust vent outside. 12" min. (305 mm) 12"...
  • Page 19: Connect Vent

    CONNECT VENT LEVEL DRYER Level Dryer Connect vent to exhaust outlet Place Place level here level here Using a 4" (102 mm) clamp, connect vent to exhaust outlet Check levelness of dryer from side to side. Repeat from in dryer. If connecting to existing vent, make sure vent is front to back.
  • Page 20: Complete Installation Checklist

    All Models: COMPLETE INSTALLATION Select a Timed Dry heated cycle, and start dryer. Do not CHECKLIST select Air Only Temperature setting. Check that all parts are now installed. If there is an extra If dryer will not start, check the following: part, go back through steps to see what was skipped.
  • Page 21: Reverse Door Swing

    REVERSE DOOR SWING Lift door off top screws Place towel on dryer Lift door until top screws in dryer cabinet are in large part of hinge slot. Pull door forward off screws. Set door (handle side up) on top of dryer. Remove top screws from dryer cabinet. Place towel on top of dryer to avoid damaging the surface.
  • Page 22 Remove screws from door Attach door hinges Remove screws at top, bottom, and side of door (4 screws). Keep door screws separate from hinge screws as they are different sizes. Separate inner from outer door Holding door over towel on dryer, pry inner door and lift to Reattach door hinges to dryer door so that the larger hole is separate it from outer door.
  • Page 23: Troubleshooting

    Remove and transfer plugs Check door strike alignment Remove the 4 screws that attach 2 plugs on the left side. Transfer plugs to opposite side using the same 4 screws. Close door and check that door strike aligns with door catch. If it is needed, slide door catch left or right within slot to Insert screws in hinge holes on adjust alignment.
  • Page 24 ®/™ ©2016. W10904260B All rights reserved. W10904262B-SP 12/16 Tous droits réservés.

This manual is also suitable for:

Mgdb765fc0Wed7500gw0Ymedb765fw0Wgd7500gw0

Table of Contents