Table of Contents
Advertisement
Quick Links
Advertisement
Table of Contents

Subscribe to Our Youtube Channel
Related Manuals for Medion Erazer P15805


Summary of Contents for Medion Erazer P15805
- Page 1 Instruction Manual 39.6 cm / 15.6" Notebook...
-
Page 2: Table Of Contents
Table of Content Information about these Operating Instructions ........4 1.1. Explanation of Symbols ..................4 1.2. Proper Use........................ 6 EU Declaration of Conformity ..............6 2.1. Information on WLAN ..................7 Information on Trademarks ................ 8 Safety Instructions ..................8 4.1. - Page 3 Data Input ....................30 15.1. Keyboard ........................30 15.2. Touchpad .......................31 Sound System .................... 32 16.1. External Audio Connections ................32 Network Operation ..................32 17.1. Network Connection ..................32 17.2. Wi-Fi (Wireless Network) ...................32 17.3. Bluetooth® ......................33 17.4. Airplane Mode ......................33 Card Reader ....................34 18.1.
-
Page 4: Information About These Operating Instructions
1. Information about these Operating Instructions Thank you for choosing our product. We hope you enjoy using it. Read the safety instructions and all other instructions carefully before using the device for the first time. Note the warnings on the device and in the operating instructions. - Page 5 Additional information on using the device. Please follow the guidelines in the operating instructions. • Bullet point/information on operating steps and results Tasks to be performed Declaration of conformity (see section ‘Declaration of conformity’): Products that feature this symbol meet the requirements of the EC directives.
-
Page 6: Proper Use
• Do not use the device in extreme environmental conditions. 2. EU Declaration of Conformity MEDION AG hereby declares that this product conforms with the essential requirements and the remaining relevant regulations: •... -
Page 7: Information On Wlan
AT = Austria, BE = Belgium, CZ = Czech Republic, DK = Denmark, EE = Estonia, FR = France, DE = Germany, IS = Iceland, IE = Ireland, IT = Italy, EL = Greece, ES = Spain, CY = Cyprus, LV = Latvia, LT = Lithuania, LU = Luxembourg, HU = Hungary, MT = Malta, NL = Netherlands, NO = Norway, PL = Poland, PT = Portugal, RO = Romania, SI = Slovenia, SK = Slovakia, TR = Turkey, FI = Finland, SE = Sweden, CH = Switzerland, UK = United Kingdom, HR = Croatia... -
Page 8: Information On Trademarks
The Bluetooth® word mark and logos are registered trademarks of Bluetooth SIG, Inc. and are used by MEDION under licence. The USB™ word mark and logos are registered trademarks of USB Implementers Forum, Inc. and are used by MEDION under licence. Dolby is a registered trademark of Dolby Laboratories. -
Page 9: Operational Safety
WARNING! Impairment to hearing! Listening through earphones or headphones at excessive volume levels, as well as changes to the basic settings of the equaliser, drivers, software or operating system generates excessive acoustic pressure and can lead to damage or loss of hearing. ` Before pressing play, set the volume to the lowest setting. - Page 10 The slots and openings on the device are for ventilation purposes. ` Do not cover these openings, as this could cause the device to overheat or even catch fire. ` Do not insert anything into the device through the slots and openings.
-
Page 11: Never Carry Out Repairs Yourself
4.3. Never carry out repairs yourself CAUTION! Risk of electric shock! There is a risk of electric shock if repairs are not carried out by qualified personnel! ` Never open the housing of the notebook, the battery or the mains adapter! ` In the event of a fault, please contact the Service Centre or an approved repair specialist. -
Page 12: Environmental Requirements
• This device is not suitable for use with VDU workstations. 4.5. Environmental Requirements • The notebook is most reliably operated at an ambient temperature between 5 °C (+41 °F) and 30 °C (+86 °F) and at a relative humidity between 20% and 80% (without condensation). -
Page 13: Power Supply
4.6. Power Supply CAUTION! Risk of electrical shock! There are live components inside this AC adapter. In the event of an unintentional short circuit of this AC adapter, there is a risk of electrical shock or fire! ` Do not open the housing of the AC adapter. ` Do not cover the mains adapter. -
Page 14: Notes On The Battery
NOTICE! Risk of damage! Unsuitable mains adapters may cause damage to the product. ` Only use the mains adapter supplied in order to charge the device. 4.7. Notes on the Battery WARNING! Risk of explosion! There is a risk of explosion if the battery is replaced incorrectly. -
Page 15: Cabling
• Ensure the notebook is switched off before replacing the battery. 4.8. Cabling • Position the cables so that they cannot be stepped on or might cause a risk for tripping. • To avoid damaging the cables, do not place any objects on them. •... -
Page 16: Information About The Touchpad
4.9. Information about the Touchpad NOTICE! Risk of damage! The touchpad is a highly sensitive input device and it will respond to a light touch and minimal pressure. ` Never use undue force to operate the touchpad as this could damage or destroy it. The touchpad is operated with the thumb or another finger and reacts to the energy given out by the skin. -
Page 17: Data Backup
been contaminated with chemicals. • Avoid contact between the display and hard objects (e.g. buttons, wristwatch). 4.11. Data backup Back up your data to external storage media before each update. We do not accept any liability for claims for compensation arising from loss of data or any consequential loss or damage. - Page 18 Take regular breaks when working at your notebook to prevent tenseness and fatigue. Sitting for a long time without changing position can be uncomfortable. Correct posture is very important for minimising the risks of physical problems or damage. 50 - 60 cm 40 - 45°...
-
Page 19: Included With Your Notebook
5. Included with your Notebook Risk of suffocation! Packaging material is not a toy! There is a risk of suffocation if plastic packaging is swallowed or used inappropriately! ` Keep packaging material, e.g. plastic film or bags, away from children. ` Check your purchase to ensure all items are included and contact us within 14 days of purchase if anything is missing. -
Page 20: Views And Description Of The Controls
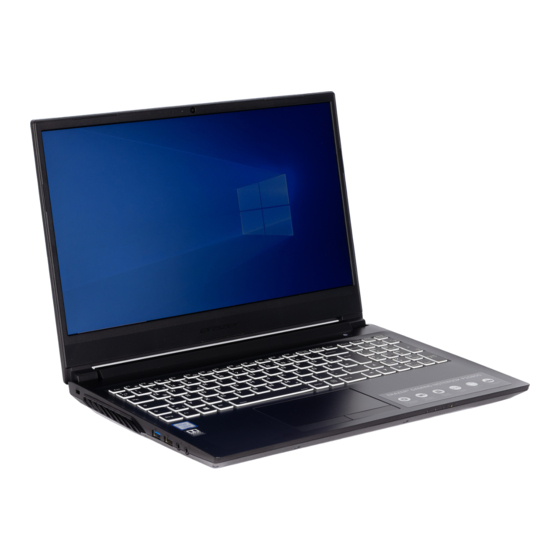
7. Views and description of the controls 7.1. Open Notebook (image similar) -
Page 21: Rear Side
Microphone Webcam LED webcam Display ON/OFF switch Keyboard Fingerprint Sensor (optional) Touchpad Operating and Status LEDs 7.2. Rear Side (image similar) Ventilation Openings depending on model USB 3.1 port (type C) with DisplayPort function (only with corresponding adapter, not supplied) Mini DisplayPort HDMI Connector LAN Port (RJ-45) -
Page 22: Left Side
7.3. Left Side (image similar) Ventilation Openings Kensington®Lock USB Port 3.1 (type A) USB Port 2.0 Microphone Audio combi connection (mic in, headphones) 7.4. Right Side 16 20 (image similar) Ventilation Openings USB 3.1 Port (type A) USB 3.1 Port (type C) Card Reader... -
Page 23: Bottom View
7.5. Bottom View (image similar) Battery Compartment Unlocking/locking the Battery Compartment cover Ventilation Openings 8. Operating and Status LEDs The system displays power supply status and operating modes via LEDs. The operating lights also light up during notebook activity: Operating Indicator This indicator lights up when the system is powered on. -
Page 24: Power Supply
9. Power Supply 9.1. On/Off Switch ` Open the notebook and hold the on/off switch down briefly to switch the notebook on or off. If it is no longer possible to switch off the notebook via the software, keep the On/Off switch pressed down for about 10 seconds. Do not switch your notebook off while the hard drive is being accessed. -
Page 25: Starting The Notebook
The operating system will be loaded from the hard drive. The loading process takes a little longer during the initial setup. Once all the necessary data has been entered, the operating system will be set up. The operating system is fully loaded once the Windows ®... -
Page 26: Ac Power
In the first few days following the initial installation, Windows® may update and configure data (e.g. with new updates) which can result in delays in the notebook shutting down and starting up. For this reason, do not switch the notebook off prematurely. This may adversely affect the installation. -
Page 27: Battery Mode
12.1. Battery Mode Batteries store electrical energy in their cells and then release it again as required. Please charge and discharge the new battery completely two or three times consecutively to ensure that it reaches its optimum performance! 12.1.1. Shipping Mode The notebook is in secure transport mode after being unpacked;... -
Page 28: Power Management (Power Options)
12.1.4. Charging the Battery The battery is charged using the AC adapter. When the AC adapter is connected, the battery charges automatically regardless of whether or not the notebook is switched on or not. A complete charge takes a few hours with the notebook switched off. With the notebook switched on, the charging process takes significantly longer. -
Page 29: Energy Saving Tips
13.1. Energy Saving Tips Utilize the Fn+F12 sleep mode keys to turn into power saving mode. • • Tune the settings in Power Options to optimise the computer’s power management. • Always disconnect the AC power cord or uninstall the battery pack or switch off the wall outlet if the computer would be left unused for a certain time to achieve zero energy consumption. -
Page 30: Connecting An External Monitor
14.2. Connecting an External Monitor The Notebook has a Mini DisplayPort t as well as an HDMI port for an external monitor. ` Shut down your Notebook correctly. ` Plug the external monitor’s signal cable (not included) into the Mini DisplayPort socket on the Notebook. -
Page 31: Touchpad
Description Brightness up Fn + F9 Increases the brightness of the display. Webcam Fn + F10 Enables or disables the webcam. Airplane mode Fn + F11 Switches the airplane mode on or off. Sleep Fn + F12 The notebook goes into power-saving mode. 15.2. -
Page 32: Sound System
16. Sound System Your notebook comes with a high-definition audio system with 2 speakers (Dolby ). Personal settings can be configured via the Dolby menu. This ensures optimum support for all current programs and games. 16.1. External Audio Connections Your Notebook has an integrated stereo speaker so you can always reproduce sound without additional devices. -
Page 33: Bluetooth
17.2.1. Requirements A so called Wi-Fi access point may be used as a remote station. A Wi-Fi access point is a radio transmitting device that communicates with your Notebook and controls access to the connected network. Wi-Fi access points are frequently found in large offices, airports, train stations, universities or Internet cafés. -
Page 34: Card Reader
18. Card Reader The shape and capacity of a memory card can vary depending on the manufacturer. You can use the following types of memory card: SD, SDHC, SDXC. Memory cards are not included. 18.1. Inserting a Memory Card NOTICE! Risk of damage! Incorrectly inserting the memory card may damage the device. -
Page 35: Securing Your Notebook
20. Securing Your Notebook 20.1. Password Setting (Power-on) You can protect your notebook against unauthorised use with a power-on password. On switching on the notebook, a password prompt will appear on the screen. The password is set up in the UEFI configuraton. NOTICE! Risk of damage! Please note that changes should only be carried out... -
Page 36: Resetting The Notebook To Its Factory Settings
The fingerprint needs to be read multiple times, follow the instructions on the screen for this purpose. ` Once the fingerprint has been successfully read, click/tap on the Add another button in the pop-up window to scan another fingerprint. ` Once all of the fingerprints have been read, click/tap on the Close button in the pop-up window to conclude the process. -
Page 37: System Restore With Windows Recovery Options
The drivers and tools will be saved to a storage medium. − Create driver and tool rescue media Create a support disc − Create driver and tool rescue USB disk Create a support USB storage medium Update your PC, without damaging your data •... -
Page 38: Uefi Configuration
` Tap or click on Get started. ` A dialogue box will now open, select the recovery option Keep my files to refresh your notebook. 21.2.2. How to Reset your Notebook ` Open the start menu. ` Select the Settings app from the list. ` Tap or click on Update &... -
Page 39: Faqs - Frequently Asked Questions
` Changes must only be carried out by specialists or very experienced users. 22.1. Executing the UEFI Configuration You can only run the configuration program upon system startup. If the notebook has already started up, switch it off and restart it. ` Press the F2 key to run the UEFI configuration. - Page 40 Solution: Press the on/off switch. − The background lighting has been disabled using the Fn + F2 keyboard shortcut. Solution: Reactivate the background lighting by pressing any key. The Notebook turns itself off during operation. ` The battery may be fully discharged. Plug the Notebook in using the AC adapter and charge the battery.
-
Page 41: Customer Service
You’ve checked through the suggestions in the previous section and you’re still having problems with your device? Then call our hotline or contact us at www.medion.com. We’ll be glad to help you. Before contacting your technology centre, however, prepare the following information: •... -
Page 42: Transport
The current drivers are available on our homepage at http://www.medion.com. Please use the service address for the country where the device was purchased. 24.5. Transport Please note the following information if you wish to transport the Notebook: ` Switch the notebook off. -
Page 43: Storage When Not In Use
You can increase the lifespan of your notebook with the following measures: ` Only use a damp, lint-free cloth to clean the notebook. ` Do not use solvents, corrosive or aerosol-based detergents to clean the device. ` Use special cleaning products for the display and the touchpad (e.g. glass cleaner). -
Page 44: Upgrading/Modifying And Repair
If you cannot use your laptop for a longer period of time (e.g. you go on holiday) activate the automatic battery protection manually in your device’s UEFI. This protects your battery from fully discharging. ` In the UEFI you will find the Shipping Mode option under the Exit menu option. ` Select the Shipping Mode option with the arrow keys. -
Page 45: Disposal
26. Disposal PACKAGING The product has been packaged to protect it from damage in transit. The packaging is made of materials that can be recycled in an environmentally friendly manner. DEVICE All old appliances marked with the symbol illustrated must not be disposed of in normal household rubbish. -
Page 46: Information On Display Errors
However, these approaches were mostly very complicated and varied from one manufacturer to the next. When handling warranty issues for all of its display products, MEDION therefore adheres to the strict and transparent requirements of the standard EN ISO 9241-307, Class II; which has been briefly summarised below. -
Page 47: Battery Information
EN ISO 9241-307, error class II Cluster Cluster Resolution Type 1 Type 2 Type 3 Type 1, type 2 Type 3 1024 x 768 1280 x 800 1280 x 854 1280 x 1024 1366 x 768 1400 x 1050 1600 x 900 1920 x 1080 1920 x 1200 28. -
Page 48: Service Information
In our Service Community, you can meet other users, as well as our staff, and you can exchange your experiences and pass on your knowledge there. You will find our Service Community at http://community.medion.com. • Alternatively, use our contact form at www.medion.com/contact. -
Page 49: Legal Notice
31. Privacy statement Dear customer, We wish to inform you that we, MEDION AG, Am Zehnthof 77, 45307 Essen, Germa- ny process your personal data as a data controller. For matters regarding data protection, we are supported by our company data pro- tection officer who can be contacted at MEDION AG, Datenschutz, Am Zehnthof 77, D –... -
Page 50: Index
32. Index Keyboard ............30 Shortcuts ..........30 Battery ............47 Battery Mode ..........27 Licence Agreement ........25 Charging the Battery ......28 Discharging the Battery ...... 28 Network Operation ........32 Inserting the Battery ......27 Requirements ......... 33 Removing the Battery ......
Need help?
Do you have a question about the Erazer P15805 and is the answer not in the manual?
Questions and answers