Page 1
Aspire M1610/Veriton M261 Service Guide Service guide files and updates are available on the AIPG/CSD web; for more information, please refer to http://csd.acer.com.tw PRINTED IN TAIWAN...
Page 4
Conventions The following conventions are used in this manual: SCREEN MESSAGES NOTE WARNING CAUTION IMPORTANT Denotes actual messages that appear on screen. Gives bits and pieces of additional information related to the current topic. Alerts you to any damage that might result from doing or not doing specific actions.
Page 5
DIFFERENT part number code to those given in the FRU list of this printed Service Guide. You MUST use the list provided by your regional Acer office to order FRU parts for repair and service of customer machines.
System Specifications Features Operating System • Microsoft Windows Vista (Home Basic, Home Premium, Business) Processor ® • Socket Type: Intel • Processor Type: ® • Intel Core 2 Duo 755 FSB 800/533 MHz ® • Intel Pentium 4/D 775 FSB 800/533 MHz ®...
Page 10
• Slot Quantity: 1 • Support 3.5” Devices • Slot Type: 40 pin PATA IDE slot • Slot Quantity: 1 • Transfer rate support: • PIO mode: 0/1/2/3/4 • ATA mode: 33/66/100 port supported • Slot Type: SATA slot • Slot Quantity: 2 •...
Page 11
• ACPI 2.0, • Provides DMI 2.0, WFM 2.0, WOL, and SM Bus for system management. I/O Connector • Controller: Super I/O ITE 8718F-FX with hardware monitor Rear I/O Connector • 1 PS/2 Keyboard Port • 1 PS/2 Mouse Port •...
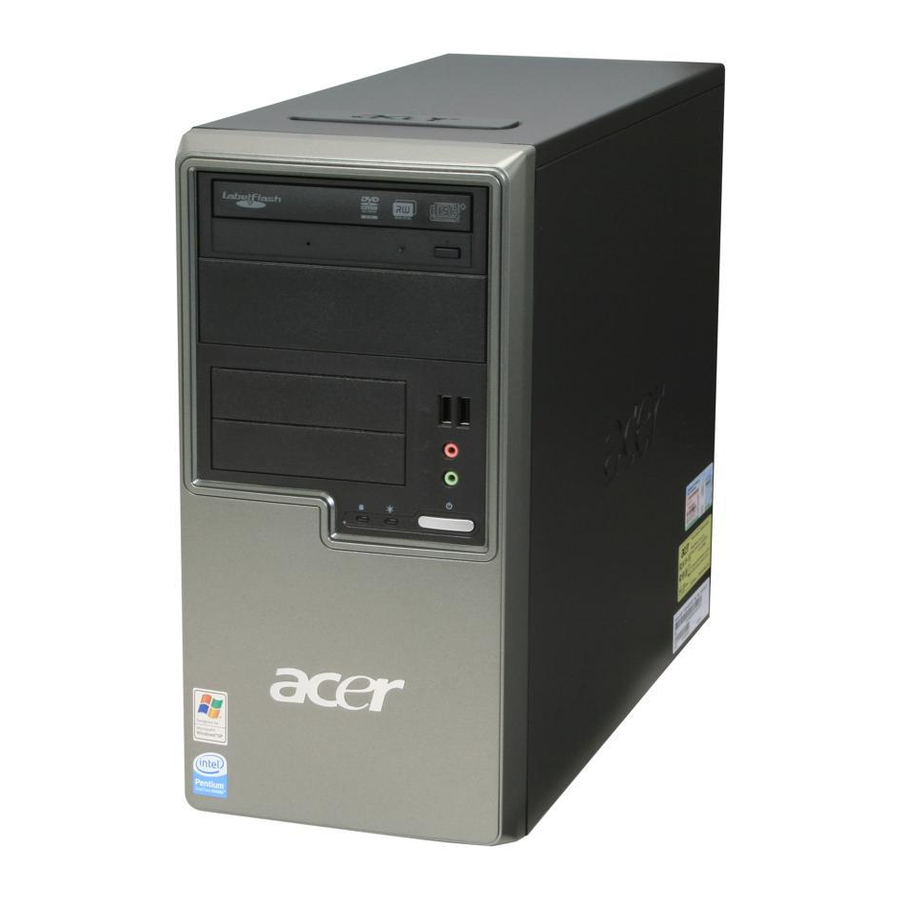
Aspire M1610 Front Panel The computer’s front panel consists of the following: Label Description Optical Device 3.5 inch Device Power button HDD LED LAN LED Speaker Out Microphone USB Port Chapter 1...
Aspire M1610 Rear Panel The computer’s rear panel consists of the following: Label 6 audio jacks (7.1 HD audio jack) USB PORTS CRT/LCD port COM port PS/2 mouse SPDIF Bracket Recovery Switch Holder Chapter 1 Description Label LAN Port 1394 Port...
Veriton M261 Front Panel The computer’s front panel consists of the following: Label Description Power-Button Speaker-out/Line-out Port Microphone-in out (Front) USB Ports Optical drive HDD LED Power LED Chapter 1...
Veriton M261 Rear Panel The computer’s rear panel consists of the following: Label 3 audio jacks CRT/LCD port Parallel port PS/2 keyboard Power cord Port Lock Handle Chapter 1 Description Label RJ45 port Serial port USB PORTS PS/2 mouse Recovery Switch Holder Description...
• The smallest memory capacity possible is 128 MB, assuming Single-Channel Mode by using 256- Mb technology • Supports high throughput MuTIOL (Multi-Threaded I/O Link) • PCI-Express x16 Graphics interface • One 16-lane PCI Express port intended for Graphics attach, fully compliant to the PCI Express Base Specification revision 1.0a •...
• Audio Connectors/Headers • ATAPI analog line-level stereo outputs for Internal Speaker • Vertical connector for three mini-audio jacks (Stereo Line In, Stereo LINE Out, Stereo Microphone • Header for Stereo Line out and Mono Microphone In for front panel cabling option that adheres to the Intel®...
• High Definition Audio 6 Ports Connector with Line In, Line Out, Microphone, Surround, CEN/LFE and Side-Surround Vertical Audio connector with Line In, Line Out and Microphone Power & Power Management Two power management modes are supported in BIOS: Advanced Configuration and Power Interface (ACPI 2.0) or Advanced Power Management (APM 1.2).
System BIOS LPC Bus The SST 49LF004B FWH or supported alternative LPCs will be implemented on the GDM03. Refer to the BIOS Specification for specific implementations. • Pm49FL004T-33JCE • 4Mbit symmetrical Flash SPI Bus (default) • W25X40VAIZ • 4Mbit symmetrical Flash Chapter 1...
Chapter 2 System Utilities Most systems are already configured by the manufacturer or the dealer. There is no need to run Setup when starting the computer unless you get a Run Setup message. The Setup program loads configuration values into the battery-backed nonvolatile memory called CMOS RAM. This memory area is not part of the system RAM.
Entering Setup Power on the computer and the system will start POST (Power On Self Test) process. When the message of “Press DEL to enter SETUP” appears on the screen, press the key of [Delete] to enter the setup menu. NOTE: If the message disappears before you respond and you still wish to enter Setup, restart the system by turning it OFF and On.
Page 25
The items in the main menu are explained below: • Product Information — To introduce the Product Name, System P/N and MainBoard ID...etc. • Standard CMOS Features — The basic system configuration can be set up through this menu. • Advanced BIOS Features —...
SMBIOS version System BIOS ID BIOS Release Date Phoenix - AwardBIOS CMOS Setup Utility Product Information ASM1610/VTM261 F672CR 000000000037 Acer Acer 6.00PG 756A1D01 06/01/2007 F5: Previous Values F7: Optimized Defaults Displays the model name of your system. Displays the main board’s identification number.
Standard CMOS Features Select Standard CMOS Features from the main menu to configure some basic parameters in your system. The following screen shows the Standard CMOS Features menu: Date (mm:dd:yy) Time (hh:mm:ss) IDE Channel 0 Master IDE Channel 0 Slave IDE Channel 1 Master IDE Channel 1 Slave SATA Channel 1 Master...
Page 28
Parameter IDE Channel 0/1 Master/Slave SATA Channel 1/2 Master Drive A Video Halt On Base Memory Extended Memory Total Memory Description Leave this item at Auto to enable the system to automatically detect and configure IDE devices on the channel. If it fails to find a device, change the value to Manual and then manually configure the drive by entering the characteristics of the drive in the items described below.
IDE Channel 0/1 Master The following screen shows the IDE Channel Master menu. NOTE: IDE Channel 0 and Channel 1 Master have the same options, the only difference is the menu title. IDE HDD Auto Detection IDE Channel 0 Master Access Mode Capacity Cylinder...
IDE Channel 0/1 Slave The following screen shows the IDE Channel Slave menu. NOTE: IDE Channel 0 and Channel 1 Slave have the same options, the only difference is the menu title. IDE Auto Detection Extended IDE Drive Access Mode Capacity Cylinder Head...
SATA Channel 1/2 Master The following screen shows the SATA Channel Master menu. NOTE: SATA Channel 1 and Channel 2 Master have the same options, the only difference is the menu title. IDE HDD Auto Detection IDE Channel 0 Master Access Mode Capacity Cylinder...
Advanced BIOS Features The following screen shows the Advanced BIOS Features: CPU Feature Hard Disk Boot Priority Virus Warning Quick Power On Self Test First Boot Device Second Boot Device Third Boot Device Boot Other Device Boot Up Floppy Seek Boot Up Num Lock Status Typematic Rate Setting X Typematic Rate (chars/sec)
Page 33
Parameter First /Second/Third Boot The items allow you to set the sequence of boot Device device where BIOS attempts to load the disk operating system. Boot Other Device This parameter allows you to specify the system boot up search sequence. Boot Up Floppy Seek Setting to Enabled will make BIOS seek floppy drive a: before booting the system.
CPU Feature The following screen shows the CPU Features menu: Limit CPUID MaxVal C1E Function Execute Disable Bit :Move Enter: Select +/-/PU/PD :Value F10: Save and Exit ESC:Exit F1: General Help Phoenix - AwardBIOS CMOS Setup Utility CPU Features [Disabled] [Auto] [Enabled] F5: Previous Values...
Hard Disk Boot Priority The following screen shows the Hard Disk Boot Priority menu: 1. Ch2 M. : ST3320820AS 2. Bootable Add-in Cards :Move Enter: Select +/-/PU/PD :Value F10: Save and Exit ESC:Exit F1: General Help Chapter 2 Phoenix - AwardBIOS CMOS Setup Utility Hard Disk Boot Priority F5: Previous Values Item Help...
Advanced Chipset Features The following screen shows the Advanced Chipset Features menu: Internal Graphic Control Memory Hole at 15M - 16M :Move Enter: Select +/-/PU/PD :Value F10: Save and Exit ESC:Exit F1: General Help Parameter Internal Graphic Control Memory Hole at 15M-16M Phoenix - AwardBIOS CMOS Setup Utility Advanced Chipset Features [Press Enter]...
Integrated Peripherals The following screen shows the Integrated Peripherals Features: Onboard IDE Device Onboard PCI Device Onboard Super IO Device :Move Enter: Select +/-/PU/PD :Value F10: Save and Exit ESC:Exit F1: General Help Parameter Onboard IDE Device Onboard PCI Device Onboard Super IO Device Phoenix - AwardBIOS CMOS Setup Utility Integrated Peripherals...
Onboard IDE Device The following screen shows the Onboard IDE Device menu: Serial ATA Mode IDE Primary Master PIO IDE Primary Slave PIO IDE Secondary Master PIO IDE Secondary Slave PIO Primary Master UltraDMA Primary Slave UltraDMA Secondary Master UltraDMA Secondary Slave UltraDMA IDE DMA Transfer Access :Move Enter: Select +/-/PU/PD :Value F10: Save and Exit ESC:Exit...
Onboard PCI Device The following screen shows the Onboard PCI Device menu: USB Controller USB 2.0 Supports USB Keyboard Support USB Mouse Support Azalia Audio Controller Onboard LAN Controller Onboard Lan Boot ROM :Move Enter: Select +/-/PU/PD :Value F10: Save and Exit ESC:Exit F1: General Help Phoenix - AwardBIOS CMOS Setup Utility Onboard PCI Device...
Onboard Super IO Device The following screen shows the Onboard Super IO Device menu: Onboard FDC Controller Onboard Serial Port 1 Onboard Serial Port 2 UART Mode Select X UR2 Duplex Mode Onboard Parallel Port ECP Mode Use DMA :Move Enter: Select +/-/PU/PD :Value F10: Save and Exit ESC:Exit F1: General Help Chapter 2 Phoenix - AwardBIOS CMOS Setup Utility...
Power Management The Power Management menu lets you configure your system to most effectively save energy while operating in a manner consistent with your own style of computer use. The following screen shows the Power Management parameters and their default settings: ACPI function ACPI Suspend Type Video Off in Suspend...
Page 43
Parameter ACPI Suspend Type This item specifies the power saving modes for ACPI function. S1(POS): The S1 sleep mode is a low power state. In this state, no system context (CPU or chipset) is lost and hardware maintains all system context. S3 (STR): The S3 sleep mode is s power-down state in which power is supplied only to essential components such as main memory and wake-capable devices and all system context...
PnP/PCI Configuration The following screen shows the PnP/PCI Configuration parameters and their default settings: PCI/VGA Palette Snoop **PCI Express relative items** Maximum ASPM Supported Maximum Payload Size :Move Enter: Select +/-/PU/PD :Value F10: Save and Exit ESC:Exit F1: General Help Parameter PCI/VGA Palette Snoop Maximum ASPM Supported...
PC Health Status The following screen shows the PC Health Status parameters and their default settings: CPU Warning Temperature CPU Shutdown Temperature SYS Shutdown Temperature CPU Core Voltage DIMM Voltage +3.3V +5.0V +12V CPU Temperature SYS Temperature CPU Fan Speed SYS Fan Speed Smart FAN Control :Move Enter: Select +/-/PU/PD :Value F10: Save and Exit ESC:Exit...
Frequency/Voltage Control The following screen shows the Frequency and Voltage Control parameters and their default settings: Auto Detect DIMM/PCI Clk Spread Spectrum :Move Enter: Select +/-/PU/PD :Value F10: Save and Exit ESC:Exit F1: General Help The following table describes the parameters found in this menu. Settings in boldface are the default and suggested settings.
Load Optimized Defaults This option opens a dialog box that lets you install defaults for all appropriate items in the Setup Utility. Product Information Standard CMOS Features Advanced BIOS Features Advanced Chipset Features Integrated Peripherals Power Management Setup PnP/PCI Configuration Esc: Quit F10: Save &...
Set Supervisor/User Password When this function is selected, the following message appears at the center of the screen to assist you in creating a password. Product Information Standard CMOS Features Advanced BIOS Features Advanced Chipset Features Integrated Peripherals Power Management Setup PnP/PCI Configuration Esc: Quit F10: Save &...
Save & Exit Setup Highlight this item and press <Enter> to save the changes that you have made in the Setup Utility and exit the Setup Utility. Product Information Standard CMOS Features Advanced BIOS Features Advanced Chipset Features Integrated Peripherals Power Management Setup PnP/PCI Configuration Esc: Quit...
Exit Without Saving Highlight this item and press <Enter> to discard any changes that you have made in the Setup Utility and exit the Setup Utility. Product Information Standard CMOS Features Advanced BIOS Features Advanced Chipset Features Integrated Peripherals Power Management Setup PnP/PCI Configuration Esc: Quit F10: Save &...
Machine Disassembly and Replacement To disassemble the computer, you need the following tools: • Wrist grounding strap and conductive mat for preventing electrostatic discharge. • Wire cutter. • Phillips screwdriver (may require different size). NOTE: The screws for the different components vary in size. During the disassembly process, group the screws with the corresponding components to avoid mismatches when putting back the components.
General Information Before You Begin Before proceeding with the disassembly procedure, make sure that you do the following: Turn off the power to the system and all peripherals. Unplug the AC adapter and all power and signal cables from the system. Chapter 3...
CAUTION: Before you proceed, make sure you have turned off the system and all peripherals connected to it. Aspire M1610/Veriton M261 Disassembly NOTE: The only physical difference between the two models is the front bezel as shown in the procedures.
Page 54
Disconnect the front bezel LED cable. Disconnect the audio cables. Disconnect the USB cable. Disconnect the Card Reader cable. Chapter 3...
Page 55
Disconnect the PA and PD power-cable from the MB connector. Disconnect P1 power cable and FDD data cable. 10. Disconnect the ODD power and data cables. Chapter 3...
Page 56
11. Disconnect the HDD power and data cables. 12. Disconnect the System Fan power-cable from the MB connector. 13. Disconnect the HDD by railing the HDD-holder as shown. Remove the HDD from the chassis. Chapter 3...
Page 57
14. Release the three latches on the front bezel, then remove the front bezel. Aspire M1610 Veriton M261 Front Bezel Front Bezel 15. Disconnect the ODD by railing the ODD-holder as shown below. Remove the ODD from the chassis. 16. Release the CPU cooler from the MB by removing the four securing screws.
Page 58
17. Disconnect the CPU Cooler power-cable from the MB connector. 18. Release the memory. 19. Remove the System FAN by releasing the four screws shown then removing the fan from the chassis. Chapter 3...
Page 59
20. Remove the CPU by releasing the CPU Latch on the Socket and then disconnecting the CPU. 21. Remove the motherboard by releasing the six screws shown then lifting MB clear of the chassis. 22. Remove the power-supply by releasing the four screws shown then lifting the Power-supply clear of the chassis.
Reassembly Procedure Aspire M1610/Veriton M261 Reassembly NOTE: The only physical difference between the two models is the front bezel as shown in the procedures. Install the Power-supply by fitting the Power-supply into the chassis, then fasten the four screws shown.
Page 61
Fit the System Fan into the chassis, then fasten the four screws shown. Install the Memory. Fit the CPU cooler to the MB and fasten four screws shown. Chapter 3...
Page 62
Connect the CPU Cooler power-cable to the MB connector. Connect the System Fan power-cable to the MB connector. Install the ODD into the chassis and slide the ODD rail to lock it. 10. Install the FDD and slide the FDD rail to lock it. Chapter 3...
Page 63
11. Install the front bezel. Aspire M1610 Veriton M261 Front Bezel Front Bezel 12. Install the HDD into the chassis and slide the HDD rail to lock it. 13. Connect the HDD data cable and power-cable to the rear of HDD.
Page 64
14. Connect the ODD data cable and power-cable to the rear of ODD. 15. Connect the P1 power-cable and FDD data cable to the MB connector. 16. Connect the PA and PD power-cable to the MB connector. Chapter 3...
Page 65
17. Connect the USB cables. 18. Connect the Card Reader cable. 19. Connect the AUDIO cables. 20. Connect the front bezel LED cable. Chapter 3...
Page 66
21. Install the TV&VGA&MODEM card. 22. Close the system. Chapter 3...
Troubleshooting Please refer to generic troubleshooting guide for troubleshooting information relating to following topics: • Power-On Self-Test (POST) • POST Check Points • POST Error Messages List • Error Symptoms List Chapter 4 Chapter 4...
Jumper and Connector Information Mainboard Jumper Locations Item Name Description Front panel header COM2 COM header SATA2 SATA data transfer connector 2 SATA1 SATA data transfer connector 1 SYS_FAN_1 System fan header (3pin) IDE1 Parallel ATA IDE channel PWR1 M/B power connector FLOPPY FDD transfer channel GPIO connector...
Jumper Settings This section explains how to set jumpers for correct configuration of the mainboard. Setting Jumpers Use the motherboard jumpers to set system configuration options. Jumpers with more than one pin are numbered. When setting the jumpers, ensure that the jumper caps are placed on the correct pins. System Board Jumper Setting Features On-board Jumper and...
Page 71
Front USB Illustration Silk Screen Footprint F_USB? H2X5MZO9 Front Audio Illustration Silk Screen Footprint F_AUDIO h2x5mzo8_1h86 Chapter 5 Signal Name VREG_FP_USBP Front Panel USB Power(Ports 0,1) VREG_FP_USBP Front Panel USB Power(Ports 0,1) USB_FP_P0- Front Panel USB Port 0 Negative Signal USB_FP_P1- Front Panel USB Port 1 Negative Signal USB_FP_P0+...
Page 72
Front 1394 Illustration Silk Screen Footprint F_1394 H2X5MZO9 Internal Speaker Illustration Silk Screen Footprint SPEAKER h2x4mzo4h86 Sys FAN (3pin) Illustration Silk Screen Footprint FAN3MH100 SYS_FAN_1 Signal Name TPA+ TPA- Ground Ground TPB+ TPB- +12V(Fused) +12V(Fused) Ground Schematic Part HEADER_2X5_9 Signal Name MONO-L Ground MONO-R...
Page 73
Clear CMOS Set pin 1 and pin 2 closed Silk Screen CLR_CMOS Intruder Illustration INTRUDERJ Ground Silk Screen Footprint INTR J3 (for customer Acer requested) Illustration AGPIO1 Ground Silk Screen Footprint INTR Chapter 5 Signal Name Ground FAN POWER 12V...
PROVIDERS, your Acer office may have a DIFFERENT part number code to those given in the FRU list of this printed Service Guide. You MUST use the local FRU list provided by your regional Acer office to order FRU parts for repair and service of customer machines.
Exploded Diagrams Aspire M1610 Item AM10 Main Bezel 3.25” Cover 5.25” Cover USB Shielding USB PCB-ASM FDD Lock Slide CD ROM Lock Slide Chassis Right Side Door Description Item Power Supply PCI Bracket Left Side Door Motherboard HDD Lock Slide 3.5”...
Veriton M261 Item 3.5” Filler Panel 5.25” Rotate Cover V541 Bezel CD ROM FDD w/Panel HDD Disk Mothboard HDD Lock Slide FDD Lock Slide Chapter 6 Description Item CD ROM Lock Slide USB Board USB Bracket Right Side Chassis Power Supply PCI Bracket Left Side Decription...