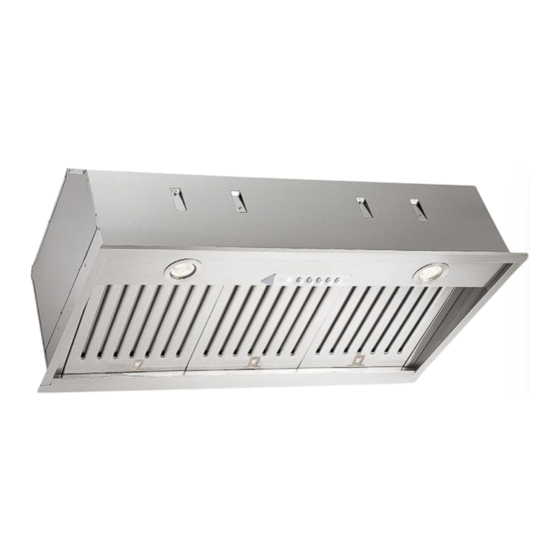
Xo XOI33S User Instructions
Hide thumbs Also See for XOI33S:

Advertisement

Quick Links

NEED HELP?
Call our ventilation experts toll free al 800-966-8300
AVEZ-VOUS BESOIN D'AIDE?
Contactez nos experts au numéro gratuit 800-966-8300
¿NECESITA AYUDA?
Póngase en contacto con nuestros expertos a través del número gratis 800-966-8300
RANGE HOOD - User instructions
USA
HOTTE DE CUISINE - Notice d'utilisation
F
CAMPANA EXTRACTORA - Manual de utilización
E
XOI33S
XOI33KS
XOI45KS

Advertisement

Table of Contents
loading

Summary of Contents for Xo XOI33S

  • Page 1 XOI33S XOI33KS XOI45KS NEED HELP? Call our ventilation experts toll free al 800-966-8300 AVEZ-VOUS BESOIN D’AIDE? Contactez nos experts au numéro gratuit 800-966-8300 ¿NECESITA AYUDA? Póngase en contacto con nuestros expertos a través del número gratis 800-966-8300 RANGE HOOD - User instructions HOTTE DE CUISINE - Notice d’utilisation...
  • Page 2 The warranty is extended to the original purchaser for products purchased for ordinary home use in North America. Should you require service for your XO product call a product service specialist at 800.966.8300 What is not covered Improper Installation.
  • Page 3: Important Safety Instructions

    ENGLISH IMPORTANT SAFETY INSTRUCTIONS FOR RESIDENTIAL USE ONLY READ AND SAVE THESE INSTRUCTIONS PLEASE READ ENTIRE INSTRUCTIONS BEFORE PROCEEDING. IMPORTANT: Save these Instructions for the Local Electrical Inspectors use. INSTALLER: Please leave these Instructions with this unit for the owner. OWNER: Please retain these instructions for future reference.
  • Page 4: Installation Instructions

    Crepes Suzette, Cherries Jubilee, Peppercorn Beef Flambè). C. Clean ventilating fans frequently. Grease should not be allowed to accumulate on fan or filter. D. Use proper pan size. Always use cookware appropriate for the size of the surface element. E. Keep fan, filters and grease laden surface clean. F.
  • Page 5 D. Ducted fans must always be vented to the outdoors. E. This unit must be grounded. WARNING - TO REDUCE THE RISK OF FIRE, USE ONLY METAL DUCTWORK. WARNING - UNDER CERTAIN CIRCUMSTANCES DOMESTIC APPLIANCES MAY BE DANGEROUS. A. Do not check filters with hood working. B.
  • Page 6: Duct Fittings

    DUCT FITTINGS: Equivalent Total Duct Quantity This Hood Must Use an Dimensions: Number Equivalent Piece: Used: Length*: Length: 6" Round Duct. It Can Transition to 3-1/4" x 1 ft. (per foot Round, straight 10" or 3-1/4" x 12" Duct. lenhgth) 3-1/4"...
  • Page 7: Install The Ductwork

    3. Long duct runs, elbows, and transitions will reduce the performance of the hood. Use as few of them as possible. 4.XOI33S: Install a roof or wall cap. Connect 6" round metal ductwork to cap and work back towards hood location. Use duct tape to seal the joints between ductwork sections.
  • Page 8 PRODUCT DIMENSIONS AND CLEARANCE XOI33S: › Front of hood › Side of hood 12-5/8" 4" Ø6" 45° 1-3/16" 16" 32-3/8" 33-3/4" 18-7/16" › Top of hood › Mounting height and clearance: Min 27" - Max 32" 36" - 8 -...
  • Page 9 PRODUCT DIMENSIONS AND CLEARANCE XOI33KS - XOI45KS: › Front of hood › Side of hood 12-5/8" 5-11/16" Ø 8-11/16" Ø 8" 45° 1-3/16" 16" 32-3/8" - 44-3/8" 18-7/16" 33-3/4" - 45-3/4" › Top of hood › Mounting height and clearance: Min 27"...
  • Page 10: Installation

    1 - figure 2 and fully respecting the measurements indicated. When fixing the hood in place make sure a wooden frame (not supplied) is fitted inside the cabinet, as Fig.1 XOI33S XOI33KS - XOI45KS 12-5/8" 5-11/16" 12-5/8"...
  • Page 11 shown in figure 3. Fix the appliance in place using the 6 screws P (Fig.3) and then fit the two safety screws D (Fig.3). Fig.3 - 11 -...
  • Page 12 For all measurements relating to the cooker hood, please refer to Fig.2. Before fixing the cooker hood to the lower part of the cabinet, the following steps should be performed: 1. Remove the 4 screws E fixing the two cooker hood brackets H (RHS and LHS) in place as indicated in Fig.4A.
  • Page 13 Fig.5 Fig.6 Fig.7 - 13 -...
  • Page 14: Power Supply

    POWER SUPPLY: IMPORTANT – (Please read carefully) WARNING: FOR PERSONAL SAFETY, THIS APPLIANCE MUST BE PROPERLY GROUNDED. Remove house fuse or open circuit breaker before beginning installation. Do not use an extension cord or adapter plug with this appliance. Follow National electrical codes or prevailing local codes and ordinances.
  • Page 15: Connect Electrical

    2. CONNECT ELECTRICAL: For connection to the power supply refer to the follows Fig.3-Fig.8: BLACK = L line WHITE = N neutral GREEN/YELLOW = G ground. - A double-pole switch properly rated must be installed to provide the range hood power supply disconnection.
  • Page 16 parts is used, the upper part must be placed outside the lower part. Do not connect the range hood exhaust duct air to the same duct air used to exhaust hot air or fumes from other appliances other than electrical. Before proceeding with the assembly operations, remove the anti-grease filter(s) (Fig.9) so that the unit is easier to handle.
  • Page 17 following controls: A = LIGHT B = OFF C = SPEED I D = SPEED II E = SPEED III G = MOTOR WORKING indicator. - 17 -...
  • Page 18: Maintenance

    MAINTENANCE We recommend that the cooker hood is switched on before any food is cooked. We also recommend that the appliance is left running for 15 minutes after the food is cooked, in order to thoroughly eliminate all contaminated air. The effective performance of the cooker hood depends on constant maintenance;...
  • Page 19 - DO NOT use ordinary steel wool or steel brushes. Small bits of steel may adhere to the surface causing rust. - DO NOT allow salt solutions, disinfectants, bleaches, or cleaning compounds to remain in contact with stainless steel for extended periods. Many of these compounds contain chemicals with may be harmful.
  • Page 20 FUSE The halogen lamps circuit is controlled by a fuse 5x20 mm, 125V 5A. In case of necessity it can be replaced only by specialized personnel. Replacing halogen light bulbs: In order to replace the dichroic lamps, carefully remove the lamp from the lamp holder with the help of a small flat screw- driver or a similar tool.
  • Page 21 XOI33S: - 21 -...
  • Page 22 XOI33KS - XOI45KS: - 22 -...
  • Page 23 Duct Options and Electrical Requirements: - 6 inch duct required. - Ductless Option for applications where no ducting in available. - AC 120v-60Hz (4.35amp). XO is Exclusively Distributed by: Eastern Marketing Corp 24 Eisenhower Parkway Roseland, New Jersey 07068 800-966-8300 www.easternmarketingcorp.com www.xoappliace.com...
  • Page 24 Duct Options and Electrical Requirements: - 8 inch duct required. - Ductless Option for applications where no ducting in available. - AC 120v-60Hz (6.2amp). XO is Exclusively Distributed by: Eastern Marketing Corp 24 Eisenhower Parkway Roseland, New Jersey 07068 800-966-8300 www.easternmarketingcorp.com www.xoappliace.com...

This manual is also suitable for:

Xoi33ksXoi45ksXoi4515ks

Table of Contents