Table of Contents
Advertisement
Quick Links
NEED HELP?
Call our ventilation experts toll free al 800-966-8300
AVEZ-VOUS BESOIN D'AIDE ?
Contactez nos experts au numéro gratuit 800-966-8300
¿NECESITA AYUDA?
Póngase en contacto con nuestros expertos a través del número gratis 800-966-8300
RANGE HOOD - User instructions
USA
HOTTE DE CUISINE - Notice d'utilisation
F
CAMPANA EXTRACTORA - Manual de utilización
E
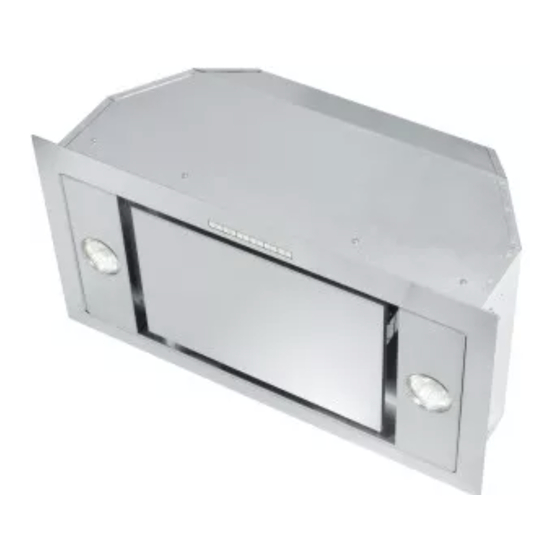
XO128S
Advertisement
Table of Contents

Subscribe to Our Youtube Channel
Related Manuals for Xo XO128S


Summary of Contents for Xo XO128S
- Page 1 XO128S NEED HELP? Call our ventilation experts toll free al 800-966-8300 AVEZ-VOUS BESOIN D’AIDE ? Contactez nos experts au numéro gratuit 800-966-8300 ¿NECESITA AYUDA? Póngase en contacto con nuestros expertos a través del número gratis 800-966-8300 RANGE HOOD - User instructions HOTTE DE CUISINE - Notice d’utilisation...
- Page 2 The warranty is extended to the original purchaser for products purchased for ordinary home use in North America. Should you require service for your XO product call a product service specialist at 800.966.8300 What is not covered Improper Installation.
- Page 3 ENGLISH IMPORTANT SAFETY INSTRUCTIONS FOR RESIDENTIAL USE ONLY READ AND SAVE THESE INSTRUCTIONS PLEASE READ ENTIRE INSTRUCTIONS BEFORE PROCEEDING. IMPORTANT: Save these Instructions for the Local Electrical Inspectors use. INSTALLER: Please leave these Instructions with this unit for the owner. OWNER: Please retain these instructions for future reference.
-
Page 4: Installation Instructions
Crepes Suzette, Cherries Jubilee, Peppercorn Beef Flambè ). C. Clean ventilating fans frequently. Grease should not be allowed to accumulate on fan or filter. D. Use proper pan size. Always use cookware appropriate for the size of the surface element. E. - Page 5 E. This unit must be grounded. WARNING - TO REDUCE THE RISK OF FIRE, USE ONLY METAL DUCTWORK. WARNING - UNDER CERTAIN CIRCUMSTANCES DOMESTIC APPLIANCES MAY BE DAN- GEROUS. A. Do not check filters with hood working. B. Do not touch the lamps after a prolonged use of the appliance. C.
- Page 6 Maximum Duct Length: For satisfactory air movement, the total duct length should not exceed 100 equivalent feet. - 6 -...
-
Page 7: Install The Ductwork
WARNING FIRE HAZARD NEVER exhaust air or terminate duct work into spaces between walls, crawl spaces, ceiling, attics or garages. All exhaust must be ducted to the outside, unless using the recirculating option. Use single wall rigid Metal ductwork only. Fasten all connections with sheet metal screws and tape all joints w/ certified Silver Tape or Duct Tape. - Page 8 PRODUCT DIMENSIONS AND CLEARANCE XO122S - XO128S: › Front of hood › Side of hood 9/16" 5-14/16" 19-7/16" - 26-1/2" 10-1/8" 21-3/16" - 28-5/16" 11-1/8" › Top of hood › Mounting height and clearance: Min 27" - Max 32" 36"...
- Page 9 INSTALLATION INSTRUCTIONS INSTALLATION - VENTED TO THE OUTSIDE 1. FIXING THE HOOD TO THE LOWER PART OF THE WALL CABINET: This type of appliance must be fitted inside a cabinet or inside another type of support structure. The overall measurements of the range hood are given in figure 1-2.
- Page 10 Fig.3 - 10 -...
- Page 11 Min - 0-6/16" Max - 0-16/16" Fig.4 - 11 -...
- Page 12 Fig.5 - 12 -...
-
Page 13: Power Supply
POWER SUPPLY: IMPORTANT – (Please read carefully) WARNING: FOR PERSONAL SAFETY, THIS APPLIANCE MUST BE PROPERLY GROUNDED. Remove house fuse or open circuit breaker before beginning installation. Do not use an extension cord or adapter plug with this appliance. Follow National electrical codes or prevailing local codes and ordinances. -
Page 14: Connect Electrical
2. CONNECT ELECTRICAL: • Power Supply Connection: For connection to the power supply refer to the follows Fig.6: BLACK = L line WHITE = N neutral GREEN/YELLOW = G ground - A double-pole switch properly rated must be installed to provide the range hood power supply disconnection. - Page 15 DUCTLESS RECIRCULATING OPTION: Model XORFRND carbon filter kit Fig.1: Remove the aluminum panels by pulling the lever 1 out and pushing down- wards 2. - 15 -...
- Page 16 Fig.2: The filters C must be applied to the suction unit inside the hood, centering them inside of it and turning them 90° until they snap into place. Fig.3: Put the aluminum panels back in place. - 16 -...
- Page 17 Reciculating Installations IT IS HIGHLY RECOMMENDED THAT PROFESSIONAL STYLE COOKING ALWAYS BE VEN- TEND TO THE OUTSIDE. For installations where ductwork is impossible or highly impr- ractical Charcoal Filters, which attach to the blower assembly, absorb smoke and odors. ceiling ceiling vent cabinet...
- Page 18 • If the apparatus is equipped with the following controls: PLEASE NOTE: with this command it is also possible to control the appliance using a remote control, available on de- mand. • Synchronization: ATTENTION! The remote control must be synchronized with the hood before you can use it. To synchronize the remote control with the hood, proceed as follows: 1.
- Page 19 If the motor is already running (at any speed, including Intensive), pressing key F switches it to 1st speed for 5 minutes, after which it turns off. When the Timer function is active, the user can change motor speed using keys C-D-E without interrupting the 5-minute Timer function.
-
Page 20: Maintenance
MAINTENANCE • We recommend that the range hood is switched on before any food is cooked. We also recommend that the appliance is left running for 15 minutes after the food is cooked, in order to thoroughly eliminate all contaminated air. The effective performance of the range hood depends on constant maintenance;... - Page 21 - Follow all cleaningby rising with clear water. Wipe dry with a clean, soft cloth to avoid water marks. - For discolorations or deposit that persist, use a non-scratching household cleanser or stainless steel polishing powder with a little water and a soft cloth. - For stubborn cases, use a plastic scouring pad or soft bristle brush together with cleaser and water.
- Page 22 • Replacing halogen light bulbs: To replace the dichroic lamps, rotate the lamp anticlockwise by means of a suction cup as shown in figure. Replace the bulbs with new ones of the same type. - 22 -...
- Page 23 XO122S - XO128S: - 23 -...
-
Page 24: Options And Accessories
OPTIONS AND ACCESSORIES: Model XORFRND carbon filter kit - 24 -... -
Page 25: Installation Preparation
INSTALLATION PREPARATION: Check installation hardware: Locate the hardware package packed with the hood and check contents. Aluminum filter - 25 -...
Need help?
Do you have a question about the XO128S and is the answer not in the manual?
Questions and answers