Table of Contents
Advertisement
Quick Links
Advertisement
Table of Contents

Related Manuals for thomann Stairville FS-x150 LED Follow Spot


Summary of Contents for thomann Stairville FS-x150 LED Follow Spot
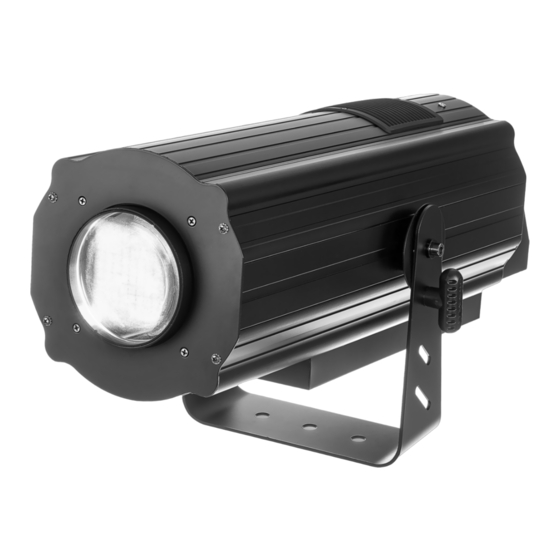
- Page 1 FS-x350 LED Follow Spot FS-x150 LED Follow Spot follow spot user manual...
- Page 2 Thomann GmbH Hans-Thomann-Straße 1 96138 Burgebrach Germany Telephone: +49 (0) 9546 9223-0 Internet: www.thomann.de 08.03.2022, ID: 478626, 537967 (V2)
-
Page 3: Table Of Contents
Table of contents Table of contents General information......................4 1.1 Further information......................4 1.2 Notational conventions....................4 1.3 Symbols and signal words................... 5 Safety instructions......................... 6 Features............................8 Installation..........................9 Starting up..........................10 Connections and controls....................11 Operating..........................14 7.1 Main menu........................14 7.2 Functions in DMX mode..................... -
Page 4: General Information
1.1 Further information On our website (www.thomann.de) you will find lots of further information and details on the following points: Download This manual is also available as PDF file for you to download. -
Page 5: Symbols And Signal Words
General information Instructions The individual steps of an instruction are numbered consecutively. The result of a step is indented and highlighted by an arrow. Example: Switch on the device. Press [Auto]. ð Automatic operation is started. Switch off the device. 1.3 Symbols and signal words In this section you will find an overview of the meaning of symbols and signal words that are used in this manual. -
Page 6: Safety Instructions
Safety instructions Safety instructions Intended use This device is intended for use as an electronic lighting effect by means of LED tech‐ nology. The device is designed for professional use only and is not suitable for use in households. Use the device only as described in this user manual. Any other use or use under other operating conditions is considered to be improper and may result in personal injury or property damage. - Page 7 Safety instructions NOTICE! Operating conditions This device has been designed for indoor use only. To prevent damage, never expose the device to any liquid or moisture. Avoid direct sunlight, heavy dirt, and strong vibrations. Only operate the device within the ambient conditions specified in the chapter ‘Technical specifications’...
-
Page 8: Features
Features Features The follow spot is particularly suitable for professional lighting tasks and is recom‐ mended for distances of up to 30 meters. Special features of the device: Control via DMX (6 channels) and via buttons and display on the unit Control of iris, dimmer and strobe via fader on the device Adjustable fade time, (0.5 s to 30 s) Master / Slave function... -
Page 9: Installation
Installation Installation Unpack and check carefully there is no transportation damage before using the unit. Keep the equipment packaging. To fully protect the product against vibration, dust and moisture during transportation or storage use the original packaging or your own packaging material suitable for transport or storage, respectively. You can install the unit on a follow spot tripod, on the ceiling or a crossbeam. -
Page 10: Starting Up
Starting up Starting up Create all connections while the device is off. Use the shortest possible high-quality cables for all connections. Take care when running the cables to prevent tripping hazards. Connections in DMX mode Connect the DMX input of the device to the DMX output of a DMX controller or another DMX device. -
Page 11: Connections And Controls
Connections and controls Connections and controls Righthand view ö & 1 Operating panel on the rear side of the unit 2 Ventilation opening 3 Locking screw for the mounting bracket 4 Mounting bracket Steplessly adjustable mounting bracket for installing the unit on a follow spot tripod stand. The bracket can be mounted rotated by 180 degrees to attach the unit to the ceiling or a crossbeam. - Page 12 Connections and controls Rear and bottom side MENU DOWN ENTER IRIS DIMMER STROBE OFF/ON 2700K 3200K POWER IN DMX IN DMX OUT 5600K 6500K 8000K WHITE YELLOW BLUE GREEN ORANGE 8 Display [MENU] Opens the main menu. Exits a submenu. [ENTER] Confirms a selected value.
- Page 13 Connections and controls 16 [DMX OUT] DMX output, designed as 3-pin XLR panel socket 17 Swivel bracket FS-x350 LED Follow Spot FS-x150 LED Follow Spot...
-
Page 14: Operating
Operating Operating 7.1 Main menu Starting the device Connect the device to the power grid. The display indicates a system reset. The device is then ready for use. The device is controlled using the buttons and faders. Navigating the menu Press [MENU] to activate the main menu. - Page 15 Operating Operating hours display Press [MENU]. Press [UP] or [DOWN] until the display shows ‘Fixture Hours’ and confirm the selection with [ENTER]. Press [UP] or [DOWN] until the display shows the desired submenu and confirm the selection with [ENTER]. Press [UP] or [DOWN] to select the desired value and confirm the selection with [ENTER].
- Page 16 Operating Press [UP] or [DOWN] to select the desired submenu and confirm the selection with [ENTER]. Submenu Function ‘Hold’ If the DMX control fails, the last setting is retained. ‘Blackout’ If the DMX control fails, the device is blacked out. ‘Emergency Light’...
- Page 17 Operating Key lock Press [MENU] to activate the main menu. Press [UP] or [DOWN] until the display shows ‘AutoLock’ and confirm the selec‐ tion with [ENTER]. Press [UP] or [DOWN] until the display shows the submenu ‘On’ and confirm the selection with [ENTER]. ð...
-
Page 18: Functions In Dmx Mode
Operating 7.2 Functions in DMX mode Channel Value Function Colour selection 000…015 White 016…039 White and red 040…063 064…087 Red and green 088…111 Green 112…135 Green and yellow 136…159 Yellow 160…183 Yellow and blue 184…207 Blue 208…231 Blue and orange 232…255 Orange Colour temperature... -
Page 19: Technical Specifications
Technical specifications Technical specifications FS-x350 LED Follow Spot (item no. 478626) Light source 1 × LED, 300 W 770 mm Light source properties Colour temperature 8000 K Optical properties Beam angle 10 ° FOCUS Control Buttons, faders and display on the unit Number of DMX channels 270 mm Input connections... - Page 20 Technical specifications FS-x150 LED Follow Spot (item no. 537967) Light source 1 × LED, 150 W 560 mm Light source properties Colour temperature 8000 K Optical properties Beam angle 10 ° FOCUS Control Buttons, faders and display on the unit Number of DMX channels 270 mm Input connections...
-
Page 21: Plug And Connection Assignments
Plug and connection assignments Plug and connection assignments Introduction This chapter will help you select the right cables and plugs to connect your valuable equipment so that a perfect light experience is guaranteed. Please take our tips, because especially in ‘Sound & Light’ caution is indicated: Even if a plug fits into a socket, the result of an incorrect connection may be a destroyed DMX controller, a short circuit or ‘just’... -
Page 22: Troubleshooting
4. Check to see if the DMX cables run near or alongside to high voltage cables that may cause damage or interference to DMX interface circuits. If the procedures recommended above do not succeed, please contact our Service Center. You can find the contact information at www.thomann.de. follow spot... -
Page 23: Cleaning
Cleaning Cleaning Optical lenses Clean the optical lenses, that are accessible from the outside, regularly in order to optimize the light output. The frequency of cleaning depends on the operating envi‐ ronment: wet, smoky or particularly dirty surroundings can cause more accumulation of dirt on the optics of the device. -
Page 24: Protecting The Environment
Protecting the environment Protecting the environment Disposal of the packaging material For the transport and protective packaging, environmentally friendly materials have been chosen that can be supplied to normal recycling. Ensure that plastic bags, packaging, etc. are properly disposed of. Do not just dispose of these materials with your normal household waste, but make sure that they are collected for recycling. - Page 25 Notes FS-x350 LED Follow Spot FS-x150 LED Follow Spot...
- Page 26 Notes follow spot...
- Page 28 Musikhaus Thomann · Hans-Thomann-Straße 1 · 96138 Burgebrach · Germany · www.thomann.de...
Need help?
Do you have a question about the Stairville FS-x150 LED Follow Spot and is the answer not in the manual?
Questions and answers