
Related Manuals for ALLEN & HEATH dLive C1500


Summary of Contents for ALLEN & HEATH dLive C1500
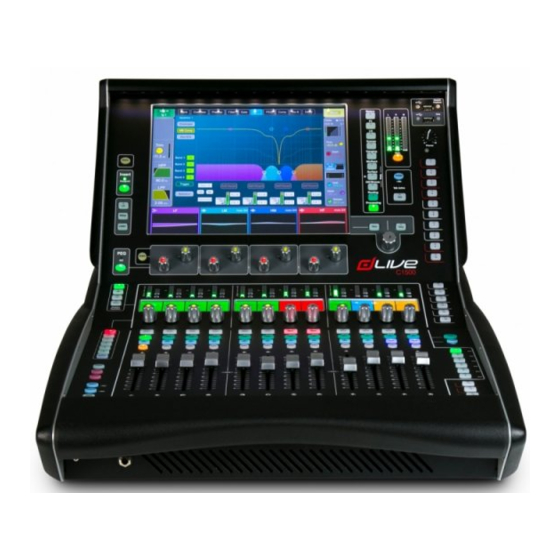
- Page 1 C1500, C2500, C3500 Getting Started Guide Before starting please check www.allen-heath.com for the latest dLive firmware and documentation. AP10826 Issue 3...
- Page 2 Limited One Year Manufacturer’s Warranty Allen & Heath warrants the Allen &Heath -branded hardware product and accessories contained in the original packaging ("Allen & Heath Product”) against defects in materials and workmanship when used in accordance with Allen & Heath's user manuals, technical specifications and other Allen & Heath product published guidelines for a period of ONE (1) YEAR from the date of original purchase by the end-user purchaser ("Warranty Period").
-
Page 3: Important - Read Before Starting
IMPORTANT - Read before starting Safety instructions Before starting, read the Important Safety Instructions printed on the sheet supplied with the equipment. For your own safety and that of the operator, technical crew and performers, follow all instructions and heed all warnings printed on the sheet and on the equipment panels. -
Page 4: Table Of Contents
Packed items Check you have received the following: • dLive Surface • Getting Started Guide AP10826 • Safety Sheet • IEC mains lead • Dust cover Contents IMPORTANT - Read before starting ......................3 Packed items ..............................4 Contents ............................... 4 Introduction............................ -
Page 5: Introduction
1. Introduction dLive is a distributed digital mixing system providing a uniquely flexible solution for any live sound application. It separates the mix engine from the control surface, putting the audio and processing where it is needed, and offering a host of control and audio networking possibilities. Refer to the Allen & Heath website to find out more about dLive. - Page 6 C1500 12 faders, 6 layers = 72 strips Single screen C2500 20 faders, 6 layers = 120 strips Single screen C3500 24 faders, 6 layers = 144 strips Twin screen Surface Getting Started Guide AP10826 Issue 3...
-
Page 7: Rear Panel
2. Rear Panel Mic/Line inputs – 6x recallable preamps for balanced or unbalanced microphone and line level signals. Gain, Pad and 48V are digitally controlled within the preamp. The PP indicator lights up when phantom power voltage is detected at the socket, whether internally or externally sourced. - Page 8 ALLEN & HEATH GigE Lnk/Act Lnk/Act Lnk/Act Primary Secondary Control Network Use the screen to patch signals from or to the I/O Ports. Screen Out – VGA port for connection of an external monitor. The external monitor can mirror either of the touchscreen views or display a third view. Use the Surface / Screen screen to configure.
- Page 9 Audio Sync Locked – Indicates a valid clock source. Surface Getting Started Guide AP10826 Issue 3...
-
Page 10: Front Panel
3. Front Panel Channel Processing – Press a fader strip key to access the processing for the input or mix channel assigned to it. Read the Harmony UI paragraph below for further information. Touchscreen – Single or twin 12” capacitive touchscreen with gesture control and daylight visibility. - Page 11 Talkback – Press to Talk latching or momentary key and Talk Active indicator. Hold down Assign and press any master key to assign. Scene navigation – Press Go to recall the Next scene as indicated in the upper right corner of the system screen. This Scene is highlighted in green in the Scenes menu and Scenes widget.
-
Page 12: Harmony Ui
Assign – Hold down and press a strip key to toggle its assignment to the active Mix on or off. Pre/Post – Hold down and press a strip key to toggle sends to the active Mix pre or post fade. Toggle all channels on/off or pre/post by pressing a master or Sel. -
Page 13: Screen Modes
Listen – Hold down and tap on any highlighted area of the screen to listen to that point in the signal path of the selected channel. The signal temporarily overwrites the PAFL bus and associated meters. – In switch, peak indicator, Frequency and Gain controls for the 4 bands of parametric EQ. -
Page 14: Fader Strip
3.3 Fader strip Meter – 10-segment signal meter and 4-segment gain reduction meter. The meter displays audio signal activity for the channel. The red peak indicator lights to warn that the signal is within 5dB of clipping. It is multi- point sensing which means it detects peak activity at several points in the signal path. -
Page 15: Working With The Mix
3.4 Working with the Mix Normal mix mode (FOH) Main active Press a Main Mix master strip key. IP 1 IP 2 IP 3 IP 4 IP 5 IP 6 IP 7 IP 8 Aux1 Aux2 Aux3 This is the normal mixing mode. The Input strips hold down present the channel faders. -
Page 16: Connect And Power Up
4. Connect and power up 4.1 MixRack connection Plug a touring grade CAT5e (or higher specification) cable up to 100m long between the dLive Surface and MixRack gigaACE port. On a DM32, DM48 or DM64 MixRack, use gigaACE port A only. ... -
Page 17: Connect A Laptop Or Wireless Router
4.4 Connect a laptop or wireless router Connect a laptop, router or access point to either of the Network ports to use with dLive Editor or iOS apps. Read the Release Notes and Help Files accompanying the software or apps for further information. ... -
Page 18: Dimensions
5. Dimensions C1500 - 480.6mm/18.9" C2500 - 774mm/30.5" C3500 - 885mm/34.8" C1500 - 377.5mm/14.9" C2500 - 657.5mm/25.9" C3500 - 717.5mm/28.2" C1500 - 302.5mm/11.9" C2500 - 582.5mm/22.9" C3500 - 642.5mm/25.3" 410.70 573.3 Surface Getting Started Guide AP10826 Issue 3... -
Page 19: Technical Specs
6. Technical specs Inputs System Mic/Line XLR Inputs Balanced XLR, +48V phantom power Measured balanced XLR in to XLR out, 20-20kHz, minimum Gain, Pad out Mic/Line Preamp Fully recallable Dynamic Range 110dB Input Sensitivity -60 to +15dBu System Signal to Noise -92dB Analogue Gain +5 to +60dB, 1dB steps...
Need help?
Do you have a question about the dLive C1500 and is the answer not in the manual?
Questions and answers