Table of Contents
Advertisement
Use and Care manual
Condensing Dryer
TD-C700E
TD-C70040E
TD-C70042E
TD-C70043E
TD-C70045E
TD-C70046E
TD-C70047E
Please read this manual carefully prior to use.
Keep it for future reference.
Write down model name and serial number of your product
Have all these details ready when you call for service.
Advertisement
Table of Contents

Related Manuals for LG TD-C700E


Summary of Contents for LG TD-C700E
- Page 1 Use and Care manual Condensing Dryer TD-C700E TD-C70040E TD-C70042E TD-C70043E TD-C70045E TD-C70046E TD-C70047E Please read this manual carefully prior to use. Keep it for future reference. Write down model name and serial number of your product Have all these details ready when you call for service.
-
Page 2: Table Of Contents
Ultra big Capacity Drum LG Dryer has 7.0kg capacity which is the ultra big capacity. Lower Energy Consumption Energy Energy is saved by Sirocco & Radial fan. Reduced drying time Drying time is shortened by efficient air flow mechanism and optimized heater. -
Page 3: Safety Instructions
afety instructions To help reduce any risk of electric shock, fire, or other personal or property injury when using your dryer, please follow basic safety instructions. WARNING ! Serious injury or death may occur when not observing the following rules. Not allowed actions. - Page 4 afety instructions • Do not use damaged power • Be sure that pets eat off the cord, plug and socket. dryer. It may cause a fire and an Pets may die from an electric shock. electric shock and appearance may be damaged.
- Page 5 afety instructions • Young children should be supervised to ensure that they do not play with the appliance. Children may fall off. Pets or children may be wounded by rotating parts or suffocated inside drum. • If this appliance is supplled from a cord extension set or an electrical. Portable outlet device must be positioned so that it is not subject to splashing or ingress of moisture.
-
Page 6: Installation Instructions
Closet installation instructions The LG Dryer can be placed on the top of a front loading washing machine. They are sure to be fixed with stacking kit (See the next page). This installation must be conducted by an experienced installer in order to secure robust installation of both washer and dryer. - Page 7 GROUNDING INSTRUCTION Stacking Kit This appliance must be grounded. In the event of In order to stack this dryer on a LG washing malfunction or breakdown, grounding will reduce machine, LG stacking kit is needed. the risk of electric shock by providing a path of least resistance for the electric current.
- Page 8 nstallation Instructions Level the dryer 1. Levelling the dryer is to prevent undesirable noise and vibration. When placing your dryer in an solid and level area where water is not dripping and freezing, flammable materials are not stored. 2. If the dryer is not properly level, adjust the front levelling legs up and down as necessary.
-
Page 9: Appearance & Design
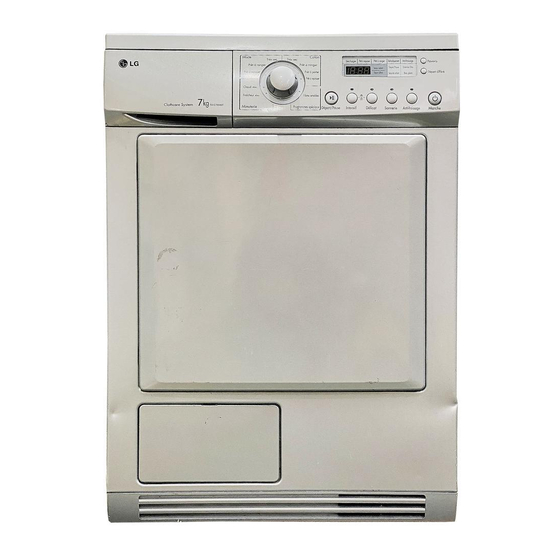
Control panel Water container Door Condenser Cover Air ventilation grill Control Panel LED Display • Time Display TD-C700E/40E/45E • Indicator lamps Additional function buttons • High Temp. / Low Temp. • Buzzer Off • Anti-Crease • Favourite • Time Delay... -
Page 10: Operating Your Dryer
perating your dryer Cycle Selection Table Standard Electronic Auto Dry Cycles Program Mixed-Fabric cycles (Note) press the "Low Temp." button for heat-sensitive items Bed linen and table linen, tracksuits, For thick and quilted fabrics which do not need to be ironed. Very Dry anorak, blankets shirts, blouses and sportswear... - Page 11 perating your dryer Before first use of the dryer ※ Before you use the dryer for the first time, there are some points that you have to check. After removing package, you will check the product has no problem and is properly installed. 1.
- Page 12 perating your dryer 5. Close the Door. Select the desired Before you close the door, make sure fabrics are well Cycle. placed inside and that foreign objects, especially flammable ones, are not caught around door. 6. Select the Drying Cycle you want. You can choose a cycle by turning the program control knob until the required program reaches to its indicator.
- Page 13 Rack Dry ※ TD-C700E/40E/45E NOTE The dryer Rack is placed inside the dryer like the picture. Remove and discard packing material before use, Check the lint filter and remove any lint accumulated from items dried on the Rack.
-
Page 14: Additional Functions
Functions TD-C700E/40E/45E TD-C70042E/43E/46E/47E High Temp. / Low Temp. Favourite These are functioning to shorten or lengthen the If there is some cycle you would like to make based cycle time by increasing or decreasing on your own drying habit, use “Favourite”. -
Page 15: Caring For Your Dryer
aring for your dryer How important Care and cleaning is~ Clean lint filter during a cycle It’s not very difficult to care for your dryer. All you If “Clean Filter ” indicator lamp flashes during have to do is to follow the information below. operation, clean the filter promptly. - Page 16 aring for your dryer Condenser Condenser is also a very important part for efficient drying performance result so it needs a special care from you. It is recommended that condenser be cleaned three or four times a year. 1. Open condensing cover by using a coin or flat 4.
- Page 17 aring for your dryer Front Ventilation Grille Moisture Sensor? Vacuum the front ventilation grill 3~4 time a year to This device functions to sense the moisture make sure there must be no build-up of lints or dirts remaining contents of the laundry during operation which cause improper intake air flow.
- Page 18 aring for your dryer Reverse the door 4. Detach both hinge point The door can be reversed to fit to your own covers. installation conditions. From the factory, the door hinge is located on the right side. Caution ! 1. This work may cause the injury of your hands so you must be careful to handle some sharp devices like tork screwdriver or 5.
- Page 19 aring for your dryer Change the Bulb Caution ! The bulb itself could be very hot when the dryer just Power cord must be unplugged before this finishes its operation. So before changing the bulb, work to avoid danger of electric shock. be sure that the inside of the drum is cool down.
-
Page 20: Additional Tips For Smart Use
dditional Tips for smart use Drying Guide Capacity for laundry type Cotton 7 kg Mixed 3.5 kg Wool 1.5 kg Delicate 1.5 kg Below are fabric care labels. Woolen Article Dry woolens in "wool" cycle. Be sure to follow fabric care label "symbols", first. Wool is not Symbols Instructions completely dried from the program so don't repeat... - Page 21 4. The model No. and the serial No. of your dryer. 5. The date of purchase. Holder : 2EA Screw : 4EA If stacking is needed, you must stack the dryer upon LG washing machine. In order to do this, stacking kit must be purchased separately.
-
Page 22: Troubleshooting
roubleshootings Troubleshooting Tips To save you time and money, the following page will help answer your questions before service call. Questions What to do Dryer doesn't work 1. Check dryer is plugged in. 2. Check "Start" button is pressed. 3. Check door is properly closed. 4. - Page 23 roubleshootings Error Mode • : LED displays “ ” in case of the door open. The door must be closed and start Button must be pressed for re-operation. High temperature and high humidity of air continues to remain at the contained dryer by drying object during drying if the dryer suddenly stops due to power failure or other different causes while drying is in progress.
-
Page 24: Technical Data
echnical Data 850 mm 600 mm Weight : 50 kg 595 mm Electrical Requirements Ventilation Requirement Watts Alcove or Volts Hertz Closet (Max) under counter 230 V 50 Hz 2900 Ensure air flow of Closet door must have 2(louvered) openings, 112 cu.ft./min You are sure to check the rating plate on the each having a minimum... -
Page 25: Warranty
arranty ■ What is not covered. Service trips to your home to instruct you on the product. If the product is connected to any voltage other than that shown on the rating plate. If the fault is caused by accidents, neglects, misuses of Acts of God. If the fault is caused by reasons except for normal domestic use or use in accordance with the owner's manual. - Page 28 P/ No.: 3828EL4002J...
Need help?
Do you have a question about the TD-C700E and is the answer not in the manual?
Questions and answers