Table of Contents
Advertisement
Available languages
Available languages
Quick Links
Owner's manual
Electric Dryer
RC9011A/B/C
TD-C9011A
Thank you for buying an LG Dryer.
Please read your manual carefully, as it provides instructions
on safe installation, Use, and Maintenance.
Record the model and Serial Numbers,
and retain the manual for future reference.
Model #
Serial #
Date of purchase
P/ No.: MFL32312574
Advertisement
Chapters
Table of Contents

Subscribe to Our Youtube Channel
Related Manuals for LG TD-C9011A


Summary of Contents for LG TD-C9011A
- Page 1 Owner’s manual Electric Dryer RC9011A/B/C TD-C9011A Thank you for buying an LG Dryer. Please read your manual carefully, as it provides instructions on safe installation, Use, and Maintenance. Record the model and Serial Numbers, and retain the manual for future reference.
-
Page 2: Table Of Contents
Ultra Big Capacity Drum The LG Dryer has a large capacity. Reduced drying time Drying time is reduced by the use of an efficient air flow system and an optimized heater. Innovative Noise Reduction The optimized design of the air flow system and the vibration reduction technology helps to reduce noise. -
Page 3: Safety Instructions
afety Instructions READ ALL INSTRUCTIONS BEFORE USE WARNING For your safety, the information in this manual must be followed to minimize the risk of fire or explosion, electric shock, or to prevent property damage, personal injury, or loss of life. Your Safety and the safety of others is very important. - Page 4 afety Instructions READ ALL INSTRUCTIONS BEFORE USE WARNING For your safety, the information in this manual must be followed to minimize the risk of fire or explosion, electric shock, or to prevent property damage, personal injury, or loss of life. •...
- Page 5 afety Instructions SAFETY INSTRUCTIONS FOR INSTALLATION • To reduce the risk of electric shock, do not • Keep all packaging from children. Packaging install the dryer in humid spaces. Failure to material can be dangerous for children. There is a follow this warning can cause serious injury, fire, risk of suffocation.
-
Page 6: Installation Instructions
nstallation Instructions The following instructions will help guide you through the initial steps of setting up your dryer for use. Please note that every section of this manual provides important information regarding the preparation and use of your dryer, and it is important that you review this entire manual before proceeding with any installation or use. More detailed instructions concerning electrical connections, gas connections, and exhaust requirements are provided in other parts of this manual. - Page 7 nstallation Instructions Electrical Connections Preparation of the Dryer Prior to the first use of this appliance, use all-purpose Following are several warnings and instructions cleaning products or a solution of detergent and water, concerning making the electrical connection for electric dryers. More detailed information with a damp cloth to remove from the inside of the concerning the electrical connection is provided at dryer drum/drying compartment any dust or dirt that...
- Page 8 Instructions Stacking Kit WARNING In order to stack this dryer an LG stacking kit is required. • Incorrect installation can cause serious accidents. • The weight of the dryer and the height of installation makes the stacking procedure too risky for one person.
- Page 9 nstallation Instructions Level the dryer 1. Level the dryer is to prevent undesirable noise and vibration. Locate your dryer on a solid, level floor. Make sure it is not subjected to splashing water or freezing temperatures. Do not store flammable materials near the dryer.
-
Page 10: Electrical Requirement
lectrical Requirement COONECTING ELECTRIC DRYERS • The power cord (pigtail) connection between wall receptacle and dryer terminal block IS NOT supplied with dryer. Type of pigtail and gauge of wire must WARNING conform to local codes and with instructions on the To help prevent fire, electric shock, serious following pages. - Page 11 lectrical Requirement Review the following options to determine the appropriate electrical connection for your home: 4-wire receptacle : 4-wire connection with (NEMA type14-30R) a Power supply cord. • lf your local codes or ordinances do not allow the Use the instructions in this section if your home has use of a 3 wire connection, or you are installing a 4-wire receptacle (NEMA type 14-30R) and you your dryer in a mobile home, you must use a 4-...
- Page 12 lectrical Requirement : 3-Wire Connection with : Optional 3-wire a Power Supply Cord connection. lf your local codes or ordinances permit the • If your local codes or ordinances do not allow the connection of a frame-grounding conductor to the connection of a frame-grounding conductor to the neutral wire, use these instructions.
-
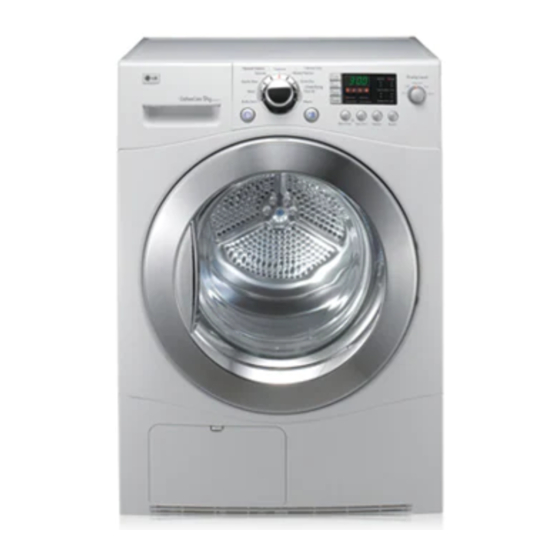
Page 13: Appearance And Design
ppearance And Design Control Panel Water Container Door Condenser Cover Air Ventilation Grill Control Panel LED Display • Time Display Program Selector • Indicator Lamps Power ON/OFF START/PAUSE Additional Function Buttons Button • MORE TIME • TIME DELAY • LESS TIME •... -
Page 14: Operating Your Dryer
perating Your Dryer Cycle Selection Table Drying Electronic Sensor Dry Cycles Level Quilts, small comforters VERY For thick and quilted fabrics and blankets Terry towels, tea towels, MORE For thick and quilted fabrics which do not need to be ironed towels, bed linen Bath towels, tea towels, For fabrics which do not need to be ironed... - Page 15 perating Your Dryer BEFORE YOU USE YOUR DRYER 1. When unpacking your dryer, make sure there is no visible damage to the machine. 2. Follow the installation instructions and use a level to ensure proper installation. 3. Check the water reservoir, condenser, door, gasket and drum for signs of damage. 4.
- Page 16 perating Your Dryer 5. Close the Door. Select the desired Before you close the door, make sure fabrics are cycle. properly loaded and not caught in the door opening. 6. Select the Drying Cycle you want. You can choose a cycle by turning the program control knob until the required program reaches to its indicator.
-
Page 17: Additional Functions
dditional Functions TIME DELAY CUSTOM PROGRAM The TIME DELAY feature allows you to have If you have a special combination of settings the dryer run at a time that is more convenient, that you use frequently, you can save these for example when electricity rates are cheaper. - Page 18 dditional Functions CHILD LOCK OPTIONS Use this option to prevent cycle settings from GENTLE being changed while the dryer is operating. - These are functioning to shorten or lengthen Press and hold the TIME DELAY button for 3 the cycle time by increasing or decreasing seconds to activate or deactivate the CHILD temperature.
-
Page 19: Caring For Your Dryer
aring For Your Dryer Clean lint filter Clean lint filter during a cycle To maintain proper air flow and keep your dryer If the CLEAN FILTER light flashes and the alarm operating a peak efficiency, it is important to empty sounds during operation, clean the filter promptly. - Page 20 aring For Your Dryer Condenser The condenser is a very important part of your dryer. This is where the moisture is removed form the air so there is no need for an outside exhaust. If the condenser is not properly maintained, it will greatly increase energy consumption and drying time.
- Page 21 aring For Your Dryer Ventilation Grille and Cool Air Inlet 3. Connect the external drain Grille hose included Use a vacuum cleaner to clean the front with the dryer. ventilation grill and the cool air inlet in the back. Route this hose Failure to remove any lint or dirt buildup will to a permanent reduce air flow and increase energy...
-
Page 22: Additional Tips For Smart Use
dditional Tips For Smart Use Drying Guide Below are fabric care labels. Woolen Article Dry woolens in wool cycle. Be sure to follow fabric Symbols Instructions care label symbols. Wool is not completely dried from the program so don't repeat drying. Pull woolens to their original shape and dry them flat. - Page 23 dditional Tips For Smart Use Accessory parts Spare Parts Spare parts in are covered under the terms of Your dryer comes with accessories such as warranty. Components covered by warranty are provided free of charge. If coverage is expired, Condensing drain hose spare parts must be purchased from an authorized service center.
-
Page 24: Troubleshooting Guide
roubleshooting Guide Troubleshooting Tips Save time and money! Review the charts on the following pages first and you may not need to call for service. 1. Problem: My dryer won’t start Question What to Do Confirm that the dryer’s plug is securely and completely pushed into the Is the dryer plugged in? power outlet Check your home’s or laundry room’s fuse box/circuit breaker box and replace the... - Page 25 roubleshooting Guide 4. Problem: There is lint on my clothes Question What to Do Please refer to the manual section on cleaning the lint filter, and please confirm that Is your lint filter full? the lint filter is clean. It is important that the lint filter is clean before each new load of laundry.
- Page 26 roubleshooting Guide 7. Problem: It takes too long for my clothes to dry Question What to Do Separate heavy weight items from light weight items when creating loads. Did you properly sort your loads of laundry? Heavy fabrics take longer to dry because they tend to retain more moisture. Are you drying large loads of heavy To help reduce and maintain more consistent drying times for large and heavy fabrics, fabrics?
- Page 27 roubleshooting Guide Error Mode • LED displays in case of the door open. The door must be closed and start Button must be pressed for re-operation. • If display errors continues to occur, unplug the power cords and then call to the Service Center.
-
Page 28: Technical Data
echnical Data 33.5" (850 mm) 25.2" (640 mm) 23.6" (600 mm) Type : Electric Dryer Rating : Please refer to the rating label regarding detailed information. Size : 23.6 X 25.2 X 33.5 (inch) Capacity : IEC 4.2 cu.ft Weight : 105 lb (47.5 kg) ❋... - Page 33 RC9011A/B/C TD-C9011A Gracias por comprar una Secadora LG. Por favor lea su manual correctamente, ya que contiene informaciòn importante de una instalaciòn segura, Uso y mantenimiento. Guarde el modelo y nùmero de serie y conserve su manual para futuras referencias.
- Page 34 Tambor de capacidad ultragrande LG Secadora tiene una capacidad. Tiempo de secado reducido El tiempo de secado se reduce gracias al uso de un eficaz sistema de flujo de aire y sistema de calor optimizado. Innovador sistema de reducción de ruido El optimizado diseño del sistema de flujo de aire y la tecnología de...
-
Page 35: Instrucciones De Seguridad
nstrucciones de seguridad LEA TODAS LA INSTRUCCIONES ANTES DE USAR ADVERTENCIA Por su seguridad, debe seguir la información indicada en este manual para minimizar el riesgo de incendio o explosión, descarga eléctrica, o para prevenir dasños a la propiedad, lesiones personales o muerte. Su Seguridad y la de los dem son de suma importancia. - Page 36 nstrucciones de seguridad LEA TODAS LA INSTRUCCIONES ANTES DE USAR ADVERTENCIA Por su seguridad, se debe seguir la información indicada en este manual para minimizar el riesgo de incendio o explosión, descarga eléctrica, o para prevenir daños a la propiedad, lesiones personales o muerte. •...
- Page 37 nstrucciones de seguridad INSTRUCCIONES IMPORTANTE PARA LA INSTALACIÓN • No coloque velas o cigarrillos sobre el puede fundir, creando descargas eléctricas y/o producto. No hacerlo puede provocar una riesgo de incendio. deformación, humo o un incendio. • Quite todos los elementos de embalaje y •...
-
Page 38: Instrucciones De Instalación
nstrucciones de instalación Las siguientes instrucciones le servirán de guía a través de los pasos iniciales para la preparación de su secadora para el uso. Por favor note que cada sección de este manual proporciona información importante sobre la preparación y uso de su secadora, y es muy importante que lea este manual completamente antes de proceder con cualquiera instalación o con su uso. - Page 39 nstrucciones de instalación Confirmación de la Operación Conexión Elèctrica de la Fuente de Calor. A continuación encontrará advertencias e instrucciones concernientes a la confección de la conexión eléctrica Cierre la puerta al tambor / Compartimiento de secado de para secadoras eléctricas. Información detallada la secadora y después de haber completado todos los adicional concerniente a la conexión eléctrica es pasos en este manual para una instalación correcta de...
- Page 40 • Una instalación incorrecta puede causar Para colocar esta secadora sobre una lavadora accidentes serios. LG, es necesario un kit de superposición de LG. • El peso de la secadora y la altura de la instalaciòn hacen que montar el kit sea peligroso para una sola persona.
- Page 41 nstrucciones de instalación Nivele la secadora 1. Se debe nivelar la secadora para evitar ruidos y vibraciones no deseables. Coloque la secadora en un suelo firme y nivelado. Asegúrese de que en el lugar donde se coloque no se produzcan salpicaduras de agua ni descensos bruscos de temperatura.
-
Page 42: Requerimientos Eléctricos
equerimientos eléctricos CÓMO CONECTAR LAS • Si un circuito de ramal a la secadora es de 15 pies (4,5 m) o menos de longitud, use alambre listado por SECADORAS ELÉCTRICAS UL (Underwriters Laboratories) Núm.-10 AWG (únicamente alambre de cobre), ADVERTENCIA •... - Page 43 equerimientos eléctricos Revise las siguientes opciones para determinar la conexión eléctrica adecuada para su casa: Conexión de 4-alambres con Tomacorriente de 4-alambres un Cordón de Alimentación. (Tipo NEMA 14-30R). • Si los códigos y ordenanzas locales no permiten el Utilice las instrucciones en esta sección si su casa uso de una conexión de 3 alambres, o está...
- Page 44 equerimientos eléctricos Conexión de 3-alambres con Conexión Opcional de 3- un cable de Alimentación. alambres. • Si los códigos y ordenanzas locales no permiten la Si los códigos y ordenanzas locales permiten la conexión de un conductor estructura-tierra a un conexión de un conductor estructura-tierra al cable neutral, utilice las instrucciones bajo esta alambre neutral, utilice estas instrucciones.
-
Page 45: Aspecto Y Diseño
specto y diseño Contenedor de Panel de control agua Puerta Cubierta del condensador Rejilla de ventilación Panel de control Pantalla LED Selector de • Indicador de tiempo programas • Luces indicadoras Botones de funciones adicionales Botón de INICIO/PAUSA MARCHA/APAGADO • Más tiempo •... -
Page 46: Funcionamiento De La Secadora
uncionamiento de la secadora Tabla de selección de ciclos Programa Ciclos electrónicos de secado automático estándar Colchas, edredones Para tejidos gruesos y acolchados Extra pequeños y sábanas Toallas de felpa, paños, Para tejidos gruesos y acolchados que no necesitan plancha Muy seco toallas y ropa de cama Toallas de baño, paños, ropa... - Page 47 uncionamiento de la secadora Antes de utilizar la secadora por primera vez 1. Al desembalar la secadora, asegúrese de que ésta no presenta daños visibles 2. Siga las instrucciones de montaje y utilice un nivel para garantizar que la instalación se realiza de forma adecuada.
- Page 48 uncionamiento de la secadora 5. Cierre la puerta. Seleccione el ciclo Antes de cerrar la puerta, es necesario asegurarse deseado. de que las prendas estén bien colocadas y que no haya objetos extraños, especialmente inflamables, atrapados alrededor de la puerta. 6.
-
Page 49: Funciones Adicionales
unciones adicionales Tiempo diferido Favorito Si tiene una combinacion especial de ajustes que La función Temporizador le permite poner en usa con frecuencia, puede guardar estos ajustes a marcha la secadora a una hora concreta que manera de PROGRAMA PERSONALIZADO. mejor le convenga, por ejemplo, cuando en el * Para guardar un PROGRAMA horario de tarifa nocturna. - Page 50 unciones adicionales Seguro para Niños Opción Utilice esta opción para impedir Suave que se cambie la configuración del - Estas opciones se usan para acortar o alargar ciclo cuando la secadora está en marcha. el tiempo del ciclo aumentando o reduciendo la Presione y sostenga los botones TIME DELAY temperatura.
-
Page 51: Cuidado De La Secadora
uidado de la secadora Importancia del cuidado y la limpieza Limpieza del filtro de pelusas durante un ciclo Importancia del cuidado y la limpieza Si la luz Limpiar filtro parpadea y se emite una alarma El mantenimiento de la secadora no es muy difícil. sonora durante el ciclo, limpie el filtro de inmediato. - Page 52 uidado de la secadora Condensador El condensador es una pieza muy importante de la secadora. Aquí es donde se extrae la humedad del aire, por lo que no es preciso contar con una salida de aire. Si el mantenimiento del condensador no se realiza correctamente, el consumo energético y el tiempo de secado aumentarán enormemente.
- Page 53 uidado de la secadora Rejilla de ventilación y Rejilla 3. Conecte el conducto de drenaje externo de entrada de aire frío suministrado con la Utilice un aspirador para limpiar la rejilla de secadora. Coloque ventilación frontal y la entrada de aire frío de la este conducto en parte posterior.
-
Page 54: Consejos Adicionales Para Un Uso Inteligente
onsejos adicionales para un uso inteligente Guía para el secado A continuación figuran las etiquetas de Prendas de lana cuidado de los tejidos. Estírelas hasta que recuperen su forma original y séquelas extendidas. Materiales tejidos y de rizo Símbolos Instrucciones Algunos materiales tejidos y de rizo pueden encoger, dependiendo de su calidad. - Page 55 onsejos adicionales para un uso inteligente Piezas de repuesto Accesorios Las piezas de repuesto que necesite se La secadora viene con los accesorios siguientes: proporcionan según los términos de la garantía. 1. Manguera de vaciado del agua de Los componentes cubiertos por la garantía se condensación proporcionan gratis.
-
Page 56: Guía Para La Solución De Problemas
uía para la solución de problemas Consejos para la solución de problemas Ahorre tiempo y dinero! Primero revise las tablas en las siguientes páginas quizás no necesite llamar a servicio. - Page 57 uía para la solución de problemas...
- Page 58 uía para la solución de problemas...
- Page 59 uía para la solución de problemas Modo de error • La pantalla LED mostrará el símbolo si la puerta está abierta. Debe cerrar la puerta y pulsar el botón Start (Inicio) para volver a iniciar la operación. • Si continúa experimentando errores en pantalla, desenchufe el cable de alimentación y llame al Centro de asistencia.
-
Page 60: Datos Técnicos
atos técnicos 33,5" (850 mm) 25,2" (640 mm) 23,6" (600 mm) Nombre : Secadora Eléctrica Suministro de Energìa : Favor de consultar la etiqueta de medición referente a la información detallada Tamaño : 23,6 X 25,2 X 33,5 (inch) Capacidad de la Secadora : IEC 4.2 cu.ft. Peso : 105 lb (47,5kg) ❋...
Need help?
Do you have a question about the TD-C9011A and is the answer not in the manual?
Questions and answers