Table of Contents
Advertisement
Available languages
Available languages
Quick Links
es_main.book.book Page 1 Friday, February 26, 2021 4:35 PM
MANUAL DEL PROPIETARIO
LAVADORA
Antes de empezar la instalación, lea con atención estas
instrucciones. Con ello, la instalación le resultará más sencilla
y se asegurará de que el aparato quede instalado de forma
correcta y segura. Guarde estas instrucciones cerca del
aparato después de la instalación para poder consultarlas en
el futuro.
ESPAÑOL
WT21WT6HKA
MFL68267097
Rev.00_022621
Copyright © 2021 LG Electronics Inc. Todos los derechos reservados
www.lg.com
Advertisement
Chapters
Table of Contents

Related Manuals for LG LAVADORA WT21WT6HKA


Summary of Contents for LG LAVADORA WT21WT6HKA
- Page 1 Guarde estas instrucciones cerca del aparato después de la instalación para poder consultarlas en el futuro. ESPAÑOL WT21WT6HKA www.lg.com MFL68267097 Rev.00_022621 Copyright © 2021 LG Electronics Inc. Todos los derechos reservados...
-
Page 2: Table Of Contents
Agregado de detergente, suavizantes y blanqueadores......18 Panel de control ....................20 Tabla de programas..................21 Opciones y funciones extra ................23 FUNCIONES INTELIGENTES Aplicación LG ThinQ..................28 Smart Diagnosis ....................28 MANTENIMIENTO Limpieza después de cada lavado ..............29 Limpieza periódica del aparato..............29 SOLUCIÓN DE PROBLEMAS... -
Page 3: Instrucciones De Seguridad
es_main.book.book Page 3 Friday, February 26, 2021 4:35 PM INSTRUCCIONES DE SEGURIDAD INSTRUCCIONES DE SEGURIDAD LEA TODAS LAS INSTRUCCIONES ANTES DE USAR Las siguientes instrucciones de seguridad tienen por objetivo evitar riesgos imprevistos o daños derivados de un funcionamiento poco seguro o incorrecto del aparato. - Page 4 es_main.book.book Page 4 Friday, February 26, 2021 4:35 PM INSTRUCCIONES DE SEGURIDAD • Debe vigilarse a los niños de corta edad para asegurarse de que no jueguen con el aparato. • La limpieza y mantenimiento no debe ser realizada por niños sin supervisión.
- Page 5 es_main.book.book Page 5 Friday, February 26, 2021 4:35 PM INSTRUCCIONES DE SEGURIDAD • No conecte el aparato a tomacorrientes de múltiples conectores o a una extensión del cable de alimentación. • No modifique el enchufe de alimentación provisto con el aparato. Si no se ajusta a la tomacorriente, haga que un electricista calificado instale una toma adecuada.
- Page 6 • En caso de una fuga de agua del aparato, desconecte el enchufe de alimentación y comuníquese con el centro de información del cliente de LG Electronics. • Cierre los grifos de agua para aliviar la presión en las mangueras y válvulas y minimizar la fuga si en caso ocurriera una ruptura.
- Page 7 • Únicamente personal de servicio autorizado de un centro de servicio LG ELECTRONICS debe desarmar, reparar o modificar el electrodoméstico. Contacte a un centro de información al cliente de LG ELECTRONICS si mueve e instala el electrodoméstico en una ubicación diferente.
- Page 8 es_main.book.book Page 8 Friday, February 26, 2021 4:35 PM INSTRUCCIONES DE SEGURIDAD Eliminación • Antes de descartar un electrodoméstico antiguo, desenchúfelo. Corte el cable directamente detrás del electrodoméstico para evitar que se use. • Aleje todos los materiales de embalaje, como bolsas plásticas y poliestireno, de los niños.
-
Page 9: Instalación
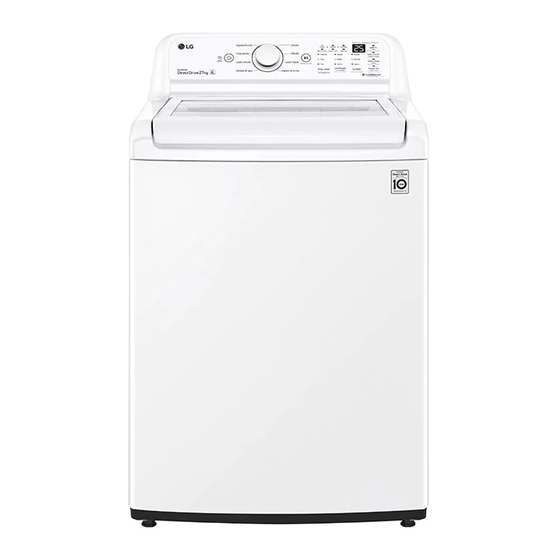
es_main.book.book Page 9 Friday, February 26, 2021 4:35 PM INSTALACIÓN INSTALACIÓN Partes y especificaciones NOTA • El aspecto y las especificaciones pueden cambiar sin previo aviso para mejorar la calidad del electrodoméstico. Vista frontal Vista trasera * Esta característica solo está disponible en algunos modelos. - Page 10 es_main.book.book Page 10 Friday, February 26, 2021 4:35 PM INSTALACIÓN *2 Este accesorio no está incluido en el producto, pero puede comprarlo a través del centro de servicio de Mangueras de entrada de agua fría y caliente Manguera de Drenaje Precinto Cubierta anti-ratas Tornillo para la cubierta anti-ratas...
-
Page 11: Requisitos Del Lugar De Instalación
Las aplicaciones móviles. reparaciones realizadas por personas sin experiencia pueden ocasionar lesiones o averías graves. Contáctese con su técnico de NOTA reparaciones autorizado de LG. • No instale este electrodoméstico sobre una superficie o plataforma alzada, plinto o soporte. -
Page 12: Conexión De Las Mangueras De Entrada De Agua
es_main.book.book Page 12 Friday, February 26, 2021 4:35 PM INSTALACIÓN de la manguera de entrada de agua esté ADVERTENCIA conectado al aparato. • El enchufe de alimentación debe conectarse/en un tomacorriente adecuado, correctamente instalado y que tenga la conexión de/a tierra debida, de conformidad con todos los códigos y las ordenanzas locales. -
Page 13: Instalación De La Manguera De Drenaje
es_main.book.book Page 13 Friday, February 26, 2021 4:35 PM INSTALACIÓN Conexión de la manguera al Para modelos con bomba de aparato drenaje Enrosque la manguera de entrada de agua a la La altura de descarga debe estar a válvula de entrada de agua en la parte posterior del aproximadamente 90 - 120 cm del piso. - Page 14 es_main.book.book Page 14 Friday, February 26, 2021 4:35 PM INSTALACIÓN Ajuste y nivelación de los pies PRECAUCIÓN Cuando el electrodoméstico no está totalmente a • Tenga cuidado con sus pies o manos cuando nivel, gire las patas de ajuste hasta que el tumbe o levante el electrodoméstico.
-
Page 15: Funcionamiento
es_main.book.book Page 15 Friday, February 26, 2021 4:35 PM FUNCIONAMIENTO FUNCIONAMIENTO Descripción general del • Si el botón Inicio/Pausa no se presiona dentro de un determinado periodo de funcionamiento tiempo, el electrodoméstico se apagará y todas las configuraciones se perderán. Uso del electrodoméstico Fin del ciclo. - Page 16 es_main.book.book Page 16 Friday, February 26, 2021 4:35 PM FUNCIONAMIENTO productores de pelusa pueden provocar bolitas y pelusas en los tejidos colectores.
- Page 17 es_main.book.book Page 17 Friday, February 26, 2021 4:35 PM FUNCIONAMIENTO Verificación de la etiqueta de manera irreparable tanto su electrodoméstico como su ropa. cuidado de tejidos Estas informan acerca del contenido de la ropa y cómo deben lavarse. Símbolos de las etiquetas de mantenimiento Símbolo Tipo de lavado / tejido •...
-
Page 18: Agregado De Detergente, Suavizantes Y Blanqueadores
es_main.book.book Page 18 Friday, February 26, 2021 4:35 PM FUNCIONAMIENTO Agregado de detergente, • Diluya detergente líquido en agua, viértalo en el tambor, inicie el ciclo. suavizantes y blanqueadores PRECAUCIÓN • Utilizar detergente líquido sin diluirlo, o dejar Dosis de detergente prendas en el tambor luego de haber vertido el detergente líquido diluido podría hacer que la •... - Page 19 es_main.book.book Page 19 Friday, February 26, 2021 4:35 PM FUNCIONAMIENTO Agregado de suavizante dispensador de blanqueador . Evite salpicaduras o sobrellenado. • Agregue suavizante hasta la línea de llenado máximo. • Si el suavizante está concentrado, entonces • Mezcle el blanqueador en polvo con agua hasta debería diluirse.
-
Page 20: Panel De Control
es_main.book.book Page 20 Friday, February 26, 2021 4:35 PM FUNCIONAMIENTO Panel de control Características del panel de control Botón de Encendido/Apagado • Presione el botón de Encendido/Apagado para encender o apagar el electrodoméstico. • El electrodoméstico se apaga automáticamente una vez haya transcurrido cierto tiempo luego de haber completado el lavado. -
Page 21: Tabla De Programas
es_main.book.book Page 21 Friday, February 26, 2021 4:35 PM FUNCIONAMIENTO - Si la pantalla muestra -:--, entonces el tiempo se mostrará después de que el sensor de carga haya detectado el tamaño de las prendas. - El tiempo mostrado solo es una estimación. Diversos factores externos (tamaño de las prendas, temperatura ambiente, temperatura del agua entrante, etc.) pueden afectar al tiempo real. - Page 22 es_main.book.book Page 22 Friday, February 26, 2021 4:35 PM FUNCIONAMIENTO Lavado Rápido Descripción Use esta opción para lavar rápidamente la ropa ligeramente sucia y las cargas pequeñas. Para una alta eficiencia de lavado y enjuague, lave pequeñas cargas de 2-3 prendas ligeramente sucias. NOTA •...
-
Page 23: Opciones Y Funciones Extra
es_main.book.book Page 23 Friday, February 26, 2021 4:35 PM FUNCIONAMIENTO Edredón Descripción Utilice este programa para lavar una sabana o ropa de cama que tengan el signo de lavado a mano en la etiqueta de mantenimiento. • La cantidad de ropas recomendada en este programa es menor a 5,0 kg. •... - Page 24 es_main.book.book Page 24 Friday, February 26, 2021 4:35 PM FUNCIONAMIENTO Presione el botón Temp. Lavado hasta que se • La selección de la opción Enjuague Extra con el ilumine la configuración deseada. programa Normal cambia automáticamente el programa al programa Lavado profundo. •...
- Page 25 es_main.book.book Page 25 Friday, February 26, 2021 4:35 PM FUNCIONAMIENTO NOTA NOTA • Esta lavadora está equipada con una función de • Si no se presiona el botón de Inicio/Pausa para drenaje especial que está diseñada para que sea iniciar el tiempo de demora, la lavadora se lo más segura posible.
- Page 26 es_main.book.book Page 26 Friday, February 26, 2021 4:35 PM FUNCIONAMIENTO NOTA • Una vez que se establece esta función, todos los botones quedan bloqueados, excepto el botón Encendido/Apagado. • Cuando los controles están bloqueados, y el tiempo restante se muestran alternativamente en la pantalla durante el lavado mientras el bloqueo para niños está...
- Page 27 es_main.book.book Page 27 Friday, February 26, 2021 4:35 PM FUNCIONAMIENTO Lavado Manual Cuando necesite un enjuague y centrifugado, solo centrifugado, solo enjuague o únicamente ciclo de lavado, puede configurarlo manualmente. Enjuague y Centrifugado Solo Centrifugado Presione el botón de Encendido/Apagado. Presione el botón Lavado Demorado por 3 segundos.
-
Page 28: Funciones Inteligentes
Siga las instrucciones que aparece debajo para usar el método de diagnóstico audible. Características de la aplicación • Ejecute la aplicacón LG ThinQ y seleccione la LG ThinQ función Smart Diagnosis en el menú. Siga las instrucciones para el diagnóstico audible que se Smart Diagnosis proporcionan en la aplicación LG ThinQ. -
Page 29: Mantenimiento
es_main.book.book Page 29 Friday, February 26, 2021 4:35 PM MANTENIMIENTO MANTENIMIENTO ADVERTENCIA • Desenchufe el electrodoméstico antes de limpiarlo para evitar el riesgo de descarga eléctrica. Si no se cumple con esta advertencia, se pueden producir lesiones graves, incendios, descargas eléctricas o la muerte. - Page 30 es_main.book.book Page 30 Friday, February 26, 2021 4:35 PM MANTENIMIENTO • Cuando el interior del electrodoméstico no NOTA se seque completamente, se pueden provocar malos olores o moho. • Si el mensaje se muestra en el electrodoméstico, o si se selecciona luego de ADVERTENCIA completar 30 ciclos de lavado, el tiempo de ejecución aumentará...
- Page 31 es_main.book.book Page 31 Friday, February 26, 2021 4:35 PM MANTENIMIENTO Retire el filtro de entrada de agua con pinzas pequeñas y luego limpie el filtro utilizando un cepillo de diente de cerdas medianas.
-
Page 32: Solución De Problemas
Puede solucionar la mayoría de los problemas por sí mismo, ahorrando tiempo y dinero, ya que no tendrá la necesidad de llamar al Centro de Servicio de LG Electronics. La siguiente tabla debería ayudarlo a resolver problemas. - Page 33 es_main.book.book Page 33 Friday, February 26, 2021 4:35 PM SOLUCIÓN DE PROBLEMAS Síntomas Causa posible y solución Objetos extraños, como monedas, pines, pinzas, etc., están atrapados entre el pulsador y el tambor interior. ERROR OBJETOS EXTRAÑOS • Apague el electrodoméstico y luego presione el botón Encendido/ Apagado.
- Page 34 es_main.book.book Page 34 Friday, February 26, 2021 4:35 PM SOLUCIÓN DE PROBLEMAS Síntomas Causa posible y solución El programa ha funcionado más de 30 veces. ALARMA DE LIMPIEZA • Ejecute la función Limpieza de la tina. DE TINA El sensor de detección de prendas está defectuoso. ERROR SENSOR •...
- Page 35 es_main.book.book Page 35 Friday, February 26, 2021 4:35 PM SOLUCIÓN DE PROBLEMAS Síntomas Causa posible y solución Ruido de vibración Los materiales de empaque no han sido removidos. • Remueva los materiales de empaque. Las prendas podrían estar distribuidas desigualmente en el tambor. •...
- Page 36 es_main.book.book Page 36 Friday, February 26, 2021 4:35 PM SOLUCIÓN DE PROBLEMAS Funcionamiento Síntomas Causa posible y solución El electrodoméstico no El panel de control se ha apagado debido a la inactividad. funcionará. • Esto es normal. Presione el botón de Encendido/Apagado para encender el electrodoméstico.
- Page 37 es_main.book.book Page 37 Friday, February 26, 2021 4:35 PM SOLUCIÓN DE PROBLEMAS Síntomas Causa posible y solución El detergente no se Se está usando demasiado detergente. dispensa • Siga las pautas proporcionadas por el fabricante del detergente. completamente o no se dispensa en absoluto.
- Page 38 es_main.book.book Page 38 Friday, February 26, 2021 4:35 PM SOLUCIÓN DE PROBLEMAS Síntomas Causa posible y solución El tiempo del ciclo es La carga es muy pequeña. superior al habitual. • Agregue más artículos para dejar que el electrodoméstico equilibre las prendas.
- Page 39 es_main.book.book Page 39 Friday, February 26, 2021 4:35 PM SOLUCIÓN DE PROBLEMAS Síntomas Causa posible y solución Arrugas El electrodoméstico no se descargó en su momento. • Retire siempre los artículos del electrodoméstico tan pronto como el ciclo finalice. El electrodoméstico está sobrecargado. •...
- Page 40 es_main.book.book Page 40 Friday, February 26, 2021 4:35 PM Notas...
- Page 41 Before beginning installation, read these instructions carefully. This will simplify installation and ensure that the product is installed correctly and safely. Leave these instructions near the product after installation for future reference. ENGLISH WT21WT6HKA www.lg.com Copyright © 2021 LG Electronics Inc. All Rights Reserved.
- Page 42 Preparing Laundry ...................14 Adding Detergents, Softeners and Bleaches..........16 Control Panel ....................18 Programme Table ....................19 Extra Options and Functions ................21 SMART FUNCTIONS LG ThinQ Application ..................26 Smart Diagnosis ....................26 MAINTENANCE Cleaning after Every Wash................27 Cleaning the Appliance Periodically ..............27 TROUBLESHOOTING Before Calling for Service................29...
-
Page 43: Safety Instructions
global_main.book.book Page 3 Friday, February 26, 2021 4:06 PM SAFETY INSTRUCTIONS SAFETY INSTRUCTIONS READ ALL INSTRUCTIONS BEFORE USE The following safety guidelines are intended to prevent unforeseen risks or damage from unsafe or incorrect operation of the appliance. The guidelines are separated into ‘WARNING’ and ‘CAUTION’ as described below. - Page 44 global_main.book.book Page 4 Friday, February 26, 2021 4:06 PM SAFETY INSTRUCTIONS • Children should be supervised to ensure that they do not play with the appliance. • Cleaning and user maintenance shall not be made by children without supervision. • If the power cord is damaged, it must be replaced by the manufacturer, its service agent or similarly qualified persons in order to avoid a hazard.
- Page 45 global_main.book.book Page 5 Friday, February 26, 2021 4:06 PM SAFETY INSTRUCTIONS • Do not modify the power plug provided with the appliance. If it does not fit the power outlet, have a proper outlet installed by a qualified electrician. • This appliance must be grounded. In the event of malfunction or breakdown, grounding will reduce the risk of electric shock by providing a path of least resistance for electric current.
- Page 46 • Make sure that drainage is working properly. If water is not drained properly, your floor may get flooded. • If, during spinning, opening the door does not stop the drum within about 10 seconds, immediately discontinue operating the appliance and contact your dealer or LG Electronics service centre.
- Page 47 • Only qualified service personnel from LG Electronics service centre should disassemble, repair, or modify the appliance. Contact an LG Electronics customer information centre if you move and install the appliance in a different location.
-
Page 48: Installation Parts And Specifications
global_main.book.book Page 8 Friday, February 26, 2021 4:06 PM INSTALLATION INSTALLATION Parts and Specifications NOTE • Appearance and specifications may change without notice to improve the quality of the appliance. Front View Rear View * This feature is only available on some models. Door Hot and Cold Water Inlets Control Panel... - Page 49 Page 9 Friday, February 26, 2021 4:06 PM INSTALLATION *2 This accessory is not included in the product, but you can purchase it from the LG service centre. Cold and Hot Water Inlet Hoses Drain Hose Tie Strap Anti-Rat Cover...
-
Page 50: Installation Place Requirements
Contact your local WARNING authorised LG repairer. • The power plug must be plugged into an • This appliance must only be used for domestic appropriate outlet socket that is installed and... -
Page 51: Connecting The Water Inlet Hoses
global_main.book.book Page 11 Friday, February 26, 2021 4:06 PM INSTALLATION Connecting the Water Inlet Connecting the Hose to the Water Tap Hoses Connecting Screw-Type Hose to Tap with Thread Before connecting the water inlet hose to the water Screw the hose connector onto the water supply tap, check the hose fitting type and then choose tap. -
Page 52: Installing The Drain Hose
global_main.book.book Page 12 Friday, February 26, 2021 4:06 PM INSTALLATION Installing the Drain Hose Adjusting and Levelling the Feet Before connecting the drain hose, check your drain hose model and choose the correct instruction. When the appliance is not perfectly level, turn the adjustable feet until the appliance no longer For Models with Drain Pump wobbles. - Page 53 global_main.book.book Page 13 Friday, February 26, 2021 4:06 PM INSTALLATION CAUTION • Be careful your feet or hands when you lay or raise the appliance. Remove the sponge attached on the base. Insert the 8 screws into the holes to assemble the anti-rat cover to the appliance.
-
Page 54: Operation Operation Overview
global_main.book.book Page 14 Friday, February 26, 2021 4:06 PM OPERATION OPERATION Operation Overview End of cycle. • When the cycle is finished, a melody will sound. Immediately remove your clothing Using the Appliance from the appliance to reduce wrinkling. Before the first wash, select the Normal programme and add a half amount of detergent. - Page 55 global_main.book.book Page 15 Friday, February 26, 2021 4:06 PM OPERATION Checking the Fabric Care Label cause irreparable damage to both your appliance and clothes. This will tell you about the fabric content of your clothes and how it should be washed. Symbols on the Care Labels Symbol Wash / Fabric type...
-
Page 56: Adding Detergents, Softeners And Bleaches
global_main.book.book Page 16 Friday, February 26, 2021 4:06 PM OPERATION Adding Detergents, CAUTION Softeners and Bleaches • Using liquid detergent without diluting, or leaving laundry for a long time after pouring Detergent Dosage diluted liquid detergent into the drum might cause the clothes to be damaged, bleached, •... - Page 57 global_main.book.book Page 17 Friday, February 26, 2021 4:06 PM OPERATION Adding Fabric Softeners bleach dispenser . Avoid splashing or overfilling. • Add a fabric softener to the maximum fill line. • If the softener is concentrated, then it should be diluted.
-
Page 58: Control Panel
global_main.book.book Page 18 Friday, February 26, 2021 4:06 PM OPERATION Control Panel Control Panel Features POWER Button • Press the POWER button to turn on or off the appliance. • The appliance automatically turns off once a certain time has passed after the wash has completed. Programme Knob •... -
Page 59: Programme Table
global_main.book.book Page 19 Friday, February 26, 2021 4:06 PM OPERATION - The time shown is only an estimate. Several external factors (laundry size, room temperature, incoming water temperature, etc.) can affect the actual time. Extra Options and Functions • You can use the extra options and functions to customize the programmes. Programme Table Washing Programme Wash programmes are designed for the best wash performance for different types of clothes. - Page 60 global_main.book.book Page 20 Friday, February 26, 2021 4:06 PM OPERATION Speed Wash (Lavado Rápido) Description Use this option to quickly wash lightly soiled clothing and small loads.For high wash and rinse efficiency, wash small loads of 2-3 lightly soiled garments. NOTE •...
-
Page 61: Extra Options And Functions
global_main.book.book Page 21 Friday, February 26, 2021 4:06 PM OPERATION Duvet (Edredón) Description Use this programme to wash a blanket or bedclothes that have the hand wash sign on the care label. • This programme's recommended clothes amount is under 5.0 kg. •... - Page 62 global_main.book.book Page 22 Friday, February 26, 2021 4:06 PM OPERATION To add the maximum amount of water to a • Select the water temperature suitable for the programme, press and hold the Deep Fill type of load you are washing. Follow the garment fabric care labels for best results.
- Page 63 global_main.book.book Page 23 Friday, February 26, 2021 4:06 PM OPERATION Cold Wash (Lavado Frío) Rinse+Spin (Enjuague+Centrifugado) Use this option to save energy by using cooler Select this option to rinse and spin a load water while increasing the wash and rinse times to separately from a regular cycle.
- Page 64 global_main.book.book Page 24 Friday, February 26, 2021 4:06 PM OPERATION Locking the Control Panel Turn on the power. Press and hold the Extra Rinse (Enjuague Extra) button simultaneously for 3 seconds to activate this function. Unlocking the Control Panel Turn on the power. Press and hold the Extra Rinse (Enjuague Extra) button simultaneously for 3 seconds to deactivate this function.
- Page 65 global_main.book.book Page 25 Friday, February 26, 2021 4:06 PM OPERATION Manual Washing When you need a rinse and spin, spin only, rinse only or wash only cycle, these can be set manually. Rinse and Spin Spin only Press the POWER button. Press the Delay (Lavado Demorado) button for 3 seconds.
-
Page 66: Smart Functions
Page 26 Friday, February 26, 2021 4:06 PM SMART FUNCTIONS SMART FUNCTIONS LG ThinQ Application • Launch the LG ThinQ application and select the Smart Diagnosis feature in the menu. Follow the instructions for audible diagnosis provided The LG ThinQ application allows you to in the LG ThinQ application. -
Page 67: Maintenance
global_main.book.book Page 27 Friday, February 26, 2021 4:06 PM MAINTENANCE MAINTENANCE WARNING • Unplug the appliance before cleaning to avoid the risk of electric shock. Failure to follow this warning may result in serious injury, fire, electric shock, or death. •... - Page 68 global_main.book.book Page 28 Friday, February 26, 2021 4:06 PM MAINTENANCE • Turn off the water taps to the appliance if the NOTE appliance is to be left for any length of time (e.g. holiday), especially if there is no floor drain •...
-
Page 69: Troubleshooting
You can remedy most of the problems by yourself, consequently save time and money, since you do not need to call LG Electronics service centre. The following table should assist you by troubleshooting. - Page 70 global_main.book.book Page 30 Friday, February 26, 2021 4:06 PM TROUBLESHOOTING Symptoms Possible Cause & Solution Foreign objects, such as coins, pins, clips, etc.,are caught between the pulsator and the inner drum. FOREIGN OBJECTS ERROR • Turn off the appliance and then press the POWER button. Press the Spin (Centrifugado) button without selecting a cycle to drain and spin the laundry.
- Page 71 global_main.book.book Page 31 Friday, February 26, 2021 4:06 PM TROUBLESHOOTING Symptoms Possible Cause & Solution Sensor for clothes-sensing is defective. CLOTHES SENSING • Manually redistribute the laundry if laundry have become tangled. ERROR Motor’s revolution is too low. Contact-point of Connector is defective. •...
- Page 72 global_main.book.book Page 32 Friday, February 26, 2021 4:06 PM TROUBLESHOOTING Operation Symptoms Possible Cause & Solution Appliance will not Control panel has powered off due to inactivity. operate. • This is normal. Press the POWER button to turn on the appliance. Appliance is unplugged.
- Page 73 global_main.book.book Page 33 Friday, February 26, 2021 4:06 PM TROUBLESHOOTING Symptoms Possible Cause & Solution Water leaking Water inlet hose connection is loose at tap or appliance. • Check hoses for leaks, cracks and splits. • Tighten hose connections. House drain pipes are clogged. •...
- Page 74 global_main.book.book Page 34 Friday, February 26, 2021 4:06 PM TROUBLESHOOTING Performance Symptoms Possible Cause & Solution Poor stain removal Proper options are not selected. • Heavier soils and tougher stains may require extra cleaning power. Select the Soak option to boost the cleaning power of the selected cycle. Previously set stains.
- Page 75 global_main.book.book Page 35 Friday, February 26, 2021 4:06 PM Memo...
- Page 76 global_main.book.book Page 36 Friday, February 26, 2021 4:06 PM Memo...
- Page 77 global_main.book.book Page 37 Friday, February 26, 2021 4:06 PM Memo...
- Page 78 global_main.book.book Page 38 Friday, February 26, 2021 4:06 PM Memo...
- Page 79 global_main.book.book Page 39 Friday, February 26, 2021 4:06 PM Memo...
- Page 80 es_main.book.book Page 40 Friday, February 26, 2021 4:35 PM...
Need help?
Do you have a question about the LAVADORA WT21WT6HKA and is the answer not in the manual?
Questions and answers