Table of Contents
Advertisement
Available languages
Available languages
Quick Links
SEC.
A
WORK
BRAND
52
LG
<FRONT>
A
B
C
182+/-3
1
Update Manual of Victor 799 Mexico
EDXH100082
2
3
4
5
REV. NO.
REVISION DESCRIPTION
REF. NO.
B
C
MODEL
P/NO.
MFL68639779
WM20WV6
WM22WV6
<BACK>
182+/-3
17/01/10
DM.KIM
HA.NGUYEN
DATE
PREPARED
APPROVED
PRINTING DEGREE
MATERIAL AND PRINTING DESCRIPTION
내지:SNOW WHITE 80g OFFSET 인쇄
1
외지:SNOW WHITE 150g OFFSET 인쇄
<< NOTES >>
1. Material, printing and exterier size are refer to work tables.
2. Printing, text size and line are based on LG design film.
3. Exterier size on the drawing is cutting line.
4. Before product controlled by criteria sample.
5. The part should not contain prohibited substances(Pb,Cd,Hg,Cr+6,PBB,PBDE)
and details
should comply with LG standard of LG(63)-A-5501-34
TRIG.
MODELING
DESIGNED
LG 전자
LG Electronics Inc.
LG MODEL Name
LANGUAGE
SUFFIX
ENGLISH+
FH4G2CDNV*
A**ELAT
SPANISH
SCALE N
UNIT
mm
S
T
REVIEWED
CHECKED APPROVED
I
T
D.J.LEE
D.J.LEE
N.V.HA
DM.KIM
L
E
17.04.01
17.04.01
17.04.01
17.04.01
RELATED DWG.
(주)
DWG.
No.
RELEASING THIS DRAWING
WITHOUT PERMISSION LG
Electronics SHOULD BE
ACCUSED ACCORDING TO THE
LAWS AND COMPANY RULES.
이 도면은 LG전자의 자산으로 불법
유출시 관계법과 회사규정에 의해 처벌됨.
PAGE
REMARK
VICTOR 799
92
DR COMPLETED
PDF
도면 DR 완료
ILLUSTRATOR
16.04.01
완료일 :
MANUAL,OWNER'S
1/1
VICTOR 799
MFL68639779
Advertisement
Chapters
Table of Contents

Related Manuals for LG WM20WV6


Summary of Contents for LG WM20WV6
- Page 1 <BACK> 1. Material, printing and exterier size are refer to work tables. 2. Printing, text size and line are based on LG design film. 3. Exterier size on the drawing is cutting line. 4. Before product controlled by criteria sample.
- Page 2 MACHINE Before beginning installation, read these instructions carefully. This will simplify installation and ensure that the product is installed correctly and safely. Leave these instructions near the product after installation for future reference. WM20WV6 WM22WV6 www.lg.com Made in Vietnam MFL68639779...
- Page 3 MACHINE Before beginning installation, read these instructions carefully. This will simplify installation and ensure that the product is installed correctly and safely. Leave these instructions near the product after installation for future reference. WM20WV6 WM22WV6 www.lg.com Made in Vietnam MFL68639779...
-
Page 4: Table Of Contents
TABLE OF CONTENTS This manual is produced for a group of products and may contain images or content different from the model you purchased. This manual is subject to revision by the manufacturer. SAFETY INSTRUCTIONS ........03 Important Safety Instructions ...............05 INSTALLATION ............08 Parts ....................08 Accessories ..................08... -
Page 5: Safety Instructions
SAFETY INSTRUCTIONS The following safety guidelines are intended to prevent unforeseen risks or damage from unsafe or incorrect operation of the product. The guidelines are separated into ‘WARNING’ and ‘CAUTION’ as described below. This symbol is displayed to indicate matters and operations that can cause risk. - Page 6 GROUNDING REQUIREMENTS WARNING For your safety, the information in this manual must be followed to minimize the risk of fire, explosion, or electric shock, or to prevent property damage, injury to persons, or death. • This appliance must be grounded. In the event of malfunction or breakdown, grounding will reduce the risk of electric shock by providing a path of least resistance for electric current.
-
Page 7: Important Safety Instructions
Failure to do so • Only an authorized repair person from can result in injury. LG Electronics service centre should disassemble, repair, or modify the • Store and install this appliance where product. Improper service may cause it will not be exposed to temperatures injury, electric shock or fire. - Page 8 This can cause fire. • In case of flood, stop using the product and contact the LG Electronics service • Remove the power plug when you clean centre. Contact with water can cause the product. Not removing the plug may electric shock.
- Page 9 Technical Safety for Using the Disposal Tumble Dryer • Before discarding an old appliance, unplug it. Render the plug useless. • Do not dry unwashed items in the Cut off the cable directly behind the appliance. appliance to prevent misuse. •...
-
Page 10: Installation
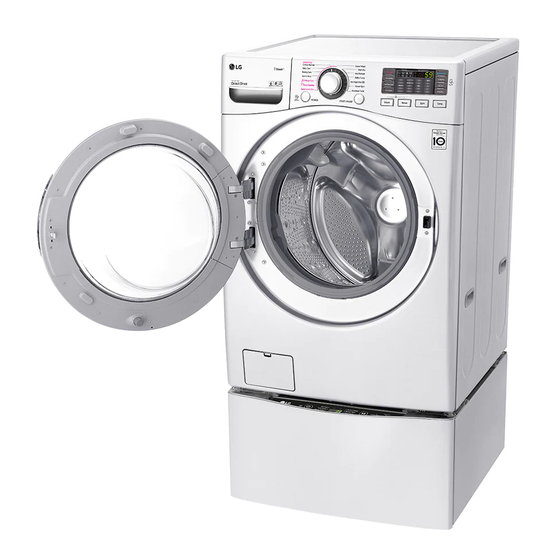
INSTALLATION Parts Transit bolts Power plug Drawer Control panel Drum Door Drain hose Drain plug Drain pump filter Cover cap (Location may vary depending on products) Adjustable feet Accessories Inlet hose (1EA) Spanner Elbow Bracket (Option : Hot & cold(2EA)) (for securing drain hose) Anti–slip sheets (2EA) Caps for covering shipping bolt holes... -
Page 11: Specifications
Specifications Model WM20WV6 WM22WV6 Wash Capacity 20 kg 22 kg Power Supply 120 V~, 60 Hz Size 686 mm (W) x 756 mm (D) x 983 mm (H) Product Weight 92 kg Max. Watt 1,100 W Permissible Water pressure 0.1 - 1.0 MPa (1.0 - 1.0 kgf / cm²) -
Page 12: Installation Place Requirements
Installation Place Requirements • Do not install your washing machine in rooms where freezing temperatures may occur. Frozen hoses may Location burst under pressure. The reliability of the electronic control unit may be impaired at temperatures below freezing point. • Please ensure that when the washing machine is installed, it is easily accessible for an engineer in the event of a breakdown. -
Page 13: Unpacking And Removing Shipping Bolts
Unpacking and Removing Install the hole caps. Shipping Bolts • Locate the hole caps included in the accessory pack and install them in the shipping bolt holes. Lift the washing machine off the foam base. • After removing the carton and shipping material, lift the washing machine off the foam base. -
Page 14: Using Anti-Slip Sheets (Optional)
• It is most effective to install the anti–slip sheets • You can obtain rubber cups (p/no.4620ER4002B) from under the front legs. If it is difficult to place the the LG Service Centre. pads under the front legs, place them under the NOTE back legs. -
Page 15: Leveling The Washing Machine
Leveling the Washing Machine Connecting Inlet Hose If the floor is uneven, turn the adjustable feet as required • Water supply pressure must be between 0.1 MPa and (Do not insert pieces of wood etc. under the feet). Make 1.0 MPa (1.0 ‒ 10.0 kgf/cm sure that all four feet are stable and resting on the floor •... - Page 16 Connecting Hose to Water Tap Push the adapter onto the end of the tap so that the rubber seal forms a watertight connection. Connecting screw-type hose to tap with thread Tighten the four fixing screws. Screw the hose connector onto the water supply tap. Push the inlet hose vertically upwards so that the rubber seal within the hose can adhere completely to the tap and then tighten it by screwing it to the...
- Page 17 Connecting Hose to Washing Machine Push the adapter onto the end of the tap so that the rubber seal forms a watertight connection. Make sure that there are no kinks in the hose and that Tighten the adapter ring plate and the four fixing they are not crushed.
-
Page 18: Installation Of Drain Hose
Installation of Drain Hose • The drain hose should not be placed higher than 100 cm above the floor. Water in the washing machine may not drain or may drain slowly. • Securing the drain hose correctly will protect the floor from damage due to water leakage. -
Page 19: Operation
OPERATION Using the Washing Machine Choose the desired washing cycle. • Press the Cycle button repeatedly or turn the Before the first wash, select a cycle (Cotton 60 °C, add cycle selector knob until the desired cycle is a half load of detergent), allow the washing machine selected. -
Page 20: Sorting Iaundry
Sorting Iaundry Caring before loading. • Combine large and small items in a load. Load Look for a care label on your clothes. large items first. • This will tell you about the fabric content of your • Large items should not be more than half the garment and how it should be washed. -
Page 21: Adding Cleaning Products
Adding Cleaning Products Adding Detergent and Fabric Softener Adding detergent Detergent Dosage • Main wash only → • Detergent should be used according to the instruction of the detergent manufacturer and selected according • Pre wash+Main wash → to type, colour, soiling of the fabric and washing NOTE temperature. - Page 22 Using tablet • Do not leave the fabric softener in the detergent drawer for more than 2 days (Fabric softener may Open the door and put tablets into the drum. harden). • Softener will automatically be added during the last rinse cycle.
-
Page 23: Control Panel
Control Panel Power button Programme dial • Press the Power button to turn the washing • Programmes are available according to laundry machine on. type. • To cancel the Delay Wash function, the Power • Lamp will light up to indicate the selected button should be pressed. -
Page 24: Programme Table
Programme Table Washing Programme Maximum Programme Description Fabric Type Load Coloured fast garments (shirts, Algodón/Normal Provides better performance by combining nightdresses, pajamas, etc) and normally Rating various drum motions. (Cotton/Normal) soiled cotton load (underwear). This cycle is for washing heavily soiled Carga Pesada Less than laundry though more powerful tub... - Page 25 Extra Options Enjuague Reserva Prelavado Agua Plus Programme Extra Cold Wash™ (Delay Wash) (Pre Wash) (Water Plus) (Extra Rinse) Algodón/Normal ● ● ● ● ● (Cotton/Normal) Carga Pesada ● ● ● ● ● (Heavy Duty) Voluminoso ● ● ● ● ●...
- Page 26 Operating Data Programme Wash Temp. Spin Speed Soil Level Caliente (Hot) Muy Alto (Extra High) Tibia* (Warm*) Muy Sucia (Heavy) Algodón/Normal Fuerte* (High*) Templada (Semi Warm) Normal* (Normal*) (Cotton/Normal) Media (Medium) Fria (Cold) Ligero (Light) Bajo (Low) Ligeramente Fría (Tap Cold) Caliente (Hot) Muy Alto* (Extra High*) Tibia* (Warm*)
- Page 27 Programme Wash Temp. Spin Speed Soil Level Caliente* (Hot*) Muy Alto* (Extra High*) Tibia (Warm) Fuerte (High) Muy Sucia (Heavy) Lavado Rápido Templada (Semi Warm) Media (Medium) Normal (Normal) (Speed Wash) Fria (Cold) Bajo (Low) Ligero* (Light*) Ligeramente Fría (Tap Cold) No Centrifugar (No Spin) Limpeza de Tina (Tub Clean)
-
Page 28: Option Cycle
Option Cycle Añadir Prendas (Add Garments) Use this function to add loads or remove the foreign Reserva (Delay Wash) material. You can set a time delay so that the washing machine Press the Añadir Prendas button. will start automatically and finish after a specified time interval. - Page 29 Fresh Care Velocidad de Centrifugado (Spin Speed) You can set the desired spin speed. Use this function when you won't be able to take out your clothes immediately after the wash cycle ends. Use this feature properly according to the characteristics of the load.
- Page 30 Alarma (Signal) Enjuague Extra (Extra Rinse) The washing machine plays a melody when the wash Add an extra rinse cycle to the default rinse cycle. cycle is finished. The buttons make a sound each time a Press the Power button. button is pressed.
- Page 31 Enjuague+Centrifugado (Rinse+Spin) Descargar Ciclo (Downloaded Cycle) Select this cycle to rinse and spin a load separately The Downloaded Cycle features of this appliance allow from a regular cycle. This can be helpful in preventing you to download new and special cycles that are not fresh stains from setting in fabrics.
-
Page 32: Using Smart Function (Optional)
Installation of the application a more detailed guide on how to use the Tag On function. • Search "LG Smart ThinQ" on the Google Play Store • Depending on the smart phone manufacturer and from your smart phone. Android OS version, the NFC activation process may differ. -
Page 33: Maintenance
MAINTENANCE Care and Cleaning of the Interior WARNING • Unplug the washing machine before cleaning to • Use a towel or soft cloth to wipe around the washing avoid the risk of electric shock. Failure to follow machine door opening and door glass. this warning may result in serious injury, fire, •... -
Page 34: Cleaning The Drain Pump Filter
Cleaning the Drain Pump Filter After cleaning, turn the pump filter and insert the drain plug. • The drain filter collects threads and small objects left in the laundry. Check regularly that the filter is clean to ensure smooth running of your washing machine. •... -
Page 35: Cleaning The Dispenser Drawer
Cleaning the Dispenser Drawer Limpieza de Tina (Tub Clean) Detergent and fabric softener may build up in the Tub Clean is a special cycle to clean the inside of the dispenser drawer. Remove the drawer and inserts and washing machine. check for buildup once or twice a month. -
Page 36: Caution On Freezing During Winter
Caution on Freezing During • After closing the tap, disconnect the cold inlet hose from the tap, and remove water while keeping the Winter hose facing downwards. • When frozen, the product does not operate normally. Make sure to install the product where it will not freeze during winter. - Page 37 How to Handle Freezing • When water is removed completely from the drum, close the hose plug used for removal of residual • Make sure to empty the drum, pour warm water of water, select Rinse and Spin, and press the Start/ 50–60 °C up to the rubber part inside the drum, close Pause button.
-
Page 38: Using The Smart Diagnosis™ Function
Use this function if you need an accurate diagnosis using the information transmitted for analysis. by an LG Electronics service centre when the product NOTE malfunctions or fails. Use this function only to contact •... -
Page 39: Troubleshooting
TROUBLESHOOTING • Your washing machine is equipped with an automatic error-monitoring system to detect and diagnose problems at an early stage. If your washing machine does not function properly or does not function at all, check the following before you call for service: Diagnosing Problems Symptoms Reason... - Page 40 Symptoms Reason Solution Electrical power cord may not be plugged in or connection may be • Make sure plug fits tightly in wall outlet. loose. • Reset circuit breaker or replace fuse. Do Washing machine does House fuse blown, circuit breaker not increase fuse capacity.
-
Page 41: Error Messages
Error Messages Symptoms Reason Solution Water supply is not adequate in • Check another tap in the house. area. Water supply taps are not • Fully open tap. completely open. Water inlet hose(s) are kinked. • Straighten hose(s). The filter of the inlet hose(s) are •... - Page 42 Symptoms Reason Solution • Close the door completely. Door is not closed properly. If ‘ ’ is not released, call for service. • Unplug the power plug and call for service. • Close the water tap. Water overfills due to the faulty •...
- Page 43 Memo...
- Page 44 Memo...
- Page 45 Memo...
- Page 46 Memo...
- Page 47 Memo...
- Page 48 Memo...
- Page 49 Antes de instalar, lea atentamente estas instrucciones. Esto simplificará la instalación y garantizará que el producto se instale de manera correcta y segura. Una vez instalado, guarde estas instrucciones cerca del producto para consultarlas en el futuro. WM20WV6 WM22WV6 www.lg.com...
- Page 50 ÍNDICE Este manual fue elaborado para un conjunto de productos, por lo que puede contener imágenes o contenido que difieren del modelo que usted compró. Este manual está sujeto a revisión por parte del fabricante. INSTRUCCIONES DE SEGURIDAD ......03 Instrucciones de seguridad importantes ..........05 INSTALACIÓN ............08 Partes ....................08 Accesorios ...................08...
-
Page 51: Instrucciones De Seguridad
INSTRUCCIONES DE SEGURIDAD La finalidad de las siguientes pautas de seguridad es evitar riesgos imprevistos o daños como consecuencia del uso incorrecto o no seguro del producto. Estas pautas están divididas en "ADVERTENCIA" y "PRECAUCIÓN", como se describe a continuación. Este símbolo hace referencia a asuntos u operaciones que pueden implicar riesgos. - Page 52 REQUISITOS DE CONEXIÓN A TIERRA ADVERTENCIA Para su seguridad, debe respetarse la información de este manual con el objeto de minimizar el riesgo de incendios, explosiones o descargas eléctricas, o para evitar daños en la propiedad, lesiones en personas o incluso la muerte.
-
Page 53: Instrucciones De Seguridad Importantes
• Solo una persona autorizada para su evitar que se desprenda. Si se salpica reparación por el Centro de servicios agua, podría producirse una descarga LG Electronics debe desarmar, reparar eléctrica. o modificar el producto. Una reparación no adecuada puede ocasionar lesiones, descarga eléctrica o incendios. - Page 54 • En caso de inundaciones, suspenda el varias salidas de enchufe o cables de uso del producto y contáctese con el extensión. Esto puede provocar un Centro de servicios LG Electronics. El incendio. contacto con el agua podría ocasionar una descarga eléctrica.
- Page 55 • No toque el enchufe con las manos • Nunca detenga este electrodoméstico mojadas. Puede ocasionar descarga antes de que termine el ciclo de eléctrica o lesiones. secado, a menos que se quiten todas las prendas rápidamente y se separen para disipar el calor.
-
Page 56: Instalación
INSTALACIÓN Partes Pernos de transporte Enchufe de alimentación Gaveta Panel de control Tambor Puerta Manguera de drenaje Tapón de drenaje Filtro de la bomba de drenaje Tapa (la ubicación puede variar en función del producto) Pies ajustables Accesorios Manguera de entrada (1EA) Llave de tuercas Soporte (Opción: caliente &... -
Page 57: Especificaciones
Especificaciones Modelo WM20WV6 WM22WV6 Capacidad de lavado 20 kg 22 kg Fuente de alimentación 120 V~ 60 Hz Tamaño 686 mm (W) x 756 mm (D) x 983 mm (H) Peso del producto 92 kg Potencia nominal 1 100 W Presión de agua permitida... -
Page 58: Requisitos Del Lugar De Instalación
Requisitos del lugar de • No instale la lavadora en salas de máquina donde puede haber temperaturas bajo cero. Las mangueras instalación congeladas pueden explotar bajo presión. La confiabilidad de la unidad de control electrónico puede Ubicación verse perjudicada a temperaturas bajo cero. •... -
Page 59: Desempaque Y Extracción De Pernos Para Transporte
Desempaque y extracción de Instalar las tapas. pernos para transporte • Busque las tapas incluidas en el paquete de accesorios e instálelas en los orificios de los Levantar la lavadora de la base de espuma. pernos para transporte. • Una vez quitado el cartón y el material de transporte, levante la lavadora de la base de Tapa espuma. -
Page 60: Uso De Hojas Antideslizantes (Opcional)
• Coloque las copas de goma para reducir la vibración. • Puede obtener copas de goma (núm. pieza Coloque el lado adhesivo de la almohadilla 4620ER4002B) en el Centro de servicios LG. antideslizante sobre el suelo. NOTA • Es más eficaz instalar las hojas antideslizantes debajo de las patas delanteras. -
Page 61: Nivelación De La Lavadora
Nivelación de la lavadora Conexión de la manguera de entrada Si el suelo no está nivelado, gire el pie ajustable según sea necesario (no inserte trozos de madera, etc. • La presión del suministro de agua debe ser de entre debajo del pie). - Page 62 Conexión de la manguera con el grifo Presione el adaptador contra el extremo del grifo de modo que el sello de goma forme una conexión Conexión de la manguera tipo rosca con el hermética. Ajuste los cuatro tornillos de fijación. grifo roscado Enrosque el conector de la manguera en el grifo de suministro de agua.
- Page 63 Conexión de la manguera con la lavadora Presione el adaptador contra el extremo del grifo de modo que el sello de goma forme una conexión Asegúrese de que no haya dobleces en la manguera y hermética. que no esté machacada. Ajuste la placa anular del adaptador y los cuatro Si la lavadora tiene dos válvulas.
-
Page 64: Instalación De La Manguera De Drenaje
Instalación de la manguera de drenaje • La manguera de drenaje no debe colocarse a una altura superior a 100 cm sobre el suelo. Es posible que el agua de la lavadora no drene, o que drene lentamente. • Al ajustar la manguera de drenaje correctamente se protege el suelo de daños ocasionados por pérdidas de agua. -
Page 65: Funcionamiento
FUNCIONAMIENTO Uso de la lavadora Elegir el ciclo de lavado deseado. • Presione el botón de ciclo repetidamente o gire Antes del primer lavado, seleccione un ciclo (Algodón la perilla de selección de ciclo hasta llegar al 60 °C, agregue media carga de detergente) y realice ciclo deseado. -
Page 66: Clasificación De Las Prendas Para Lavar
Clasificación de las prendas para Cuidados previos al lavado. lavar • Combine prendas grandes y chicas en una carga. Coloque las prendas grandes primero. Buscar las etiquetas de mantenimiento de las • Las prendas grandes no deben ocupar más de prendas. -
Page 67: Incorporación De Productos De Limpieza
Incorporación de productos de NOTA limpieza • No deje que el detergente se endurezca. De lo contrario, pueden producirse obstrucciones, Dosis de detergente malos resultados de enjuague u olores. • Carga completa: Según la recomendación del • El detergente debe usarse de acuerdo con las fabricante. - Page 68 Uso de tabletas • No deje el suavizante en la gaveta por más de 2 días (puede endurecerse). Abra la puerta y coloque las tabletas en el tambor. • El suavizante se incorporará automáticamente durante el último ciclo de enjuague. •...
-
Page 69: Panel De Control
Panel de control Botón de Encendido Botón de Selección de Programa • Presione el botón de Encendido para • Hay programas disponibles para distintos tipos encender la lavadora. de prendas para lavar. • También se puede utilizar para cancelar la •... -
Page 70: Tabla De Programas
Tabla de programas Programa de lavado Carga Programa Descripción Tipo de tela máxima prendas rápidas de color (camisas, Proporciona un mejor desempeño camisones, pijamas, etc.) y prendas Algodón/Normal combinando diferentes movimientos Normal de algodón con suciedad normal (ropa del tambor. interior) Este ciclo es para lavado de ropa muy Menos de... - Page 71 Opciones adicionales Enjuague Programa Reserva Prelavado Cold Wash™ Agua Plus Extra ● ● ● ● ● Algodón/Normal ● ● ● ● ● Carga Pesada ● ● ● ● ● Voluminoso Planchado ● ● ● ● ● Permanente ● ● ● ●...
- Page 72 Datos de funcionamiento Temperatura de Velocidad de Nivel de Programa lavado centrifugado suciedad Caliente Muy Alto Tibia* Muy Sucia Fuerte* Algodón/Normal Templada Normal* Media Fria Ligero Bajo Ligeramente Fría Caliente Muy Alto* Tibia* Muy Sucia* Fuerte Carga Pesada Templada Normal Media Fria Ligero...
- Page 73 Temperatura de Velocidad de Nivel de Programa lavado centrifugado suciedad Caliente* Muy Alto* Tibia Fuerte Muy Sucia Lavado Rápido Templada Media Normal Fria Bajo Ligero* Ligeramente Fría No Centrifugar Limpeza de Tina Caliente Muy Alto Tibia* Fuerte* Muy Sucia Descargar Ciclo Templada Media Normal*...
-
Page 74: Ciclo Opcional
Ciclo opcional Añadir Prendas Use esta función para agregar ropa o quitar material Reserva extraño. Puede configurar un Reserva para que la lavadora Presione el botón de Añadir Prendas. comience automáticamente y termine después de un intervalo de tiempo especificado. Cierre la puerta después de agregar ropa o Presione el botón de Encendido. - Page 75 Fresh Care Velocidad de Centrifugado Puede seleccionar la velocidad de centrifugado que Utilice esta función cuando no tenga oportunidad de desee. Utilice esta función correctamente, según las sacar su ropa inmediatamente después de que finalice el ciclo de lavado. características de la carga. •...
- Page 76 Nivel de Suciedad Cold Wash™ Puede hacer un lavado más intensivo de la ropa Esta opción ahorra energía mediante el uso de agua ajustando el nivel de suciedad en la lavadora. fría, extendiendo los tiempos de lavado y enjuague para mantener el rendimiento del lavado.
- Page 77 Agua Plus NOTA • La desconexión de la corriente no restablece Utilice esta opción para agregar agua adicional a los la función de bloqueo infantil. Debe desactivar ciclos de lavado y enjuague para un mejor rendimiento el bloqueo infantil para poder acceder a otras del lavado con prendas voluminosas o grandes.
-
Page 78: Uso De La Función Inteligente (Opcional)
éxito. • El contenido que se encuentra en este manual puede ser diferentes dependiendo de la versión de la aplicación de la "LG Smart ThinQ" , y puede ser modificada sin informar a los clientes. -
Page 79: Mantenimiento
MANTENIMIENTO Cuidado y limpieza del interior ADVERTENCIA • Desenchufe la lavadora antes de limpiarla para • Use una toalla o un paño suave para limpiar alrededor evitar el riesgo de descarga eléctrica. Si no tiene de la abertura y el vidrio de la puerta de la lavadora. en cuenta esta advertencia podrían producirse •... -
Page 80: Limpieza Del Filtro De La Bomba De Drenaje
Limpieza del filtro de la bomba de Después de la limpieza, gire el filtro de la bomba e inserte la manguera de drenaje. drenaje • El filtro de drenaje acumula hilos y pequeños objetos que quedan de las prendas. Controle regularmente que el filtro esté... -
Page 81: Limpieza De La Gaveta Dispensadora
Limpieza de la gaveta Limpieza de Tina dispensadora Limpieza de Tina es un ciclo especial para limpiar la parte interna de la lavadora. El detergente y el suavizante pueden acumularse en la En este ciclo se utiliza un nivel de agua alto con una gaveta dispensadora. -
Page 82: Precaución De Congelamiento En El Invierno
Precaución de congelamiento en • Una vez cerrado el grifo, desconecte la manguera de entrada de agua fría y extraiga el agua sosteniendo la el invierno manguera hacia abajo. • Cuando se congela, el producto no funciona normalmente. Asegúrese de instalar el producto en un lugar donde no se congele durante el invierno. - Page 83 Qué hacer en caso de congelamiento • Una vez drenada completamente el agua del tambor, cierre el tapón de la manguera utilizado para quitar el • Asegúrese de vaciar el tambor, vierta agua caliente a agua residual, seleccione Enjuague y Centrifugado y 50 - 60 °C hasta la parte de goma dentro del tambor, presione el botón Inicio/Pausa.
-
Page 84: Uso De La Función Smart Diagnosis
Use esta función si necesita un diagnóstico preciso para que pueda asistirlo en el uso de la información de un Centro de servicios LG Electronics cuando el transmitida para análisis. producto está averiado o falla. Use esta función solo... -
Page 85: Solución De Problemas
SOLUCIÓN DE PROBLEMAS • La lavadora está equipada con un sistema de monitoreo de errores automático que detecta y diagnostica problemas anticipadamente. Si la lavadora no funciona correctamente, o no funciona en absoluto, compruebe lo siguiente antes de llamar al servicio: Diagnóstico de problemas Síntomas Motivo... - Page 86 Síntomas Motivo Solución La manguera de drenaje El agua de la • Limpie y estire la manguera de drenaje. está doblada u obstruida. lavadora no drena, o drena El filtro de drenaje está • Limpie el filtro de drenaje. lentamente. obstruido.
-
Page 87: Mensajes De Error
Mensajes de error Síntomas Motivo Solución El suministro de agua no es • Revise otro grifo del hogar. adecuado en el área. Los grifos de suministro de agua • Abra el grifo completamente. no están completamente abiertos. Las mangueras de entrada de •... - Page 88 Síntomas Motivo Solución • Cierre la puerta completamente. La puerta no está cerrada Si no se muestra " ", llame apropiadamente. al servicio. • Desenchufe el cable de alimentación y llame al servicio. • Cierre el grifo de agua. La lavadora se llena demasiado •...
- Page 89 Memorándum...
- Page 90 Memorándum...
- Page 91 Memorándum...
- Page 92 Memorándum...
- Page 93 Memorándum...
Need help?
Do you have a question about the WM20WV6 and is the answer not in the manual?
Questions and answers