
Related Manuals for Kenwood K-501USB-B


Summary of Contents for Kenwood K-501USB-B
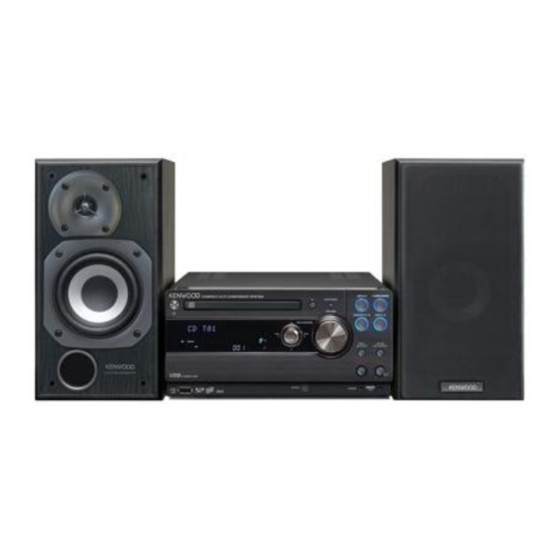
- Page 1 COMPACT HI-FI COMPONENT SYSTEM K-501USB Read Before Use Read the opposite side for the "Operating Procedures". B60-5655-00 00 MA (E,X) BT 0607...
-
Page 2: Before Applying Power
IMPORTANT SAFETY Before applying power INSTRUCTIONS Caution : Read this page carefully to ensure safe operation. Caution : Read this page carefully to Units are designed for operation as follows. ensure safe operation. Australia ............AC 240 V only Read Instructions – All the safety and operating Europe .............. - Page 3 14. Replacement Parts – When replacement parts 6. Power Sources – This product should be operated are required, be sure the service technician has used only from the type of power source indicated on the replacement parts specified by the manufacturer product.
- Page 4 Information on Disposal of Old Electrical and Electronic Equipment (applicable for EU countries that have adopted separate waste collection systems) Products with the symbol (crossed-out wheeled bin) cannot be disposed as household waste. Old electrical and electronic equipment should be recycled at a facility capable of handling these items and their waste byproducts.
-
Page 5: Table Of Contents
Contents (For "Read Before Use") To ensure safety, read the items carrying this marking carefully. Before applying power ................2 IMPORTANT SAFETY INSTRUCTIONS ....2 Accessories/Associated Products ..............6 Installation ......................7 Connections ......................8 Controls, Connectors and Indicators ............12 Additional Information .................. 16 Before Recording ..................... -
Page 6: Accessories/Associated Products
If any accessories are missing, or if the unit is damaged or fails to operate, notify your dealer immediately. If the unit was shipped to you directly, notify your shipper immediately. Kenwood recommends that you retain the original carton and packing materials in case you need to move or ship the unit in the future. -
Page 7: Installation
Installation Install this system as shown below. Installation Method Main unit Place the left and right speakers correctly. If they are placed in wrong locations, the left and right audio cannot be reproduced correctly. Place the main unit by leaving a space of at least 1 cm from each speaker. -
Page 8: Connections
Connections Connecting the main unit and accessories C o n n e c t e v e r y c o n n e c t i o n c o r d f i r m l y. Incomplete insertion may cause loss of audio output or generation of noise. - Page 9 AM loop antenna The provided AM antenna is an indoor antenna. Install it as apart as possible Fit into the groove. from the main unit, TV set, speaker cords and power cord and orient it in the direction that offers best reception condition.
- Page 10 In this case, select the “Storage” mode. USB connector Connect a Kenwood digital memory audio player PHONES jack (separately available M1GC7) or other USB mass storage class-compatible digital audio player. Connect headphones (separately available) equipped with a stereo mini-plug.
- Page 11 FM outdoor antenna Use a 75-Ω coaxial cable, lead it indoors and connect to the FM 75 Ω terminal. Remove the simplified FM indoor antenna after connecting the outdoor antenna. Caution for outdoor antenna installation Memory card slot Since antenna installation necessitates skill and experience, always consult your dealer Inser t a memor y card (separately before installation.
-
Page 12: Controls, Connectors And Indicators
The indicator lights up when the timer is activated. MUTE indicator (See page 24.) D.AUDIO indicator The indicator lights during audio muting. The indicator lights when a Kenwood digital audio player is connected through the dedicated cable. Play/record/pause indicators Sound setup indicator (Refer to page 18 Record setup indicators (Refer to page 57 of of the “Operating Procedures”.) - Page 13 Power key (See page 25.) D.AUDIO IN connector (Refer to page 10 of the “Operating Procedures”.) Press to switch the power of the system ON/OFF Connect a Kenwood digital audio player using (standby mode). the dedicated cable. Standby/timer indicator Headphones jack (See page 10.) The indicator lights when the system power is set to the standby mode.
- Page 14 When the tuner source is selected, press to select a broadcasting station. D.AUDIO play/pause key Press to start or let pause the playback of the Kenwood digital audio player connected to the D.AUDIO IN connector using the dedicated cable. (Refer to page 10 of the “Operating Procedures”.)
- Page 15 Operation TIMER key (Refer to page 46 of the “Operating Procedures”.) Press to activate or deactivate the timer. Plug the power cord of the system to a power outlet INTRO SCAN key (Refer to page 16 of the “Operating Procedures”.) and press the power key on the remote control unit Press to start the Intro Scan of all music files or the to turn the system ON.
-
Page 16: Additional Information
Note Do not connect a component other than a USB mass storage class- Kenwood Digital compatible digital audio player to the USB connector. Kenwood will Audio Player not assume any liabilities for the malfunction, damage or loss of data that may result from connection of other kind of component. - Page 17 The data saved in the USB device or memory card may be If a USB device other than specified above is used, the lost depending on the usage conditions. Kenwood will not music files may be unable to be played correctly. Also,...
- Page 18 Additional Information Handling of CD Handling precautions Cautions on CD discs Hold a CD taking care not to touch the played surface. Always use a disc carrying the marking. Discs playable on the system A disc without this marking may be unable to be played back correctly.
-
Page 19: Before Recording
Destination USB audio player Memory card connected to D.AUDIO Recording OUT jack Source × USB audio player Memory Card Kenwood digital audio × player connected to D.AUDIO IN × Radio × External component (connected to AUX) : Digital recording possible : Analog recording in normal recording speed only ×... -
Page 20: Folders And Music Files
Folders and Music Files With this system, the music data recorded in a USB audio player or memory card is referred to as a “music file”. The music files are saved in locations called the “folders”. A folder is created every time music files are recorded in the USB audio player or memory card to store the recorded music files in it. - Page 21 M a x i m u m n u m b e r s o f The recorded music files and folders accommodating them are folders and music files numbered automatically. These number can later be modified. handled by the KWD folder Numbers assigned to folders: AL_A01…AL_A99…...
-
Page 22: How To Use This Volume "Operating Procedures
* Playback pauses at the beginning of the selected music fi le. * To change the record mode setup, a memory card or connect the * When the dedicated cable is used, the Kenwood digital see pages 56 to 61. system components. For details, audio player can be controlled from the main unit or remote control unit. - Page 23 * The display illustrations in this manual * The track marks can have been drawn exclusively for use also be entered Start playback of the Kenwood automatically. (See in explanation. They may differ from page 59.) digital audio player.
-
Page 24: Basic Operation
Basic Operation Preparations Install the system in a proper location. Inserting a memory card (See page 7.) Check the connections. Press the bottom edge of the (See pages 8 to 11.) memory card slot to open the cover. Prepare the remote control unit. (See page 15.) Insert a memory card. - Page 25 Turn the system ON (OFF). * Pressing the play/pause key of the desired audio input source also turns the system ON (One- touch operation function). (See page 13.) * Pressing the power key while the system is ON switches it OFF (standby mode). Load a disc.
-
Page 26: Care And Storage
Care and Storage Care and storage of main unit Care and storage of SD card Do not place in the following locations. Before storing the SD card Place exposed to direct sunlight. Always store the SD card in its case. Place subjected to excessive humidity or dirt. -
Page 27: Specifications
Specifications Main unit (RD-K501USB) [Amplifier block] [CD player block] Effective output power during STEREO operation (1 kHz, Laser ..............Semiconductor laser 10%, T.H.D., at 6 Ω) D/A converter ..................1 bit ..................20 W + 20 W (RMS) Oversampling .............8 fs (352.8 kHz) Total harmonic distortion .............0.025% Frequency response .......... - Page 28 English...