Table of Contents
Advertisement
SHARP ELECTRONICS (Europe) GmbH
Sonnistraße 3, D-20097 Hamburg, Deutschland
SHARP CORPORATION
http://www.sharp-eu.com
PIN
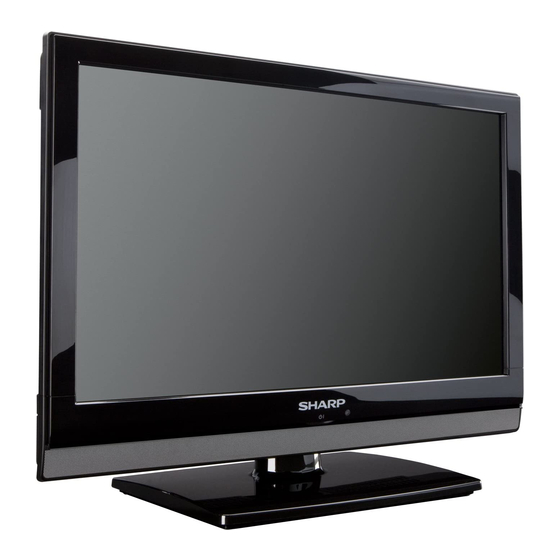
LC-19SH7E
LC-26SH7E
LC-32SH7E
LC-42SH7E
LCD COLOUR TELEVISION
LCD-FARBFERNSEHGERÄT
TÉLÉVISEUR COULEUR À ÉCRAN
CRISTAUX LIQUIDES (LCD)
TELEVISORE A COLORI LCD
LCD-KLEURENTELEVISIE
TELEVISIÓN EN COLOR LCD
TELEVISOR LCD A CORES
Printed in Poland
Gedruckt in Polen
Imprimé en Pologne
Stampato in Polonia
Afgedrukt in Polen
Impreso en Polonia
Impresso na Polónia
P41G7830843
TBD
OPERATION MANUAL
BEDIENUNGSANLEITUNG
MODE D'EMPLOI
MANUALE DI ISTRUZIONI
GEBRUIKSAANWIJZING
MANUAL DE MANEJO
MANUAL DO UTILIZADOR
LC-19SH7E / LC-26SH7E / LC-32SH7E
LC-42SH7E
Advertisement
Table of Contents

Related Manuals for Sharp LC-19SH7E-BK


Summary of Contents for Sharp LC-19SH7E-BK
- Page 1 SHARP ELECTRONICS (Europe) GmbH Sonnistraße 3, D-20097 Hamburg, Deutschland SHARP CORPORATION http://www.sharp-eu.com LC-19SH7E LC-26SH7E LC-32SH7E LC-42SH7E LCD COLOUR TELEVISION LCD-FARBFERNSEHGERÄT TÉLÉVISEUR COULEUR À ÉCRAN CRISTAUX LIQUIDES (LCD) TELEVISORE A COLORI LCD LCD-KLEURENTELEVISIE TELEVISIÓN EN COLOR LCD TELEVISOR LCD A CORES...
-
Page 2: Table Of Contents
The illustrations and on-screen displays in this operation manual are for explanation purposes and may vary slightly from the actual operations. Contents Contents ���������������������������������������������������������������� 1 introduction ����������������������������������������������������������� 2 Dear SHARP customer ... 2 Important Safety Precautions ... 2 Remote control unit ... 3 TV (Front view) ... 4 TV (Rear view) ... 4 preparation������������������������������������������������������������... -
Page 3: Introduction
Dear SHarp customer Thank you for your purchase of the SHARP LCD colour TV product. To ensure safety and many years of trouble-free operation of your product, please read the Important Safety Precautions carefully before using this product. important Safety precautions •... -
Page 4: Remote Control Unit
introduction remote control unit BI (poWer) Press to turn the LCD TV on or enter standby mode. Ø (input SourCe) Select an input source. 0-9 DiGit ButtonS To select a TV channel directly. Press this button to display electronic programme guide when watching digital channels. -
Page 5: Tv (Front View)
introduction tV (Front view) tV (rear view) SERVICE Socket HDMI Volume buttons Programme (Channel) buttons MENU button INPUT SOURCE button POWER button HDMI 1 HDMI 2 AV L/R Audio Output (Standby/On) indicator COMPONENT (VIDEO and L/R AUDIO INPUT) SCART (CVBS Tuner out) PC IN (VGA / AUDIO) AV VIDEO and L/R Audio Output SPDIF OUT(Digital audio out) -
Page 6: Preparation
preparation Supplied accessories Stand unit and screws AC cord (x1) Cable clamp (x1) Product shape varies Attached in back of in some countries the TV. YPbPr Remote control (×1) AAA battery (×2) MENU /EXIT PR LIST FREEZE Operation Manual Quick Setup Guide Operation Manual Quick Setup Guide mount the tV stand... -
Page 7: Installation Of Batteries
preparation installation of batteries 1� Insert two AAA batteries into Remote control. Make sure (k) and (l) are facing the proper direction. 2� Replace the cover. note • If the remote control will not to be used for a long time, remove the batteries to avoid remote control damage. -
Page 8: Quick Guide
Quick guide initial installation overview Follow the below steps one by one when using the TV for the first time. Some steps may not be necessary depending on your TV installation and connection. preparation Œ Connect antenna cable to the antenna terminal. 75Ω... -
Page 9: Watching Tv
Watching tV Daily operation turning on/off the power Press B on the TV. Switch it off by pressing B on the TV. MENU Changing channels With p<>: YPbPr Standby mode to standby mode If the TV set is switched on, you can switch it to standby by pressing B on the remote control. -
Page 10: Epg (Electronic Programme Guide)
Watching tV epG (electronic programme Guide) EPG is an on-screen guide that displays scheduled digital TV programmes. This guide is not available with analogue channels. You can navigate, select and view programmes. There are two types of EPG, “Now and Next” and “7 or 8 day”... -
Page 11: Teletext
Watching tV teletext What is Teletext? Teletext broadcasts pages of information and entertainment to specially equipped television sets. Your TV receives Teletext signals broadcast by a TV network, and decodes them into graphical format for viewing. News, weather and sports information, stock exchange prices and programme previews are among the many services available. -
Page 12: Tv Menu
tV menu picture adjust picture settings 1� Press menu / eXit on the remote control and select picture. 2� Press oK or ≥ to enter the list. Menu Picture Smart Picture Brightness Sound Contrast Colour Tint Features Sharpness Colour Temperature Parental Advanced Control Select... -
Page 13: Use Sound Mode
tV menu • Balance: Sets the balance of the left and right speakers to best fit your listening position. • Virtual Surround: Automatically switches the TV to the best surround sound mode available from a broadcast. Select on or off. •... -
Page 14: Update Scan
tV menu Step 3: automatic installation Your TV searches and stores all available digital and analogue TV channels as well as all available digital radio channels. 1� Press menu / eXit on the remote control and select tV ≥ Channels� note •... -
Page 15: Channel Skip
tV menu 3� In the Start Frequency (mHz) box, enter the frequency by using the digit buttons on the remote control. 4� Press <> to select Scan up or Scan Down to scan the next available analogue channel from the frequency you have entered. 5�... -
Page 16: Analogue Ch Fine Tune
tV menu • Frequency: Use digit buttons on the remote control to enter the frequency. (Only for analogue channels). • Colour System: Press ≤≥ to select the colour system. (Only for analogue channels) • Sound System: Press ≤≥ to select the sound system. -
Page 17: Change The Time Zone
tV menu Zoom 2 (not for HD) Scales the classic 4:3 format to 16:9. Wide Stretches the classic 4:3 format to 16:9. note • When source input is PC mode, only Full screen and 4:3 are available. • For 4:3 PC input signal, picture format 4:3 and Wide screen are available. -
Page 18: Use Subtitles
tV menu use subtitles You can enable subtitles for each TV channel. Subtitles are broadcasted via teletext or DVB-T digital broadcasts. With digital broadcasts, you have the additional option of selecting a preferred subtitle language. Set analogue subtitles 1� menu / eXit on the remote control and Press select Features >... -
Page 19: Lock One Or More Channels
tV menu note: • You have to enter a 4-digit password everytime to access parental menu. • Enter “0000” as the default password. • If you forget your password, enter “5351” to override any existing passwords. lock one or more channels 1�... -
Page 20: Connecting External Devices
Connecting external devices Before connecting ��� • Be sure to turn off the TV and any devices before making any connections. • Firmly connect a cable to a terminal or terminals. • Carefully read the operation manual of each external device for possible connection types. This also helps you get the best possible audiovisual quality to maximise the potential of the TV and the connected device. -
Page 21: Scart Connection
Connecting external devices SCart connection example of connectable devices E Decoder When using the SCart 1 Full SCART, which transmits RGB, S-Video and CVBS in, and CVBS tuner out. Decoder SCART cable SCART SCART 1 example of connectable devices E VCR E DVD recorder When using the SCart 2 Half SCART, which transmits S-Video or CVBS in, and CVBS monitor out. -
Page 22: Speaker / Amplifier Connection
Connecting external devices Speaker / amplifier connection Connecting an amplifier with digital audio input / analogue audio input Digital audio in Speaker / amplifier (COAXIAL) connection AUDIO IN Audio cable AUDIO OUT SPDIF OUT inserting a Ca Card In order to receive coded digital stations, a Common Interface Module (CI Module) and a CA Card must be inserted in the CI slot of your TV set. -
Page 23: Connecting A Pc
Connecting external device Connecting a pC Digital connection HDMI cable HDMI DVI-HDMI cable Ø 3,5 mm stereo mini jack cable PC IN analogue connection Ø 3,5 mm stereo mini jack cable RGB cable DVI-I / RGB conversion cable DVI-I Ø 3,5 mm stereo mini jack cable PC IN Supported display resolutions Computer formats (pC) -
Page 24: Appendix
appendix troubleshooting problem No picture Abnormal colours Twisted picture Picture too dark Audio only, no images Picture only, no audio Cannot use remote control Cannot receive sufficient channels through antenna No colour Blinking picture accompanied by ghost image Broken lines or segments Certain TV channels are blocked (Hope to acquire some channels) Overlapping images or ghost images... -
Page 25: Specification
appendix Specification item LCD screen size Number of dots Video Colour System TV-Standard Analogue Function Digital Receiving VHF/UHF Channel CATV TV-Tuning System STEREO/BILINGUAL Viewing angles Audio amplifier Speaker Antenna RS-232C SCART 1 SCART 2 (Only for 26” and 32”) PC IN Rear Component SPDIF... - Page 26 Operating temperature • As a part of policy of continuous improvement, SHARP reserves the right to make design and specification changes for product improvement without prior notice. The performance specification figures indicated are nominal values of production units. There may be some deviations from these values in individual units.
-
Page 27: Environmental Specifications
The copyrights for the software components and various relevant documents included with this product that were developed or written by SHARP are owned by SHARP and are protected by the Copyright Act, international treaties, and other relevant laws. This product also makes use of freely distributed software and software components whose copyrights are held by third parties. -
Page 28: Trademarks
appendix trademarks • “HDMI, the HDMI logo and High-Definition Multimedia Interface are trademarks or registered trademarks of HDMI Licensing LLC.” • The “HD ready” Logo is a trademark of EICTA. • The “HD TV” Logo is a trademark of EICTA. •... - Page 29 If the product is used for business purposes and you want to discard it: Please contact your SHARP dealer who will inform you about the take-back of the product. You might be charged for the costs arising from take-back and recycling.
Need help?
Do you have a question about the LC-19SH7E-BK and is the answer not in the manual?
Questions and answers