Table of Contents
Advertisement
Quick Links
Advertisement
Table of Contents

Related Manuals for Gaggenau DF480700


Summary of Contents for Gaggenau DF480700
- Page 1 Gaggenau en-us User manual DF480700 Dishwasher...
-
Page 2: Table Of Contents
en-us Table of contents 1 IMPORTANT SAFETY INSTRUCTIONS..... 4 12.4 Adding Detergent............. 24 1.1 Safety definitions............ 4 12.5 Detergent table ............ 25 1.2 General information............ 4 13 Dishware.............. 25 1.3 Intended use .............. 4 13.1 Damage to glass and dishware........ 25 1.4 Restrictive Use............ 4 13.2 Loading dishware.......... - Page 3 en-us 22.2 How Long the Warranty Lasts ........ 43 22.3 Extended Warranty .......... 43 22.4 Repair/Replace as Your Exclusive Remedy ... 44 22.5 Out of Warranty Product ........ 44 22.6 Warranty Exclusions .......... 44 22.7 Obtaining Warranty Service - GG...... 45...
-
Page 4: Important Safety Instructions
en-us IMPORTANT SAFETY INSTRUCTIONS READ AND SAVE THESE INSTRUCTIONS Read all instructions carefully before use. These precau- Up to an altitude of max. 8,200 ft (2500 m) above sea ¡ tions will reduce the risk of electrical shock, fire and injury level. to persons. -
Page 5: Risk To Children
en-us IMPORTANT SAFETY INSTRUCTIONS READ AND SAVE THESE INSTRUCTIONS WARNING ▶ Do not use harsh chemicals such as bleach-based Under certain conditions, hydrogen gas may be produced products to clean your dishwasher. Some bleach-based in a hot water system that has not been used for two products can damage your dishwasher and may weeks or more. -
Page 6: Safety Systems
en-us IMPORTANT SAFETY INSTRUCTIONS READ AND SAVE THESE INSTRUCTIONS 1.9 Safety systems Protect children from possible hazards resulting from the appliance. The appliance is equipped with a Childproof lock → Page 7 . -
Page 7: Preventing Material Damage
Preventing material damage en-us 2 Preventing material damage 4 Environmental protection and en- Preventing material damage Environmental protection and energy-saving ergy-saving Preventing material damage NOTICE: Environmental protection and energy-saving Harsh chemicals such as bleach-based products can dam- 4.1 Saving energy age your dishwasher. Do not use harsh chemicals such as bleach-based ▶... - Page 8 en-us Environmental protection and energy-saving Sensor setting Description Standard Optimal setting for mixed loads and heavily soiled dishware. Saves both energy and water. Sensitive Adjusts the program strength for effective removal of food rem- nants even with low soiling levels. Energy and water consumption are adjusted accordingly.
-
Page 9: Familiarizing Yourself With Your Appliance
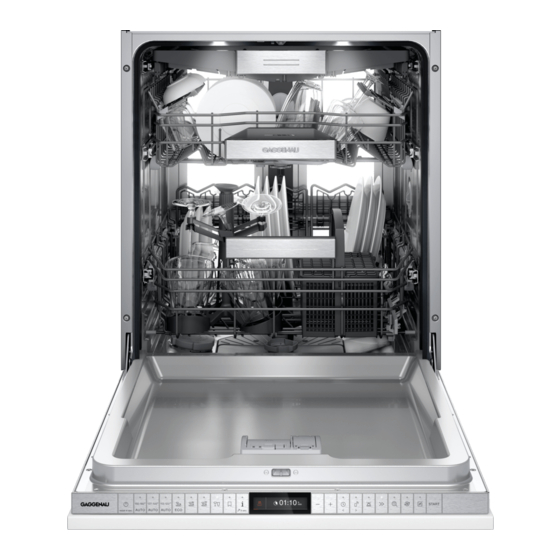
Familiarizing yourself with your appliance en-us 5 Familiarizing yourself with your appliance Familiarizing yourself with your appliance Familiarizing yourself with your appliance 5.1 Appliance Here you can find an overview of the parts of your appliance. Rating plate Rating plate with E number and FD number → Page 42 . You will need this data to contact Customer service → ... -
Page 10: Controls
en-us Familiarizing yourself with your appliance Dispenser for special salt Special salt is added to the dispenser for special salt. → "Water softening system", Page 22 Lower spray arm The lower spray arm washes the dishware in the lower rack. If the dishware has not been washed properly, clean the spray arms. - Page 11 Familiarizing yourself with your appliance en-us ON/OFF button and reset button Switching on the appliance → Page 27 Switching off the appliance Terminating the wash cycle → Page 28 Cycle buttons Cycles Info button If you press , the display shows information about se- lected cycles, basic settings and additional options.
-
Page 12: Dishwasher Cycles
en-us Dishwasher Cycles 6 Dishwasher Cycles Dishwasher Cycles Below is an overview of the different cycles available on your dishwasher. Dishwasher Cycles The running time may vary depending on the cycle selected. The running time depends on the water temperature, the quantity of dishware, the level of dirt and the option selected. The running time will change if the rinse aid system is switched off or rinse aid needs to be added. -
Page 13: Energy Guide
Options en-us Cycle Purpose Cycle sequence Usage 1) Hour/min. 2) Electrical/kWH 3) Water/gal Dishware: Time-optimized: 1) 0:30 ¡ Cleaning delicate dishware, Cleaning 113 °F 2) 0.400 ¡ ¡ ¡ Quick Wash silverware, temperature-sen- Intermediate rinse 3) 2.7 ¡ ¡ sitive plastics and glasses. Final rinse 124 °F ¡... -
Page 14: Options
en-us Features Raise or lower the rack evenly to the right level. Option → "Rack heights", Page 21 Energy and water consumption ¡ are increased. Features 8 Features You can find an overview of the possible features of your Features appliance and how to use them here. These features depend on your appliance model. -
Page 15: Lower Rack
Features en-us Installing the upper rack 8.2 Lower rack Pull the guide rails of the upper rack out of the appli- Arrange pans and plates in the lower rack. ance . Insert the upper rack . Silverware basket Note the position of the detent pins. Lift the rack slightly and guide the rear detent pins into the rear locking hooks of the guide rails ... -
Page 16: Silverware Basket
en-us Features Lift the rack out of the front holders and pull forward slightly. 8.4 Silverware drawer Lift the rack out of the rear holders. Arrange silverware in the silverware drawer. Slide the guide rails into the appliance. Installing the lower rack Pull the guide rails of the lower rack out of the appli- ance. - Page 17 Features en-us To fold down the front tines, push the lever forward and Lower the silverware drawer and pull out. fold down the tines . Slide the guide rails into the appliance. Installing the silverware drawer If you want to return the silverware drawer to its original position, fold the side shelf back up until it clicks into posi- Pull the guide rails of the silverware drawer out of the tion.
-
Page 18: Cup Shelf
en-us Features Slide the silverware drawer into the appliance . 8.6 Flip tines Use the flip tines to position dishware securely, e.g. plates. 8.5 Cup shelf You can fold the tines down to arrange pans, bowls and Use the cup shelf and the space underneath for small glasses better. -
Page 19: Baking Sheet Spray Head
Features en-us 8.7 Baking sheet spray head 8.8 Optional extra cleaning area Use the baking sheet spray head to clean large items of Use the Optional extra cleaning area in the upper rack to dishware, e.g. trays, racks and plates. clean all types of glasses gently yet thoroughly. Arrange max. -
Page 20: Stemware Basket
en-us Features Pull the tab on the Optional extra cleaning area up 8.9 Stemware basket and forward . Use the stemware basket to ensure perfect dishwashing results for your stemware. Set the slider to ON. Clean under running water. Place the Optional extra cleaning area in the upper rack and lock in position ... -
Page 21: Rack Heights
Before using for the first time en-us Turn the rotating fixing arm clockwise and push down Unloading the stemware basket . Note: Observe the information on how to unload dishware. → "Removing dishware", Page 26 Take the stemware basket by the handle out of the lower rack. -
Page 22: Water Softening System
en-us Water softening system Start the Program with the highest cleaning temperature 10 Water softening system Water softening system without dishware. To remove any marks from water or other residues, we Hard water leaves limescale on dishware as well as the Water softening system recommend you operate the appliance without dishware washing tank, and parts of the appliance may become before using it for the first time. -
Page 23: Switching Off The Water Softening System
Rinse aid system en-us Add rinse aid up to the max mark. 10.4 Switching off the water softening sys- If you do not need to use the water softening system, e.g. you already have a whole house water softening system, you can turn the system off. Note To avoid damage to the appliance, only switch off the water softening system in the following cases:... -
Page 24: Detergent
en-us Detergent According to manufacturers, combination detergents ¡ 12 Detergent Detergent with salt replacement substances can only be used up to a certain water hardness, usually 26 °E, without Find out which detergents are suitable for your appliance. Detergent adding special salt. For the best washing and drying re- sults we recommend using special salt from a water 12.1 The correct detergents hardness of 17 °E. -
Page 25: Detergent Table
Dishware en-us Close the lid of the detergent dispenser. Cause Recommendation Plastic dishware not re- ¡ sistant to heat Dishware made from ¡ copper or tin Dishware soiled with ¡ ash, wax, lubricating grease or paint Very small items of dish- ¡... -
Page 26: Removing Dishware
en-us Dishware For better washing and drying results, position items To prevent water dripping onto dishware, unload it start- ¡ with curves or recesses at an angle so water can run ing at the bottom and working up. off. Check the washing tank and accessories for soiling and clean if necessary. -
Page 27: Basic Operation
Basic Operation en-us Additional loading patterns for 10 place settings: Lower rack Basic Operation 14 Basic Operation Basic Operation 14.1 Protection against unintentional opera- tion Your appliance is equipped with a function that helps to prevent unintentional operation, e.g. by children. After starting the appliance, the door has to be closed within 4 seconds, otherwise the operation will be paused. -
Page 28: Setting Options
en-us Basic Operation 14.5 Setting options 14.10 Displaying wash cycle information You can set options to complete the chosen cycle. You can show information about cycles and options on the display. Note: The available options depend on which cycle is se- Press . lected. -
Page 29: Basic Settings
Basic settings en-us 15 Basic settings Basic settings You can configure your appliance to meet your needs. Basic settings 15.1 Overview of the basic settings The basic settings depend on the features of your appliance. Basic setting Selection Description Time setting 00:00 - 24:00 Set the current time. -
Page 30: Changing The Basic Settings
en-us Home Connect™ Basic setting Selection Description Greeting Switch display of the brand name logo on or off when the appliance is switched on. Factory setting Reset Restore changed settings to the factory settings. The settings for initial use must be configured. Factory setting (may vary according to model) 15.2 Changing the basic settings 16.1 Home Connect™... -
Page 31: Remote Start
Cleaning and maintenance en-us Security certificate of the Wi-Fi communication module ¡ 16.3 Remote start (to ensure a secure data connection). The current software and hardware version of your ap- ¡ You can use the Home Connect™ app to start the appli- pliance. ance with your mobile device. -
Page 32: Machine Care
To avoid these prob- Care and Machine Cleaner for Dishwashers online at lems and reduce odors, we recommend cleaning your ap- https://www.gaggenau.com/global/store or from customer pliance at regular intervals. service. Machine Care combined with machine cleaning products Machine Care is a program which removes various de- will provide the right care for your appliance. -
Page 33: Cleaning The Spray Arms
Cleaning and maintenance en-us Turn the coarse filter anticlockwise and remove the Insert the filter system into the appliance and turn the filter system . coarse filter clockwise. Make sure that no foreign objects fall into the sump. Make sure that the arrow markings match up. ‒... -
Page 34: Troubleshooting
en-us Troubleshooting 18 Troubleshooting Troubleshooting You can eliminate minor issues on your appliance your- Troubleshooting self. Please read the information on eliminating issues be- fore contacting Customer Service. This may avoid unnec- essary repair costs. Issue Cause and troubleshooting Appliance door does not open. Childproof lock is activated. - Page 35 Troubleshooting en-us Issue Cause and troubleshooting E:3200 or indicator for water sup- The flow rate must be at least 10 l/min when the water supply is open. ply lights up. Filters in the water connection of the supply or AquaStop hose are blocked. Switch off the appliance.
- Page 36 en-us Troubleshooting Issue Cause and troubleshooting Dishware is not dry. Cycle or cycle option has no drying phase, or drying phase is too short. Select a wash cycle with drying. → Page 12 ▶ Some option buttons decrease the drying result. Water collects in recesses of dishware or silverware. Position dishware at an angle where possible.
- Page 37 Troubleshooting en-us Issue Cause and troubleshooting Food remnants on dishware. Adjust the sensitivity of the sensors. ▶ → "Sensors", Page 7 Tall narrow containers in corner areas are not rinsed out adequately. Do not position tall narrow containers at too great an angle or in corner areas. ▶...
- Page 38 en-us Troubleshooting Issue Cause and troubleshooting Tea residue or lipstick marks on Dishwashing temperature is too low. dishware. Select a program with a higher dishwashing temperature. ▶ Too little detergent is being used or is unsuitable. Use a suitable Detergent and follow the manufacturer's instructions for the ▶...
- Page 39 Troubleshooting en-us Issue Cause and troubleshooting Irreversible clouding of glassware. Glasses are not dishwasher-proof, only suitable for dishwashers. Use dishwasher-proof glasses. ▶ Glasses are usually only suitable for cleaning in a dishwasher, i.e. long-term wear or long-term changes must be expected. Avoid a lengthy steam phase (standing time after wash cycle ends).
- Page 40 en-us Troubleshooting Issue Cause and troubleshooting Appliance does not start. The breaker has tripped. Check the relevant breaker. ▶ Power cord is not inserted. Check whether the power outlet is working. Check whether the power cord plug is properly inserted in the power outlet and on the rear of the appliance.
-
Page 41: Transportation, Storage And Disposal
Transportation, storage and disposal en-us Prise off the pump cover using a spoon and grip it by 19.2 Vacation and Storage the crosspiece. NOTICE: Preparing your unit for vacation Before leaving for vacation during warmer weather, be- ▶ sides turning off the main valve, also turn off water sup- ply at the nearest point to the dishwasher. -
Page 42: Model Number (E-Nr.), Production Number (Fd) And Consecutive Numbering (Z-Nr.)
If you contact the Customer Service, you will require the model number (E-Nr.), the production number (FD) and the consecutive numbering (Z-Nr.) of your appliance. USA: 1-877-442-4436 www.gaggenau.com www.gaggenau.com/zz/store 1-877-442-4436 www.gaggenau.com www.gaggenau.ca For assistance with connecting to Home Connect™, you can also view instructions here: www.home-connect.com/us/en/help-support/set-up... -
Page 43: Technical Specifications
Technical specifications en-us 21 Technical specifications Technical specifications Facts and figures for your appliance can be found here. Technical specifications Weight Max.: 60 kg Voltage 120 V, 50 Hz or 60 Hz Power rating 1440 W Fuse 12 A Water pressure Min. 7.25 psi (50 kPa) ¡ Max. 145 psi (1000 kPa) ¡... -
Page 44: Repair/Replace As Your Exclusive Remedy
en-us Statement of Limited Product Warranty A failure to comply with any applicable state, local, city, ¡ 22.4 Repair/Replace as Your Exclusive Rem- or county electrical, plumbing and/or building codes, regulations, or laws, including failure to install the prod- uct in strict conformity with local fire and building codes During this warranty period, BSH or one of its authorized and regulations. -
Page 45: Obtaining Warranty Service - Gg
Statement of Limited Product Warranty en-us 22.7 Obtaining Warranty Service - GG To obtain warranty service for your product, you should contact Gaggenau Customer Support at 1-877-442-4436 to schedule a repair. - Page 46 Wi-Fi® Module FCC/IC Statements Model: SMB FCC ID: 2AHES-SMB IC: 21152-SMB The Home Connect module is a communication device designed to provide communication between appliances and smart devices. This module is integrated at the factory, under direct control of B/S/H Home Appliances Corporation, and is not user serviceable or upgradable.
- Page 48 BSH Home Appliances Corporation 1901 Main Street, Suite 600 Irvine, CA 92614 www.gaggenau.com 1-877-442-4436 © 2021 BSH Home Appliances Corporation...
Need help?
Do you have a question about the DF480700 and is the answer not in the manual?
Questions and answers