Polaris PGC 34-100-2NV Installation Instructions And Use & Care Manual

Polaris PGC 34-100-2NV Installation Instructions And Use & Care Manual

Commercial gas water heater

Advertisement

WARNING: If the information in these
instructions is not followed exactly, a fire
or explosion may result causing property
damage, personal injury or death.
Do not store or use gasoline or other
flammable vapors and liquids in the
vicinity of this or any other appliance.
WHAT TO DO IF YOU SMELL GAS
Do not try to light any appliance.
Do not touch any electrical switch;
do not use any telephone in your
building.
Immediately call your gas supplier
from a neighbor's telephone. Follow
the gas supplier's instructions.
If you cannot reach your gas
supplier, call the fire department.
Installation and service must be performed
by a qualified installer, service agency or
the gas supplier.
PRINTED IN U.S.A. 0514
United States
PGC* 34-100-2NV or 2PV
PGC* 34-130-2NV or 2PV
PGC* 34-150-2NV or 2PV
PGC* 50-130-2NV or 2PV
PGC* 50-150-2NV or 2PV
PGC* 50-175-3NV or 3PV
PGC* 50-199-3NV or 3PV
* Indicates warranty period
Note:
The manufacturer of this water heater recommends that it
be professionally installed by trained and qualified service
professionals.
Instructions and
Use & Care Guide
To obtain technical, warranty or service assistance during or
after the installation of this water heater, visit our website at:
When calling for assistance, please have the following
information ready:
1. Model number
2. 7 Digit product number
3. Serial number
4. Date of installation
5. Place of Purchase
Table of Contents........................................................... 2
INSTALLER:
OWNER:
LOW LEAD
CONTENT
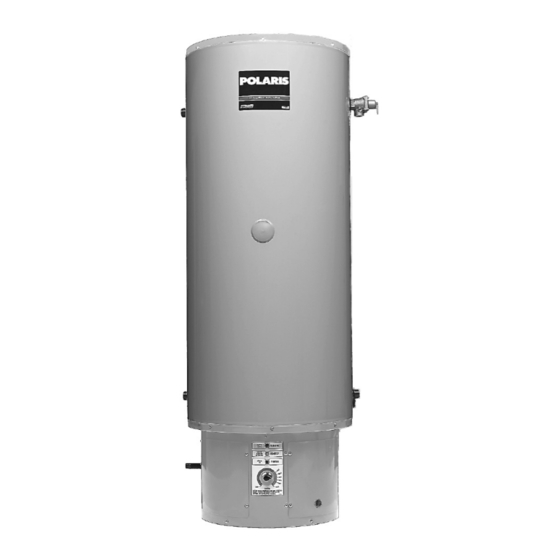
This manual covers model numbers:
Polaris
Commercial Gas
Water Heater
Installation
http://www.americanwaterheater.com
or call toll free:
1-800-456-9805
Affix these instructions to or adjacent to the water
heater.
Retain these instructions and warranty for future
reference. Retain the original receipt as proof of
purchase.
®
322762-001
1

Advertisement

Table of Contents
loading
Need help?

Need help?

Do you have a question about the PGC 34-100-2NV and is the answer not in the manual?

Questions and answers

Subscribe to Our Youtube Channel

Summary of Contents for Polaris PGC 34-100-2NV

  • Page 1: Water Heater Safety

    PGC* 50-199-3NV or 3PV * Indicates warranty period Note: The manufacturer of this water heater recommends that it be professionally installed by trained and qualified service professionals. Polaris ® Commercial Gas Water Heater Installation Instructions and WARNING: If the information in these instructions is not followed exactly, a fire Use &...
  • Page 2: Table Of Contents

    Gas Supply and Piping ............. 18-19 Electrical Connections/Wiring Diagram ........20-21 Installation Checklist ............... 22 Operating Your Water Heater ............23-25 Polaris® Operating Instructions ............24 Maintenance of Your Water Heater ..........25-26 Troubleshooting ..................27 Software Operation Sequence ............. 28 Parts List and Diagram .................
  • Page 3: Installation Instructions

    INSTALLATION INSTRUCTIONS Consumer Information A data plate identifying your water heater can be found on the front of the heater. When referring to your water heater, OBSERVE ALL GOVERNING CODES AND ORDINANCES. always have the information listed on the data plate readily This water heater is design-certified by CSA International available.
  • Page 4: State Of Massachusetts Installation Requirements

    INSTALLATION REQUIREMENTS FOR THE COMMONWEALTH OF MASSACHUSETTS For all side wall terminated, horizontally vented power vent, direct vent, and power direct vent gas fueled water heaters installed in every dwelling, building or structure used in whole or in part for residential purposes, including those owned or operated by the Commonwealth and where the side wall exhaust vent termination is less than seven (7) feet above finished grade in the area of the venting, including but not limited to decks and porches, the following requirements shall be satisfied: INSTALLATION OF CARBON MONOXIDE DETECTORS At the time of installation of the side wall horizontal vented gas...
  • Page 5: Location Requirements

    • Consider the inlet and exhaust vent system piping when selecting the water heater location. The venting system must be able to run from the water heater to the termination with a minimal length and number of elbows. Input rates are reduced as vent system length increases.
  • Page 6: Condensate Line

    Clearances and Accessibility CONDENSATE LINE Notice: Minimum clearances from combustible materi- Important: Do not run the condensate drain in areas als are stated on the data plate located on the front of the that are likely to freeze. Frozen condensate will block the water heater.
  • Page 7: Vent Pipe System

    When installing the drain line, note the following: accordance with CAN/CSA-B149.1-current edition. • Plastic pipe or tubing must be used to connect the When replacing an existing Polaris ® unit, it is recommended condensate drain to a suitable drain or condensate that the venting system be reviewed for compliance with pump.
  • Page 8: Intergrated Filter Installation

    Integrated Filter Installation Figure 4A: Remove Plastic Cap When installing the adaptor rubber boot, note the following: • Remove and discard the plastic cap from the outer clamshell housing (see figure 4A). • To connect the heater to the air inlet, use the vent adaptor rubber boot provided in the base skirt.
  • Page 9 Vent Pipe Material All joints in the inlet and outlet piping must be properly cemented. Size and cut all piping before cementing. The following plastic materials may be used for both the 1. Cut the pipe end square and remove all ragged edges combustion air inlet and exhaust outlet piping subject to and burrs.
  • Page 10 Vent Termination Locations 1. Use only 2 inch pipe or a 2 inch concentric vent on the vent termination for 100,000 - 150,000 BTU/ The air inlet and exhaust outlet must be installed with the Hr models. Do not expose any 3” X 2” reducers or following minimum clearances (see figure 6): bushings to outdoor ambient temperatures.
  • Page 11: Vent Terminations

    Note: See “Venting Additional Polaris ® Units” on Page 12 coupling to prevent the pipe from being pushed back into the for correct terminations if installing more than one Polaris ® structure. The standard horizontal exhaust outlet termination gas water heater.
  • Page 12 Minimum Above Grade To Keep Terminal Openings Above Anticipated Snow Levels. ® Venting Additional Polaris Units When using three or more Polaris units, install vent ® terminations per Method C or Method D: ® When using two (2) Polaris units, install vent terminations...
  • Page 13 Figure 12: Through the Roof Termination 12” (30.5cm) Minimum clearance above anticipated snow level. 36” (.9144 m) Min. 24” (61cm) Max. Note: For installation of more than two Polaris units, ® follow the pattern established in Method G. 2” (5.08 cm) Max.
  • Page 14: Gas Input Rate

    100k, 130k, and 150k models is shown in figure 15. WATER PIPING SYSTEM Piping Installation 6. The Polaris gas water heater is shipped with a factory- ® installed Temperature and Pressure Relief Valve. Piping, fittings, and valves should be installed according to Install a discharge line in the opening in the T &...
  • Page 15 Adequate Drain Mixing Valve Installation Closed System/Thermal Expansion A mixing valve has been provided for use with the Polaris ® Gas water heater and must be installed, per the As water is heated, it expands (thermal expansion). In a manufacturer’s instructions, in the domestic hot water line.
  • Page 16 Do not use with piping that has been treated with chromates, boiler seal or other chemicals and do not When installing the Polaris® with a storage tank, see figure add any chemicals to the water heater piping. 18 for piping suggestions.
  • Page 17 Notes on Figure 18: Figure 18: Polaris with Auxillary Storage Tank - One or Two ® Temperature System (With or Without Building Recirculation) If tank temperature is set above 120°F (48.9°C) and water is sup- plied for domestic use (hand wash- ing, showering, etc.) a mixing valve...
  • Page 18: Gas Supply And Piping

    GAS SUPPLY AND PIPING Figure 19: Gas Piping Installation Explosion Hazard Use a new AGA or CSA approved gas supply line. 3” (7.62 cm) Minimum Install a shut-off valve. Do not connect a natural gas water heater to a L.P. Gas Supply. Gas Pressure Do not connect an L.P.
  • Page 19 Gas Pressure Testing Important: This water heater and its gas connection must be leak tested before placing the appliance in operation. If the code requires the gas lines to be tested at a • pressure of 14” W.C. (3.486 kPa) or greater, the water heater and its manual shut-off valve must be discon- nected from the gas supply piping system and the line capped.
  • Page 20: Electrical Connections/Wiring Diagram

    ELECTRICAL CONNECTIONS 4. Connect this circuit (directly from the electrical service box) to an electrical disconnect switch. 5. Ground the water heater by connecting the electrical Electrical Shock Hazard service ground wire to the green ground wire (provided). Disconnect power before Note: The power supply to this water heater must be servicing.
  • Page 21 WIRING DIAGRAM HEATER SUPPLIED WITH T92 SERIES RELAY Figure 20A NEUTRAL TO 120/60 FUSED BLOWER BLUE POWER SUPPLY DISCONNECT BLACK WHITE N.O. BLOWER WHITE BLACK GREEN RELAY BROWN WHITE BLACK/WHITE RELAY COIL GROUND NEUTRAL (WHITE) GREEN TO 120/60 GREEN IGNITION POWER IGNITER SUPPLY...
  • Page 22: Installation Checklist

    INSTALLATION CHECKLIST Water Heater Location Alternate Horizontal Correct relationship - outlet to inlet. Requirements 12” Min. (30.5 cm) above anticipated snow level. 2” exhaust outlet/air inlet pipe sloped down towards Centrally located with the water piping system. Located water heater at 1/4” per foot (21 mm per meter). 3” as close to the gas piping and vent pipe system as pos- piping sloped down towards the heater at 1/8”...
  • Page 23: Operating Your Water Heater

    OPERATING YOUR WATER HEATER Read and understand these directions thoroughly before When the thermostat calls for heat, the blower will run for attempting to operate the water heater (see Operating 6 seconds to purge the system of any accumulated gas or Instructions on Page 24).
  • Page 24: Polaris® Operating Instructions

    * Temperatures shown are approximates and may vary. Stacking occurrence of igniter failure due to excessive condensate. Important: A mixing valve (provided) must be installed in Stacking occurs when a series of short draws of hot water the hot water outlet to reduce the risk of scald injury when (3 gallons [11.3 liters] or less) are taken from the water setting the thermostat in excess of 120°F (48.9°C).
  • Page 25 OPERATIONAL CONDITIONS Figure 23: Drain Valve Access Water Heater Sounds During the normal operation of the water heater, sounds or noises may be heard. These noises are common and may result from the following: 1. Normal expansion and contraction of metal parts during periods of heat-up and cool-down.
  • Page 26: Maintenance Of Your Water Heater

    MAINTENANCE OF YOUR WATER HEATER 3 Month Inspection Replacing the Gas Valve Important: The rubber gasket that seals the gas valve to At least every 3 months, a visual inspection should be the venturi manifold must be used (previous gaskets may made of the combustion air inlet as well as the exhaust and be reused, if in good condition).
  • Page 27: Troubleshooting

    TROUBLESHOOTING Table 5: Ignition Control Module (ICM) LED Error Codes: (Flashes visible through viewport in access door) FLASHES INDICATED PROBLEM CONTROL REACTION Pressure Switch Closed Pressure Switch Open Failed Ignition Gas Valve Hardware Fault Flame Sense Hardware Fault False Flame SL** Ignition Control Hardware Fault Ignition Control Software Fault...
  • Page 28: Software Operation Sequence

    SOFTWARE OPERATION SEQUENCE IGNITION CONTROL MODULE SOFTWARE OPERATION SEQUENCE...
  • Page 29: Parts List And Diagram

    REPAIR PARTS LIST/DIAGRAM When ordering repair parts always give the following information: Model, serial, and product numbers Type of gas Item number Parts description Repair Parts List ITEM PARTS DESCRIPTION 1” NPT x 2.5” BRASS NIPPLE THERMOSTAT SENSOR BUSHING O-RING THERMOSTAT SENSOR/ECO INVERTED FLARE NUT PLUG...
  • Page 30: Polaris ® Models And Dimensions

    POLARIS MODELS & DIMENSIONS Figure 26 Table 6: WATER T&P INLET/EX- INPUT APPROX EXTERIOR CONNECTIONS SUPPLY HAUST MODEL GAL. (MBTU VENT SHIP. NUMBER CAP. PER HR.) DIA. WEIGHT PGC* 34-100-2NV OR 2PV 2 OR 3 48-1/2 15-3/4 40-1/2 6-3/8 5-1/2 / 6-5/8...
  • Page 31 NOTES...
  • Page 32 Polaris ® Commercial Gas Water Heater P.O. Box 1597, Johnson City, TN 37605 To obtain technical, warranty or service assistance during or after the installation of this water heater, visit our website at: http://www.americanwaterheater.com or call toll free: 1-800-456-9805 Copyright © 2014 American Water Heater Company All Rights Reserved...

Table of Contents