Table of Contents
Advertisement
Quick Links
Safety Precautions
Do not subject the device to severe impact or drop it from heights.
Do not use the device in extreme hot or cold, dusty or damp conditions. Do not
expose it to direct sunlight.
Avoid using the device near strong magnetic fields.
Normal functioning of the product may be disturbed by ESD. If so, simply reset
and restart the device following the instruction manual. During file transmission,
please handle with care and operate in a static-free environment.
Keep the device away from water and other liquids. In the event that water or
other liquids enter the device, power off the product immediately and clean the
device.
Do not use chemicals to clean the device in order to avoid corrosion. Clean it
with a dry cloth.
Do not install this equipment in a confined space such as a book case or similar
unit. The ventilation should not be impeded by covering the ventilation openings
with items such as newspaper, table-cloths, curtains etc.
No naked flame sources, such as lighted candles, should be placed on the
apparatus.
Attention should be drawn to environmental aspects of battery disposal.
Use the apparatus in moderate climates.
We are not responsible for damage or lost data caused by malfunction, misuse,
modification of the device or battery replacement.
Do not attempt to disassemble, repair or modify the product. This will invalidate
the warranty.
If the device will not be used for an extended period of time, please charge the
battery at least once per month to maintain battery life.
Charge the battery if:
a) The battery level icon displays
b) The device powers off automatically when restarted.
c) There is no response when pressing keys with keys unlocked and battery full.
Do not interrupt the connection when the device is being formatted or
transferring files. Otherwise, data may be corrupted or lost.
When the device is used as a portable HD, please use only per the instructions.
Otherwise, permanent data loss could occur.
Please use and install data using the attachments/accessories provided and only
according to the manufacturer's instruction.
Please refer to the information on the bottom of the device for electrical and
safety information before installing data or operating the device.
To reduce the risk of fire or electric shock, do not expose this device to rain or
moisture. The device should not be exposed to dripping or splashing. Never
place objects filled with liquids, such as vases, on the device.
There is danger of explosion if the battery is replaced incorrectly. Replace only
with the same or equivalent type.
(An empty battery)
1
Advertisement
Table of Contents

Related Manuals for Archos Arnova 7F G3


Summary of Contents for Archos Arnova 7F G3
-
Page 1: Safety Precautions
Safety Precautions Do not subject the device to severe impact or drop it from heights. Do not use the device in extreme hot or cold, dusty or damp conditions. Do not expose it to direct sunlight. Avoid using the device near strong magnetic fields. Normal functioning of the product may be disturbed by ESD. - Page 2 The battery (battery or batteries or battery pack) should not be exposed to excessive heat such as sunlight, fire or the like. Please follow responsible procedures for battery disposal. If the power adaptor disconnected from the device, the device will remain operable as long as the battery has sufficient charge.
-
Page 3: Listening Cautions
Listening Cautions This product respects the current regulations for limiting the output volume of consumer audio devices to a safe level. By listening to your device with headphones or earbuds at high volumes, you run the risk of permanent damage to your ears. -
Page 4: Table Of Contents
Table of Content Safety Precautions...................... 1 Listening Cautions ...................... 3 Feature Summary ....................... 5 Accessories ........................ 5 Buttons & Ports......................5 Charging Battery......................6 Installing Memory Card ....................6 Transferring Files ......................6 Turning On/Off ......................7 Home Screen......................7 Unlocking the Screen.................... -
Page 5: Feature Summary
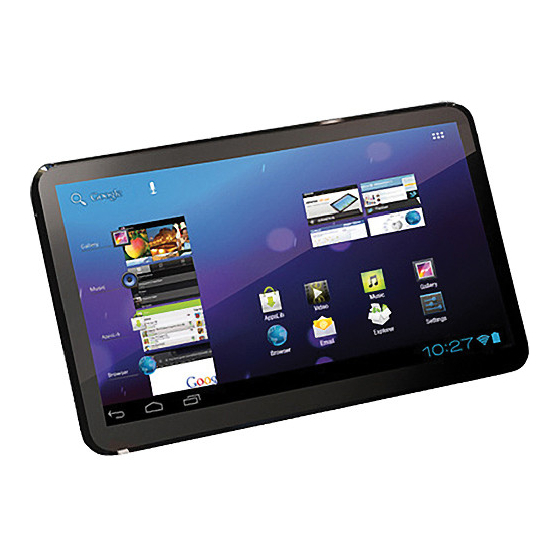
Feature Summary Wi-Fi network With the built-in Wi-Fi technology, this device can provide you easy access to internet. 7.0” Touch Screen Touch or slide your finger on the screen, the screen responds instantly. Third-party Application Support With the built-in Android OS, you can install a large number of third-party applications in this device. -
Page 6: Charging Battery
Charging Battery The device has a built-in rechargeable battery. No extra battery installation is required. Just charge the device when it indicates low battery. To charge the battery, connect the device to any standard wall outlet via the DC-IN port using the power adaptor. It takes about 5 hours to fully charge the battery. When the battery is fully charged, the charge indicator should light up in orange. -
Page 7: Turning On/Off
hard drive. (4) Disconnect the device from the PC safely. Note: 1. The pre-installed applications and Android OS occupy a considerable part of capacity – about 1.2GB, it is normal that you see huge difference between available memory space and total capacity. 2.Before connecting your device to PC, you should make sure the application Windows Media Player of your PC has been upgraded to V10.0 or above version. - Page 8 Customizing Home Screen Items To add a Home Screen item (shortcuts, widgets, folders etc.), you can tap the application icon to display all applications and then hold your tap on an item until it is placed on home page. Hold down To move a Home Screen item, hold your finger onto it until it is highlighted, then drag it to the desired location, and release it.
-
Page 9: Unlocking The Screen
Display all Applications The device has many useful applications pre-installed. You can tap the Application to display them. : Holding your finger on an item can add it to the desktop as a shortcut. Unlocking the Screen The screen will be locked after the device is idle for a few seconds. You need to unlock the screen by dragging the lock icon rightwards before you continue to use the device. - Page 10 For Wi-Fi application, you need to configure a Wi-Fi network first, and you will have to stay in a Wi-Fi service zone. Whenever it is within the coverage of a WiFi network you have configured, the device will attempt to make a connection. Make WI-FI Connection Before launching an Internet application such as the web browser, you first need to activate the Wi-Fi and configure a Wi-Fi network.
-
Page 11: Using The Virtual Keyboard
To display menus, tap To enter a new address, tap the address bar and then type in address. Note: Not all wireless networks offer access to the Internet. Some Wi-Fi networks only link several computers together, without any Internet connection. Using the Virtual Keyboard Tapping on any text input field can open the virtual board. - Page 12 Before reading, you need to transfer or download e-books to the device. You can copy e-books from your computer’s local drive to the device by USB connection (see the “Transferring files” section mentioned before). Note: Make sure your e-books are in format of PDF, EPUB, TXT, FB2, RTF or PDB supported by the device.
-
Page 13: Playing Music
Playing Music Tap the Music icon in the application page to launch the music player. Music Library You should enter the music library once you start the music player. The Music Library shows your music files sorted by categories (Artist, Album, etc.) if your music files contain these song information tags. -
Page 14: Playing Video
Playback Screen a. Now Playing List b. Shuffle songs /Not shuffle a b c d c. Repeat /Not repeat d. Display lyric e. Artist Name f. Album Name g. Title (holding your tap on the title can search for information about the track from the h i j Internet.) h. -
Page 15: Hdmi Output
Playback Screen a. VOL- b. Progress bar c. VOL+ d. Bookmark e. Brightness f. Previous Video/Fast Rewind g. Play/Pause h. Next video/Fast forward i. View Mode j. Exit Note: Some video files may not be played correctly with the device. Refer to the Technical Specifications at the end of the manual, and make sure the video resolution, encoding format or file type is supported. -
Page 16: Viewing Photos
screen of television. (5) To switch the display back from the TV to the tablet, just disconnect the HDMI connection. Viewing Photos Tap the Gallery icon in the application page to launch the Photo Gallery. Viewing Photos Photos should be listed in thumbnail. You can slide your finger on the screen left or right to browse photos. -
Page 17: Using The Camcorder/Camera
Display Menu When you are viewing the picture, you can tap on the screen or the Menu icon show a menu. Using the Camcorder/Camera Tap the Camera in the application page to launch the Camera. Preview window Viewfinder Zoom Start/Stop Settings Photography mode VCR mode... - Page 18 Applications” section). You can go back or forward one level in the interface by tapping on the Back icon or Next icon You can go back one level in the directory by tapping on the LevelUp button Wherever you are in the interface, you can go back directly to the Home screen by tapping Tapping can hide/display the toolbar.
-
Page 19: Sending/Receiving E-Mails
Select “Rename” from the pop-up menu. Tap the input field to display the virtual keyboard, and then choose letters from the virtual keyboard to rename the file/folders. Tap “OK” to confirm the new name. Select Multiple Items You can select more than one file or folder together. In the top toolbar, tap the Multi icon “... -
Page 20: Managing 3 Rd Party Applications
Add another Account Following these steps to add another account if you want. (1) Launch the email application and then tap on the Menu icon to display the menu item. Choose “Accounts” to display accounts. (2) Tap on the Menu icon to display the menu item, and then choose “Add account”. -
Page 21: Managing Tasks
online at the Internet or directly on your product. Pre-installed Applications The device has pre-installed applications when it was manufactured. You can see them by tapping the Applications icon . They are video player, audio player, browser, alarm clock, calculator etc. Install Applications You can install applications manually following these steps: (1) Download the installation file directly from the built-in application library (e.g. -
Page 22: Troubleshooting
Troubleshooting Reset this device In the event that the device freezes, you can force the device to shut down by holding the Power button for 15 seconds. If the Power button does not reset your device, use the “pinhole reset” button, located on the back the device. - Page 23 OGG (Q1- Q10): 8~48KHZ FLAC(Compress Level 0~8): 8~48KHZ APE (Version 3.95,3.97,3.98,3.99,normal and fast) : 8~48KHZ AAC(ADIF, ATDS Header AAC-LC and AAC-HE): 8~48KHZ File Format AVI, 3GP, MP4, RM, RMVB, FLV, MOV, AVI(MPEG4,XVID,DIV 1920*1088pixels/30FPS (Max) X3/4/5/6, MS MPEG4 Audio Codec:MP2/MP3/AC3/AAC/PCM MPEG4,XVID,DIVX3/4/5/6: 3GP/MP4(H.264,H.263 1920*1088pixels/30FPS (Max.) ,MPEG4,XVID,DIVX3/4...
-
Page 24: Fcc Statement
FCC Statement This equipment has been tested and found to comply with the limits for a Class B digital device, pursuant to Part 15 of the FCC Rules. These limits are designed to provide reasonable protection against harmful interference in a residential installation. This equipment generates, uses and can radiate radio frequency energy and, if not installed and used in accordance with the instructions, may cause harmful interference to radio communication. - Page 25 National Restrictions This device is intended for home and office use in all EU countries (and other countries following the EU directive 1999/5/EC) without any limitation except for the countries mentioned below: Country Restriction Reason/remark France Military Radiolocation use. Outdoor use limited Refarming of the 2.4 GHz has been to 10 mW e.i.r.p.
Need help?
Do you have a question about the Arnova 7F G3 and is the answer not in the manual?
Questions and answers