Table of Contents
Advertisement
Quick Links
Advertisement
Table of Contents

Related Manuals for LG LG-RD5130


Summary of Contents for LG LG-RD5130
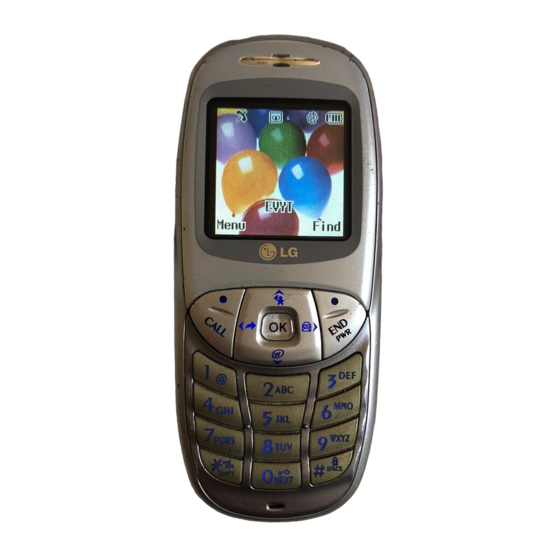
- Page 1 LG-RD5130 User Guide CDMA PHONE...
-
Page 2: Table Of Contents
Contents Introduction Highlights Important Information Check Accessories Before You Start FCC RF EXPOSURE INFORMATION Chapter 1. Getting Started Cautions Phone Overview On screen Icons Chapter 2. Basic Functions Turning the Phone On and Off Making a Call Correcting Dialing Mistakes Receiving Calls Emergency Dialing Speed Dialing... -
Page 3: Chapter 1. Getting Started
??Keep your phone in a safe place when not in use. ??Only use the batteries, antennas, and chargers provided by LG. Using the wrong accessories could void your warranty. ??Only authorized personnel should service the phone and its accessories. Faulty installation or service may result in accidents and consequently invalidate the warranty. - Page 4 In use A call is in progress. No icon indicates the phone is in standby mode. Digital indicator Digital service is available. Analog indicator Analog service is unavailable Indicates that a text message or voice mail has been received Roaming The phone is outside of its home service area.
-
Page 5: Chapter 2. Basic Functions
Chapter 2. Basic Functions Turning the Phone On and Off Turning the Phone On 1. Install a charged battery pack or connect the phone to an external power source such as the cigarette lighter adapter or car kit. 2. Press [END/PWR] for a few seconds until the red light on the top of the phone flashes. ??Fully extend the antenna for the best performance. - Page 6 Dialing a call from Phone Book You can place a call from any memory location either by speed dialing or by pressing [SEND] while looking up the memory location. One-Touch Dialing : One-touch dialing is a convenient feature which enables you to dial frequently used numbers in your speed-dial data by pressing a key .
-
Page 7: Chapter 3. Menu Features
Chapter 3. Menu Features General Guidelines to MENU Access and Settings 1. Press Soft Key 1 [Menu]. The animation of menu category will appear on the display screen. 2. Press Soft key 1 [Ok]. The menu items will appear on the display screen. 3. - Page 8 Profiles ([Menu]+[4]) Allows you to set vibration, volume and alert types refer to sound. Vibrate ([Menu]+[4]+ [1]) Select the alert type to vibration Silent ([Menu]+[4]+ [2]) This menu is the same with General Menu General ([Menu]+[4]+ [3]) Press Soft Key 1[Option] and LCD will display sub menu. Then select menu you want with [? ] [? ] or [? ] key.
- Page 9 2. Service Area ( [Menu]+[5]+ [2] ) You can see the currently provided serviced area. 3. Clock ( [Menu]+[5]+[3] ) You can determine that clock display or not in standby. 4. Wallpaper ( [Menu]+[5]+[4] ) You can set up the screen displayed on the LCD screen in the standby mode. (Theme, Current Profiles display,Banner) 5.
- Page 10 4. Auto redial ( [Menu]+[6]+[2]+[4] ) Set the length of time the phone waits before automatically redialing a number when the attempted call fails. ??off / every 10 seconds / every 30 seconds / every 60 seconds 5. Voice privacy ( [Menu]+[6]+[2]+[5] ) Set the voice privacy feature for CDMA calls as “Enhanced”...
- Page 11 locked the phone when the phone is turned on. “Always” means that the phone is always locked 2. Clear all names ( [Menu]+[6]+[4]+[2] ) Deletes all information saved in the memory location (Entry 9 is designated to Emergency Call). Be careful since any deleted information is not recoverable. 3.
-
Page 12: Chapter 4. Book Features
Chapter 4. Book Features Names ([Menu]+[1]) Add name ([Menu]+[1]+[1]) 1. Press Soft Key 1 [Menu] 2. Press [1] 3. Enter the phone number you want to add. 4. Select number’ s destination (Home, Office, Mobile and Other) 5. Enter name 6. -
Page 13: Chapter 5. Message Features
Chapter 5. Message Features Text message, page and voice mailbox become available as soon as the power is on. You can access the above types of messages using the message key ([? ]). In addition, you can make a call to the call back number by pressing the [Send] during a message check. The phone can store up to 31 messages (Voice message : 1, Text messages 30) with 140 characters per message. -
Page 14: Voice Mail
2. Inbox ([? ]+[2]) A. Press [Select] B. Press [Option] C. Select [View] ? View : view received msg ? Erase : erase received msg ? Reply : send msg to #CB 3. Outbox ([? ]+[3]) A. Press [Select] B. Press [Option] C. -
Page 15: Erase Messages
2) Press [Option] 3) Select [View] ? View : view template ? Erase : erase template ? Add : Add template 4) Add string 5) From this state the same with Write Message 8.Erase Messages ([? ]+[8]) 1) Press [Select] 2) Press [Select] This menu will erase Inbox, Outbox, Archive, Draft and All messages 3) Select [Yes] if you want to erase... -
Page 16: Chapter 6. Functions Used During A Call
Chapter 6. Functions used during a call Scratch pad(During a call : [MENU]+[1] ) You can save memo during a call and this data is saved at call history Mute / Unmute (During a call : [MENU]+[2] ) ??Sometimes it is necessary to mute a call so that caller does not hear you or certain background noise. -
Page 17: Chapter 7. Accessories
The hands-free car kit, model PHF-50W, enables you to attach the phone to the car providing you with hands-free operation. It will also charge a completely discharged battery in 5 hours. Data Cable Kit Connects your phone to your PC.(Model LG-DC200DJ) Headset Connects to your phone, allowing hands free operation. Includes earpiece, microphone and mute key. -
Page 18: Appendix 1. Installation
Appendix 1. Installation 1 Installing a Battery Pack 1) The Battery pack is keyed so it can only fit one way. Align the groove in the battery pack with the rail on the back of the phone until the battery pack rests flush with the back of the phone. 2) Insert the bottom of battery into the openning on the back of the phone. -
Page 19: Appendix 2. Rf Exposure Statement
Connect the red wire to the car battery positive terminal and the black wire to the car ground. Connect the green wire to the car ignition sensor terminal. ( In order to operate HFK please make sure to connect green wire to ignition sensor terminal.) Connect the kit’ s power cable connector to the interface box power receptacle.
Need help?
Do you have a question about the LG-RD5130 and is the answer not in the manual?
Questions and answers