
Related Manuals for Beko WTXS61032W


Summary of Contents for Beko WTXS61032W
- Page 1 Lavatrice Manuale utente Washing Machine User’s Manual WTXS61032W IT / EN Numero del documento= 2820525919_IT / 25-03-17.(16:47)
- Page 2 Questo prodotto è stato fabbricato utilizzando la tecnologia più all'avanguardia in condizioni rispettose per l'ambiente.
- Page 3 Istruzioni per la sicurezza generale Questa sezione comprende istruzioni di sicurezza che aiutano a prevenire gli infortuni e i rischi di danni materiali. Qualsiasi garanzia risulta nulla se queste istruzioni non vengono osservate. 1.1 Sicurezza delle persone e delle cose Non mettere mai l'elettrodomestico su un pavimento coperto da tappeto.
-
Page 4: Sicurezza Dei Bambini
1.2 Sicurezza dei bambini Questo prodotto può essere utilizzato da bambini di età superiore a 8 anni e da persone le cui capacità fisiche, sensoriali e mentali non sono pienamente sviluppate o che mancano di esperienza e conoscenza necessaria a condizione che ricevano supervisione o formazione sull'uso sicuro dell'elettrodomestico e sui rischi che comporta. - Page 5 Non lavare mai l'elettrodomestico versando o cospargendo acqua su di esso! Rischio di shock elettrico! Non toccare mai la spina del cavo di alimentazione con le mani bagnate! Non afferrare il cavo di alimentazione per staccare la macchina, scollegarla sempre tenendo la presa con una mano e tirando la spina con l’altra mano.
-
Page 6: Informazioni Sulla Confezione
Istruzioni importanti per l’ambiente 2.1 Conformità con la Direttiva RAEE Questo prodotto è conforme alla direttiva RAEE UE (2012/19/UE). Questo prodotto presenta un simbolo di classificazione per i rifiuti elettrici ed elettronici (RAEE). Questo elettrodomestico è stato realizzato con parti e materiali di alta qualità che possono essere riutilizzati e sono adatti ad essere riciclati. -
Page 7: Specifiche Tecniche
Specifiche tecniche Conforme al regolamento della commissione delegata (UE) N. 1061/2010 Nome fornitore o marchio commerciale Beko Nome modello WTXS61032W Capacità valutata (kg) Classe efficienza energetica / Scala da A+++ (Massima efficienza) a D (Efficienza minima) A+++ Consumo energetico annuale (kWh) Consumo energetico del programma standard Cotone 60°C a pieno carico (kWh) -
Page 8: Installazione
4.1 Installazione • Rivolgersi al più vicino agente autorizzato per l' a ssistenza per l'installazione dell' e lettrodomestico. • La preparazione del luogo e le installazioni elettriche, idriche e dell' a cqua di scarico sul luogo della installazione sono una responsabilità del cliente. • Assicurarsi che i flessibili di ingresso e scarico dell' a cqua nonché il cavo di alimentazione non siano piegati, schiacciati o strappati quando si riposiziona l' e lettrodomestico dopo le procedure di installazione o pulizia. • Far eseguire installazione e collegamenti elettrici dell' a pparecchio dall' a gente autorizzato per l' a ssistenza. -
Page 9: Collegamento Della Fornitura Idrica
4.1.4 Collegamento della fornitura idrica La pressione idrica necessaria per utilizzare l' e lettrodomestico è compresa tra 1 e 10 bar (0,1 – 1 MPa). Sono necessari 10 – 80 litri d' a cqua che fluiscono dal rubinetto completamente aperto in un minuto perché l' e lettrodomestico funzioni senza problemi. -
Page 10: Regolazione Dei Piedini
4.1.6 Regolazione dei piedini ATTENZIONE: La lavabiancheria deve stare su una superficie pianeggiante e in equilibrio, perché funzioni in modo più silenzioso e senza vibrazioni. Mettere in equilibrio l' e lettrodomestico regolando i piedini. Altrimenti l' a pparecchio può spostarsi provocando problemi di rumori e vibrazioni. ATTENZIONE: Non utilizzare alcun utensile per allentare i controdadi. - Page 11 4.2 Preparazione 4.2.1 Selezione del bucato * Selezionare il bucato in base al tipo di tessuto, al colore, al livello di sporco e alla temperatura di lavaggio consentita. * Rispettare sempre le istruzioni presenti sulle etichette dei capi. 4.2.2 Preparazione del bucato da lavare • Gli indumenti con accessori in metallo, quali reggiseni, fibbie di cinture o bottoni metallici possono danneggiare la lavabiancheria.
-
Page 12: Corretta Capacità Di Carico
4.2.5 Corretta capacità di carico La capacità massima di carico dipende dal tipo di bucato, dal grado di sporco e dal programma di lavaggio desiderato. L' e lettrodomestico regola automaticamente la quantità di acqua secondo il peso del bucato che viene posto all'interno. - Page 13 Uso di ammorbidenti Versare l’ammorbidente nello scomparto apposito del cassetto del detersivo. • Non superare il contrassegno di livello (>max<) dello scomparto ammorbidente. • Se l’ammorbidente ha perso fluidità, diluirlo con acqua prima di metterlo nel cassetto del detersivo. Uso di detersivi liquidi Se l'elettrodomestico contiene un contenitore per detersivo liquido: • Posizionare il contenitore del detergente liquido nel comparto n. “2”. • Se il detergente liquido ha perso fluidità, diluirlo con acqua prima di metterlo nel contenitore detergente.
- Page 14 4.2.7 Consigli per un lavaggio efficace Indumenti Colori chiari e capi Colori nero/ Delicati/ Colori bianchi scuri lana/seta (Intervallo di (Intervallo di (Intervallo di temperatura (Intervallo di temperatura temperatura temperatura consigliata basato sul livello di consigliata basato sul livello di consigliata basato sul consigliata basato sporco: 40-90 °C)
-
Page 15: Funzionamento Del Prodotto
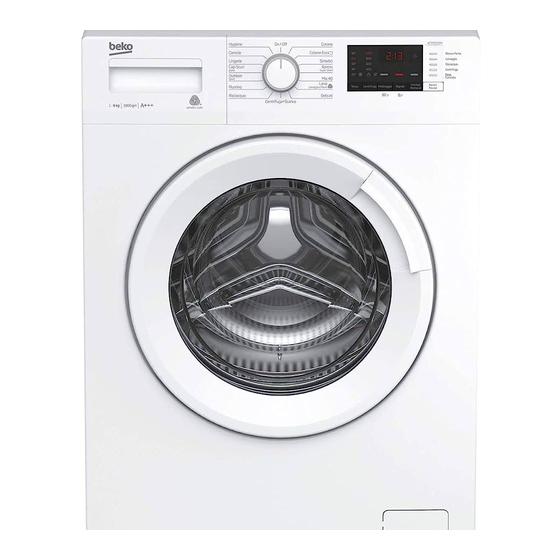
4.3 Funzionamento del prodotto 4.3.1 Pannello di controllo WTXS61032W Hygiene Cotone 90° 1000 Blocco Porta Camicie Cotone Eco 60° Lavaggio Lingerie Sintetici 40° Risciacquo Capi Scuri Xpress 30° Jeans Super Short 20° Fine Outdoor Cancella Mix 40 Sport Pet Hair... - Page 16 4.3.4 Tabella Programma e consumo Funzione ausiliaria Programma Temperatura 2,15 1000 • • • Freddo-90 Cotone 1,65 1000 • • • Freddo-90 1,00 1000 • • • Freddo-90 60** 47,5 0,73 1000 Freddo-60 Cotone Eco 60** 0,62 1000 Freddo-60 40** 33,7 0,62 1000...
-
Page 17: Programmi Principali
4.3.5 Programmi principali A seconda del tipo di tessuto, usare i programmi principali che seguono. • Cotone Programma utilizzabile per capi di cotone resistente, come lenzuola, coperte, asciugamani, accappatoi, biancheria intima, ecc. Selezionando la funzione di lavaggio rapido, la durata del programma si riduce notevolmente, tuttavia conservando le effettive prestazioni di lavaggio grazie all’intensità... -
Page 18: Programmi Speciali
• Capi Scuri / Jeans Programma da usare per proteggere il colore dei propri capi con tonalità scure o i jeans. Anche se a bassa temperatura, compie lavaggi ad alte prestazioni con uno speciale movimento del cestello. Per il bucato di colore scuro, si consiglia di utilizzare del detersivo liquido o per lana. Non utilizzare per capi delicati contenenti lana, ecc. -
Page 19: Selezione Della Temperatura
4.3.8 Selezione della temperatura Quando viene selezionato un nuovo programma, la temperatura consigliata per il programma selezionato viene visualizzata sull’indicatore della temperatura. Per diminuirla, premere il pulsante di regolazione della temperatura. La temperatura si ridurrà in maniera graduale. Se si seleziona il lavaggio a freddo, gli indicatori del livello di temperatura non si illumineranno. -
Page 20: Funzioni Ausiliarie
4.3.10.1 Funzioni ausiliarie • Prelavaggio Conviene effettuare il prelavaggio solo con bucato molto sporco. Evitare il prelavaggio consente di risparmiare energia, acqua, detersivo e tempo. Il prelavaggio senza detersivo è consigliato per tulle e tende. • Rapido Selezionando questa funzione si dimezza la durata dei programmi. Grazie alle fasi di lavaggio ottimizzate, si ottengono attività... -
Page 21: Avvio Del Programma
Per disattivare il blocco bambini: Tenere il pulsante della funzione ausiliaria 2 per 3 secondi mentre un programma è in corso. C03, C02, C01 compaiono sul display rispettivamente mentre si tiene premuto il pulsante per 3 secondi. Poi mentre la spia del pulsante della funzione ausiliaria 2 lampeggia, “COF” compare sul display indicando che è stato disattivato il blocco bambini. In aggiunta al metodo suddetto, per disattivare il blocco bambini, portare la manopola di selezione del programma sulla posizione acceso/spento quando nessun programma è... -
Page 22: Avanzamento Del Programma
4.3.13 Avanzamento del programma L' a vanzamento di un programma in corso può essere seguito grazie all'indicatore di follow-up del programma. All’inizio di tutte le fasi di programma, la spia dell’indicatore appropriato si accenderà e rimarrà accesa fino al termine della fase. Si possono modificare le impostazioni di funzioni ausiliarie, velocità... -
Page 23: Annullamento Del Programma
4.3.16 Annullamento del programma Per annullare il programma, ruotare la manopola di selezione del programma per selezionare un altro programma. Il programma precedente viene annullato. La spia fine / annulla lampeggia in modo continuo per avvisare che il programma è stato annullato. La lavatrice completa il programma quando si ruota la manopola di selezione del programma;... -
Page 24: Manutenzione E Pulizia
4.4 Manutenzione e pulizia La vita di servizio dell' e lettrodomestico è più lunga e i problemi affrontati di frequente diminuiscono se si esegue la pulizia ad intervalli regolari. 4.4.1 Pulizia del cassetto del detersivo Pulire il cassetto del detersivo ad intervalli regolari (ogni 4-5 cicli di lavaggio) come mostrato di seguito per evitare l' a ccumulo di polvere di detersivo nel tempo. -
Page 25: Pulire I Filtri Di Ingresso Dell'acqua
4.4.4 Pulire i filtri di ingresso dell'acqua C' è un filtro nella parte terminale di ciascuna valvola di immissione dell’acqua sul lato posteriore della lavabiancheria e anche alla fine di ciascun flessibile di immissione dell’acqua, nel punto di collegamento al rubinetto. Questi filtri evitano che le sostanze estranee e lo sporco dell' a cqua entrino nella lavabiancheria. - Page 26 3 Seguire le procedure sotto per scaricare l’acqua. Quando l'elettrodomestico ha un flessibile di scarico di emergenza, per scaricare l'acqua: Estrarre il flessibile di scarico di emergenza dal suo alloggiamento Disporre un ampio contenitore all’estremità del flessibile. Scaricare l’acqua del contenitore, tirando la presa all' e stremità del flessibile. Quando il contenitore è...
-
Page 27: Ricerca E Risoluzione Dei Problemi
Ricerca e risoluzione dei problemi Problema Motivo Soluzione Il programma non si avvia dopo la Il pulsante Avvio / Pausa / Annulla non è stato • *Premere il pulsante Avvio / Pausa / Annulla. chiusura dello sportello. premuto. Potrebbe essere difficile chiudere lo sportello di • Ridurre la quantità... - Page 28 Problema Motivo Soluzione Il lavaggio dura più del tempo La pressione dell'acqua è bassa. • La lavabiancheria aspetta di aspirare una specificato nel manuale.(*) quantità adeguata di acqua per evitare una qualità di lavaggio scadente a causa di una diminuita quantità di acqua. Pertanto i tempi di lavaggio si allungano.
- Page 29 Problema Motivo Soluzione La prestazione del lavaggio è Si usa una quantità di detersivo insufficiente. • Usare la quantità consigliata di detersivo scadente: Le macchie persistono adatta alla durezza dell’acqua e al bucato. o il bucato non è sbiancato. (**) È...
- Page 30 Problema Motivo Soluzione Residui di detersivo nel cassetto Il detersivo è posto in un cassetto bagnato. • Asciugare il cassetto dosatore prima di del detersivo. (**) mettervi il detersivo. Il detersivo potrebbe essersi inumidito. • Tenere i detersivi chiusi in un ambiente privo di umidità...
-
Page 31: Washing Machine
Washing Machine User Manual WTXS61032W Document Number= 2820525919_EN / 25-03-17.(16:04) - Page 32 This product was manufactured using the latest technology in environmentally friendly conditions.
-
Page 33: General Safety Instructions
General safety instructions This section includes security instructions which may help prevent the injuries and material damage risks. All kinds of warranties shall be invalid if these instructions are not observed. 1.1 Life and property safety Never place the product on a carpet-covered floor. Electrical parts will get overheated since air cannot circulate from under the device. This will cause problems with your product. -
Page 34: Electrical Safety
Electrical products are dangerous for the children. Keep the children away from the product when it is in use. Do not allow them to play with the product. Use child lock to prevent children from intervening with the product. Do not forget to close the loading door when leaving the room where the product is located. store all detergents and additives in a safe place away from the reach of the children by closing the cover of the detergent container or sealing the detergent package. -
Page 35: Important Instructions For Environment
Important instructions for environment 2.1 Compliance with WEEE Directive This product complies with EU WEEE Directive (2012/19/EU). This product bears a classification symbol for waste electrical and electronic equipment (WEEE). This product has been manufactured with high quality parts and materials which can be reused and are suitable for recycling. Do not dispose of the waste product with normal domestic and other wastes at the end of its service life. Take it to the collection center for the recycling of electrical and electronic equipment. Please consult your local authorities to learn about these collection centers. Compliance with RoHS Directive: The product you have purchased complies with EU RoHS Directive (2011/65/EU). It does not contain harmful and prohibited materials specified in the Directive. 2.2 Package information Packaging materials of the product are manufactured from recyclable materials in accordance with our National Environment Regulations. Do not dispose of the packaging materials together with the domestic or other wastes. -
Page 36: Technical Specifications
Technical specifications Complying Commission Delegated Regulation (EU) No 1061/2010 Supplier name or trademark Beko Model name WTXS61032W Rated capacity (kg) Energy efficiency class / Scale from A+++ (Highest Efficiency) to D (Lowest Efficiency) A+++ Annual Energy Consumption (kWh) Energy consumption of the standard 60°C cotton programme at full load (kWh) 0.730... -
Page 37: Appropriate Installation Location
4.1 Installation • Apply to the nearest authorized service agent for the installation of your product. • Preparation of the location and electrical, tap water and waste water installations at the place of installation is under customer's responsibility. • Make sure that the water inlet and discharge hoses as well as the power cable are not folded, pinched or crushed while pushing the product into its place after installation or cleaning procedures. • Make sure that the installation and electrical connections of the product are performed by authorized service. Manufacturer shall not be held liable for damages that may arise from procedures carried out by unauthorized persons. • Prior to installation, visually check if the product has any defects on it. If so, do not have it installed. Damaged products cause risks for your safety. 4.1.1 Appropriate installation location • Place the product on a hard and level floor. Do not put it onto a carpet with high pile or other similar surfaces. • When the washing machine and dryer are placed on top of each other, their total weight –when loaded–... -
Page 38: Connecting Water Supply
4.1.4 Connecting water supply The water supply pressure required to run the product is between 1 to 10 bars (0.1 – 1 MPa). It is necessary to have 10 – 80 liters of water flowing from the fully open tap in one minute to have your machine run smoothly. Attach a pressure reducing valve if water pressure is higher. CAUTION: Models with a single water inlet should not be connected to the hot water tap. In such a case the laundry will get damaged or the product will switch to protection mode and will not operate. CAUTION: Do not use old or used water inlet hoses on the new product. It may cause stains on your laundry. Tighten the nuts of the hose by hand. Never use a tool when tightening the nuts. When hose connection is completed, check whether there is leak problems at the connection points by opening the taps fully. If any leaks occur, turn off the tap and remove the nut. -
Page 39: Adjusting The Feet
4.1.6 Adjusting the feet CAUTION: In order to ensure that the product operates more silently and vibration-free, it must stand level and balanced on its feet. Balance the machine by adjusting the feet. Otherwise, the product may move from its place and cause crushing and vibration problems. CAUTION: Do not use any tools to loosen the lock nuts. Otherwise, they will get damaged. Loosen the lock nuts on the feet by hand. Adjust the feet until the product stands in a stable and balanced way. 3. Tighten all lock nuts by hand again. 4.1.7 Electrical connection Connect the product to a grounded outlet protected by a 16 A fuse. Our company shall not be liable for any damages that will arise when the product is used without grounding in accordance with the local regulations. • Connection must comply with national regulations. • The wiring for the electrical outlet circuit must be sufficient to meet the appliance requirements. Use of a Groud Fault Circuit Interrupter (GFCI) is recommended. • Power cable plug must be within easy reach after installation. -
Page 40: Sorting The Laundry
4.2 Preparation 4.2.1 Sorting the laundry * Sort laundry according to type of fabric, color, and degree of soiling and allowable water temperature. * Always obey the instructions given on the garment tags. 4.2.2 Preparing laundry for washing • Laundry items with metal attachments such as, underwired bras, belt buckles or metal buttons will damage the machine. Remove the metal pieces or wash the clothes by putting them in a laundry bag or pillow case. • Take out all substances in the pockets such as coins, pens and paper clips, and turn pockets inside out and brush. Such objects may damage the product or cause noise problem. • Put small size clothes such as infant's socks and nylon stockings in a laundry bag or pillow case. • Place curtains in without compressing them. Remove curtain attachment items. • Fasten zippers, sew loose buttons and mend rips and tears. • Wash “machine washable” or “hand washable” labeled products only with an appropriate programme. • Do not wash colours and whites together. New, dark coloured cottons release a lot of dye. Wash them separately. • Tough stains must be treated properly before washing. If unsure, check with a dry cleaner. • Only use the dyes / color changers and descaling agents which are appropriate to machine wash. Always follow the instructions on the package. • Wash trousers and delicate laundry turned inside out. -
Page 41: Using Detergent And Softener
4.2.6 Using detergent and softener When using detergent, softener, starch, fabric dye, bleacher and decolorant, descaling agents; read the manufacturer's instructions written on the package and follow the dosages specified. Use measuring cup if available. The detergent drawer is composed of three compartments: – (1) for prewash – (2) for main wash – (3) for softener –... - Page 42 Using liquid detergents If the product contains a liquid detergent cup: • Put the liquid detergent container into the compartment no “2”. • If the liquid detergent lost its fluidity, dilute it with water before putting it into the detergent container. If the product does not contain a liquid detergent cup: • Do not use liquid detergent for the prewash in a programme with prewash. • Liquid detergent stains your clothes when used with Delayed Start function. If you are going to use the Delayed Start function, do not use liquid detergent.
-
Page 43: Tips For Efficient Washing
4.2.7 Tips for efficient washing Clothes Delicates/ Light Colours and Black/Dark Colours Woolens/ Whites Colours Silks (Recommended (Recommended (Recommended temperature (Recommended temperature temperature range temperature range range based on soiling level: range based on soiling level: based on soiling level: based on soiling 40-90 cold -40... -
Page 44: Preparing The Machine
4.3 Operating the product 4.3.1 Control panel WTXS61032W Hygiene Cotone 90° 1000 Camicie Cotone Eco Blocco Porta 60° Lavaggio Lingerie Sintetici 40° Risciacquo Xpress Capi Scuri 30° Jeans Super Short 20° Fine Outdoor Cancella Mix 40 Sport Pet Hair Avvio/ Lana Temp. -
Page 45: Programme And Consumption Table
4.3.4 Programme and consumption table Auxiliary functions Programme Temperature 2,15 1000 • • • Cold-90 Cotone 1,65 1000 • • • Cold-90 1,00 1000 • • • Cold-90 60** 47,5 0,73 1000 Cold-60 Cotone Eco 60** 0,62 1000 Cold-60 40** 33,7 0,62 1000... -
Page 46: Main Programmes
4.3.5 Main programmes Depending on the type of fabric, use the following main programmes. • Cotone (Cottons) You can wash your durable cotton laundry (sheets, bedlinen, towels, bathrobes, underwear etc.) in this programme. When the quick wash function button is pressed, programme duration becomes notably shorter but effective washing performance is ensured with intense washing movements. If the quick wash function is not selected, superior washing and rinsing performance is ensured for your heavily soiled laundry. • Sintetici (Synthetics) You can wash your laundry (such as shirts, blouses, synthetic/cotton blended fabrics etc.) in this programme. -
Page 47: Special Programmes
• Mix 40 Use to wash your cotton and synthetic clothes together without sorting them. • Camicie (Shirts) This programme is used to wash the shirts made from cotton, synthetic and synthetic blended fabrics altogether. It reduces wrinkles. When the quick wash function is selected, the Pre-treatment algorithm is executed. • Apply the pre-treatment chemical on your garments directly or add it together with detergent when the machine starts to take water from the main washing compartment. Thus, you can obtain the same performance as you obtain with normal washing in a much shorter period of time. Usage life of your shirts increases. • Outdoor / Sport You can use this programme to wash sports and outdoors garments that contain cotton/synthetics mix and water repellent covers such as gore-tex etc. It makes sure your garments are washed gently thanks to special rotating movements. • Lingerie You can use this programme to wash delicate garments that are suitable for hand wash and delicate women's underwear. - Page 48 4.3.8 Temperature selection Whenever a new programme is selected, the recommended temperature value for the selected programme appears on the temperature indicator. To decrease the temperature, press the Temperature Adjustment button. Temperature will decrease gradually. Temperature level lights will not turn on when the cold level is selected. If the programme has not reached the heating step, you can change the temperature without switching the machine to Pause mode. 4.3.9 Spin speed selection Whenever a new programme is selected, the recommended spin speed of the selected programme is displayed on the spin speed indicator.
- Page 49 • Pet Hair Removal This function helps to remove pet hair that remain on your garments more effectively. When you select this function, Prewash and Extra Rinse steps are added to the normal programme. Thus, washing is performed with more water and the pet hair is removed more effectively. 4.3.10.2 Functions/Programmes Selected by Pressing the Function Buttons for 3 Seconds • Drum Clean 3 Press and hold the auxiliary function button 1 for 3 seconds to select the programme. Use regularly (once in every 1-2 months) to clean the drum and provide the required hygiene. Operate the programme while the machine is completely empty. To obtain better results, put powder lime-scale remover for washing machines into the detergent compartment no. “2”. When the programme is over, leave the loading door ajar so that the inside of the machine gets dry. This is not a washing programme. It is a maintenance programme. Do not run the programme when there is something in the machine. If you try to do so, the machine detects that there is load inside and aborts the programme. •...
-
Page 50: Starting The Programme
3. S et the desired time by pressing the Delayed Start button. 4. P ress Start / Pause button. The delayed start time you have set is displayed. Delayed start countdown starts. “_” symbol next to the delayed start time moves up and down on the display. Additional laundry may be loaded during the delayed start period. 5. At the end of the countdown, duration of the selected programme will be displayed. “_” will disappear and the selected programme will start. Changing the delayed start period If you want to change the time during countdown: 1. Press the Delayed Start button. Time will increase by 1 hour each time you press the button. 2. If you want to decrease the delayed start time, press Delayed Start button repeatedly until the desired delayed start time appears on the display. Canceling the Delayed Start function If you want to cancel the delayed start countdown and start the programme immediately: 1. Set the Delayed Start period to zero or turn the Programme Selection knob to any programme. Thus, Delayed Start function will be canceled. The End/Cancel light flashes continuously. 2. Then, select the programme you want to run again. 3. Press Start / Pause button to start the programme. 4.3.12 Starting the programme 1. -
Page 51: Adding Or Taking Out Laundry
4.3.15 Changing the selections after programme has started Switching the machine to pause mode Press the Start / Pause button to switch the machine to pause mode while a programme is running. The light of the step which the machine is in starts flashing in the Programme Follow-up indicator to show that the machine has been switched to the pause mode. -
Page 52: Maintenance And Cleaning
4.4 Maintenance and cleaning Service life of product extends and frequently experienced problems will be reduced if it is cleaned at regular intervals. 4.4.1 Cleaning the detergent drawer Clean the detergent drawer at regular intervals (every 4-5 washing cycles) as shown below in order to prevent accumulation of powder detergent in time. Lift the rear part of the siphon to remove it as illustrated. If more than normal amount of water and softener mixture starts to gather in the softener compartment, the siphon must be cleaned. Press the dotted point on the siphon in the softener compartment and pull towards you until the compartment is removed from the machine. -
Page 53: Draining Remaining Water And Cleaning The Pump Filter
4.4.5 Draining remaining water and cleaning the pump filter The filter system in your machine prevents solid items such as buttons, coins and fabric fibers clogging the pump impeller during discharge of washing water. Thus, the water will be discharged without any problem and the service life of the pump will extend. If the machine fails to drain water, the pump filter is clogged. Filter must be cleaned whenever it is clogged or in every 3 months. Water must be drained off first to clean the pump filter. -
Page 54: Troubleshooting
Troubleshooting Problem Reason Solution Program does not start after Start / Pause / Cancel button was not pressed. • *Press the Start / Pause / Cancel button. closing the door. It may be difficult to close the loading door in case • Reduce the amount of laundry and make sure of excessive loading. - Page 55 Problem Reason Solution Washing takes longer time than Water pressure is low. • Machine waits until taking in adequate specified in the manual.(*) amount of water to prevent poor washing quality due to the decreased amount of water. Therefore, the washing time extends. Voltage might be low. • Washing time is prolonged to avoid poor washing results when the supply voltage is low.
- Page 56 Problem Reason Solution Washing performance is poor: Regular drum cleaning is not applied. • Clean the drum regularly. For this, please Oily stains appeared on the see 4.4.2. laundry. (**) Washing performance is poor: Odours and bacteria layers are formed on the • Leave the detergent drawer as well as Clothes smell unpleasantly.
- Page 57 Problem Reason Solution Too much foam forms in the Improper detergents for the washing machine are • Use detergents appropriate for the washing machine. (**) being used. machine. Excessive amount of detergent is used. • Use only sufficient amount of detergent. Detergent was stored under improper conditions. • Store detergent in a closed and dry location. Do not store in excessively hot places.
- Page 60 www.beko.com...
Need help?
Do you have a question about the WTXS61032W and is the answer not in the manual?
Questions and answers