Table of Contents
Advertisement
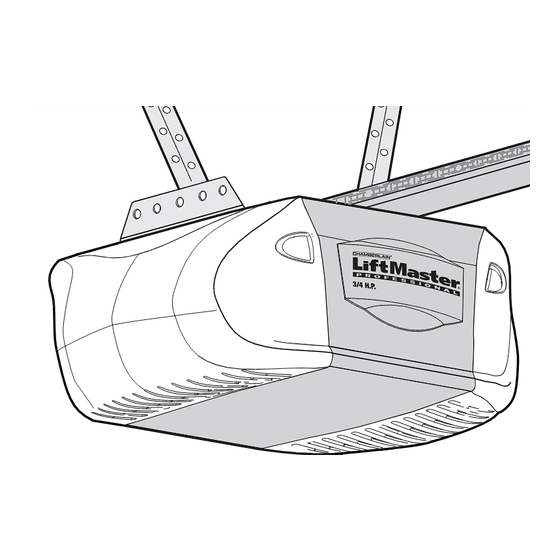
GARAGE DOOR OPENER
Model 2575 3/4 HP
For Residential Use Only
Owner's Manual
Please read this manual and the enclosed safety materials carefully!
Fasten the manual near the garage door after installation.
The door WILL NOT CLOSE unless the Protector System
properly aligned.
Periodic checks of the opener are required to ensure safe operation.
The model number label is located under the light lens on the left side
panel of your opener.
The Chamberlain Group, Inc.
845 Larch Avenue
Elmhurst, Illinois 60126-1196
www.liftmaster.com
®
is connected and
®
Advertisement
Table of Contents

Related Manuals for Chamberlain 2575


Summary of Contents for Chamberlain 2575
- Page 1 GARAGE DOOR OPENER Model 2575 3/4 HP For Residential Use Only Owner’s Manual Please read this manual and the enclosed safety materials carefully! Fasten the manual near the garage door after installation. The door WILL NOT CLOSE unless the Protector System properly aligned.
-
Page 2: Table Of Contents
Safety Symbol and Signal Word Review This garage door opener has been designed and tested to offer safe service provided it is installed, operated, maintained and tested in strict accordance with the instructions and warnings contained in this manual. WARNING... -
Page 3: Preparing Your Garage Door
To prevent damage to garage door and opener: • ALWAYS disable locks before installing and operating the opener. • ONLY operate garage door opener at 120V, 60 Hz to avoid malfunction and damage. Tools needed During assembly, installation and adjustment of the opener, instructions will call for hand tools as illustrated below. -
Page 4: Planning
Planning Identify the type and height of your garage door. Survey your garage area to see if any of the conditions below apply to your installation. Additional materials may be required. You may find it helpful to refer back to this page and the accompanying illustrations as you proceed with the installation of your opener. -
Page 5: Carton Inventory
Carton Inventory Your garage door opener is packaged in two cartons which contain the motor unit and all parts illustrated below. Accessories will depend on the model Motion Detecting Door Control Panel Light Lens (2) Header Bracket Chain Pulley Bracket... -
Page 6: Assembly Step
ASSEMBLY STEP 1 Attach the T-Rail to the Motor Unit To avoid installation difficulties, do not run the garage door opener until instructed to do so. • Remove the bolt and lock nut from the top of the motor unit. -
Page 7: Tighten The Chain
4. Disable all locks and remove all ropes connected to garage door before installing opener to avoid entanglement. 5. Install garage door opener 7 feet or more above floor. 6. Mount emergency release handle 6 feet above floor. 7. NEVER connect garage door opener to power source until instructed to do so. -
Page 8: Installation Step
INSTALLATION STEP 1 Determine the Header Bracket Location WARNING To prevent possible SERIOUS INJURY or DEATH: • Header bracket MUST be RIGIDLY fastened to CAUTION structural support on header wall or ceiling, otherwise garage door might not reverse when required. DO NOT install header bracket over drywall. - Page 9 ONE-PIECE DOOR WITHOUT TRACK 1. Close the door and mark the inside vertical centerline of your garage door. Extend the line onto the header wall above door, as shown. If headroom clearance is minimal, you can install the header bracket on the ceiling. See page 10. If you need to install the header bracket on a 2x4 (on wall or ceiling), use lag screws (not provided) to securely fasten the 2x4 to structural supports...
-
Page 10: Install The Header Bracket
INSTALLATION STEP 2 Install the Header Bracket You can attach the header bracket either to the wall above the garage door, or to the ceiling. Follow the instructions which will work best for your particular requirements. Do not install the header bracket over drywall. -
Page 11: Attach The T-Rail To The Header Bracket
INSTALLATION STEP 3 Attach the T-Rail to the Header Bracket NOTE:... -
Page 12: Position The Opener
INSTALLATION STEP 4 Position the Opener... -
Page 13: Hang The Opener
INSTALLATION STEP 5 Hang the Opener... -
Page 14: Install The Door Control
INSTALLATION STEP 6 Install the Door Control NOTE: NOTE: (Standard installation only) NOTE: NOTE: 7/16"... -
Page 15: Install The Lights
INSTALLATION STEP 7 Install the Lights NOTE: INSTALLATION STEP 8 Attach the Emergency Release Rope and Handle NOTE:... -
Page 16: Electrical Requirements
INSTALLATION STEP 9 Electrical Requirements... -
Page 17: Install The Protector System
INSTALLATION STEP 10 Install The Protector System ®... - Page 18 Garage door track installation (preferred): Wall installation: Floor installation:...
- Page 19 NOTE:...
-
Page 20: Fasten The Door Bracket
INSTALLATION STEP 11 Fasten the Door Bracket NOTE: Metal or light weight doors using a vertical angle iron brace between the door panel support and the door bracket: Metal, insulated or light weight factory reinforced doors: Wood Doors: NOTE:... -
Page 22: Connect The Door Arm To The Trolley
INSTALLATION STEP 12 Connect Door Arm to Trolley... -
Page 24: Adjustment Pages
ADJUSTMENT STEP 1 Adjust the UP and DOWN Travel Limits... -
Page 25: Adjust The Force
ADJUSTMENT STEP 2 Adjust the Force... -
Page 26: Adjustment
ADJUSTMENT STEP 3 Test the Safety Reversal System ADJUSTMENT STEP 4 Test the Protector System ®... -
Page 27: Operation Pages
OPERATION Using Your Garage Door Opener ✚ ✚ ✚ ✚... -
Page 28: Using The Wall-Mounted Door Control
Using the Wall-Mounted Door Control To Open the Door Manually... -
Page 29: Care Of Your Garage Door Opener
CARE OF YOUR OPENER Having a Problem? - Page 30 Having a Problem? (Continued)
-
Page 31: Programming Pages
PROGRAMMING ✚ To Add an Additional Hand-held Remote Control To Erase All Codes From Motor *3-Channel Remotes Unit Memory ✚ ✚... -
Page 32: To Add Or Change A Keyless Entry Pin
To Add or Change a Keyless Entry PIN NOTE: Your new Keyless Entry must be programmed to operate your garage door opener. To change an existing, known PIN To set a temporary PIN close ✽ NOTE: This method requires two people if the Keyless Entry is already mounted outside the garage. -
Page 33: Repair Parts Pages
REPAIR PARTS Rail Assembly Parts Installation Parts... -
Page 34: Motor Unit Assembly Parts
Motor Unit Assembly Parts LIMIT SWITCH ASSY. -
Page 35: Accessories
ACCESSORIES ✚ ✚ ✚ ✚ ✚ ✚...
Need help?
Do you have a question about the 2575 and is the answer not in the manual?
Questions and answers