
Related Manuals for SOUNDMASTER SCD7900


Summary of Contents for SOUNDMASTER SCD7900
- Page 1 ENGLISH Hersteller Wörlein GmbH Tel.: +49 9103/71670 Gewerbestrasse 12 Fax.: +49 9103/716712 D 90556 Cadolzburg Email. info@woerlein.com GERMANY Web: www.woerlein.com SCD7900...
-
Page 2: Controls And Connections
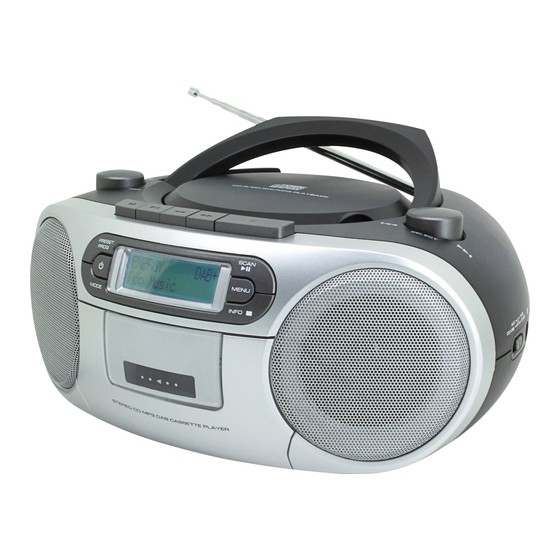
CONTROLS & CONNEC TIONS FRONT SIDE AND BACK 1. Volume knob 8. Scan/ Play pause button 15. USB jack 2. Mode button 9. Menu button 16. Battery compartment 3. Standby button 10. Info/ Stop button 17. AC socket 4. Preset/ Prog button 11. -
Page 3: Getting Started
GET TING STARTED DAB/FM AERIAL Before using your radio for DAB or FM reception, pull out the telescopic antenna. You may need to adjust the position of the telescopic antenna for maxing signal strength. CONNEC TING POWER Before connecting the power, check that the mains voltage on the rating plate is the same as the voltage in your area. -
Page 4: Adjusting The Volume
INTIAL SCAN When this unit is switched on for the first time at TUNER mode, then press MODE button switching to DAB, the scanning display will be shown while the scanning process takes place: The radio scans all usable stations (full scan) and stores them alphanumerically -1 Radio, 2 Radio, AA Radio, AB Radio…The initial scan will take a few minutes. -
Page 5: Selecting A Source
SW VERSION: This option will display the version number of the control software currently installed in your radio. This will be helpful to a technician who is servicing this product. When unit during Standby mode, press MENU button then turn the TUNING knob to select SW Version. -
Page 6: Dab Scanning
DAB SCANNING RE-SCANNING STATIONS When first used, your radio scanned the DAB band for available stations. The station services found were then stored in your system's memory. You can re -scan the band at any time if you move to a different area or just to refresh the stored list of available stations. -
Page 7: Station Presets
DLS (Dynamic Label Segment): This is a scrolling message giving real-time information-song titles, news headlines, etc. PROGRAMME TYPE: This describes the style of the program being broadcast. ENSEMBLE NAME: DAB Digital radio stations are broadcast in multiplexes. Each multiplex is a bundle of radio stations transmitted in a signal frequency. -
Page 8: Listening To Fm Radio
LISTENING TO FM RADIO This unit can also receive FM band radio stations and display RDS data (where broadcast). To change to the FM band · Set the function selector to TUNER, press MODE button to select mode. Tune to FM stations ·... - Page 9 LISTENING TO A CD LOADING DISCS This player can playback CD and MP3 audio format. To select CD operation: • Set the function selector to CD/ USB position, press the MODE button to select CD mode. Loading a disc: • Lift up the CD Door on top of the unit slowly. •...
-
Page 10: Program Play
CD PLAYBACK, PAUSE: • Load the CD. • Press the SCAN / button to star t the CD playing • When a CD is playing, pressing the SCAN / button at any time will pause playback. Press the button again to re -star t play. Selecting tracks: •... - Page 11 LISTENING TO AN USB 1. Set the FUNCTION selector to CD/USB. 2. Press the MODE button until display show USB. 3. Press button to playback the music. 4. The operation procedures are the same as CD playback. Refer to general control for details. NOTE: - Compatible storage device (up to 32GB) .
-
Page 12: Cassette Play
CASSETTE PLAY PAUSE BUTTON Pauses playback STOP/ EJECT Button Stops playback Opens the cassette door F.FED Button Fast forwards playback REW Button Fast reverses playback PLAY button Plays back cassette Cassette Playback 1. Set the FUNCTION selector to TAPE position. 2. -
Page 13: Care And Maintenance
CARE AND MAINTENANCE CARE AND CLEANING All care and cleaning operations should be carried out with the unit unplugged from the mains power. The surface of the unit can be cleaned with a barely damp cloth and then dried carefully. Never use abrasives, abrasive cloths or chemical solvents. - Page 14 Care and maintenance Compact Disc Care To remove a disc from its storage case, press down on the center of the case and lift the disc out, holding it carefully by the edges. Finger prints and dust should be carefully wiped off the disc’s recorded surface with a soft cloth.
-
Page 15: Troubleshooting
TROUBLESHOOTING Poor quality radio reception The aerial signal may not be adequate. Try repositioning the aerial while watching the signal strength. Signal strength can be displayed by tuning to a DAB station. Press the INFO. button then turn the TUNING knob, PROBLEM CAUSE / SOLUTI... -
Page 16: Warranty & Specifications
WARRANTY & SPECIFICATIONS SPECIFICATIONS Supply voltage, current : AC 230V ~ 50Hz Power consumption . . . : 16W 9V (6 x “C ” SIZE R14). Batter y supply..: DC Output power.
Need help?
Do you have a question about the SCD7900 and is the answer not in the manual?
Questions and answers