Table of Contents
Advertisement
Quick Links
Advertisement
Table of Contents

Subscribe to Our Youtube Channel
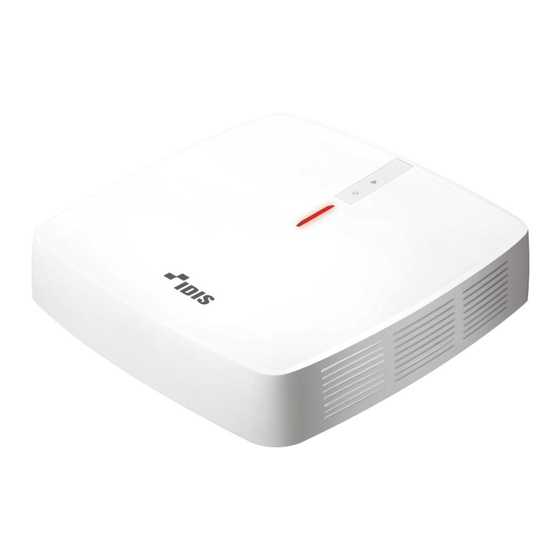
Summary of Contents for Idis DR-1204P
- Page 1 Network Video Recorder Quick Guide DR-1204P Powered by...
-
Page 2: Safety Precautions
Safety Precautions Important Safeguards 14. Damage requiring Service Unplug this equipment from the wall outlet and refer servicing to qualified 1. Read Instructions service personnel under the following conditions: All the safety and operating instructions should be read before the A. -
Page 3: Fcc Compliance Statement
IDIS Co., Ltd. reserves all rights concerning this document. Use or duplication of this document in part or whole without the prior consent of IDIS Co., Ltd. is strictly prohibited. Contents of this document are subject to change without prior notice for reasons such as functionality enhancements. - Page 4 Upon unpackaging the product, check the contents inside to ensure that all the following accessories are included. Item Network Video Recorder Power Cable / DC Adapter(56V) Quick Guide Manual and IDIS Center Program CD Optical USB Mouse Overview Dimensions (Unit - mm) 48.4...
-
Page 5: Front Panel
Front Panel LEDs Network LED: Flashes when the • main unit is linked to an ethernet. • HDD LED: Flashes when data is being written on the HDD or a video search is in progress. • Power LED: Lights up while the main unit is in operation. - Page 6 Connections on the Rear Panel HDMI Monitor VGA Monitor USB HDD Network IDIS Center Remote Monitoring Power (56V) Keyboard Camera...
-
Page 7: Getting Started
Network Setup Wizard Getting Started After exiting from Quick Wizard, the network with Network Wizard will start automatically. Setup Wizard ● Start the Network Setup Wizard • Setup Wizard only appears during initial booting. ● Internet When you login as an administrator account after Connection initial booting, you can use Wizard to go to Live menu and select Wizard. -
Page 8: Camera Registration
Camera Registration - Mode: Select the scan mode. - Advanced Setup: If the camera is networked but Once Network Setup Wizard is complete, live mode screen not scanned, use this setup. This setup allows you to appears. While in live mode, right-click on the mouse and change the network setting of the NVR’s VIDEO IN select Camera Registration to run the Camera Registration port which is camera’s network environment. -
Page 9: Apply/Cancel Buttons
Apply/Cancel Buttons Find Password While in Camera Registration mode, select Apply to register Enter a user, registered email and then select Get all changes. Verification Code. Select Cancel to exit Camera Registration mode without applying the changes. It is not possible to register a camera that has already been registered to a different NVR. -
Page 10: Basic Feature
Setup > General has been configured, Panic Recording will automatically terminate after the specified duration of time has elapsed. IDIS Web is a program that allows you to view and search • Panic Recording takes place irrespective of any video from remote locations over the Internet and can recording schedule set up by the user. -
Page 11: System Requirements
Intel CoreTM 2 Duo E7200 Contact your network administrator for the IP address or better 2.53GHz or better of the NVR you wish to connect to and the IDIS Web 2GB or more 1.5GB or more port number. ATI RadeonTM HD 3650 or... -
Page 12: Installation
When IDIS Center software is installed, IDIS Center and IDIS Center Run as administrator shortcut icons will be created on the desktop. Run IDIS Center software by double-clicking on IDIS Center or IDIS Center Run as administrator shortcut icon. If a removable eSATA HDD or... -
Page 13: Device Registration
User ID and Password set up on each device, and then select OK for remote access. To use the functions provided by IDIS Center, you must first register a device and add the device to a device group. Select System > IDIS Center Setup > Device in the menu at the top of the screen. - Page 14 Open the Play Store(Google Play) on your Android device. In Play Store (Google Play), enter IDIS Mobile in the search field. Install IDIS Mobile program and open it. The start-up menu appears when pressing the Menu button on your mobile device.
-
Page 15: Ios Device
Open the App Store on your device. Enter IDIS Mobile in the search filed of the App Store. Install IDIS Mobile program and open it. Register the device by pressing + button and entering the device (NVR) information. -
Page 16: Specifications
Fast Ethernet(IP Camera) x4 Client Connection Fast Ethernet(Client) x1 Transmission Speed 20Mbps / 50Mbps(BRP Mode) Camera Power PoE(IEEE 802.3at class 4) supported 4 ports, 30W Email (attach clip (.cbf) .MP4), Callback to Remote S/W, Push notification (IDIS Event Notification Mobile), SNS (Twitter) -
Page 17: Internal Buzzer
INTERFACE Local(NVR) : - / 1 HDMI Audio In / Out IP Camera : 4 / 4 (Depending on IP Camera) Internal Buzzer USB 2.0 x GENERAL Operating System Embedded Linux Unit Dimensions 215mm x 214.5mm x 48.5 mm (8.5" x 8.5" x 1.9") (W x H x D) Unit Weight 1.21Kg(with 1HDD) - Page 18 IDIS Co., Ltd. For more information, please visit at www.idisglobal.com...


Need help?
Do you have a question about the DR-1204P and is the answer not in the manual?
Questions and answers