
Subscribe to Our Youtube Channel
Related Manuals for inventum IVW6013A


Summary of Contents for inventum IVW6013A
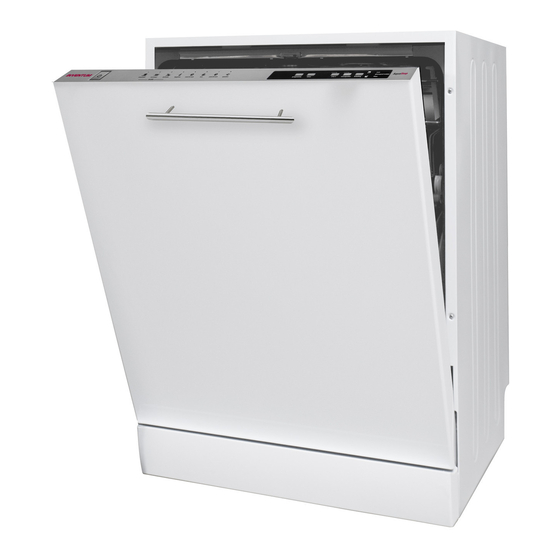
- Page 1 BUILT IN DISHWASHER inbouw vaatwasser IVW6013A • gebruiksaanwijzing • instruction manual...
- Page 2 •...
-
Page 3: Table Of Contents
Nederlands Veiligheidsvoorschriften pagina 4 Aflevering pagina 4 Installatie pagina 4 Plaatsing pagina 4 Aansluiten op de waterkraan en -afvoer pagina 5 Elektrische aansluiting pagina 6 Dagelijks gebruik pagina 6 Productkaart pagina 9 Productomschrijving pagina 11 Voor het eerste gebruik pagina 12 Zoutreservoir in de machine vullen pagina 12 Zoutverbruik instellen... -
Page 4: Veiligheidsvoorschriften
veiligheidsvoorschriften • Lees eerst de gebruiksaanwijzing en de installatievoorschriften aandachtig en geheel door voordat u het apparaat gaat gebruiken en bewaar deze zorgvuldig voor latere raadpleging. AFLEVERING • Controleer onmiddelijk of de verpakking en de vaatwasmachine tijdens het transport beschadigd zijn. Een beschadigd apparaat niet in gebruik nemen maar contact opnemen met uw leverancier. -
Page 5: Aansluiten Op De Waterkraan En -Afvoer
kan komen. • Plaats de machine in de buurt van een waterkraan, waterafvoer en stopcontact. Plaats de machine zodanig dat de aansluitingen niet meer gewijzigd hoeven te worden. • Pak om de machine te verplaatsen niet de deur of het paneel vast. •... -
Page 6: Elektrische Aansluiting
Waarschuwing: Bij gebruik van een afvoerslang langer dan 4 m, wordt de vaat mogelijk niet schoon. In dat geval accepteert Inventum geen aansprakelijkheid. ELEKTRISCHE AANSLUITING • De aansluitstekker met randaarde van de machine moet worden aangesloten op een geaard stopcontact dat de juiste spanning en stroom levert. - Page 7 Let op dat deze niet bekneld raken. • Plaats geen voorwerpen in de vaatwasser die niet geschikt zijn om gereinigd te worden in de vaatwasser. Zorg er ook voor dat geen van de korven te vol beladen worden. Inventum is niet aansprakelijk voor Nederlands •...
- Page 8 krassen of roest in uw vaatwasser als de korven foutief beladen zijn. • Vermijd contact met huid en ogen. Houd bij geopende deur van de vaatwasser kinderen uit de buurt. • Zorg ervoor dat alle losse onderdelen van de vaatwasser correct zijn geplaatst.
-
Page 9: Productkaart
PRODUCTKAART INVENTUM Typenummer IVW6013A Standaard couverts 12 couverts Energie-efficiëntieklasse * Energieverbruik [Aec] in kWh per jaar ** Energieverbruik standaard cyclus [Et] 0,90 Opgenomen vermogen in uitstand [Po] 0,50 Opgenomen vermogen in standby stand [Pl] 1,00 Jaarlijks waterverbruik ** 2520 Droog efficientieklasse *** Standaard programma ECO 50°C... - Page 10 Technische gegevens IVW6013A Afmetingen [mm] (bxdxh) 598 x 550 x 820 Netto gewicht [kg] Bruto gewicht [kg] Elektrische aansluitwaarde [W] 1900 Netspanning [V] / netfrequentie [Hz] 220-240/ 50 Lengte aansluitsnoer [m] Stekkertype EU/TR Aansluiting toevoerslang 3/4 inch binnendraad Positie toevoerslang...
-
Page 11: Productomschrijving
productomschrijving 1. Aan/uit-knop - druk op de Aan/uit-knop en het indicatielampje Klaar (10) gaat branden. 2. Display - voor weergave van de resterende programmaduur en de uitgestelde start - timer. 3. Programmakeuzeknop - selecteer met deze knop het gewenste wasprogramma. 4. -
Page 12: Voor Het Eerste Gebruik
voor het eerste gebruik Voordat u de machine voor de eerste keer gebruikt, moet u controleren of de elektriciteits- en watertoevoerspecificaties in het huis overeenkomen met de waarden zoals weergegeven in de veiligheids- en installatieinstructies. Verwijder alle verpakkingsmaterialen om en in de machine. Vul het zoutreservoir met zout en voeg water toe totdat het bijna overloopt en stel het zoutverbruik in. -
Page 13: Glansspoelmiddel Vullen En Het Verbruik Instellen
Tabel instelling waterhardheid Niveau Duitse Franse Britse Indicator hardheidsniveau water- hardheid hardheid hardheid hardheid Display toont 6-11 10-20 7-14 12-17 21-30 15-21 18-22 31-40 22-28 23-31 41-55 29-39 32-50 56-90 40-63 GLANSSPOELMIDDEL VULLEN EN HET VERBRUIK INSTELLEN Het glansspoelmiddel voorkomt dat er sporen van druppels, kalkvlekken en strepen achterblijven op de schone vaat. Het zorgt er bovendien voor dat de vaat sneller droogt doordat het water er gemakkelijk afglijdt. -
Page 14: Vaatwasmiddelgebruik
VAATWASMIDDELGEBRUIK Gebruik een vaatwasmiddel dat speciaal bedoeld is voor gebruik in huishoudelijke vaatwasmachines. Vaatwasmiddel is verkrijgbaar in poedervorm, tabletten of gelcapsules. Het vaatwasmiddel moet in het reservoir worden geplaatst voordat u de machine start. Bewaar het afwasmiddel op een koele, droge plaats en houdt het buiten bereik van kinderen. -
Page 15: De Hoogte Van De Bovenste Korf Instellen
IVW6013A 3 verstelbare hoogtes Verschillende manieren van het laden van de korven vindt u op de volgende pagina’s. DE HOOGTE VAN DE BOVENSTE KORF INSTELLEN De bovenste korf bevindt zich in de hoogste stand. In deze stand kunt u grote voorwerpen, zoals pannen en grote borden in de onder- ste korf plaatsen. -
Page 16: Verschillende Manieren Van Het Laden Van De Korven
VERSCHILLENDE MANIEREN VAN HET LADEN VAN DE KORVEN Bovenste korf Onderste korf Bovenste en onderste korf verkeerd geladen WAARSCHUWING: zorg bij het plaatsen van het vaatwerk dat de sproeiarmen vrij rond kunnen blijven draaien. Let op dat er niets door de bodem van het bestekmandje steekt. -
Page 17: De Vaatwasmachine Instellen
de vaatwasmachine instellen DE VAATWASMACHINE AAN EN UIT ZETTEN • Zet de vaatwasmachine aan met de Aan/Uit- knop (1). Het indicatielampje Klaar zal branden. • Selecteer het gewenste programma met de programmakeuzeknop (2). Afhankelijk van het model zal het bijbehorende indicatielampje gaan branden of het juiste programma wordt in het display weergegeven. -
Page 18: Programmakeuzetabel
PROGRAMMAKEUZETABEL Programma Programma informatie Programmaverloop Tijd in minuten 60-70°C 111-183 P1 - Past automatisch de tijd, de wastemperatuur en de 50-60°C 100-127 hoeveelheid water aan aan de mate van vuil op het vaatwerk. P2 - 30-50°C 64-92 P3 - Voorwassen 60°C wassen Wasprogramma voor zeer vuile vaat, zoals Koud spoelen... -
Page 19: Reiniging & Onderhoud
reiniging & onderhoud Als u de vaatwasmachine regelmatig reinigt, verlengt u de levensduur van de machine. Controleer voordat u de vaatwasmachine gaat reinigen of de machine uit staat. Verwijder de stekker uit het stopcontact en draai de waterkraan dicht. Reinig de buitenkant van de vaatwasmachine met een vochtige doek. Om nare luchtjes van etensresten te voorkomen, reinig de deurrubbers regelmatig met een vochtige doek of spons. -
Page 20: Storingen
• Als de storing hiermee niet opgelost is, neemt u contact op met de servicedienst. De watertemperatuur is niet • Neem contact op met de Inventum servicedienst. goed. Defecte verwarming en warmtesensor. Beveiliging tegen waterlekkage is •... -
Page 21: Wat Te Doen Als
• Er is te veel zout naast het reservoir terecht gekomen tijdens het vullen. • Het water in de toevoer is vervuild. Mocht er zich een storing voor doen die niet beschreven staat, neem dan contact op met de Inventum servicedienst. Nederlands... -
Page 22: Algemene Service- & Garantie Voorwaarden
3. Om aanspraak te maken op de 5 jaar Inventum garantie kun je teruggaan naar de winkel waar je het product hebt gekocht of contact opnemen met de consumentenservice van Inventum via het formulier op www.inventum.eu/service-aanvraag. - Page 23 Als je beschadigingen aantreft, dien je deze binnen 5 werkdagen na aankoop te melden bij de winkel waar je het product hebt gekocht, of bij de consumentenservice van Inventum via het contactformulier op de website www.inventum.eu/service-aanvraag.
- Page 24 English Safety and installation instructions page 25 Delivery page 25 Installation page 25 Positioning the appliance page 25 Connecting to the water tap and drainage page 26 Electrical connection page 26 In daily use page 27 Product fiche page 29 Description of the appliance page 31 Before first use...
-
Page 25: Safety And Installation Instructions
safety and installation instructions • Please read these instructions before operating the appliance and retain for future use. DELIVERY • Check for any damage to the packaging or the appliance during transportation. Never use a damaged appliance, but contact your supplier. •... -
Page 26: Connecting To The Water Tap And Drainage
• The plug of the appliance must be connected to an earthed socket. Make sure that the voltage and the frequency values for the current in the home correspond to those on the rating plate. Inventum is not responsible for damage when using the appliance with a socket that is not earthed. -
Page 27: In Daily Use
Where dishes do not bear any such marking, always follow the manufacturer’s instructions. • Only use detergent, rinse aid and salt that is intended for use in a dishwasher. Inventum will not be responsible for any damage that might occur in your appliance otherwise. - Page 28 • Do not put any items into your appliance which are not suitable for dishwashing. Also, do not fill any basket above its capacity. Inventum will not be responsible for any scratch or rust to form on the inner frame of your appliance due to basket movements otherwise.
-
Page 29: Product Fiche
PRODUCT FICHE INVENTUM Model IVW6013A Number of place settings 12 place settings Energy efficiency class * Annual energy consumption [Aec] kWh ** Energy consumption standard cycle [Et] 0,90 Power consumption in OFF mode [Po] 0,50 Power consumption in standby mode [Pl]... - Page 30 Technical specifications IVW6013A Dimensions [mm] (bxdxh) 598 x 550 x 820 Nett weight [kg] Gross weight [kg] Power consumption [W] 1900 Rated voltage [V] / frequency [Hz] 220-240/ 50 Length of power cord [m] Type of plug EU/TR Type of supply hose connection...
-
Page 31: Description Of The Appliance
description of the appliance 1. On/off button - when the on/off button is pressed the indicator light Ready (10) lights up. 2. Display - shows the remaining time of the program and the timer. 3. Program selector button - select the desired washing program with this button - P1-P9. 4. -
Page 32: Before First Use
before first use Prior to using the machine for the first time please check whether the electricity and supply water specifications match the values indicated by the installation instructions for the appliance. Remove all packaging materials inside the machine. Fill the salt reservoir and fill up with water until it almost overflows. Set the water hardness setting. Fill the rinse aid reservoir. -
Page 33: Filling With Rinse Aid And Setting The Consumption
Table of water hardness level settings Water German French British Hardness level indicator hardness hardness hardness hardness level Display shows 6-11 10-20 7-14 12-17 21-30 15-21 18-22 31-40 22-28 23-31 41-55 29-39 32-50 56-90 40-63 FILLING WITH RINSE AID AND SETTING THE CONSUMPTION Rinse aid is used to prevent traces of water droplets being left on the clean dishes. -
Page 34: Dishwasher Detergents
DISHWASHER DETERGENTS Use a detergent specifically designed for use in domestic dishwashers. You can find it in a powder, gelcapsules and tablets. Detergent must be placed into the reservoir before starting the dishwasher. Keep the detergents stored in a cool, dry place and out of reach of children. -
Page 35: Adjusting The Height Of The Upper Basket
IVW6013A 3 adjustable heights Different ways of loading the baskets are shown on the next pages. ADJUSTING THE HEIGHT OF THE UPPER BASKET The upper basket is in the upper position. When it is in this position, you can place large items, such as pots and large plates, on the lower basket. -
Page 36: Different Ways Of Loading The Baskets
DIFFERENT WAYS OF LOADING THE BASKETS Upper basket Lower basket Upper and lower basket faulty loading WARNING: place your dishes into your dishwasher in a way that they will not prevent the upper and lower spray arms from spinning. Make sure that no objects are sticking through the bottom of the cutlery basket. •... -
Page 37: Setting The Dishwasher
setting the dishwasher SWITCHING THE DISHWASHER ON AND OFF • Switch the dishwasher on by pressing the On/off button (1). • Select the desired program with the program selector knob (2). • If you prefer, you can choose an additional function (3), like prewash. •... -
Page 38: Program Selection Table
PROGRAM SELECTION TABLE Program Program information Program process Time in minutes 60-70°C 111-183 P1 - Automatically adjusts the washing time with temperature and the amount of water by determining the soil level of the 50-60°C 100-127 dishes. P2 - 30-50°C 64-92 P3 - Pre-wash... -
Page 39: Cleaning & Maintenance
cleaning & maintenance Cleaning the dishwasher regularly, prolongs the dishwasher’s service life. Check before cleaning the dishwasher if it’s is turned off. Unplug the dishwasher and turn off the tap. Clean the outside of the dishwasher with a damp cloth. To prevent odors from forming within the dishwasher, clean the seals of the door regularly with a soft damp cloth. -
Page 40: Troubleshooting
• Check whether the tap is fully open and there is nothing blocking the water mains. • Close the tap, remove the input hose and check whether it is clogged. • Start the dishwasher again. Contact the service department of Inventum when the error remains. Water supply is not stopping. -
Page 41: What To Do If
• The cap of the salt reservoir is not closed well. • Too much salt was spilt inside the dishwasher while refilling the reservoir. • The water mains is polluted. Contact the service department of Inventum when a malfunction occurs which is not described. English •... -
Page 42: General Terms And Conditios Of Service And Warranty
3. The 3-year extended warranty can only be applied for if you are in the possession of a copy of the original receipt and the Inventum 5-year warranty certificate. - Page 43 3. The inspection to establish whether repair is possible involves a charge. You need to grant your permission for this, in advance. 4. In the event of a large domestic appliance, Inventum, at your request, can send out a service engineer. In that case, you will be charged the call-out costs, as well as parts and labour.
- Page 44 Deze gebruiksaanwijzing is ook te downloaden als pdf via onze website www.inventum.eu These instructions are also available in an alternative format on our website www.inventum.eu IVW6013A/02.231216WM Wijzigingen en drukfouten voorbehouden/ Änderungen und Druckfehler vorbehalten/ Sous réserve de modification / Modifications and printing errors reserved...
Need help?
Do you have a question about the IVW6013A and is the answer not in the manual?
Questions and answers