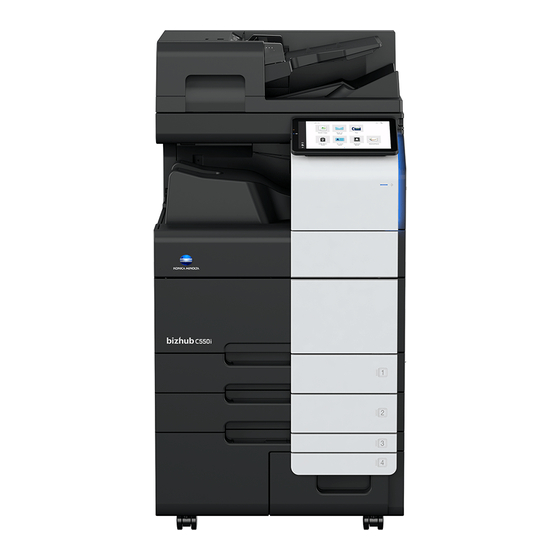
Konica Minolta bizhub C550i Quick Manual
Hide thumbs
Also See for bizhub C550i:
- Quick manual (64 pages) ,
- Best practices manual (58 pages) ,
- Shortcut manual (44 pages)
Table of Contents
Advertisement
Advertisement
Table of Contents

Related Manuals for Konica Minolta bizhub C550i


Summary of Contents for Konica Minolta bizhub C550i
- Page 1 bizhub C650i/C550i/C450i QUICK GUIDE...
-
Page 3: Table Of Contents
Table of contents Safety information Introduction ............................. 1-3 Environmental information......................1-4 Safety information........................... 1-5 Regulation notices .......................... 1-9 Caution notations and labels ....................... 1-15 Special notice to user ........................1-16 Space requirements........................1-18 Operation precautions........................1-19 Legal restrictions on reproduction....................1-20 Before using this machine Environmental initiatives ........................ - Page 4 Available operations in this machine How to copy............................. 7-3 How to print ............................. 7-5 How to scan............................. 7-6 How to fax............................7-8 Registering a destination How to register a destination ......................8-3 Read this if you have a problem Main messages and remedies ....................... 9-3 9.1.1 Checking a notification message on the Touch Panel................9-3 9.1.2...
-
Page 5: Safety Information
Safety information... -
Page 7: Introduction
Introduction Safety information Introduction This [Quick Guide] uses illustrations to describe operating procedures for the most commonly used functions in an easy-to-understand way. Start by using this manual to become proficient with the useful functions that this machine offers. For details on the various functions, refer to the User’s Guides on the User’s Guide CD/DVD included with this machine. -
Page 8: Environmental Information
Environmental information Environmental information Environmental benefits of power management Electricity consumption of a device depends on both its properties and the way of using the device. Suitable power management setting offers you resource saving usage way. By setting the time to go into power saving modes (e.g. -
Page 9: Safety Information
Safety information Safety information This section contains detailed instructions on the operation and maintenance of this machine. To achieve op- timum utility of this device, all operators should carefully read and follow the instructions in this manual. Please read the following section before connecting the machine to the supply. It contains important infor- mation related to user safety and preventing equipment problems. - Page 10 Safety information WARNING Do not use a multiple outlet adapter to connect any other appliances or machines. Use of a power outlet for more than the marked current value could result in a fire or electrical shock. Do not use an extension cord. Use of an extension cord could cause a fire or electric shock. If the power cord furnished with the product is not long enough to be plugged into a wall outlet, contact your Technical Representative.
- Page 11 Safety information CAUTION Whenever moving this product, be sure to disconnect the power cord and other cables. Failure to do this could damage the cord or cable, resulting in a fire, electrical shock, or breakdown. When moving this product, always hold it at the locations specified in the User’s Guide or other documents.
- Page 12 Safety information Consumables WARNING Do not throw toner or a container that contains toner (e.g., toner cartridge, developing unit and Waste Toner Box) into an open flame. The hot toner may scatter and cause burns or other damage. CAUTION Do not leave toner-related parts (e.g., toner cartridge, developing unit and Waste Toner Box) within easy reach of children.
-
Page 13: Regulation Notices
KONICA MINOLTA branded model bizhub C650i, bizhub C550i and bizhub C450i. CE Marking (Declaration of Conformity) for users of the European Union (EU) Hereby, Konica Minolta declares that the radio equipment models specified above are in compliance with Directive 2014/53/EU. - Page 14 U.S.A. users) FCC: Declaration of Conformity Product Type Multi Function Printer Product Name bizhub C650i, bizhub C550i, bizhub C450i This device complies with Part 15 of the FCC Rules Operation is subject to the following two conditions: (1) This device may not cause harmful interference, and (2) this device must accept any interference received, including interference that may cause undesired oper- ation.
- Page 15 Internal laser radiation Maximum Average Radiation Power: 15.1 μW (bizhub C650i), 13.1 μW (bizhub C550i), 9.9 μW (bizhub C450i) at the laser aperture of the print head unit. Wavelength: 775-800 nm (bizhub C650i/C550i)/770-800 nm (bizhub C450i) This product employs a Class 3B laser diode that emits an invisible laser beam.
- Page 16 Regulation notices For European users 7WARNING Use of controls, adjustments or performance of procedures other than those specified in this manual may result in hazardous radiation exposure. This is a semiconductor laser. The maximum power of the laser diode is 25 mW and the wavelength is 775-800 nm (bizhub C650i/C550i) or 770-800 nm (bizhub C450i).
- Page 17 Regulation notices Recycling batteries (for Taiwan users only) This symbol means: Do not dispose of this product together with your household waste! Please refer to the information of your local community or contact our deal- ers regrading the proper handling of end-of-life electric and electronic equipments.
- Page 18 Regulation notices Graphic symbols used on this machine These are some of major exemplary graphical symbols. Graphic Descriptions Graphic Descriptions symbols symbols "ON" position "OFF" position STAND-BY push-push type switches Ground/Earth (Protective bonding ter- Ground/Earth (Protective earthing) minal) CLASS II EQUIPMENT Class II equipment with functional earthing Functional earthing...
-
Page 19: Caution Notations And Labels
Caution notations and labels Caution notations and labels Safety precaution notations and labels appear on this machine at the following positions. Be very careful that an accident does not occur when operations such as removing paper jams and staple jams are performed. FS-539/FS-539 SD FS-540/FS-540 SD NOTICE... -
Page 20: Special Notice To User
If trouble is experienced with this equipment FK-514 or FK-515, for repair or warranty information, please contact the Konica Minolta dealer location where you purchased this equipment. If the equipment is causing harm to the telephone network, the telephone company may request that you disconnect the equipment until the problem is resolved. - Page 21 Special notice to user Connection to party line service is subject to state tariffs. Contact the state public utility commission, public service commission or corporation commission for information. If you home has specially wired alarm equip- ment connected to the telephone line, ensure the installation of FK-514 or FK-515 does not disable you alarm equipment.
-
Page 22: Space Requirements
Space requirements Space requirements To ensure that machine operation, consumables replenishing, part replacement, and regular maintenance can easily be performed, adhere to the recommended space requirements detailed below. Main unit + DK-705 + FS-540 SD + PC-216 + LU-207 + MK-730 + CU-102 Unit: inch (mm) Main unit + DK-705 + FS-539 SD + PC-216 + LU-302 + MK-730 + CU-102 Unit: inch (mm) -
Page 23: Operation Precautions
Operation precautions Operation precautions To ensure the optimum performance of this machine, observe the precautions described below. Power source The power source requirements are as follows. Voltage fluctuation: Maximum ± 10% (at 110 V/120 V/220 to 240 V AC) Frequency fluctuation: Maximum ± 3 Hz (at 50 Hz/60 Hz) Use a power source with as little voltage or frequency fluctuations as possible. -
Page 24: Legal Restrictions On Reproduction
Legal restrictions on reproduction Legal restrictions on reproduction Certain types of originals must never be reproduced with the purpose or intent to pass reproductions of such originals off as the originals. The following is not a complete list, but is meant to be used as a guide to responsible reproduction. <Financial Instruments>... -
Page 25: Before Using This Machine
Before using this machine... -
Page 27: Environmental Initiatives
Environmental initiatives Before using this machine Environmental initiatives The company continuously strives to reduce the negative environmental impacts of all stages of its business operations. As part of such activities, the company is implementing resource-saving steps by reducing the number of pages in the User's Guide. -
Page 28: Intended Use Of Office Mfp Devices
Intended use of office MFP devices Intended use of office MFP devices Intended use This Multi Function Product incorporates the functionality of multiple office devices in one. It is designed to be used as an office system for the following purposes: Print, copy, scan and fax documents. -
Page 29: Target Groups
Target groups Target groups The user's guides are intended for the following users of the system: Target group Description User Persons using the system for objectives described in "Intended use of office MFP de- vices" as well as managing system functions and consumables according to the as- signed user rights. -
Page 30: Introduction To User's Guide
Introduction to user's guide Introduction to user's guide The user's guide of this product consists of this manual and the HTML User's Guide. This manual describes notes and precautions that should be followed in order to use this machine safely, and also provides information about basic functions and operation methods. -
Page 31: Symbols And Notations Used In This Manual
Symbols and notations used in this manual Symbols and notations used in this manual 7WARNING Improper handling can cause serious injury or death. 7CAUTION Improper handling can cause minor injury or damage to houses and property. NOTICE This symbol indicates a risk that may result in damage to this machine or documents. Follow the instructions to avoid property damage. -
Page 32: Administrator Password
Administrator password Administrator password The administrator password is set to [1234567812345678] by factory default. Try this password if the admin- istrator password has not been changed. Change the administrator password periodically. bizhub C650i/C550i/C450i... -
Page 33: How To Use The Html User's Guide
How to use the HTML User's Guide... - Page 35 How to use the HTML User's Guide About the HTML User's Guide Select a desired function on the top page (Home), and check the details of the function. Selecting [Introduction] on the top page (Home) allows you to view detailed methods for using the HTML Us- er's Guide.
- Page 36 bizhub C650i/C550i/C450i...
-
Page 37: About This Machine
About this machine... -
Page 39: Optional Components
Optional components About this machine Optional components List of optional components Name Description Main unit Scans the original in the scanner section, and prints a scanned image in the printer section. This unit is referred to as "this machine" or the "main unit" in the man- ual. - Page 40 Output Tray OT-513 Outputs printed pages. Job Separator JS-508 Install this unit onto the output tray of this machine. This unit sorts printed sheets. This unit can only be installed on bizhub C550i/C450i. bizhub C650i/C550i/C450i...
- Page 41 Finisher FS-533 Install this unit onto the output tray of this machine. Sorts, groups and staples printed paper before outputting it. This unit can only be installed on bizhub C550i/C450i. Punch Kit PK-519 Install this unit onto the Finisher FS-533.
- Page 42 Optional components Name Description i-Option LK-105 v5 Allows you to add the searchable PDF function. i-Option LK-106 Used to add a bar code font that is one of special fonts. i-Option LK-107 Used to add a unicode font that is one of special fonts. i-Option LK-108 Used to add an OCR font that is one of special fonts.
-
Page 43: Name Of Each Component (Main Unit)
Name of each component (main unit) Name of each component (main unit) Front Name Description Reverse Automatic Automatically feeds and scans originals by page. This unit scans a 2- Document Feeder sided original by only requiring the paper be fed into the machine once without reversing. - Page 44 Name of each component (main unit) Side/rear The illustration shows the main unit with Fax Kit FK-514, FAX Kit FK-515, and Fax Mount Kit MK-742. (FAX Kit FK-515 and Fax Mount Kit MK-742 can be used in North America and Hong Kong.) Name Description Power Cord...
-
Page 45: Power Supply
Power supply Power supply This machine provides the Main Power Switch and Power key. Name Description Main Power Switch Turns the main power of this machine on or off. For details on how to turn the main power on or off, refer to page 4-9. Power key Switches this machine to the Power Save mode. - Page 46 Power supply 4-10 bizhub C650i/C550i/C450i...
-
Page 47: About Panels
About panels... -
Page 49: Control Panel
Control Panel About panels Control Panel Name Description Touch Panel Displays setting screens and messages. Directly press this panel to carry out operations. Warning Indicator Indicates the status of this machine by the lamp color, flashing, or a lamp lighting up. •... -
Page 50: Touch Panel
Touch Panel Touch Panel Home screen The layout of the home screen is as follows. Name Description User/Account Name Displayed when user authentication and account track are enabled. Opening the left area displays the name of the current login user or the account name. -
Page 51: Login Methods
Login methods Login methods When user authentication is enabled: When user authentication is enabled on this machine, the login screen is displayed. Enter the user name and the password, and perform user authentication. The contents of the login screen may vary depending on the authentication setting of this machine. If Public User Access (unregistered users) is enabled, you can tap [Used by public user] on the login screen to operate this machine without authentication. - Page 52 Login methods When account track is enabled: When account track is enabled on this machine, the login screen is displayed. Enter the account name and the password to perform account track. The contents of the login screen may vary depending on the authentication setting of this machine. Enter the account name and password.
-
Page 53: Loading The Original And Paper
Loading the original and paper... -
Page 55: Load The Original
Load the original Loading the original and paper Load the original The original loading methods are classified into two types: loading the original into the ADF (Automatic Doc- ument Feeder), and directly loading the original onto the Original Glass. Select the appropriate one for your requirements. 6.1.1 Loading the original into the ADF This function is useful when you want to scan an original containing multiple pages, or a sheet original of dif-... -
Page 56: Loading Paper
Loading paper Loading paper No paper setting is required because frequently used paper is loaded during general use. This section describes how to use paper that is not usually loaded into a paper tray. The methods for loading envelopes, postcards, label sheets, and index paper are as follows. 6.2.1 Loading paper in Tray 1 to Tray 2 Up to 500 sheets of plain paper can be loaded into each tray. -
Page 57: Loading Paper Into The Bypass Tray
Loading paper Load paper into the tray with the print side facing up. When loading paper other than plain paper, specify the paper type as needed. % The paper type is automatically detected by the Intelligent media sensor that is mounted as stand- ard on this machine. - Page 58 Loading paper Load paper with the print side facing down, then align the Lateral Guide to the paper. % Insert paper into the tray until their edges are pressed against the back. NOTICE Do not load an excessive number of sheets such that the top of the stack is higher than the mark.
-
Page 59: Loading Envelopes
Loading paper 6.2.3 Loading envelopes Precautions when using envelopes Remove air from the envelope(s), and securely press along the flap fold line. Do not use envelopes that have glue or release paper on the flap or the part covered by the flap on the body. - Page 60 Loading paper For Bypass Tray Up to 10 envelopes can be loaded into the tray. Load envelopes with the flap part facing up. Align the Lateral Guide with the envelope size. Select the desired envelope size from [Envelop/4 e 6] ([Envelop/A6 Card]) of [Paper Size]. Max.
-
Page 61: Loading Postcards
Loading paper 6.2.4 Loading postcards Precautions when using postcards When loading curled postcards, uncurl them. When using postcards other than 4 e 6 (A6 Card), confirm its size, and select [Paper Size] - [Custom Size] to specify the size. For Tray 1 Up to 200 postcards can be loaded into the tray. - Page 62 Loading paper For Bypass Tray Up to 20 postcards can be loaded into the tray. Load postcards with the print side facing down. Align the Lateral Guide with the postcard size. Select the desired postcard size from [Envelop/4 e 6] ([Envelop/A6 Card]) of [Paper Size]. Max.
-
Page 63: Loading Label Sheets
Loading paper 6.2.5 Loading label sheets A label sheet consists of the front-side paper (print side), sticking layer, and pasteboard . Peel off the paste- board, then you can stick the label to other objects. Up to 20 label sheets can be loaded into the tray. With the print side facing down, load label sheets as shown in the figure. -
Page 64: Loading Index Papers
Loading paper 6.2.6 Loading index papers Up to 20 index papers can be loaded into the tray. With the print side facing down, align the tab side as shown below. Align the Lateral Guide with the index sheet size. Select [Index Paper] from [Paper Type]. 6-12 bizhub C650i/C550i/C450i... -
Page 65: Available Operations In This Machine
Available operations in this machine... -
Page 67: How To Copy
How to copy Available operations in this machine This machine provides the copy function, print function, and scan/fax function as major functions. This sec- tion describes the basic operations for each function. If you want to learn about more detailed descriptions or operation methods, refer to the HTML User's Guide included in the User's Guide CD/DVD. - Page 68 How to copy Set copy options as needed. If necessary, specify the number of copies using the keypad. Use the Start key to start copying. bizhub C650i/C550i/C450i...
-
Page 69: How To Print
How to print How to print Basic print operations This section describes the basic print operations. Open document data using the application software. From the [File] menu, select [Print]. Check the [Printer Name] (or [Select Printer]) make sure that the desired printer has been selected. % The [Print] dialog box differs depending on the application. -
Page 70: How To Scan
How to scan How to scan Basic scan operations This section describes the basic scan operations. If user authentication is enabled, the login screen appears. Enter the required items, and tap [Login]. Load the original. Tap the scan function key on the home screen. Specify the destination. - Page 71 How to scan Specify transmission options as needed. Use the Start key to start transmission. bizhub C650i/C550i/C450i...
-
Page 72: How To Fax
How to fax How to fax Basic fax operations This section describes the basic fax operations. If user authentication is enabled, the login screen appears. Enter the required items, and tap [Login]. Load the original. Tap [Fax] on the home screen. bizhub C650i/C550i/C450i... - Page 73 How to fax Specify the destination. Specify transmission options as needed. Use the Start key to start transmission. bizhub C650i/C550i/C450i...
- Page 74 How to fax 7-10 bizhub C650i/C550i/C450i...
-
Page 75: Registering A Destination
Registering a destination... -
Page 77: How To Register A Destination
How to register a destination Registering a destination How to register a destination Registering a fax address Tap [Utility] - [Utility] - [Store Address] - [Address Book] - [New Registration]. In [Select Destination], select [Fax]. Enter destination information. Setting Description [No.] Destination registration number. - Page 78 How to register a destination Registering E-mail address Tap [Utility] - [Utility] - [Store Address] - [Address Book] - [New Registration]. In [Select Destination], select [E-mail Address]. Enter destination information. Setting Description [No.] Destination registration number. Select [Use opening number] to automati- cally assign the smallest available number.
-
Page 79: Read This If You Have A Problem
Read this if you have a problem... -
Page 81: Main Messages And Remedies
Main messages and remedies Read this if you have a problem Main messages and remedies 9.1.1 Checking a notification message on the Touch Panel The notification icon is displayed on the home screen when there is a machine condition warning or notice notification. -
Page 82: Screen That Appears When A Paper/Staple Jam Has Occurred
Main messages and remedies 9.1.2 Screen that appears when a paper/staple jam has occurred If any paper or staple jam occurs on this machine, the paper jam clearing procedure and the paper or staple jam location are displayed on the screen of this machine. Confirm the clear procedure and jam location, and follow the guidance to clear the jam. -
Page 83: When An Error Message Appears
Main messages and remedies Return the original or paper, and tap [OK] or [Complete]; the system restarts scanning or printing of the orig- inal. Item Description [Start Guidance] Starts the guidance showing how to clear a paper/staple jam. [Display Switch] Changes the screen that shows the paper jam clearing procedure and the screen that shows where the paper jam occurred. -
Page 84: When The Touch Panel Is Not Visible
When the Touch Panel is not visible When the Touch Panel is not visible If a certain length of time has elapsed without any operations being carried out on this machine, the Touch Panel may turn off. Check the following items: Touch the Touch Panel. -
Page 85: When Printing Quality Has Deteriorated
When printing quality has deteriorated When printing quality has deteriorated Cleaning the Original Glass and roller Wipe the surface using a soft, dry cloth. 7CAUTION The inside of this product has areas subject to high temperature, which may cause burns. When check- ing the inside of the unit for malfunctions such as a paper misfeed, do not touch the locations (around the fusing unit, etc.) which are indicated by a "Caution HOT"... - Page 86 When printing quality has deteriorated Cleaning the Slit Scan Glass (back) Open the ADF. Open the Opening and Closing Guide. % Release the lock lever of the Opening and Closing Guide, and open the Opening and Closing Guide. Wipe stains off the Slit Scan Glass (back) using a dry, clean cloth. NOTICE Do not touch the Slit Scan Glass (back).
- Page 87 When printing quality has deteriorated Close the Opening and Closing Guide you opened in step 2. % Press the Hand mark in the center of the Opening and Closing Guide, and check that the Opening and Closing Guide is locked securely. Cleaning the Print Head Glass Printing quality deteriorates if the Print Head Glass is dirty.
- Page 88 When printing quality has deteriorated Remove the Printhead Cleaner from the Lower Front Door of this machine. Slowly insert the Printhead Cleaner all the way to the back end of the Print Head Glass, and then slowly pull it out. % Repeat this operation approximately three times for all the Print Head Glass sections.
-
Page 89: When A Message Appears To Replace Consumables Or Carry Out Cleaning
When a message appears to replace consumables or carry out cleaning When a message appears to replace consumables or carry out cleaning A message appears indicating the time(s) that expiring consumables used in this machine should be re- placed. Also, a message appears when the Slit Scan Glass is dirty. Replace consumables or clean the Slit Scan Glass as instructed in the displayed message. - Page 90 When a message appears to replace consumables or carry out cleaning Replacing a Toner Cartridge The following example shows how to replace a Yellow Toner Cartridge. Tips Shake a new Toner Cartridge well, approximately 5 to 10 times, before installing it. If a toner cartridge other than for black is empty, printing can be continued forcibly using black.
-
Page 91: About Waste Toner Box
When a message appears to replace consumables or carry out cleaning 9.4.4 About Waste Toner Box When the Waste Toner Box is full, a message appears to prompt you to replace it (at replacement by user). Follow the displayed guidance to take an action. Replacing a Waste Toner Box New Waste Toner Box... -
Page 92: About Staple Cartridge
When a message appears to replace consumables or carry out cleaning 7CAUTION Do not leave toner-related parts (e.g., toner cartridge, developing unit and Waste Toner Box) within easy reach of children. Licking any of these parts or ingesting toner could damage your health. Do not store toner-related parts (e.g., toner cartridge, developing unit and Waste Toner Box) near de- vices susceptible to magnetism, such as precision equipment and data storage devices, otherwise they may malfunction. - Page 93 When a message appears to replace consumables or carry out cleaning Unlock the Staple Cartridge. Pull out the Staple Cartridge. Pull out an empty staple case from the Staple Cartridge. bizhub C650i/C550i/C450i 9-15...
- Page 94 When a message appears to replace consumables or carry out cleaning Insert a new staple case into the Staple Cartridge. % Insert the staple case until it hits the back of the Staple Cartridge, and check that it is locked. Attach the Staple Cartridge.
- Page 95 When a message appears to replace consumables or carry out cleaning Replacing a Staple Cartridge (for Finisher FS-539/Finisher FS-539 SD) Open the Front Door of the Finisher. Unlock the Staple Cartridge. Pull out the Staple Cartridge. bizhub C650i/C550i/C450i 9-17...
- Page 96 When a message appears to replace consumables or carry out cleaning Remove any empty staple cases from the Staple Cartridge. Attach a new staple case to the Staple Cartridge. Attach the Staple Cartridge. Close the Front Door of the Finisher. Tips Do not remove staples that remain in the machine.
- Page 97 When a message appears to replace consumables or carry out cleaning Replacing a Staple Cartridge (for Finisher FS-533) Pinch the Lock Release Lever, and slide the Finisher. Pull the Punch Kit Release Lever [FS2] in the arrow direction, and open the Punch Kit. Unlock the Staple Cartridge.
- Page 98 When a message appears to replace consumables or carry out cleaning Remove any empty staple cases from the Staple Cartridge. Attach a new staple case to the Staple Cartridge. Attach the Staple Cartridge. Close the Punch Kit. Close the Finisher. Tips Do not remove staples that remain in the machine.
- Page 99 When a message appears to replace consumables or carry out cleaning Replacing a Saddle Staple Cartridge (for Finisher FS-540 SD) Open the Front Door of the Finisher. Pull out the Saddle Stitcher. Tilt the blue knob of the Saddle Staple Cartridge toward you. Saddle Staple Cartridge 1 Saddle Staple Cartridge 2 bizhub C650i/C550i/C450i...
- Page 100 When a message appears to replace consumables or carry out cleaning Pull out the Saddle Staple Cartridge. Open the Saddle Staple Cartridge cover. Remove any empty staple cases from the Saddle Staple Cartridge. Attach a new staple case to the Saddle Staple Cartridge. 9-22 bizhub C650i/C550i/C450i...
- Page 101 When a message appears to replace consumables or carry out cleaning Close the Saddle Staple Cartridge cover. Attach the Saddle Staple Cartridge. Push the blue knob of the Saddle Staple Cartridge to the back. % Check that the mark of the Saddle Staple Cartridge matches that of the Saddle Stitcher. bizhub C650i/C550i/C450i 9-23...
- Page 102 When a message appears to replace consumables or carry out cleaning Push in the Saddle Stitcher. Close the Front Door of the Finisher. Tips Do not remove staples that remain in the machine. Otherwise, the stapling function will activate but no sheets will be stapled.
- Page 103 When a message appears to replace consumables or carry out cleaning Pull out the Saddle Stitcher. Tilt the blue knob of the Saddle Staple Cartridge toward you. Saddle Staple Cartridge 1 Saddle Staple Cartridge 2 Pull out the Saddle Staple Cartridge. Open the Saddle Staple Cartridge cover.
- Page 104 When a message appears to replace consumables or carry out cleaning Remove any empty staple cases from the Saddle Staple Cartridge. Attach a new staple case to the Saddle Staple Cartridge. Close the Saddle Staple Cartridge cover. Attach the Saddle Staple Cartridge. 9-26 bizhub C650i/C550i/C450i...
- Page 105 When a message appears to replace consumables or carry out cleaning Push the blue knob of the Saddle Staple Cartridge to the back. % Check that the mark of the Saddle Staple Cartridge matches that of the Saddle Stitcher. Push in the Saddle Stitcher. Close the Front Door of the Finisher.
-
Page 106: About Hole-Punch Scraps
When a message appears to replace consumables or carry out cleaning 9.4.6 About hole-punch scraps When the punch scrap box is full, a message appears to prompt you to dispose of the punch scraps (at re- placement by user). Take action while referring to the label inside the machine. Punch scrap processing (for Finisher FS-540/Finisher FS-540 SD) Tips The figure shows the Finisher FS-540 SD with Punch Kit PK-526, Z Folding Unit ZU-609, and Relay... - Page 107 When a message appears to replace consumables or carry out cleaning Punch scrap processing (for Finisher FS-539/Finisher FS-539 SD) Tips The figure shows the Finisher FS-539 SD equipped with Punch Kit PK-524 and Relay Unit RU-513. bizhub C650i/C550i/C450i 9-29...
- Page 108 When a message appears to replace consumables or carry out cleaning Punch scrap processing (for Finisher FS-533) Tips The figure shows the Finisher FS-533 equipped with Punch Kit PK-519. 9-30 bizhub C650i/C550i/C450i...
-
Page 109: Staple Scraps
When a message appears to replace consumables or carry out cleaning 9.4.7 Staple scraps When the staple scrap box is full, a message appears to prompt you to dispose of staple scraps. Follow the instructions below to dispose of staple scraps. Staple scrap disposal procedure (Finisher FS-540/Finisher FS-540 SD only) Tips The figure shows the Finisher FS-540 SD with Punch Kit PK-526, Z Folding Unit ZU-609, and Relay... - Page 110 When a message appears to replace consumables or carry out cleaning 9-32 bizhub C650i/C550i/C450i...
Need help?
Do you have a question about the bizhub C550i and is the answer not in the manual?
Questions and answers
DOES THE MACHINE PROVIDE PROOF OF SCAN
Yes, the Konica Minolta bizhub C550i provides proof of scan using the optional Stamp Unit SP-501, which stamps a scanned original when sending a fax to indicate it has been scanned.
This answer is automatically generated
how to copy into draft on buzhub 450i