
Related Manuals for Motorola D502


Summary of Contents for Motorola D502
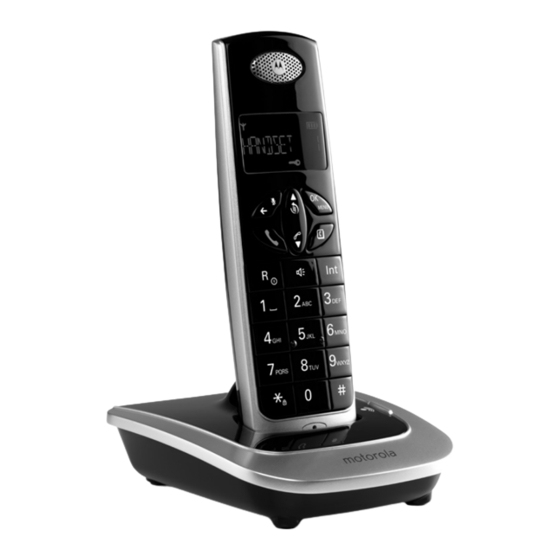
- Page 1 Digital Cordless Telephone Motorola D5 Models: D501, D502, D503 and D504 Warning: Charge the handset for 24 hours before use.
- Page 2 Welcome... to your new Motorola D5 Digital Cordless Telephone! • All handsets are fully cordless for locating anywhere within range. • 100 Name and Number phonebook. • Bright inverse display. • Speakerphone for hands-free conversation. • Caller ID shows you who’s calling and see details of the last 40 callers in a Calls list.
- Page 3 This User Guide provides you with all the information you need to get the most from your phone. Before you make your first call you will need to set up your phone. Follow the simple instructions in ‘Getting Started’, on the next few pages. IMPORTANT Only use the telephone line cord supplied.
-
Page 4: Table Of Contents
1. Getting started ..............6 2. Getting to know your phone ..........10 Switch the handset on / off ................15 Calls .......................15 3.2.1 Make a call ...................15 3.2.2 Preparatory dialling ................15 3.2.3 End a call .....................15 3.2.4 Receive a call ..................15 Adjust the earpiece volume................15 Secrecy ......................15 Intercom......................15 3.5.1... - Page 5 6. Base settings ...............24 Base ringer volume ..................24 Base ringer melody ..................24 Change base PIN code .................24 Dial mode.......................24 Recall mode ....................25 Restore default settings .................25 Emergency default ..................25 Eco mode ......................25 Default settings .....................26 7. Clock & alarm ..............27 Set the date ....................27 Set the time ....................27 Set alarm ......................27...
-
Page 6: Getting Started
1. Getting started IMPORTANT Do not place your D5 in the bathroom or other humid areas. Location You need to place your D5 base within 2 metres of the mains power and telephone wall sockets so that the cables will reach. The socket-outlet should be installed near the equipment and should be easily accessible. - Page 7 1. Plug the telephone line cord into the socket marked on the rear of the base. 2. Plug the power adaptor with clear connecter into the socket marked on the rear of the base and plug the other end into the mains power wall socket. Switch on the mains power.
- Page 8 1. Plug the power adaptor with red connecter into the socket marked on the rear of the charger and plug the other end into the mains power wall socket. 2. Remove the battery cover from the back of the handset and insert the 2 x AAA NiMH rechargeable batteries supplied.
- Page 9 Date and time If you have subscribed to a Caller ID Service, the date and time is set automatically for all handsets when you receive your first call. If you do not have a Caller ID service, you can set the date and time manually. Set the date manually: 1.
-
Page 10: Getting To Know Your Phone
2. Getting to know your phone Overview of your handset A Earpiece B Display See page 12 for an overview of the display icons. C Secrecy / Clear / Back During a call, press to switch Secrecy on/off, page 15. In menu mode, press to return to previous menu or press and hold to return to standby. - Page 11 E Menu / OK Press to open the Menu, page 14. Press to select menu options and to confirm a displayed option. F Phonebook / Exit In standby mode, press to open the phonebook menu, page 19. When viewing the redial/calls list or when editing, press to exit and return to standby. G Calls list / Down In standby mode, press to open the calls list, page 28.
- Page 12 Handset LCD Display Battery Eco mode status Circle around Scrolls appears when when Eco mode is ON charging Time or Handset name In standby mode, press and hold to switch handset idle screen between handset name or time. Flashes to indicate an incoming external call. External call in progress.
- Page 13 Overview of the base A Page In standby mode, press to ring the handset(s), page 18. Press and hold to enter registration mode when registering handsets, page 31. Navigating the menus Your D5 has an easy to use menu system. Each menu has a list of options, which you can see on the menu map on the following page.
- Page 14 Menu map PHONEBOOK HANDSET ADD ENTRY BEEP MODIFY ENTRY INT RING VOL DELETE ENTRY EXT RING VOL SETUP INT MELODY BASE VOLUME EXT MELODY BASE MELODY AUTO ANSWER DEL HANDSET NAME PIN CODE LANGUAGE DIAL MODE KEYLOCK ? RECALL DATE - TIME DEFAULT DATE SET ECO MODE...
-
Page 15: Switch The Handset On / Off
3. Using the phone NOTE Your handset will automatically time the duration of all external calls. The call timer will display after the first 15 seconds of your call. When the call ends, the total duration of your talk time flashes on the screen for 5 seconds. Switch the handset on / off Press and hold to switch the handset on or off. -
Page 16: Receive An Internal Call
icon is displayed to indicate an internal call. 1. Press followed by the number (1-5) of the handset you want to call. 3.5.2 Receive an internal call When you receive an internal call, icon flashes and the handset number that is calling you is displayed. -
Page 17: Answer A Call Hands-Free
3.6.2 Answer a call hands-free When the phone rings, press to answer the call. 3.6.3 Switch to hands-free during a call During a call, press to put the call on the loudspeaker. To switch hands-free off and return the call to the earpiece, press again. -
Page 18: Lock / Unlock The Keypad
Lock / unlock the keypad You can lock the keypad so that it cannot be operated accidentally while carrying it around. NOTE When the keypad is locked, you can still answer incoming calls and operate the handset as normal. When the call ends, the keypad lock comes on again. 1. -
Page 19: Phonebook
4. Phonebook You can store up to 100 names and numbers in the phonebook. Names can be up to 12 characters long and numbers up to 24 digits. You can also select different ringer melodies for the phonebook entries. Store a name and number If you have subscribed to Caller ID Service and wish to display the name of your caller instead of the number, save the full telephone number including the area code to your phonebook. -
Page 20: View Or Dial An Entry
View or dial an entry 1. Press icon is displayed. 2. Scroll to the entry you want. Enter the first letter of the name to search alphabetically. The first name that starts with this letter or the nearest letter in the alphabet will be displayed. Scroll to the entry you want. -
Page 21: Handset Settings
5. Handset settings Handset ringer volume You can adjust the ringer volume and set different volume levels for your internal and external calls. Choose from 5 volume levels or Off. 1. Press , scroll HANDSET and press 2. Press to select INT RING VOL EXT RING VOL and press... -
Page 22: Language
3. Enter the new handset name and press to confirm. Delete the current name by pressing NOTE The handset name will only be displayed for approximately 20 seconds when no button is pressed. If you make a mistake, press to delete the last character or digit. See “ENTERING NAMES”... -
Page 23: Keypad Lock Using The Menu
Keypad lock using the menu You can use the menu to lock the keypad. 1. Press , scroll HANDSET and press 2. Scroll KEYLOCK ? and press to confirm. icon is displayed. NOTE To unlock the keypad, press any button on the keypad, then press within 3 seconds. -
Page 24: Base Settings
6. Base settings Base ringer volume Choose from 5 volume levels or Off. 1. Press , scroll SETUP and press . The display shows BASE VOLUME. 2. Press 3. Press to select the volume (1 - 5 or OFF). 4. Press to confirm or to return to the previous menu. -
Page 25: Recall Mode
Recall mode This setting is useful to access certain network and PABX/switchboard services. The default recall time is suitable for your country and network operator. It is unlikely that you should need to change this setting unless advised to do so. 1. -
Page 26: Default Settings
Eco mode NOTE When ECO mode is set to ON, the handset range will be reduced. On the handset display when ECO mode is switch off the circle around the disappears. Default settings Auto answer Internal melody Internal volume External melody External volume Ear volume Base melody... -
Page 27: Clock & Alarm
7. Clock & alarm If you have subscribed to Caller ID Service, the date and time will be set on all your handsets whenever a call is received. You can also manually set the date and time on the individual handsets. Set the date 1. -
Page 28: Caller Id And The Calls List
8. Caller ID and the Calls list IMPORTANT To use Caller ID, you must first subscribe to the service from your network provider. A subscription fee may be payable. To ensure that the caller’s name is displayed, make sure you have stored the full telephone number, including the area code in the phonebook. -
Page 29: Dial A Number In The Calls List
• If the telephone number is longer than 12 digits, icon is displayed. Press see the remaining digits. • Press again to see the time and date of the call. • Press again to access the option to store the entry in your phonebook. 8.2.2 Dial a number in the Calls list 1. -
Page 30: Delete An Entry
8.2.5 Delete an entry 1. Press to open the Calls list. 2. Scroll to the entry you want and press . The display shows DELETE 3. Press to confirm or to cancel. 8.2.6 Delete the entire Calls list 1. Press to open the Calls list. -
Page 31: Using Additional Handsets
9. Using additional handsets You can register up to five handsets to your D5 base to extend your phone system without having to install extension sockets for each new phone. Each D5 handset can be registered with up to four bases. You can then select the base you prefer to use. -
Page 32: Register A Different Make Of Handset To Your D5 Base
Register a different make of handset to your D5 base IMPORTANT DECT GAP Profile only guarantees that basic calling functions will work correctly between different makes / types of handset and base. There is a possibility that certain features such as Caller ID will not work correctly. On the base: 1. -
Page 33: Help
10. Help No dial tone • Use only the telephone line cord supplied. • Check that the telephone line cord is connected properly. • Check that the mains power is connected properly and switched on. No display • Check that the batteries are inserted correctly and fully charged. Use only approved rechargeable batteries supplied. - Page 34 Handset does not ring • The handset ringer volume may be set to Off. Base unit does not ring • The base ringer volume may be set to Off. Noise interference on my phone or on other electrical equipment nearby •...
-
Page 35: General Information
11. General information IMPORTANT This equipment is not designed to make emergency telephone calls when the power fails. Alternative arrangements should be made for access to emergency services. This product is intended for connection to analogue public switched telephone networks and private switchboards in Singapore. - Page 36 • Do not install this product near a bath tub, sink, or shower. • Operate this phone using only the power source that is indicated on the marking label. If you are unsure of the power supply to your home, consult with your dealer or local power company.
- Page 37 (“SUNCORP”) What Does this Warranty Cover? Subject to the exclusions contained below, SUNCORP warrants that this Motorola branded product (“Product”) or certified accessory (“Accessory”) sold for use with this product that it manufactured to be free from defects in materials and workmanship under normal consumer usage for the period outlined below.
- Page 38 WARRANTY IS THE EXCLUSIVE REMEDY OF THE CONSUMER, AND IS PROVIDED IN LIEU OF ALL OTHER WARRANTIES, EXPRESS OF IMPLIED. IN NO EVENT SHALL MOTOROLA OR SUNCORP BE LIABLE, WHETHER IN CONTRACT OR TORT (INCLUDING NEGLIGENCE) FOR DAMAGES IN EXCESS OF THE PURCHASE...
- Page 39 Use of Non-Motorola branded Products and Accessories. Defects or damage that result from the use of Non-Motorola branded or certified Products or Accessories or other peripheral equipment are excluded from coverage. Unauthorized Service or Modification. Defects or damages resulting from service,...
- Page 40 <This page has been intentionally left blank>...
- Page 41 <This page has been intentionally left blank>...
- Page 42 <This page has been intentionally left blank>...
- Page 43 Brandname: Motorola Type: D501, D502, D503 and D504 Descriptions: DECT phone without telephone answering machine (D50x) and their multi-handset versions. to which this declaration related is in conformity with the essential requirements of the following directives of the Council of the European Communities: R&TTE Directive (1999/5/EC)
- Page 44 Manufactured, distributed or sold by Suncorp Technologies Ltd., official licensee for this product. MOTOROLA and the Stylized M Logo are trademarks or registered trademarks of Motorola Trademark Holdings, LLC. and are used under license. All other trademarks are the property of their respective owners.
Need help?
Do you have a question about the D502 and is the answer not in the manual?
Questions and answers