Dacor DTT36M974PS Installation Instructions Manual
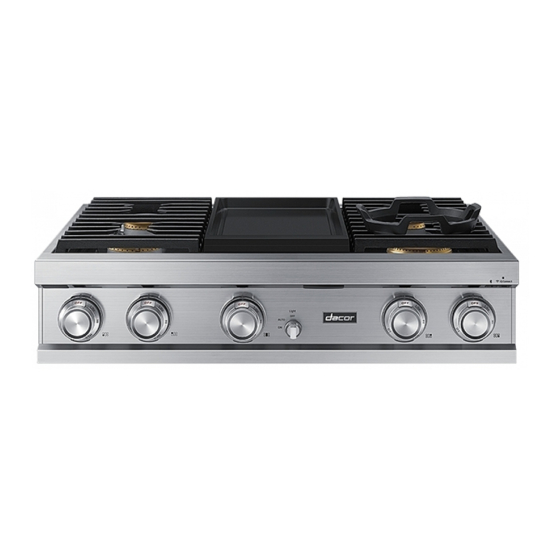
Modernist rangetop
Hide thumbs
Also See for DTT36M974PS:
- Quick manual (24 pages) ,
- Installation instructions manual (44 pages) ,
- User manual (28 pages)

Subscribe to Our Youtube Channel
Related Manuals for Dacor DTT36M974PS


Summary of Contents for Dacor DTT36M974PS
- Page 1 Installation Instructions Modernist Rangetop DTT48M976/DTT36M974 Part No. 112136 Rev H...
-
Page 2: Table Of Contents
Contents Before You Begin Important Notes Customer-Assurance Information Important Safety Instructions Product Specifications What Is In the Box Parts and Tools Needed Installation Requirements In Preparation Overall Rangetop Dimensions Countertop Cutout Dimensions Gas-Supply Requirements Special Gas Requirements (gas models sold In Massachusetts) Electrical Requirements Installation Instructions Installing the Rangetop... -
Page 3: Before You Begin
Before You Begin Important Notes User • Keep this manual for personal and professional reference. • Ensure that qualified personnel install and ground the rangetop. Overall design/accessories may differ with the model. Installer • Read this manual thoroughly before installation. •... -
Page 4: Customer-Assurance Information
Customer-Assurance Information To resolve questions and installation issues, contact your Dacor dealer or the Dacor Customer Assurance Team. Before calling, have the rangetop's model/serial numbers available (see the data label, right-hand side of the rangetop chassis.) Label Dacor Customer Assurance Phone: (800) 793-0093 x2813 (USA, Canada) Hours of Operation: Mon –... -
Page 5: Important Safety Instructions
Do not let children near the rangetop or leave them unattended in the kitchen when the • rangetop is in use. Dacor recommends activating the control/door lockout feature. Remove and immediately dispose of packaging. Do not let children play with the packaging. - Page 6 Important Safety Instructions General Safety, cont. • Do not use the rangetop as a space heater. • Air curtains or range hoods that blow air downward shall not be used with a gas range unless the hood and range are designed and tested according to the Standard for Domestic Gas Ranges, ANSI Z21.1 •...
- Page 7 Important Safety Instructions Electrical and Grounding Safety WARNING To reduce risk of fire, electric shock, personal injury, and death: • Plug the appliance in to a grounded, 3-prong outlet. • Do not remove the ground prong. • Do not use an adapter or an extension cord. •...
- Page 8 Important Safety Instructions Rangetop Safety WARNING To reduce risk of fire, electric shock, personal injury, and death: • Turn all burners are off when not in use. • Do not use aluminium foil to line the grates or any part of the rangetop. •...
-
Page 9: Product Specifications
• If your rangetop was damaged during shipping or specified parts are missing, contact your local retailer. Do not install a damaged or incomplete rangetop. • If you need an accessory marked with an asterisk (*), contact Dacor Customer Assurance via (800) 793-0093, or visit : www.dacor.com/customer-care/contact-us. -
Page 10: Parts And Tools Needed
Product Specifications Parts and Tools Needed Parts Needed Gas line shut-off valve Flexible metal appliance Flare union adapter ¾ in Flare union adapter ½ in connector ½ in (ID) x 5 ft (NPT) x ½ in (ID) (NPT) x ½ in (ID) 135-degree elbow (option) 90-degree elbow (option) Tools Needed... -
Page 11: Installation Requirements
Installation Requirements In Preparation 1. Before cutting the opening in the countertop, verify that there will be no conflict between the rangetop chassis and anything in the cabinet below. 2. Remove all packing material and accessories from the rangetop, and verify that all items are present before beginning the installation. -
Page 12: Overall Rangetop Dimensions
Installation Requirements Overall Rangetop Dimensions DTT36M974 28 3/16" (71.6 cm) 27 1/2" (69.9 cm) 25 11/16" (65.3 cm) 22 1/4" (56.5 cm) 36" (91.1 cm) DTT48M976 48" (121.6 cm) 28 3/16" (71.6 cm) 27 1/2" (69.9 cm) 25 11/16" (65.3 cm) 22 1/4"... -
Page 13: Countertop Cutout Dimensions
Installation Requirements Countertop Cutout Dimensions Cabinet/Countertop Dimensions (front view) 10” (25.4 cm) to combustible side 1 1/2” (3.8 cm) typical 1/2” (1.3 cm) wall min. both sides countertop thickness overhang, both sides 7 3/4” (19.7 cm) Recommended gas and Mounting platform 36”... - Page 14 Installation Requirements Countertop Cutout Dimensions, cont. Installed Rangetop (side view) Gas and electrical connections at 24” (61.0 cm) right rear section of chassis Installed control Countertop panel overhang 1 3/8” (3.5 cm) Cabinet face Mounting platform Gas connection and power cord may be routed through bottom or back of chassis Cabinet/Countertop Cutout Dimensions—No Downdraft Vent (top view) Rangetop Model...
- Page 15 Installation Requirements Countertop Cutout Dimensions, cont. Cabinet/Countertop Cutout Dimensions—With Downdraft Vent (top view) NOTE Gas and electrical connections must be routed through the bottom of the rangetop when installed with a downdraft vent. C: Downdraft Vent Approved Downdraft Model A: Cutout Width B: Hole Offset Cutout Vent Models*...
- Page 16 Installation Requirements Countertop Cutout Dimensions, cont. Cabinet/Countertop—With Downdraft Vent (side view) 3/8” min. (1.0 cm) flat countertop overhang required behind cutout Countertop DTT36M974 or DTT48M976 Stiffener rangetop 3/8” min. (1.0 cm) space behind downdraft vent chassis to clear stiffener Minimum countertop height: 30 1/4"...
-
Page 17: Gas-Supply Requirements
Installation Requirements Gas-Supply Requirements Provide Adequate Gas Supply The rangetop operates at a manifold pressure of: • 5 in. (13 cm) of water column for natural gas/natural-gas-at-high-altitude (NG-H) • 10 in. (25 cm) of water column for LP gas (propane)/LP-gas-at-high-altitude (LP/H). Ensure your rangetop receives the proper gas. -
Page 18: Electrical Requirements
Installation Requirements Electrical Requirements WARNING • The owner shall verify that the electrical service meets electrical requirements and that the outlet is properly installed by a licensed electrician. • To reduce risk of fire, electric shock, or personal injury: - Do not use an extension cord or adapter plug with the rangetop. - The rangetop must be properly grounded. -
Page 19: Installation Instructions
Installation Instructions Installing the Rangetop IMPORTANT Carefully read these instructions and the Important Safety Instructions (Pg. 5) before installing/ operating the rangetop. Improper installation, adjustment, service, or maintenance can lead to personal injury and property damage. Product failure due to improper installation is not warrantied. NOTE Only qualified personnel should install the rangetop. - Page 20 Installation Instructions Installing the Rangetop, cont. Connecting the Gas Supply, cont. Never install an old connector on a new appliance. For hard piping, carefully align the pipe; the rangetop cannot be moved after the connection is made. To prevent gas leaks, apply pipe-joint compound or wrap pipe-thread tape with Teflon on all male (external) pipe threads.
- Page 21 Installation Instructions Installing the Rangetop, cont. Making the Electrical Connections WARNING • Disconnect power at the main circuit breaker or fuse box before making electrical connections. • BEFORE operating/testing, follow the grounding requirements (pg. 30) of this manual. Improper connection of the grounding plug is an electric-shock risk. •...
- Page 22 Installation Instructions Installing the Rangetop, cont. Dual Burner Heads/Caps 1. Orient the burner head so the opening for the electrode aligns with the electrode. 2. Install the burner head so the electrode passes through its opening in the head. Ensure the burner head lies flat on the stove top.
- Page 23 Installation Instructions Installing the Rangetop, cont. SimmerSear Burner Assembly Place the burner heads as shown. The locater tab on the head goes in the keyed hole as shown. Burner head Locating Keyed Burner hole base Put the burner rings on the heads as shown. Match the tabs on the bottom of the ring to the Burner slots on the head.
- Page 24 Installation Instructions Installing the Rangetop, cont. Checking Flame Quality All burner flames must be visually checked to assess their quality. CAUTION If you want measure the flame, take care to avoid burn injuries. 1. Soft blue flames—Normal for natural gas. 2.
- Page 25 Installation Instructions Installing the Rangetop, cont. Final Installation Checklist After installing the rangetop, ensure all control knobs are OFF. Review this checklist to confirm the rangetop is properly installed and ready to operate. The gas line was properly connected to the rangetop. •...
- Page 26 Notes 26 English...
- Page 27 Notes English...
- Page 28 DG68-00942A-00 Dacor ∙ 14425 Clark Avenue, City of Industry, CA 91745 ∙ Phone: (800) 793-0093 ∙ Fax: (626) 403-3130 ∙ www.dacor.com...
Need help?
Do you have a question about the DTT36M974PS and is the answer not in the manual?
Questions and answers