Table of Contents
Advertisement
Quick Links
Advertisement
Table of Contents

Related Manuals for Dacor DTT36M974AM


Summary of Contents for Dacor DTT36M974AM
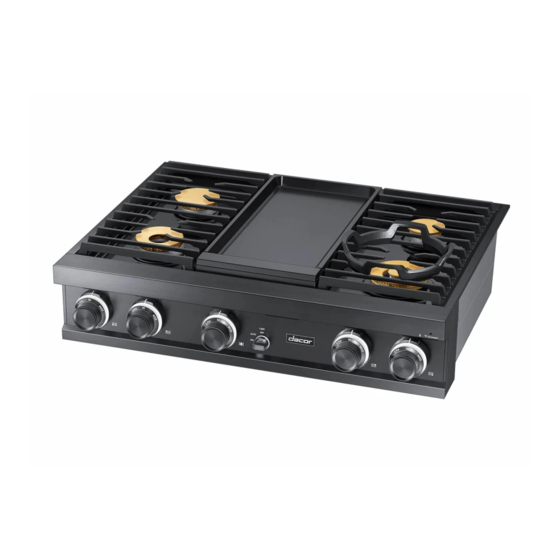
- Page 1 Installation Instructions Modernist Rangetop DTT36M974L*/DTT48M976L*...
-
Page 2: Table Of Contents
Contents Before you begin Important About this manual Important note to the installer Important note to the consumer Important note to the servicer Customer-service information Important safety instructions Read all instructions before using this appliance Symbols used in this manual State of California Proposition 65 warning (US only) Commonwealth of Massachusetts Safety and warning information... - Page 3 Website: Thank you for choosing Dacor for your home. We are a company built by families for families, and we are dedicated to serving yours. We are confident that your new Dacor product will deliver a high level of performance and enjoyment for many years to come.
- Page 4 WARNING: Failure to follow the instructions in this manual exactly may cause a fire or explosion, and, consequently, property damage, personal injury, or death. • DO NOT keep or use gasoline or other flammable products near this appliance. • IF YOU SMELL GAS: - DO NOT light any appliances.
-
Page 5: Before You Begin
Before you begin Important Installer • To promote safety and minimize problems, read this manual thoroughly before starting the installation. Leave this manual with the user. • Write the appliance’s model/serial numbers in this manual for service/ maintenance reference. • The overall design and/or accessories may differ with the model. -
Page 6: Important Note To The Consumer
Before you begin Important note to the consumer Keep these instructions with your user manual for future reference. • As when using any appliance generating heat, there are certain safety precautions you should follow. • Be sure your appliance is installed and grounded properly by a qualified installer or service technician. -
Page 7: Customer-Service Information
Customer-service information If you have questions or problems with installation, contact your Dacor dealer or the Dacor Customer Service Team. For repairs to Dacor appliances under warranty call the Dacor Distinctive Service line. Whenever you call, have the model and serial number of the appliance ready. -
Page 8: Important Safety Instructions
Important safety instructions READ ALL INSTRUCTIONS BEFORE USING THIS APPLIANCE • Electrical and gas equipment with moving parts can be dangerous. The important safety instructions in this manual are intended to minimize the risk of property damage, personal injury, and death. Be sure to read them. •... -
Page 9: Safety And Warning Information
Safety and warning information General safety WARNING To reduce the risk of fire, electric shock, personal injury, or death, observe these precautions: • Do not touch any surface, component, or mechanism of the appliance during or immediately after cooking. • Learn where and how to shut off the valve that feeds gas to the appliance. -
Page 10: Fire Safety
Safety and warning information Fire safety WARNING To reduce the risk of fire, electric shock, personal injury, or death, observe these precautions: • Do not store/place/use combustible materials (e.g., paper, plastic, pot holders, linens, gasoline, alcohol) near the appliance. • Do not wear loose fitting or hanging garments while using the appliance. -
Page 11: Gas Safety
Gas safety WARNING To reduce the risk of fire, electric shock, personal injury, or death, observe these precautions: If you smell gas: • Close the valve and do not use the appliance. • Do not light a match, candle, or cigarette. •... -
Page 12: Electrical And Grounding Safety
Safety and warning information Electrical and grounding safety WARNING To reduce the risk of fire, electric shock, personal injury, or death, observe these precautions: • Plug into a grounded 3-prong outlet. • Do not remove the ground prong. • Do not use an adapter or an extension cord. -
Page 13: Installation Safety
Installation safety WARNING To reduce the risk of fire, electric shock, personal injury, or death, observe these precautions: • The appliance should be installed and properly grounded by a qualified installer, as specified in the Installation Instructions. Adjustments and service should be performed only by qualified gas appliance installer or service technician. -
Page 14: Location Safety
Safety and warning information Location safety WARNING To reduce the risk of fire, electric shock, personal injury, or death, observe these precautions: • This appliance is for indoor household use only. Do not install the appliance outdoors or anywhere that it will be exposed to weather/water or wind/ strong drafts. -
Page 15: Rangetop Safety
Rangetop safety WARNING To reduce the risk of fire, electric shock, personal injury, or death, observe these precautions: • Make sure all burners are off when not in use. • Do not use aluminium foil to line the grates or any part of the rangetop. •... - Page 16 Safety and warning information • Always use a minimum amount of oil for any type of frying. Always thaw food before frying, and do not frying food that is overly cold or that has clumps of ice attached to it. •...
-
Page 17: Product Specifications
Do not install a damaged or incomplete cooktop. • If you need an accessory marked with an asterisk (*), contact the DACOR Call Center using the phone number on the last page of this manual, or visit our online parts website: www.dacor.com. - Page 18 Product specifications Parts needed Gas line shut-off Flexible metal Flare union adapter ¾ Flare union adapter ½ valve appliance connector in (NPT) x ½ in (ID) in (NPT) x ½ in (ID) ½ in (ID) x 5 ft 135-degree elbow 90-degree elbow (optional) (optional)
-
Page 19: Installation Requirements
Installation requirements Pre-installation checklist 1. Before preparing the opening in the countertop, verify that there will be no conflict between the rangetop chassis and anything in the cabinet below. 2. Remove packing materials, grate boxes, regulator with literature, and literature package from the appliance, verify that all items are present before beginning the installation. - Page 20 Installation requirements Maintain the following minimum clearance dimensions Vertical to combustible surface from 13” (33.0 mm) rangetop grate level; if installing an max. overhead vent hood, also check the hood specifications for minimum required clearances. See Cabinet/Countertop Dimensions - Top View. This specification not applicable Note 2 for cabinets more than a horizontal...
- Page 21 Overall cooktop dimensions DTT36M974L* 36" (91.1 cm) 28 3/16" (71.6 cm) 27 1/2" (69.9 cm) 25 11/16" (65.3 cm) 22 1/4" (56.5 cm) English 21...
- Page 22 Installation requirements DTT48M976L* 48" (121.6 cm) 28 3/16" (71.6 cm) 27 1/2" (69.9 cm) 25 11/16" (65.3 cm) 22 1/4" (56.5 cm) English...
- Page 23 Cutout dimensions of countertop 10” (25.4 cm) to combustible side 1 1/2” (3.8 cm) typical 1/2” (1.3 cm) wall min. both sides countertop thickness overhang, both sides 7 3/4” (19.7 cm) Recommended gas and Mounting platform 36” (91.4 cm) electrical service location, 1”...
- Page 24 Installation requirements Gas and electrical connections at 24” (61.0 cm) right rear section of chassis Installed control Countertop panel overhang 1 3/8” (3.5 cm) Cabinet face Mounting platform Gas connection and power cord may be Installed Rangetop - Side View routed through bottom or back of chassis Increase countertop and overhang Non-combustible...
- Page 25 NOTE Gas and electrical connections may only be routed through the bottom of the rangetop when installed with a downdraft vent. 3/8” (1.0 cm) min. Non combustible rear countertop overhang wall recommended 10” (2.5 cm) min. to combustible wall above countertop, 2 5/8”...
- Page 26 3/8” min. (1.0 cm) space behind downdraft vent chassis to clear stiffener Minimum countertop height: 30 1/4" (76.8 cm) Cabinet face Dacor approved IMPORTANT: See downdraft downdraft vent installation instructions for duct system layout/planning Cabinet/Countertop with Downdraft vent - Side View English...
- Page 27 Utility locations and dimensions Rear side Power cord 39 ” (100.0 cm) long ”-18 NPT male gas inlet Dimension DTT36M974L* DTT48M976L* 3 1/2" (8.9 cm) 4" (10.1 cm) 4 11/16 (11.9 cm) 4 11/16 (11.9 cm) 5 1/8" (13 cm) 16 1/2"...
-
Page 28: Gas Supply Requirements
Installation requirements Gas supply requirements Provide adequate gas supply This appliance is designed to operate at a manifold pressure of 5 in (13 cm) of water column on natural gas or 10 in (25 cm) of water column on LP gas (propane or butane). Make sure you are supplying your appliance with the type of gas for which it is designed. -
Page 29: Special Gas Requirements (Gas Models Sold In Massachusetts)
Special gas requirements (gas models sold in Massachusetts) COMMONWEALTH OF MASSACHUSETTS REQUIREMENTS: WARNING • Gas leaks may occur in your system, creating a dangerous situation. - Gas leaks may not be detected by smell alone. - Gas suppliers recommend installing a UL-approved gas detector according to manufacturer specifications. - Page 30 Installation requirements Rangetops - All gas models are equipped with a power cord with an equipment-grounding conductor and a grounding plug. - All gas models in the US and Canada require a 120 V, 60-Hz, AC, approved electrical service with 20-amp circuit breaker or time-delay fuse. NOTE Re-ignition may malfunction if the voltage between Neutral and Ground is over 20 VAC.
-
Page 31: Installation Instructions
Installation instructions Installing your rangetop IMPORTANT: Carefully read these instructions and the Important Safety Instructions section at the front of this manual BEFORE installing/operating the rangetop. Improper installation, adjustment, service, or maintenance can lead to personal injury and property damage. NOTE To ensure proper installation, you should hire a qualified professional. - Page 32 Installation instructions Connecting the gas supply 1. Shut off the main gas-supply valve before disconnecting the old rangetop. 2. Complete the gas hookup. 3. Open the gas valve, and relight the burners on any other gas appliances. NOTE Because hard piping restricts movement of the appliance, use a CSA International-certified flexible metal appliance connector unless local codes require hard piping.
- Page 33 Never install an old connector on a new appliance. For hard piping, you need to carefully align the pipe; the appliance cannot be moved after the connection is made. To prevent gas leaks, apply pipe-joint compound or wrap pipe-thread tape with Teflon on all male (external) pipe threads.
- Page 34 Installation instructions Checking for gas leaks WARNING To prevent an explosion/fire hazard possibly leading to personal injury or death, DO NOT use a flame to check for gas leaks. When using pressures above 1/2 psig to test the home gas-supply system, disconnect the appliance and individual shut-off valve from the gas-supply piping.
- Page 35 Assembling the rangetop burners CAUTION • Do not operate the rangetop burners without all burner parts in place. • Do not push in any rangetop controls while removing the burner; a slight electrical shock might result, perhaps causing you to knock over hot cookware. •...
- Page 36 Installation instructions Dual Burner head / caps 1. Orient the burner head so the opening for the electrode aligns with the electrode. 2. Install the burner head so the electrode passes through its opening in the head. Ensure the burner head lies flat on the stove top.
- Page 37 Round Burner head / caps 1. Put the burner heads on the burner bases as shown at left. The bottom of the head fits within the burner base. 2. Turn the head until it drops into place. Twist the head back and forth slightly to ensure it is properly seated.
- Page 38 Installation instructions SimmerSear Burner Assembly (18K BTU Burner) 1. Put the burner heads in place as shown Burner head below. The locating tab on the burner head goes in the keyed hole as shown. Locating Burner base Keyed hole 2. Put the burner rings on the burner Burner ring heads as shown below.
- Page 39 Verifying burner function After the cooktop is fully installed, connected, assembled, and plugged in, check the function of all burners. To turn on a cooktop burner 1. Push in, and turn a burner control knob to flame symbol. (A “clicking” sound indicates the electronic ignition system is functional.
- Page 40 Installation instructions Checking flame quality All burner flames must be visually checked to assess their quality. CAUTION If you want measure the flame, take care to avoid burn injuries. 1. Soft blue flames—Normal for natural gas operation. 2. Yellow tips on outer cones—Normal for LP gas operation.
- Page 41 Installing the grates NOTE For best results and longest life, install the grates as instructed below. When installed properly, the openings in the grates are centered over the burners. The grates occupy specific positions on the rangetop. For maximum stability and safe operation, these grates should only be used in their proper positions.
- Page 42 Installation instructions Final installation checklist WARNING • To ensure a safe, proper installation, the installer should complete this checklist to ensure the installation was proper and complete. • The owner shall be responsible for the rangetop's proper installation, the importance of which cannot be overstated.
- Page 44 DG68-00942A-00 Dacor ∙ 14425 Clark Avenue, City of Industry, CA 91745 ∙ Phone: (800) 793-0093 ∙ Fax: (626) 403-3130 ∙ www.dacor.com...
Need help?
Do you have a question about the DTT36M974AM and is the answer not in the manual?
Questions and answers