Table of Contents
Advertisement
Quick Links
Advertisement
Table of Contents

Related Manuals for Sangean WFT-1D+


Summary of Contents for Sangean WFT-1D+
- Page 1 WFT-1D+ Version 1...
-
Page 2: Table Of Contents
Table of Contents Important Safety Instructions ..........2-4 Getting Started ................. 5 Controls ................7-10 Getting connected to Internet (for Internet Radio) ..... 14 Listening to Internet Radio ........... 18 Digital Radio (DAB plus) ............31 Clock Operation ..............37 Upgrade firmware .............. -
Page 3: Important Safety Instructions
Important Safety Instructions 1. Read and understand all safety and operating instructions before the 9. Do not expose this product to splashing or dripping. radio is operated. Objects containing liquid, such as vases or drinking glasses, should not be placed on top of this product. 2. - Page 4 21. Unplug this product from the wall outlet and refer servicing to 16. Power cords: The power cord should be positioned so it is not walked on, pinched, or items placed on top of it. Pay particular qualified service personnel under the following conditions: attention to cords at plugs, convenience receptacles, and the When the power supply cord or plug is damaged.
- Page 5 - Consult the dealer or an experienced radio/TV technician for help. The user should not modify or change this equipment without written approval form SANGEAN ELECTRONICS INC. Modification could void authority to use this equipment.
-
Page 6: Getting Started
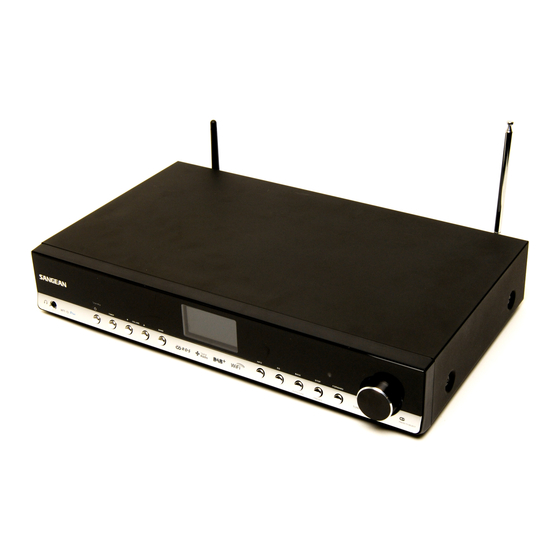
Getting Started Power Cable Congratulations on your purchase of the Sangean WFT-1D+. Check the package and ensure all the items are present: Product and Accessories: Power Cable: used to power the radio. Remote Control: used for remote operation of the radio. - Page 7 Power on the radio 1. Connect the power cable with the radio and plug it in to a live outlet as shown. 2. Press the STANDBY button to turn on the radio. Note: Use only the adapter supplied with the radio. Connecting an incompatible power supply will cause permanent damage to the radio.
-
Page 8: Controls
Controls (Front) Item Description STANDBY button Turn on/off the radio. TIMER button Press to set sleep time and alarms. VOLUME UP/DOWN button Press to turn the volume UP/down. BAND button Press to switch between modes (Internet Radio, Digital Radio(DAB +) Music Player, FM). LCD display Screen that display texts. - Page 9 Controls (Rear) Item Description Antenna for FM and Digital Radio (DAB plus) Connect for FM and Digital Radio (DAB plus). LINE OUT jack-right Connect to an external speaker - right side. LINE OUT jack-left Connect to an external speaker - left side. LAN socket Connect to Ethernet for wired Internet Radio.
- Page 10 Controls (Remote Control) Power button Volume buttons Radio Preset buttons Preset 7,8,9,0,+10 / previous track, pause, next track, add 10 Stop button TUNE + button TUNE - button FORWARD button Back button Enter button INFO button TIMER button Music Player button FM button Internet Radio button AUX IN button...
- Page 11 Item Description Power button Turn on/off the radio. Volume buttons Press to turn the volume up/down. Radio Preset buttons Press to listen to preset stations. Preset 7,8,9,0,+10 / Press to listen to preset stations 7, 8, 9, 0, 10 Also for previous track, pause, next track, 10. previous track, pause, next track, add 10 Stop button...
- Page 12 Navigate Menu Selections There are two ways to navigate through the menu selections. 1. Navigate through the selections by rotating the Turning knob on the Menu navigation: radio clockwise or counter clockwise to move the > symbol and press the Turning knob to confirm the selection. Use FORWARD/BACK to enter/go to previous menu.
- Page 13 Entering Texts To start using the radio, text entering may be required. For example, entering user name, password, search station, etc. To enter texts: Rotate the Turning knob to highlight the text/number/symbol. Press the Turning knob to confirm. Use BKSP to delete. Use OK to enter when you are done.
- Page 14 Language Setup Choose the language to display on the screen. Go to > System settings > Language and select the language. * If necessary, press the BACK button to find the “Main menu”...
-
Page 15: Getting Connected To Internet (For Internet Radio)
Getting connected to Internet (for Internet Radio) Before you can use your Internet radio, you must have the following: A broadband Internet connection or A wireless access point (Wi-Fi) or a wired Ethernet connection (10 or 100 M bits/sec with RJ45 connection) connected to your broadband Internet, preferably via a router. - Page 16 Connecting to wireless network 1. Make sure you are within range of a wireless network. 2. Go to > System settings > Network > Network wizard > [name of the wireless network]. 3. If your wireless Internet access (router) haven’t been set the password, the radio will be connected to the Internet.
- Page 17 If you do not have the WEP or WPA key, then you should obtain it from the person who set your network. Some Wi-Fi routers may come with a key already set up by the supplier, in which case you should refer to the user documentation provided with it.
- Page 18 Connecting to wired network Connect the Ethernet cable into the RJ-45 socket at the back of the radio. If a wired connection is present then the radio will use this in preference to a wireless connection. There are two indicator lights incorporated into the RJ-45 connector. If you have problems with your wired connection, they may help you to identify the possible cause of the problem.
-
Page 19: Listening To Internet Radio
Listening to Internet Radio There are 3 ways to enter Internet Radio mode: 1. From the menu selections go to > Main menu > Internet radio or 2. Press the BAND button until you see “Internet radio”, or 3. Press the INTERNET RADIO button on the remote control. - Page 20 The radio will play the last played radio station. If you would like to select other stations (or it is the 1 time use, no last played radio station), follow the instruction below. To search for Internet radio stations: In The Station list you will find 5 different ways to search for stations. Go to >...
- Page 21 Location: enables you to choose a radio station from the list first by geographic region and then by country. 1. Rotate the Tuning Knob until the display shows <Location>, and then press the Tuning Knob to enter the Location search. 2.
- Page 22 4. It will show the catalog of Internet radio stations from the country you select. Use the same way to select the catalog, and then the radio station. 5. When you find the radio station you would like to listen to, press the Tuning Knob.
- Page 23 Genre: enables you to choose radio stations according to their content, for example Classic, Rock, Sport, News, etc. 1. Rotate the Tuning Knob until the display shows <Genre>, and then press the Tuning Knob to enter the Genre search. 2. Rotate the Tuning Knob until it shows the type of music you would like to go to.
- Page 24 Search stations: enables you to search for a station by entering the name or a keyword. 1. Rotate the Tuning Knob until the display shows <Search stations>, and then press the Tuning Knob to enter the Search stations search. 2. Enter the key word of the radio station name you would like to search for by rotating and pressing the Tuning Knob.
- Page 25 Use CANCEL to cancel and exit. 4. Use the Tuning Knob to find the radio station you would like to choose, then press the Tuning Knob, and the radio will connect to the radio station you choose. Popular station: enables you to view a list of popular stations and choose from them. New station: enables you to view a list of the newest stations and choose from them.
- Page 26 To listen to the Podcasts: To listen to My Favorites / My Added Station: Some radio stations allow you listen to programs that have already My Favorites and My added stations allow you to add Internet been broadcast. radio stations using Frontier’s website and listen to those stations on your radio.
- Page 27 Frontier Website 3. After the registration, the web page shows “My favorite” and “My added station” for operating these 2 functions. After this one time registration, every time you would like to use these functions, just go to the website: and enter the email address and password. To edit My Favorites: 1.
- Page 28 Music Player The Music Player allows you to play audio files which are stored on a computer on your network. You have to set up on the computer before you play the music on your radio. It doesn’t support iTunes yet. Shared Folder The Windows Media Player 11 allows you to play audio files that are stored on a computer or a computer on your network.
- Page 29 To share media using Windows Media Player 11: 1. Open Media Player and click the arrow below Library tab then choose Options. 2. Click the Configure Sharing button. 3. Check the Share my media to: check box. WiFi Radio is shown as an Unknown Device.
- Page 30 5. Name your Share media and choose the settings. 6. Finally, check the box to choose to Allow new devices and computers automatically or not. 7. Click Ok when you are done. Shared Folder PC Setup Set up the PC to allow your radio to access your audio files via Window Shares (make the music file shared).
- Page 31 Shared Media (UPnP) To play music in the Music Player’s shared media: Shared Media uses Windows Media Player (WMP) 11 and above as 1. Go to > Main menu > Music Player > Shared media > media server. This mode does not require any setting in the radio, [name of computer] >...
-
Page 32: Digital Radio (Dab Plus)
Digital Radio (DAB plus) To listen to the Digital Radio (DAB plus) radio, there are 3 ways to enter Digital Radio (DAB plus) mode, after turning on the radio: 1. From the menu selections go to > Main menu > DAB or 2. - Page 33 Secondary service - a Digital Radio (DAB plus) Display modes - Digital Radio (DAB plus) Some radio stations have one or more secondary services associated Your radio has 5 display options when in Digital Radio (DAB plus) mode. with them. Typically they are not broadcasting continually. If a station has a secondary services, the secondary services will appear in the list Press the INFO button to cycle through the different display options.
- Page 34 Finding new stations - Digital Radio (DAB plus) If you would like to use your radio for Digital Radio (DAB plus) reception in a new location, or if no station were detected during the initial scan, you can follow the procedure below to find out which stations are available: 1.
- Page 35 Manual Tuning - Digital Radio (DAB plus) This is for you to turn to the specific channel directly. 1. Ensure the radio is on and in DAB plus (Digital Radio) mode. 2. Rotate the Turning knob until “Manual tune” is highlighted on the display, and press the Turning knob.
- Page 36 DRC (Dynamic Range Control) - Digital Radio (DAB plus) FM Radio DRC can make quieter sounds easier to hear when your radio is listened To listen to the FM radio, there are 3 ways to enter Internet in noisy environment. Not all the stations support DRC function. Radio mode, after turning on the radio: 1.
- Page 37 FM RDS – Radio Data System EQ- Equalizer The Radio Data System (RDS) is a system in which inaudible digital Your radio has bass and treble characteristics of the sound can be information in addition to the normal FM radio program is transmitted. adjusted to your personal taste.
-
Page 38: Clock Operation
Clock Operation Preset The radio must have the clock / date set to use the alarm functionality. Preset allows you to store the most frequent listened stations that you can select those stations easily and quickly. You can preset up to Clock/Date Setup 10 stations for each Internet Radio, FM and Digital Radio (DAB plus). - Page 39 Set 12/24 Hour 12/24 hour setup allows you to change the clock display format. To setup the auto update go to > System settings > Time/Date > Set format, and choose 12 hour or 24 hour display. Set Sleep Time Sleep time allows you to set the time to turn the radio off automatically.
- Page 40 Set Alarms Time: Alarm time setup. There are 2 alarms. Mode: 1. Press the Timer button twice on the radio. Choose the source of what to play when time is up: Buzzer, Internet radio, DAB (Digital Radio) or FM. 2. Choose Alarm1 or Alarm2 to enter Alarm setup, by rotating and pressing the Turning knob.
-
Page 41: Upgrade Firmware
Upgrade firmware From time to time, new software features for your radio may There are two mechanisms to upgrade the radio. be developed. For example, a new audio decoder may be added to allow an alternative audio format to be supported. You radio has Upgrade via Internet: therefore been designed to allow its internal software to be upgraded Go to >... - Page 42 Factory Reset If you wish to completely reset your radio to its initial state this may be performed by following this procedure. 1. Go to > System settings > Factory reset. 2. Rotate and press the Turning knob to confirm rest. 3.
-
Page 43: Trouble Shooting
Trouble Shooting Problem Possible Cause Possible Solution Unable to connect to Wi-Fi network 1. Router might be down. 1. Check if PC is able to connect to the network. or Unable to get Internet listing. 2. Wrog network password entered. 2. -
Page 44: Specification
Specification TUNE Frequency (MHz) 87.5 - 108 Digital Radio Band III (5A – 13F) (DAB plus) WiFi IEEE 802.11 b / g (GHz) 2.4 - 2.4835 Ethernet IEEE 802.3 Internet Radio vTuner Media Player FEATURE Program upgrade Via USB-B Tone control I/O Socket AC / DC - in Line - out...
Need help?
Do you have a question about the WFT-1D+ and is the answer not in the manual?
Questions and answers