Sangean WFR-1 Operating Instructions Manual
Wi-fi internet radio
Hide thumbs
Also See for WFR-1:
- Operating instructions manual (191 pages) ,
- User manual (41 pages) ,
- Quick setup manual (2 pages)
Table of Contents
Advertisement
Advertisement
Table of Contents

Related Manuals for Sangean WFR-1


Summary of Contents for Sangean WFR-1
-
Page 2: Table Of Contents
Table of Contents Important Safety Instructions ..........2-3 To change FM stations: ............25 Chapter 1 Getting Started ............4 Auxiliary Input (AUX IN) ............26 Product and Accessories: ............4 To play music using AUX IN: ..........26 Power on the radio ..............5 Radio Station Preset .............. -
Page 3: Important Safety Instructions
Important Safety Instructions 1. Read and understand all safety and operating instructions before 9. Don’t install near any heat sources such as radiators, heat registers, the radio is operated. stoves, or other apparatus (including amplifiers) that produce heat. 10. If the provided plug doesn’t fit into your outlet, consult an electrician 2. - Page 4 - Consult the dealer or an experienced radio/TV technician for help. The user should not modify or change this equipment without written approval form SANGEAN ELECTRONICS INC. Modification could void authority to use this equipment.
-
Page 5: Chapter 1 Getting Started
Chapter 1 Getting Started Congratulations on your purchase of the Sangean WFR-1 Wi-Fi Radio. Power Cable Check the package and ensure all the items are present: Product and Accessories: Power Cable: used to power the radio. ( When this radio is purchased in the US, the US related accessories will be provided) Remote Control: used for remote operation of the radio. -
Page 6: Power On The Radio
Power on the radio 1. Connect the power cable with the radio and plug it in to a live outlet as shown. ( When this radio is purchased in the US, the US related accessories will be provided) 2. Press the STANDBY button to turn on the radio. Note: Use only the adapter supplied with the radio. -
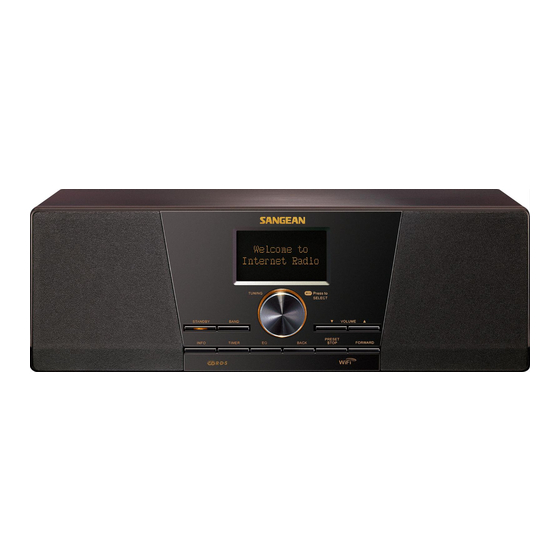
Page 7: Controls
Controls (Front) LCD display BACK button STANDBY button PRESET STOP button BAND button FORWARD button INFO button VOLUME DOWN button TIMER button VOLUME UP button EQ button Turning knob... -
Page 8: Using The Wi-Fi Radio
Using the Wi-Fi Radio Refer to the following illustrations to familiarize yourself with the buttons and controls of the radio. Item Description LCD display Screen that display texts STANDBY button Turn on/off the radio BAND button Press to switch between modes INFO button Press to display information on the LCD TIMER button... -
Page 9: Remote Control
Remote control EQ button Mute button TUNE + button Back button TIMER button TUNE - button FM button iRadio button AUX IN button Mplayer button INFO button Enter button FORWARD button Stop button Preset 7,8,9 /rewind, pause, fast forward Radio Preset buttons Volume buttons Power button... -
Page 10: Remote Control
Remote Control You can control the radio with the remote control. See the following illustration for descriptions of each button. Item Description EQ button Press to enter Equalizer setup Mute button Press to mute the radio TUNE + button Navigation button used to go up Back button Navigation button. -
Page 11: Navigate Menu Selections
Navigate Menu Selections There are two ways to navigate through the menu selections. Press BACK to activate the menu then: 1. Navigate through the selections by rotating the Turning knob on the radio clockwise or counter clockwise to move the > symbol and press the Turning knob to confirm the selection. -
Page 12: Entering Texts
Entering Texts To start using the radio, text entering may be required. For example, entering user name, password, search station, etc. To enter texts: Rotate the Turning knob to highlight the text/number/symbol. Press the Turning knob to confirm. Use < to delete. Use C to cancel and exit to enter when you are done. -
Page 13: Connecting Devices To The Radio
Connecting Devices to the Radio See the following illustration for descriptions of the outlets on the back panel. Item Description Headphone jack Connect to a headphone LINE OUT jack Connect to an external speaker AUX IN Connect to external Aux devices LAN socket Connect to Ethernet USB socket... -
Page 14: Chapter 2 Getting Connected
Chapter 2 Getting Connected Before you can use your internet radio, you must have the following: A broadband internet connection or A wireless access point (Wi-Fi) or a wired Ethernet connection (10 or 100 M bits/sec with RJ45 connection) connected to your broadband internet, preferably via a router. -
Page 15: Connecting To Wireless Network
Connecting to wireless network To setup the wireless network: 1. Make sure you are within range of a wireless network. 2. Go to >Main menu>System setup > Internet setup > Wizard > [name of the wireless network]. 3. You will be prompted to enter password: Rotate the Turning knob to highlight the text/number/symbol Press the Turning knob to confirm. -
Page 16: Connecting To Wired Network
Connecting to wired network To setup the wired network: 1. Connect the radio to the wired network using an Ethernet cable as shown. 2. Go to >Main menu> System setup > Internet setup > Wizard > [Wired] from the menu selections. 3. -
Page 17: Chapter 3 Listening To The Radio
Chapter 3 Listening to the Radio Internet Radio To listen to the internet radio: From the menu selections go to >Main menu > Internet radio or press the iRadio button on the remote. The radio will play the last played radio station. If you would like to select other stations, follow the instruction below. -
Page 18: To Listen To The Podcasts
2. Genre: enables you to choose radio stations according to their content, for example Classic, Rock, Sport, News, etc. 3. Search station: enables you to search for a station by entering the name or a keyword. 4. Popular station: enables you to view a list of popular stations and choose from them. 5. -
Page 19: To Listen To My Favourites / My Added Station
To listen to My Favourites / My Added Station: My Favourites and My added stations allow you to add internet radio stations using Frontier’s website and listen to those stations on your radio. Go to>Station list>My Favourites / >Station list>My Added Station. Register online: Before first use, please follow the instructions to register on the website:... - Page 20 Frontier Website 3. After the registration, the web page shows “My favourite” and “My added station” for operating these 2 functions. After this one time registration, every time you would like to use these functions, just go to the website: and enter the email address and password. To edit My Favourites: 1.
-
Page 21: Music Player
Music Player To play music in the Music Player’s shared folders: 1. Go to >Main menu>Music Player> Shared folders> [name of computer]>[name of folders]. User name and password may be required. 2. Find and select the audio file you want to listen to in the folder and press the Turning knob to play. -
Page 22: Shared Folder
Shared Folder The Windows Media Player 11 allows you to play audio files that are stored on a computer or a computer on your network. Your radio supports two file access methods. It can connect to Shared Folders on the network. It can also connect with file server applications using the Universal Plug and Play (UPnP) protocol known as Shared Media. -
Page 23: To Share Media Using Windows Media Player 11
To share media using Windows Media Player 11: 1. Open Media Player and click the arrow below Library tab then choose Options. 2. Click the Configure Sharing button. 3. Check the Share my media to: check box. WiFi Radio is shown as an Unknown Device. -
Page 24: Shared Folder Setup
5. Name your Share media and choose the settings. 6. Finally, check the box to choose to Allow new devices and computers automatically or not. 7. Click Ok when you are done. Shared Folder Setup Computer: Setup your PC to allow the radio to access your audio files via Windows Shares. -
Page 25: Shared Media (Upnp)
Wi-Fi Radio: Setup your radio to connect to the computer if user name and password are required to log in. 1. Go to >Main menu>System setup>Internet setup>PC settings. 2. Enter the user name and password. Shared Media (UPnP) Shared Media uses Windows Media Player (WMP) 11 and above as media server. -
Page 26: Fm Radio
FM Radio To listen to the FM radio: From the menu selections go to >Main menu > FM or press the FM button on the remote. The radio will play the last played radio station. If you would like to select other stations, follow the instruction below. -
Page 27: Auxiliary Input (Aux In)
Auxiliary Input (AUX IN) Auxiliary Input allows you to play music from an audio source such as an iPod or a DVD player. To play music using AUX IN: 1. Connect the device to the radio using an AUX cable as shown 2. -
Page 28: Radio Station Preset
Radio Station Preset On the remote control you will find numeric keys 1-10 that are used to store preset stations. See Remote Control on page 5 for more details. When no station is assigned to a number, “Preset empty” is displayed on the screen. -
Page 29: Chapter 4 Clock Operation
Chapter 4 Clock Operation The radio must have the clock / date set to use the alarm functionality. Clock Setup 1. To setup the time go to >Main menu>System setup>Time setup> Set clock. 2. Use TUNE+/TUNE- or Turning knob to adjust the values and use FORWARD/BACK to move back and forth between fields. -
Page 30: Time Zone Setup
Time Zone Setup 1. To setup the time go to >Main menu>System setup>Time setup> Set time zone. 2. Use TUNE+/TUNE- or Turning knob to adjust the values and FORWARD/BACK to move back and forth between fields. Press the Turning knob or to confirm. -
Page 31: Auto Update
Auto Update Auto update menu allows the user to select whether or not the time is to be synchronized with the internet. To setup the auto update go to >Main menu>System setup> Time setup> Auto update and Choose the source of the update. Set 12/24 Hour 12/24 hour setup allows you to change the clock display format. -
Page 32: Set Alarms
Set Alarms 1. To setup the alarm go to >Main menu>System setup>Time setup> Alarms. Or Press the Timer button twice on the radio. 2. Choose Alarm1 or Alarm2 to enter Alarm setup. Alarm setup Time: Enter the time to set the alarm off. On/Off: Use this option to turn the alarm on/off. - Page 33 Mode: Choose the source of what to play when time is up: Buzzer, Internet radio, or FM. Last listened: a. Buzzer: choose a preset buzzer. b. iRadio, FM: choose one of the last listened stations. Volume: Use TUNE + or TUNE – or the Turning knob to adjust the volume.
-
Page 34: Chapter 5 Upgrade And Reset
Chapter 5 Upgrade and Reset Software Upgrade There are two mechanisms to upgrade the radio. Upgrade via internet: Go to >Main menu>System setup>Software upgrade If there is a newer version of software available, the user will be asked to confirm the upgrade. If the radio lost power during the upgrade, it may restart automatically in USB upgrade mode. -
Page 35: Factory Reset
4. If the radio is not yet in upgrade mode (showing the text “Waiting for PC wizard…”), enter the Software upgrade mode by removing the power, then holding down the keys <skip backward> and <skip forward> while turning the radio on again. 5. -
Page 36: Chapter 6 Trouble Shooting
Chapter 6 Trouble Shooting Problem Possible Cause Possible Solution Unable to connect to Wi-Fi network 1. Router might be down 1. Check if PC is able to connect to the network or Unable to get internet listing 2. Wrong network 2. -
Page 37: Chapter 7 Product Specification
Chapter 7 Product Specification TUNER Frequency (MHz) US: 87.8-108 EU: 87.5-108 Stereo Earphones / Speaker RDS/RBDS PS/PTY/RT Frequency (kHz) 522 - 1710 WiFi IEEE 802.11 b / g (GHz) 2.4 - 2.4835 Ethernet IEEE 802.3 Internet Radio (iRadio) vTuner Media Player (mPlayer) Preset MEDIA CD / CDR / CDRW... - Page 38 FEATURE Record - SD / Flash Rewind - SDRAM Record - SD / Flash Program upgrade Via USB-B Others AUDIO Tone control Treble / Bass control EQ (Sound effect selection) Others AMPLIFIER Speaker output (TYP) 5W + 5W Earphones output 5 + 5 mW Others SPEAKER...
- Page 39 DIMENSIONS Width ( mm ) Height ( mm ) Depth ( mm ) Weight ( g ) 2946 If at any time in the future you should need to dispose of this product please note that: Waste electrical products should not be disposed of with household waste.
Need help?
Do you have a question about the WFR-1 and is the answer not in the manual?
Questions and answers