
Related Manuals for SereneLife SLFPX69


Summary of Contents for SereneLife SLFPX69
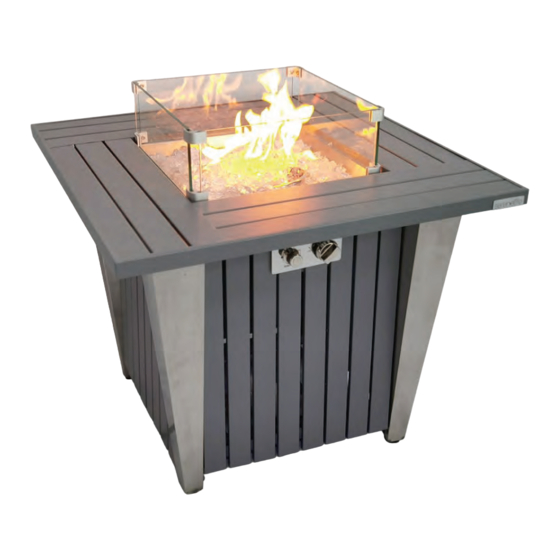
- Page 1 SLFPX69 Outdoor Gas Fire Pit Table 50,000 BTU Square Gas Fire Pit with Stainless Steel Lid and Stainless Steel Legs...
- Page 2 DANGER FIRE OR EXPLOSION HAZARD If you smell gas: • Shut o gas to the appliance. • Extinguish any open ame. • If odor continues, leave the area immediately. • After leaving the area, call your gas supplier or re department. Failure to follow these instructions could result in re or explosion, which could cause property damage, personal injury, or death.
-
Page 3: Safety Information
SAFETY INFORMATION Before you assemble or operate this unit, please carefully read this entire manual. Failure to do so may result in a re, explosion, injury or death. WARNING • The installation of this unit must adhere to local codes or Propane Storage and Handling Code, CSA B149.2. - Page 4 • Always ensure that lava rocks/pumice stones/LavaGlass are completely dry before use. Failure to do so will cause them to crack or pop. • Do not operate unit until all parts are fully assembled. • Do not paint or color any part of this heating unit. •...
- Page 5 • All installation and repair should be done by a quali ed professional. This unit should be inspected annually and cleaned regularly. • Inspect all elements of this heating unit before each use. If there is damage, the burner must be replaced. •...
- Page 6 IF APPLICABLE: • Allow heating item to cool completely before placing on lid. • DO NOT use heating item while lid is installed. Always remove the lid while heating item is in use. SAFETY INFORMATION Only use the regulator and hose assembly provided with this unit. Replacement parts must be supplied directly by us.
-
Page 7: Item Description Qty
HARDWARE DESCRIPTION ITEM M6 x 12 Screw M6 x 15 Screw Before beginning assembly of this product, be sure all parts are present. Compare parts with package contents list and hardware contents list. If any part appears to be missing or damaged do not begin assembly of this product and call customer service immediately. - Page 8 ITEM DESCRIPTION Table Top Panel Panel Panel Door Metal Stand 1 box Glass Rocks Protective Cover Burner (preassembled) Firebowl (preassembled) Guard (preassembled) Control Knob (preassembled) Regulator Hose (preassembled) Metal support www.SereneLifeHome.com...
- Page 9 ASSEMBLY INSTRUCTIONS 1. Attach the panel (C/D/E) to the legs (G/H/I/J) using screws (BB). 2. Attach the door (F) to the Metal Stand (K) using screws (BB). 3. Attach the Metal support (S) to the Metal Stand(K) and door using screws (BB). www.SereneLifeHome.com...
- Page 10 4. Attach metal stand (K) to the panel (C/E) using screws (BB). 5. Attach metal base to the bottom part of the table top (B) using screws (AA). 6. Put the lid. www.SereneLifeHome.com...
- Page 11 7. Place propane gas tank (not included) into the metal stand (K). Make sure the gas tank sits on the metal stand (K) completely. Turn the preassembled wing screw on the outer part of metal stand (K) clockwise to secure the propane gas tank tightly.
- Page 12 ASSEMBLY INSTRUCTIONS • Please keep this owner’s manual for future reference. • Do not exceed 1/4” depth of small Lava rock/Glass rocks directly above burner holes. Applying too many lava rocks may result in unburned gas pooling in the re bowl. Ventilation is required to allow fresh air in and any residual gas to escape. •...
- Page 13 WARNING CAUTION: This heating item should not be used on plastic composite or arti cial wood. WARNING When you turn the cylinder, the gas hose needs to be straightened during use. otherwise the hose may melt and cause a re. Assembling the Glass Unsc rew all pressem bled screws on the glass clamps, Then, assemble one glass panel to the other panel.
-
Page 14: Operation
Inserting the Glass Insert the glass assembly made in step 1 into the ridge on the top of the re table mantel. HOT GLASS WILL CAUSE BURNS. DO NOT TOUCH GLASS UNTIL COOLED. NEVER ALLOW CHILDREN TO TOUCH GLASS. OPERATION Before performing a leak test, be sure that no sparks can occur and you are in a spacious outdoor area. -
Page 15: Maintenance
To Light 1. Make sure the control knob is in the "OFF" position. 2. Open the door and slowly open the valve on the propane gas tank by turning the knob counterclockwise. 3. Close the door on the body. 4. Push the ignition control knob in fully and rotate about 1/4 turn counterclockwise until a click is heard, it may take several attemps to light the burner. -
Page 16: Troubleshooting
TROUBLESHOOTING Problem Cause Solution Igniter pin and burner are wet Dry o with a soft cloth Igniter battery is incorrectly Check which direction the inserted battery is inserted Heating unit won’t Contact us for parts Igniter pin is broken light replacement Reconnect wire to the Electrode wire is loose or... - Page 17 TROUBLESHOOTING Problem Cause Solution Check that the gas tank No gas ow isn’t empty Turn the control knob to Excess ow safety valve has the ‘o ’ position. Close the been activated Sudden drop in tank valve and disconnect gas ow propane gas tank.
- Page 18 Questions? Issues? We are here to help! Phone: (1) 718-535-1800 Email: support@pyleusa.com...
Need help?
Do you have a question about the SLFPX69 and is the answer not in the manual?
Questions and answers