Table of Contents
Advertisement
Advertisement
Table of Contents
Troubleshooting

Related Manuals for Victory VM-2SL


Summary of Contents for Victory VM-2SL
- Page 1 MERCHANDISER MODELS VM-1, VM-2 & VM-2SL INSTALLATION, OPERATION & SERVICE (For “Quick Navigation”, Click On Topics or Sections Highlighted In Blue) MANUAL ★ DESCRIPTION ★ INSTALLATION ★ OPERATION ★ MAINTENANCE ★ SERVICE ★ TROUBLESHOOTING ★ PARTS LISTS ★ WIRING DIAGRAMS...
- Page 2 The Seller warrants to the original purchaser, equipment manufactured by Seller to be free from defects in material and workmanship for which it is responsible. The Seller's obligation under this warranty shall be limited to replacing or repairing at Seller's option, without charge, F.O.B. Sellers factory, any part found to be defective and any labor and material expense incurred by Seller in repairing or replacing such part, such warranty to be limited to a period of one year from date of purchase or thirteen months from date of shipment from Seller's factory, whichever is earlier, provided terms of payment have been fully met.
- Page 3 Failure to Properly Register Equipment Can Void Warranty !!!! NOTICE Please Read The Entire Manual Carefully Before Installation. If Certain Recommended Procedures Are Not Followed, Warranty Claims Will Be Denied !!!! Machine Serial Number_______________________________ Installation Date_____________________________________ Victory Refrigeration Service Hotline (800) 523-5008...
-
Page 4: Table Of Contents
I. Installation Checklist... 8 J. Location of Serial Number/Data Plate... 8 K. VM Standard Shelf Installation Instructions... 9- 10 L. Assembling and Installing VM-2 & VM-2SL Beverage Organizer Shelf... 11-12 Section 3 - Operation... 13 A. Temperature Control... 13 Section 4 - Maintenance... 14 A. -
Page 5: Section 1 - Description
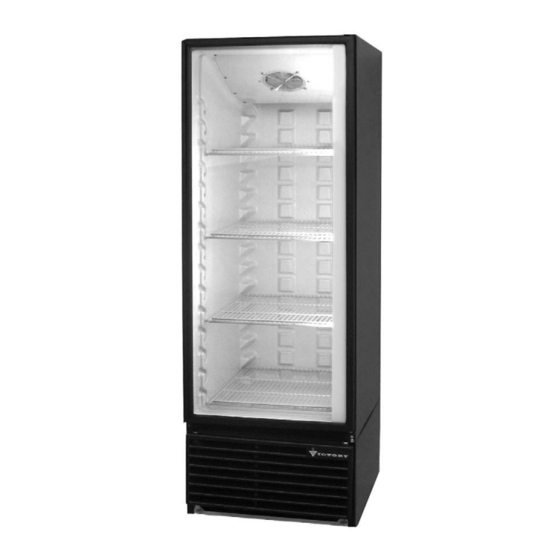
Section 1 - Description SECTION 1 DESCRIPTION Victory Merchandiser Refrigerators are Reach-In Models with full length glass swing doors on the front. There is also an optional full length sliding glass door assembly that is available for the two section model only. Victory Merchandiser One Section Model Figure 1-1 Section 1 - Description... -
Page 6: Control And Component Location
Section 1 - Description Control and Component Location Component Function 1. Doors - Swing doors are reversible for one (1) section only, and have a. Door Size - The doors are full length. b. Door Type - The doors are sealed glass. c. - Page 7 Section 1 - Description 2. Refrigeration System - The refrigeration system is self-contained and slides out for easy service. 3. Shelves - (Refer to Figure 1-2 and to the Parts List Section of this manual). a. Wire Shelves - Heavy-duty epoxy coated wire shelves are adjustable and can be angled downward for gravity- feed merchandising.
-
Page 8: Standard Features, Optional Features And Specifications
Section 1 - Description Standard Features: ● ● NSF 7 Listed for Foodservice & Prepackaged Products ● Heavy Gauge Black Powder Coated Zinc Plated Steel Exterior ● High Impact Molded ABS Interior ● Bright White Interior with Vertical Fluorescent Lighting ●... -
Page 9: Specifications
Each Shelf will Accommodate either One (1) 12” x 20” Pan One (1) 18” x 26” Pan ● Each VM-2SL Shelf will Accommodate - One (1) 12” x 20” Pan Optional Features: ● Heavy Duty Swivel 3” and 5” Casters with Brakes ●... -
Page 10: Section 2 - Installation
Section 2- Installation SECTION 2 INSTALLATION IMPORTANT: It is highly recommended that your merchandiser refrigerator be installed by an authorized Victory Certified Installer. A. Receiving Shipment Upon arrival, examine the exterior of the shipment packaging for any signs of rough handling. -
Page 11: Installing Legs Or Casters
Section 2- Installation placed into it. To estimate the possible product load weight it is generally conceded that a safe figure is 35 pounds for each net cubic foot storage space. For example, a 47 cubic foot cabinet could hold approximately 1645 pounds of product (47 x 35 = 1645). -
Page 12: Installation Checklist
Section 2- Installation from the main supply to your merchandiser. It is most important that a voltage reading be made at the compressor-motor electrical connections, or as close to the compressor- motor as possible, while the merchandiser is in operation, to assure that the correct voltage required by the compressor is being supplied. -
Page 13: Vm Standard Shelf Installation Instructions
Section 2- Installation K. VM Standard Shelf Installation Instructions Step 1 Make sure plastic end caps are on the front left and right sides of the shelf before the installation process. *Note: Putting shelving in the cabinet without end caps will cause damage to the interior! Step 3 Insert the front shelf peg into the support... -
Page 14: K. Vm Standard Shelf Installation Instructions
Section 2- Installation K. VM Standard Shelf Installation Instructions (continued) Step 5 Lift the inside shelf peg into the locking clip. Attention!!!! Do not force the peg into the place. Doing this will damage the unit as previously stated. Section 2- Installation Step 6 Shelf is installed. -
Page 15: Assembling And Installing Vm-2 & Vm-2Sl Beverage Organizer Shelf
Section 2- Installation L. Assembling and Installing VM-2 & VM-2SL Beverage Organizer Shelf Victory organizer shelves have adjustable product dividers that allow for merchandising a variety of products without the need to purchase multiple unique fixed dividers. Before installing the dividers on the shelf, determine the required spacing for the product that will be displayed. -
Page 16: L. Assembling And Installing Vm-2 & Vm-2Sl Beverage Organizer Shelf
Section 2- Installation L. Assembling and Installing VM-2 & VM-2SL Beverage Organizer Shelf (continued) Step 5 Hold the divider evenly. divider above the back hook and gently snap the divider over the rear support rod on the shelf. Step 7... -
Page 17: Section 3 - Operation
Section 3 - Operation SECTION 3 OPERATION Temperature Control The temperature control should be set to maintain a temperature of 38°F (3.3°C) to 40°F (4.4°C). Note: Continued use of this equipment will allow you to become familiar with its operation and functions. -
Page 18: Section 4 - Maintenance
Section 4 - Maintenance SECTION 4 MAINTENANCE Cleaning and Proper Detergent Use Follow requirements of local health authorities. Use a detergent-sanitizer or a mild detergent (neutral) or mildly alkaline (recommended for metal surfaces) followed by a sanitizing rinse solution. necessary to kill or deactivate the micro-organisms on the surface areas in contact with stored food. - Page 19 Section 4 - Maintenance 1. Daily Exterior Surface Cleaning (continued) a. Dip sponge in cleaning solution, wipe down surfaces. b. Polish with clean soft cloth. Always wipe in direction of grain. Once a week a film cutting agent may be used for metal finishes to maintain a shining surface. 2.
-
Page 20: Lubrication
Section 4 - Maintenance 4. Once Every Three Months, Condenser Maintenance Cleaning is recommended at least once every three (3) months. However, once a month is recommended when unit is located near cooking equipment which produces grease laden vapors, i.e.: fryers, grills, steam kettles, etc. a. -
Page 21: Section 5 - Service
2. Remove front grill by lifting from bottom and pulling forward gently. 3. Take off rear grill by removing screws with phillips head screwdriver (*Note: remove four (4) screws on VM-1; remove six (6) screws on VM-2 & VM-2SL). 4. Service required component. -
Page 22: Servicing Evaporator Fan Motor(S) And Temperature Control
2. At back of cabinet, take off rear joint cover by taking out top and bottom phillips head screws. *Note: For VM-2 & VM-2SL, take off right rear joint cover as you’re facing the back of cabinet. This will give access to heat exchanger. -
Page 23: C. Servicing Evaporator Coil And/Or Heat Exchanger Assembly
Section 5 - Service Servicing Evaporator Coil and/or Heat Exchanger Assembly (continued) 5. After service to evaporator coil and/or heat exchanger assembly, reverse steps for reinstallation and proper restoration of power. *Note: If fan panel/drain pan assembly was disconnected, make sure proper reinstallation procedures were used. -
Page 24: Vm-2Sl Sliding Glass Door Shim Insertion Instructions
Section 5 - Service D. VM-2SL Sliding Glass Door Shim Insertion Instructions If VM-2SL cabinet has gap(s) between the sliding glass door and frame, contact factory and request door roller assembly shim(s) under part number 05314501. Following are step by step guidelines that will assist in closing any gap(s). - Page 25 Section 5 - Service D. VM-2SL Sliding Glass Door Shim Insertion Instructions (continued) 1. If cabinet has gap(s) between sliding glass door and frame, place shim(s) as shown on page 2. Remove door(s) from the frame by grasping firmly on both ends and lifting the door(s) up towards the top frame and pulling out towards you (Fig.2).
- Page 26 Section 5 - Service Section 5 - Service D. VM-2SL Sliding Glass Door Shim Insertion Instructions (continued) 4. Take the roller assembly out of the door (Fig.4). Figure 4 5. Install necessary amount of shims over stud screws (Fig.5). Examples: (1) One shim will resolve a 1/4” gap in between the door and frame; (2) Two shims will resolve a 1/2”...
-
Page 27: D. Vm-2Sl Sliding Glass Door Shim Insertion Instructions
Section 5 - Service D. VM-2SL Sliding Glass Door Shim Insertion Instructions (continued) 7. Insert nuts with 1/4” nut driver (Fig.7). 8. Turn door over after roller assembly is properly installed. Place top of door in top rail of frame by pushing tension spring block with door. (Fig.8 & Fig.8a). Push bottom of door in for complete installation. -
Page 28: Section 6 - Troubleshooting
Section 6 - Troubleshooting Section 6 - Troubleshooting SECTION 6 TROUBLESHOOTING... - Page 29 TROUBLESHOOTING & SERVICING REFRIGERATION SYSTEM PROBLEM 1. Condensing unit fails to start - no hum. 2. Condensing unit fails to start - hums, but trips on overload protector. 3. Condensing unit starts, but fails to switch off of “start” winding. 4.
-
Page 30: Section 6 - Troubleshooting
TROUBLESHOOTING & SERVICING REFRIGERATION SYSTEM PROBLEM 7. Start capacitor open or shorted blown. 8. Run capacitor open, shorted or blown. 9. Relay defective or burned out. 10. Product zone temperature too high. 11. Suction line frosted or sweating. 12. Liquid line frosted or sweating. 13. -
Page 31: Section 7 - Parts List
Section 7 - Parts List Section 7 - Parts List SECTION 7 PARTS LIST... -
Page 32: One Section Cabinet And Hinged Glass Door Parts
Section 7 - Parts List Section 7 - Parts List Victory Merchandiser One Section Cabinet & Hinged Glass Door Parts... - Page 33 Section 7 - Parts List One Section Cabinet & Hinged Glass Door Parts List Item Light Rod Reflector Light Rod Upper Hinge Bracket Rear Joint Cover Lower Back Panel Lower Case End Plastic Grille Adjustable Shelf Evaporator Fan Panel Assembly Glass Door Door Gasket Lower Hinge Bracket...
- Page 34 Section 7 - Parts List Section 7 - Parts List Victory Merchandiser Two Section Cabinet & Hinged Glass Door Parts...
- Page 35 Sliding Glass Door Assembly Replacement Parts List for VM-2SL *Note: Cabinet parts for the VM-2SL are the same as the VM-2 except the door components. Parts below pertain to cabinets manufactured on or after the date of August 13th, 2001. For cabinets built prior to this date, consult factory.
- Page 36 Section 7 - Parts List Section 7 - Parts List Victory Merchandiser One Section Cabinet Refrigeration Components...
- Page 37 Section 7 - Parts List One Section Refrigerator Components Parts List *Note: Electrical wiring harness components within this parts list pertains to cabinets manufactured on or after June 12th, 2001! For cabinets built prior to this date, consult factory. Item Temperature Control Mounting Bracket Screw Temperature Control Screw (accessory to temperature control) Temperature Control...
-
Page 38: Two Section Refrigeration Components
Section 7 - Parts List Section 7 - Parts List Victory Merchandiser Two Section Cabinet Refrigeration Components... - Page 39 Section 7 - Parts List Two Section Refrigerator Components Parts List *Note: Electrical wiring harness components within this parts list pertains to cabinets manufactured on or after June 12th, 2001! For cabinets built prior to this date, consult factory. Item Temperature Control Mounting Bracket Screw Temperature Control Screw (accessory to temperature control) Temperature Control...
-
Page 40: Section 8 - Wiring Diagram
Section 8 - Wiring Diagram Section 8 - Wiring Diagram SECTION 8 WIRING DIAGRAM... -
Page 41: Vm-1D-Qs, Vm-2D-Qs & Vm-2Sl-Qs Wiring Diagram
Section 8 - Wiring Diagram Section 8 - Wiring Diagram VM-1, VM-2 & VM-2SL (Self-Contained) 115v/60Hz/1ph “End Of Section, Click Here For Table Of Contents”... - Page 42 VICTORY REFRIGERATION 110 Woodcrest Road Cherry Hill, NJ 08003 Phone (856) 428-4200 Fax (856) 428-7299 Website: www.victory-refrig.com E-Mail: parts@victory-refrig.com parts.order-entry@victory-refrig.com service@victory-refrig.com Website: www.agafoodservice.com Manual Part Number: 50843901 Print Date: 08/13/01 Rev: 02 Price: $15.00...
Need help?
Do you have a question about the VM-2SL and is the answer not in the manual?
Questions and answers