Table of Contents
Advertisement
Quick Links
USER MANUAL
USER MANUAL
Built-In Induction-Ceramic
Built-In Induction-Ceramic Hybrid Cooker
Made in Germany
Made in Germany
Please read these instructions and warranty information carefully
Please read these instructions and warranty information carefully
before use and keep them handy for future reference.
before use and keep them handy for future reference.
Hybrid Cooker
DIH-146DB
DIH-146DB
Online Warranty Registration
Online Warranty Registration
Advertisement
Chapters
Table of Contents

Related Manuals for German pool DIH-146DB


Summary of Contents for German pool DIH-146DB
- Page 1 USER MANUAL USER MANUAL Built-In Induction-Ceramic DIH-146DB DIH-146DB Built-In Induction-Ceramic Hybrid Cooker Hybrid Cooker Online Warranty Registration Online Warranty Registration Made in Germany Made in Germany Please read these instructions and warranty information carefully Please read these instructions and warranty information carefully before use and keep them handy for future reference.
- Page 2 Please register your warranty information now! For Warranty Terms & Conditions, please refer to the last page of this user manual.
-
Page 3: Table Of Contents
Table of Contents SAFETY CAUTIONS Precautions Before Usage Using The Appliance Cookware Suitable For Induction Cooktop Precautions To Prevent Damage To The Appliance Precautions In Case Of Appliance Failure Other Precautions TECHNICAL SPECIFICATIONS PRODUCT STRUCTURE NOTICE BEFORE USE Sensitive Touch Display Indication OPERATING INSTRUCTIONS Before The First Use... -
Page 4: Safety Cautions
Safety Cautions Precautions Before Usage - Unpack all the materials. - The installation and electrical connection of the appliance has to be done by a certified technician. The manufacturer can not be responsible for damage caused by installation or connecting errors. - The appliance must be installed in a kitchen cabinet and an adapted and approved working surface. - This domestic appliance is exclusively for preparation of food, to the exclusion of any other domestic, commercial or industrial use. -
Page 5: Precautions To Prevent Damage To The Appliance
Safety Cautions Precautions To Prevent Damage To The Appliance - Rough pan bottoms or damaged saucepans (not enamelled cast iron pots) may damage the ceramic glass and could scratch the surface. - Sand or other abrasive materials may damage the ceramic glass. - Avoid dropping objects, even little ones, on the ceramic surface. - Do not hit the edges of the glass with saucepans. - Make sure that the ventilation of the appliance works according to the manufacturer’s instructions. -
Page 6: Technical Specifications
Technical Specifications Model DIH-146DB Total Power (Max) 4600 W Total Power Position of the heating zone Left: Induction Right: Ceramic Left: 2000 W Right: 1000 W (inner ring) / Nominal Power (Booster: 2400 W) 2200 W (dual rings) Right: 140 mm (inner ring) Hob Diameter Left: 230 mm 230 mm (dual rings) Specifications are subject to change without prior notice. If there is any inconsistency or ambiguity between the English version and the Chinese version, the English version shall prevail. -
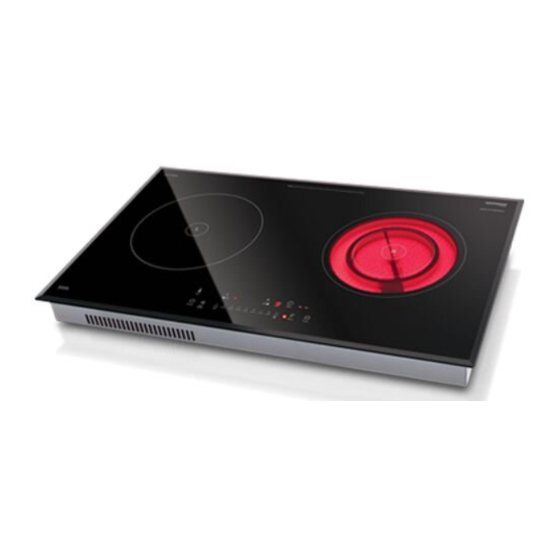
Page 7: Product Structure
Product Structure Main Body Glass Panel Body Control Panel 8.8. Child Lock Decrease power level Zone selection Power selection zone “SLIDER” and timer setting zone Increase power level Power display Control light Extended Double Zone Timer key Timer display Booster and Extened Double Ring key Pause / Recall key On/Off key Keep-Warm key... -
Page 8: Notice Before Use
Notice Before Use Sensitive Touch Your ceramic glass cooktop is equipped with electronic controls and sensitive touch keys. When your finger presses the key, the corresponding command is activated. This activation is validated by a control light, a letter or a number on the display and/or a “Beep” sound. For normal use press only one key at the same time. Display Indication Display Designation Function Zero The heating zone is activated. -
Page 9: Starting-Up
Operating Instructions Starting-Up Start up / switch off the hob: Action Control panel Display To start Press key 2 x [ - ] are displayed To stop Press key Nothing or [ H ] Start up / switch off a heating zone: Action Control panel Display... -
Page 10: Timer
Operating Instructions Timer The timer can be used simultaneously with all 2 heating zones and this with different time settings (from 0 to 99 minutes) for each heating zone. Setting and modification of the cooking time: Example for 16 minutes at power 7 : Action Control panel Display Zone selection... -
Page 11: Keep-Warm Function
Operating Instructions Keep-Warm Function This function allows you to simmer your food and keep it warm on very low power. Activating the Keep-Warm function : Action Control panel Display Zone selection Press selected zone [ Power Level ] is blinking Activate Keep-Warm function Press key [ U ] is displayed... -
Page 12: Cooking Advices
Cooking Advices Examples of cooking power setting (The values below are indicative) Power Level Cooking Function Ingredients & Dishes Melting Sauces, butter, chocolate, gelatine 1 to 2 Reheating Dishes prepared beforehand Simmering Rice, pudding, sugar syrup 2 to 3 Defrosting Dried vegetables, fish, frozen products 3 to 4 Steam Vegetables, fish, meat 4 to 5... -
Page 13: Troubleshooting
Troubleshooting The hob or the cooking zone does not start : - The hob is not connected correctly to the electrical network. - The protection fuse is cut-off. - The locking function is activated. - The sensitive touch keys are covered with grease or water. - An object is put on a touch key. -
Page 14: Installation Instructions
Installation Instructions The installation comes under the exclusive responsibility of a certified technician. The installer is held to respect the legislation and the standards enforced in his home country. How to stick the gasket: The gasket supplied with the hob avoids all infiltration of liquids into the cabinet. His installation has to be done carefully, in conformity of the following drawing. Stick the gasket ② two millimeters from the external edge of the glass, after removing the protection sheet ③. -
Page 15: Electrical Connection
Electrical Connection - The installation of this appliance and the connection to the electrical network should be entrusted only to a certified electrician who is aware of the normative regulations and respects them scrupulously. - The electrical parts should always be protected after the installation. - The relevant data of connection are on the stickers placed on the bottom of the appliance. - The appliance should be separated from the main power supply by using a multipolar circuit breaker. - Page 16 請即進行保用登記﹗ 有關保用條款細則,請看本說明書最後一頁。...
- Page 17 目錄 安全注意事項 使用前注意事項 使用時注意事項 煮食適用鍋具 防損措施 爐具故障注意事項 其他注意事項 技術規格 產品結構 注意事項 觸控感應按鍵 顯示說明 操作說明 初次使用前 “滑動條”區域和定時設置區域 啟動 餘熱指示 最大火力 定時 鎖定功能 保溫功能 暫停 / 繼續 功能 延伸區域 烹調指引 以烹調功率設定為例 清潔與保養 常見故障及解決方法 環保措施 安裝指引 電氣連接 保用條款...
-
Page 18: 安全注意事項
安全注意事項 使用前注意事項 - 開箱,取出所有部件。 - 本機安裝及電氣連接須由專業人員進行。安裝及連接失誤引起的損壞,廠商概不負責。 - 本機須安裝在廚櫃中及合適的工作枱面上。 - 該家用電器僅供烹飪食物用,不得作其他家用、商用和工業用途。 - 移除陶瓷玻璃面板上的所有標籤和粘合劑。 - 請勿變更和改裝本產品。 - 爐面不能作為工作枱面使用。 - 本機必須連接地線,且連接須符合當地標準。 - 勿使用延長線連接本機。 - 本機不能放在洗碗機和轉筒式乾燥機上使用:蒸氣會損壞本機的電子部件。 使用時注意事項 - 使用後關閉加熱區域。 - 留心濺出的油脂:油脂可能會迅速點燃。 - 使用本機時及之後,注意不要碰到玻璃面板而燙傷自己。 - 確保固定或移動電器的電線沒有接觸到陶瓷玻璃面板和高溫廚具。 - 本機運行時,附近不應放置磁性物品(信用卡、軟碟、計算器)。 - 爐面上不應放置刀叉、湯匙和蓋子等金屬物品,這些物品會變熱。 - 除了適用鍋具,勿將其他金屬物品放在玻璃面板上。以防機器突然運行或餘熱而導致物品 受熱、融化,甚至燃燒。 - 勿用布和保護膜遮蓋本機,否則會導致高溫、著火。 - 本機不適宜由肢體不健全、感覺或精神上有障礙或缺乏相關經驗和知識的人(包括兒童)... -
Page 19: 防損措施
安全注意事項 防損措施 - 底部粗糙的鍋具和破損的燉鍋(非搪瓷鑄鐵鍋)會損壞陶瓷玻璃,刮傷其表面。 - 沙子和其他磨砂物品會損壞陶瓷玻璃。 - 避免拋落物品至陶瓷面板,即使是小物品。 - 勿用燉鍋敲擊玻璃邊緣。 - 根據廠商提供的說明,確保本機通風設備正常運行。 - 勿將空鍋放在或遺留在陶瓷爐頭上。 - 糖、合成/塑膠材料和鋁片不得接觸加熱區域。這些物品在加熱冷卻後會導致陶瓷玻璃破 壞或發生其他變化:開啟本機,立即將這些物品移離高溫加熱區域。 小心:勿燙傷自己! - 控制面板上勿放置熱的容器。 - 若嵌入式爐具下邊為抽屜,確保抽屜內的物品與本產品底部的距離足夠長(11厘米)。 這對保證正常通風至關重要。 - 陶瓷爐頭底下的抽屜勿放置易燃物品(如噴劑)。爐具底下的餐具抽屜必須耐熱。 爐具故障注意事項 - 如發現故障,關閉本產品並關掉電源。 - 如果陶瓷玻璃破裂、龜裂,務必在保險箱斷開電源或切斷本機電源,並聯繫客戶服務。 - 維修必須由專業人員進行。請勿擅自拆開本產品。 - 警告:如果表面破裂,關閉本產品以防觸電。 其他注意事項 - 確保鍋具放在加熱區域中央。鍋具底部務必儘量覆蓋住加熱區域。 - 帶有心臟起搏器的用戶使用,磁場可能會影響其起搏器運行。詳細建議諮詢供應商或 醫生。 - 勿使用鋁合金和合成材料製成的容器:這些容器在高溫加熱區域會熔化。 P.19... -
Page 20: 技術規格
技術規格 型號 DIH-146DB 總功率 (最大) 4600 W 加熱區域位置 左(電磁爐頭) 右(電陶爐頭) 左:2000W 右:1000W(內環)/ 額定功率 (最大火力:2400W) 2200W(雙環) 右:140mm(內環) 爐頭直徑 左:230mm 230mm(雙環) 產品規格及設計如有變更,恕不另行通知。 中英文版本如有出入,一概以英文版為準。 本產品使用說明書以www.germanpool.com 網上版為最新版本。 P.20... -
Page 21: 產品結構
產品結構 主機 玻璃面板 爐身 控制面板 8.8. 童鎖 降低火力檔位 區域選擇 火力選擇區域“滑動條”和定時設置區域 提高火力檔位 火力顯示 延伸區域指示燈 定時鍵 定時顯示 最大火力和延伸功能鍵 暫停/繼續鍵 電源開關鍵 保溫鍵 P.21... -
Page 22: 注意事項
注意事項 觸控感應按鍵 本爐具配備電子控制裝置和觸控感應按鍵。手指按壓按鍵即可啟動相應指令。此時,相應指 示燈亮起,顯示屏顯示字母或數位,且/或發出“嗶嗶”聲。 正常使用情況下,同一時間只能按一個按鍵。 顯示說明 顯示 指示 功能 零 加熱區域啟動。 1…9 火力檔位 選擇烹調火力。 “火力” 最大火力啟動。 錯誤資訊 電子故障。 餘熱 加熱區域處於高溫狀態。 鎖定 控制面板已鎖定。 保溫 自動保溫70°C。 無鍋 未檢測到適用鍋具。 操作說明 初次使用前 用濕布清潔爐具,隨後徹底擦乾其表面。不要使用會導致玻璃表面染上藍色的清潔劑。 “滑動條”區域和定時設置區域 在“滑動條”區域滑動手指即可用滑動條選擇火力。通過手指直接觸摸所需火力檔位亦可直 接選取火力。 “滑動條”區域和定時設置區域 直接選取 “滑動條” P.22... -
Page 23: 餘熱指示
操作說明 啟動 啟動 / 關閉爐具: 操作 控制面板 顯示 開啟 按 鍵 顯示2個[-] 關閉 按 鍵 無顯示或顯示[H] 啟動 / 關閉加熱區域: 操作 控制面板 顯示 區域選擇 輕觸區域選擇鍵 [0]閃爍 設置(調節火力) 滑動“滑動條”或按[+]鍵和[-]鍵 [0]至[9] 關閉 滑動滑動條至[0]或按[-]鍵至[0] [0]或[H] 如5秒內無任何操作,本機將自動返回待機狀態。 餘熱指示 關閉加熱區域或完全關閉後,由於剛用過,加熱區域會處於高溫狀態。顯示屏將顯示[H]。 標誌[H]消失後,方可觸碰加熱區域。 只要餘熱指示還顯示,勿觸摸加熱區域並且勿在其上放置任何易熱物品。有燒焦和火災危 險。 最大火力 最大火力功能可將所選烹調區域的火力提高到最高,持續5分鐘。 啟動最大火力: 操作... -
Page 24: 鎖定功能
操作說明 定時 2個加熱區域可同時運行定時功能,並且各個加熱區域可選擇不同的時間設置(0至99分鐘)。 設置和更改烹調時間: 以7檔火力烹調16分鐘為例: 操作 控制面板 顯示 區域選擇 輕觸區域選擇鍵 [0]閃爍 選擇火力檔位 滑動“滑動條”至[7] 選擇定時 按 鍵 [00]閃爍 設置時間 按[+]至[16] [16]閃爍 所選時間在5秒後確認。時間顯示停止閃爍。 關閉烹調時間: 以7檔火力烹調13分鐘為例: 操作 控制面板 顯示 區域選擇 輕觸區域選擇鍵 [7]閃爍 選擇定時 按 鍵 顯示由[13]變為[00] 烹調時間倒數完成後自動停止: 所選烹調時間一倒數完成,定時顯示屏就會顯示[--],同時鈴聲響起。關閉爐具,鈴聲即停止。 貼士: 如果在“滑動條”上按壓[+]或[-]鍵1秒以上,定時將以10分鐘為單位變化。 童鎖功能 該功能制止爐具的所有烹調活動,並鎖定爐面按鍵以防兒童使用。 開啟 / 關閉童鎖功能: 操作... -
Page 25: 保溫功能
操作說明 保溫功能 該功能可以非常低的功率加熱食物並保溫。 啟動保溫功能: 操作 控制面板 顯示 區域選擇 輕觸區域選擇鍵 [火力檔位]閃爍 啟動保溫功能 按 鍵 顯示[U] 啟動 / 關閉加熱區域: 操作 控制面板 顯示 區域選擇 輕觸區域選擇鍵 [U]閃爍 關閉保溫功能 按壓 鍵 [已選火力檔位]閃爍,[0]至[9] 暫停 / 繼續 功能 該功能中止爐具的所有烹調活動,但保留所選程式。因此,只要再次按暫停/繼續 鍵即可 繼續原先烹調活動。 開啟 / 關閉暫停 / 繼續 功能: 操作... -
Page 26: 烹調指引
烹調指引 以烹調功率設定為例 (以下數值供參考) 火力檔位 烹調方式 食材及菜式 融化 醬汁、牛油、朱古力、明膠 1至2檔 翻熱 預先準備好的菜肴 慢燉 米飯、布甸、糖漿 2至3檔 解凍 脫水蔬菜、魚類、冷凍食品 3至4檔 蒸煮 蔬菜、魚、肉 4至5檔 煮 蒸薯仔,湯,意粉,新鮮蔬菜 中火烹調 肉、肝、蛋、香腸 6至7檔 燜燉 燉牛肉、肉卷、牛肚 7至8檔 烹煮 薯仔、油炸餅、威化餅 油炸、烤 牛扒、煎蛋、炒菜 9檔 煲水 水 煲水 水 清潔與保養 清潔前請先切斷電源。 爐具表面玻璃溫度較高時請勿進行清潔,因為存在燃燒的危險。 - 將洗滌劑用水稀釋,潤濕抹布後清潔輕微污漬。隨後用冷水清洗抹布後再擦淨,待其風乾... -
Page 27: 常見故障及解決方法
常見故障及解決方法 爐具或加熱區域不工作 : - 未正確連接電源 - 保險絲熔斷了 - 爐具已鎖定 - 觸控感應按鍵上附有油脂或水 - 有物品放置在觸控按鍵上 控制面板顯示 [ E5 ] : - 表示溫度過高,待爐具稍微降溫 其中一個或所有烹調區域斷電 : - 安全保護系統已啟動 - 長時間未關閉烹調區域 - 一個或多個感應按鍵被覆蓋 - 鍋內無食物,鍋的底部過熱 - 未將鍋具放在烹調區域上 使用時發出“嗒嗒”聲響 - 屬於正常情況,說明感應線圈正在工作 關閉爐具後風扇仍在運轉: - 該爐具內置有自動冷卻系統,可保護電子零件免受損壞 若上述故障仍未消失或有其他故障代碼,請聯繫售後服務及維修中心 環保措施 - 包裝物料環保且可回收。... -
Page 28: 安裝指引
安裝指引 爐具的安裝需要由授權的技術人員進行,安裝時必須遵守當地相關法律及標準。 如何粘貼墊片: 隨機附贈的墊片可避免液體流進機器內部。 墊片的安裝需仔細完成,具體如下圖 撕下③保護片,將墊片②粘貼在離爐外邊緣 2mm 的位置上。 安裝指引: 開孔尺寸如下: 開孔尺寸 玻璃面板尺寸 型號 ≥ 110mm ≥ 710mm ≥ 410mm DIC-146DB 730mm 430mm - 爐具應安裝在離牆及周邊至少55mm的位置上。 - 爐具的熱保護是Y級。理想狀態下,爐具兩邊需留有足夠的空間。然而爐具的後方可能有牆 和大物件或側方可能有牆,但需確保爐具的另一側無任何高於爐具的物體。 - 安裝爐具的櫃體或者支架碟的塗層及用於密封的膠水必須能承受100℃的高溫。 - 裝飾線必須是耐高溫的。 - 請勿將爐具安裝在不通風的焗爐或洗碗機上。 - 確保爐具下方至少有 ≥ 110mm的空間,確保空氣流通。 - 若爐具下方裝有抽屜,避免將易燃或不耐高溫的物品(如噴劑)放置在抽屜內。 - 為保護開口邊緣,可使用如清漆或特殊的密封膠等用於防水的材料。隨機附贈的墊片需小 心粘貼,避免液體滲透至支撐的廚櫃上,並確保墊圈正確地密封。 - 爐具及抽油煙機的間隔請遵從抽油煙機的指引。若指引中無說明,建議兩者間距至少760mm。 - 安裝完成後,電源線應避免擠壓,例如抽屜。 P.28... -
Page 29: 電氣連接
電氣連接 - 爐具的安裝及電線連接需要由授權的技術人員進行,並須嚴格遵守相關安裝指引。 - 安裝後,需保護好電線免受損壞。 - 電線連接的相關資訊已標識在爐具底部。 - 應先連接多極斷路器,再接通主電源。斷路器觸點開口寬度至少3mm。 - 爐具應先連接入斷路器、保險絲等設備,再連接至主電源。 - 根據國家及當地安裝要求,爐具需進行固定連接。 - 應固定好電源線,避免接觸爐具或焗爐等高溫表面,亦不能被鄰近的元件、抽屜或傢俱擠壓 電線。 警告! 該爐具只能連接在220V-240V 50Hz電源上。 設備必須接地線。 需按照線路圖進行電線連接。 接線盒位於爐殼下方,需選用中號螺絲刀打開後蓋。 電源 連接 電源線要求 電線 額定電流 H 05 VV - F 230V~1P+N 50Hz 1 Phase + N 3 x 2.5 mm² 25 A H 05 RR - F * 按EN 60 335-2-6/1990標準進行計算 爐盤的連接 爐具接入:單相 230V~1P+N 配置的設定: 單相 230V~1P+N 將黃綠色地線連接至“earth”(地線)端子,將黑色電線連接至“L”端,藍色的連接 至“N”端。 警告! 請確保螺絲已經上緊。... - Page 30 Notes P.30...
-
Page 31: Warranty Terms & Conditions
- the serial number is modified, damaged or removed from the product. - 機身編號被擅自塗改、破壞或刪除。 4. German Pool will, at its discretion, repair or replace any 4. 總代理有權選擇維修或更換配件或其損壞部份。 defective part. 5. This warranty will be void if there is any transfer of 5. - Page 32 傳真 Fax:+853 2875 2661 HONG KONG TOP BRAND TEN YEAR ACHIEVEMENT AWARD © 版權所有。未獲德國寶授權,不得翻印、複製或使用本說明書作任何商業用途,違者必究。 © All rights reserved. Copying, reproducing or using the contents of this manual is not allowed without prior authorization from German Pool, violators will be prosecuted. www.germanpool.com DIH-146DB-M-20(2)
Need help?
Do you have a question about the DIH-146DB and is the answer not in the manual?
Questions and answers