Chapters
Table of Contents

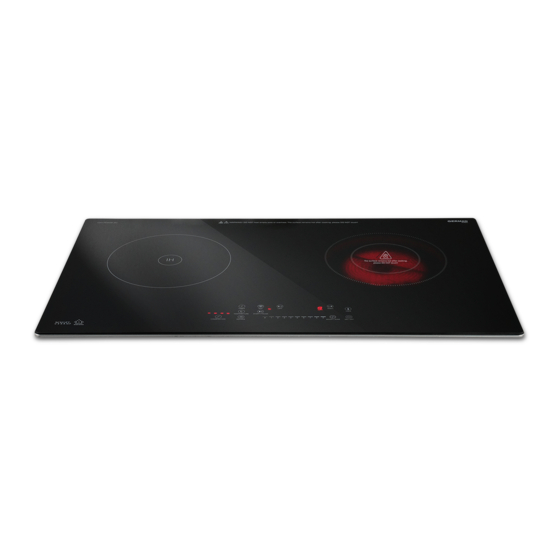
Related Manuals for German pool GIH-PD50B-SC


Summary of Contents for German pool GIH-PD50B-SC
- Page 1 QUICK GUIDE WiFi Smart Built-in GIH-PD50B-SC Induction & Ceramic Hybrid Cooker Online Warranty Registration Please read these instructions and warranty information carefully before use and keep them handy for future reference. U S E R M A N U A L...
- Page 2 請即進行保用登記! 有關保用條款細則,請看說明書最後一頁。 Please register your warranty information now ! For Warranty Terms & Conditions, please refer to the last page of this user manual.
-
Page 3: Table Of Contents
Table of Contents Warnings & Safety Precautions Installation Instructions Product Structure Operation Guidelines Operation Instructions Cleaning & Maintenance Troubleshooting Technical Specification Warranty Terms & Conditions... -
Page 4: Warnings & Safety Precautions
• Unplug this product from the power source before cleaning and maintenance. • Contact German Pool authorized service technician for repair or maintenance of this product. User Safety • Use of this product is strictly prohibited by children or persons with reduced physical, sensory or mental capabilities, or lack of experience and knowledge. - Page 5 Warnings & Safety Precautions Safety Precautions Regarding Power • DO NOT use any power source other than AC 220V to avoid fire and electric shock. • When unplugging from the socket, hold by the plug, DO NOT tug on the power cord, in order to avoid electric shock and short circuit leading to a fire.
- Page 6 Warnings & Safety Precautions • DO NOT use water to wash this product’s air inlet/outlet. • DO NOT allow water or foreign substance to enter this product’s body. Keep this product clean at all times. • DO NOT use steam cleaner or hard objects like scourge pad to clean this product. •...
-
Page 7: Installation Instructions
Installation Instructions ≥50mm ≥250mm Air out Use the seal strip to fix the cooktop on the counter so as to keep it level. Leave at least 50mm space on all sides of the cutout cavity (see diagram above). The countertop should be at least 30mm thick to avoid high temperature causing the countertop to deform. -
Page 8: Product Structure
Product Structure Main Body Induction Hob Ceramic Hob Control Panel Temperature Probe Temperature Probe Silicone Stand Charger... -
Page 9: Operation Guidelines
Operation Guidelines • Choose a suitably sized pot or pan with a flat bottom. • To conserve energy, it is recommended to cover the cookware with a lid. • The base of the cookware should be at least the size of the cooking zone. •... -
Page 10: Operation Instructions
Operation Instructions Control Panel Temperature Key Left Hob Key (Induction) Right Hob Key Timer Key WiFi Key Lock Key (Ceramic) Combination Key Recipes Key Start/Pause Key Slider Regulating Key Boost/Zone Key On/Off Key Function On/Off Key Tap this key to turn product on or off •... - Page 11 Operation Instructions A. Basic Operation Start Cooking Connect power, tap On/Off Key to turn on the product. Panels on both the left of Right Hob and Left Hob Key show “-”. Product enters standby state. Tap Left Hob Key to select induction cooker, or tap Right Hob Key to select ceramic cook- er.
- Page 12 Operation Instructions Timer During cooking, tap Timer Key to set the timer. Panel on the left of Timer Key blinks “00:00”. Tap the numbers on the Slider Regulating Key to set desired timer from 1 minute to 12 hours, eg.: •...
- Page 13 Operation Instructions B. Temperature Probe & Temperature Control Function Temperature Probe When the temperature probe is paired with the hob, user can read the real-time temperature of the food and control the cooking temperature. The temperature probe has a built-in li-ion battery, and must be charged before use: Connect the temperature probe charger to USB power source.
- Page 14 Operation Instructions If the product does not receive any further command in 3 seconds, it will automatically confirm the current temperature setting. Panel will show “----”. Secure the temperature probe onto the silicone stand, and clip the silicone stand onto the rim of the cookware.
- Page 15 Operation Instructions C. Recipes Function Preset Recipes This product comes with 9 factory default preset recipes (can be used by both induction hob and ceramic hob; power, time). Recipe Number Name Ingredients Steps Power Level Temperature Time Rice Rice & water 1 60°C 0:20:00 85°C...
- Page 16 Operation Instructions Saving Recipes Manually This product can store up to 9 recipes (for use by both induction hob and ceramic hob), and each recipe can be freely set with up to 9 steps, including power level, time, etc. Connect power, tap On/Off Key to turn on the product.
- Page 17 Operation Instructions temperature, start/pause will be recorded into the recipe (max. 9 steps). Number on the left of Combination Key will continue to increase with steps saved. After cooking is finished, tap On/Off Key to turn off heating. Panel on the left of Recipes Key will blink “1”.
-
Page 18: Cleaning & Maintenance
If this product shows malfunction or needs maintenance or repair, disconnect from the power source and contact German Pool Customer Service & Repair Centre. Inspection and repair must be carried out by German Pool authorized technician only. DO NOT disassemble this product by yourself. -
Page 19: Troubleshooting
Cookware has an uneven or curved Use cookware with a flat base temperature base Central thermostat failure. Does Contact German Pool Customer Service & product show error code E2/E9? Repair Centre Error Code U Is the cookware appropriate for the... -
Page 20: Technical Specification
Technical Specification Model GIH-PD50B-SC Voltage 220-240 V Frequency 50-60 Hz Power left: induction cooker 2,800W / right: ceramic cooker 2,200W Electric Current 13A x 2 Product Dimensions (H) 55 (W)730 (D)430 mm Cutout Dimensions (H) ≥250 (W)680 (D)380 mm Net Weight 9.3 kg... - Page 21 請即進行保用登記! 有關保用條款細則,請看說明書最後一頁。 Please register your warranty information now ! For Warranty Terms & Conditions, please refer to the last page of this user manual. P.21...
- Page 22 目錄 警告及注意事項 安裝說明 產品結構 使用前注意事項 使用說明 清潔與保養 故障檢修 技術規格 保用條款 P.22...
-
Page 23: 警告及注意事項
警告及注意事項 警告! 使用本產品前,請仔細閱讀所有說明。 • 本產品只限家居室內日常使用,如產品作任何商業、工業、出租或其他用途,保用證即告失 效。 • 請勿讓兒童或身體有殘障、精神不健全及對本產品缺乏經驗或知識的人士單獨使用本產品;如 需使用,必須要在負責任的成年人監管下方可使用。 • 應照顧好兒童,確保他們不會玩耍本產品。 • 無成年人監管下,勿讓兒童清潔及維護本產品。 • 使用前,請先檢查所有電壓是否與本產品標籤上的電壓相符。 • 如果電源線損壞,為免發生意外,電源線必須由廠方、廠方指定的維修中心或同等合格的技術 人員進行更換。 • 清潔或檢查本產品前,必須先關機及拔掉插頭。 • 請聯繫德國寶授權的技術人員進行維修或保養本產品。 為保證使用安全,避免對您和他人造成傷害和財產損失,必須遵守以下安全事項: 使用注意 • 對於身體、感官或智力有缺陷,或經驗和知識有欠缺的人士(包括兒童),嚴禁使用本產品。 • 必須看管好嬰幼兒,嚴禁讓孩童玩耍本產品。孩子和智力障礙者嚴禁使用本產品,避免造成傷 害。 • 使用後發熱區域會有餘溫,相應的爐頭顯示「H」指示,表示有高溫,嚴禁觸摸,否則會有燙 傷的風險。 • 使用過程中如果無意中砸傷或使面板出現破損,必須立即停止使用,防止因漏電造成的電擊傷 害。 • 溫度探針必須小心使用及妥善收納,防止金屬件鋒利傷人。溫度探針內有充電電池,嚴禁擺放 在火源或高溫的地方,不當使用會損壞探針。 使用限制 • 嚴禁將本產品放置於不平衡、潮濕或靠近其他火源、熱源的地方(確保本產品與火源、熱源的 距離至少30cm)。... - Page 24 警告及注意事項 • 必須單獨使用額定電流13安以上的電源插座。 • 本產品不能在外接控制器或獨立的遙控控制系統下運行。 • 如果電源軟線損壞,為避免危險,必須由製造商、其維修部或類似部門的專業人員進行更換。 關於環境 • 因熱量會導致牆壁及家具受損、變色、變形,因此使用時必須距離牆壁和家具10cm以上。 • 嚴禁將本產品直接置於金屬台面上使用,以免產品對金屬台面進行加熱而發生危險。 • 使用時,必須注意保持通風,以保證散熱通暢。 使用中 • 嚴禁將密封容器或密封食品(如罐頭、高壓鍋等)直接置於產品上加熱,以免受熱膨脹發生意 外。 • 嚴禁讓異物堵塞本產品進風口、出風口,以避免零部件過熱影響使用。 • 使用中嚴禁將金屬物體,如刀、叉、勺、蓋等放在本產品表面,因為它們可能變熱。 • 必須對進風口及出風口做定期檢查,以保證其不被阻塞。 • 本產品面板使用後餘有高溫,嚴禁觸碰,以免高溫燙傷。 • 如本產品發生異常或故障時,必須立即停止使用,並拔除電源線。在本產品冷卻後交由專業人 員進行維修。 清潔保養 • 確保本產品已斷電,待本產品面板溫度冷卻再進行清潔。 • 嚴禁將本產品浸入水中或淋水。 • 本產品進風口及出風口嚴禁用水沖洗。 • 防止水、異物進入機體內,保證機體清潔。 • 嚴禁使用蒸氣清潔器或鋼絲球等硬質物品進行清潔。 • 面板油污請使用柔軟濕布沾中性清潔劑擦拭,嚴禁使用漂白水或含腐蝕性液體進行清潔。...
-
Page 25: 安裝說明
安裝說明 ≥50mm ≥250mm Air out 可使用海綿條固定在桌面上,以使爐身 水平放好。 單位:mm 1. 開孔周圍必須預留至少50mm空間(參考上圖),工作台面應至少30mm厚,並由耐熱材料製 成,以防因高溫導致桌面變形。 2. 本產品四周必須保持良好的通風,進風口和出風口不被阻塞;安裝時注意機身底部以下必須預 留不少於250mm高的空間排風。 3. 機身底部進風口及出風口不能設在封閉的空間裡,必須保持與不同空間的空氣連接,並盡量與 房間裡的空氣保持一定程度的連接。 P.25... -
Page 26: 產品結構
產品結構 主機 電磁爐頭 電陶爐頭 控制面板 溫度探針 探針 硅膠支架 充電座 P.26... -
Page 27: 使用前注意事項
使用前注意事項 電陶爐頭鍋具選擇 • 選擇合適容量的燉鍋及平底鍋處理食物。 • 若要達到節能效果,建議使用蓋子。 • 煮食鍋的底面積最起碼跟加熱區域同樣大小。 • 煮食區域的直徑為12cm-26cm不等。 • 如果煮食鍋的底面積和加熱面積一樣時,能夠達到最佳熱傳遞效果。當選購炊具時,請注意廠 家標記的炊具的口徑比底面的直徑大。 • 禁止空燒鍋具。 • 請仔細閱讀鍋具廠家提供的說明書。 電磁爐頭鍋具選擇 • 嚴禁使用邊緣參差不齊或底部彎曲變形的鍋具。 • 必須確保鍋具的底部是光滑的,平放在玻璃上,鍋底大小符合電磁爐烹飪區域面積。必須使用 直徑符合電磁爐烹飪區域上標示的鍋具。如使用一個稍微寬一點的鍋具,能源將被最大效率地 使用。如果使用較小的鍋,效率可能低於預期,請始終把你的鍋具放在電磁爐烹飪區域中央。 • 移動鍋具時,請完全提起鍋具離開電磁爐,切勿拖動,否則可能會刮花微晶玻璃。 P.27... -
Page 28: 使用說明
使用說明 控制面板 溫度鍵 左爐鍵(電磁) 右爐鍵(電陶) WiFi鍵 童鎖鍵 定時鍵 組合鍵 食譜鍵 開始/暫停鍵 滑動欄 快速加熱/加熱 開關鍵 區域鍵 按鍵 說明 開關鍵 按此鍵開機或關機 • 按此鍵啟動或解除童鎖 童鎖鍵 • 童鎖啟動後所有按鍵均無法操作 左爐頭鍵 按此鍵啟用左爐頭(電磁爐) (電磁爐) 右爐頭鍵 按此鍵啟用右爐頭(電陶爐) (電陶爐) 滑動欄 滑動或點按以調校火力檔位、時間、溫度等 • 使用左爐頭(電磁爐)期間按此鍵即時將火力增至最大 快速加熱/加熱 • 使用右爐頭(電陶爐)期間按此鍵轉換單雙環加熱區域 區域鍵 開始/暫停鍵 烹調過程中按此鍵暫停加熱,再按此鍵恢復加熱 • 烹調期間按此鍵進入定時關機設置... - Page 29 使用說明 A. 基本操作 開始烹調 1. 接通電源後,按「開關鍵 」開機,「左爐頭鍵 」及「右爐頭鍵 」左側顯示「-」, 產品進入待機狀態。 2. 按「左爐頭鍵 」選擇電磁爐,或按「右爐頭鍵 」選擇電陶爐,對應的爐頭鍵左側閃爍 顯示「0.」,代表已啟動爐頭。 3. 使用「滑動欄」調校火力檔位並開始烹調:向右滑動增大檔位,向左滑動降低檔位,或直接按 0-9選擇檔位。烹調期間,如需調校火力檔位,先按對應的爐頭鍵,再使用「滑動欄」調校火 力檔位。 4. 烹調期間,如需暫停加熱,先按對應的爐頭鍵,再按「開始/暫停鍵 」,對應的爐頭鍵左側 顯示「II.」代表已暫停加熱;再按一次「開始/暫停鍵 」即可恢復加熱。 5. 烹調完成後,按「開關鍵 」關機。 注意: • 開機後必須先按「左爐頭鍵 」或「右爐頭鍵 」選擇爐頭後,方可進行其他操作,否則 其他按鍵無效。 • 如使用電陶爐,關機後「右爐頭鍵 」左側顯示「H」,表示爐面溫度>60℃,嚴禁觸摸。 電陶爐切換加熱區域 烹調期間,如需切換加熱區域,先按「右爐頭鍵 」,再按「快速加熱/加熱區域鍵 」切換單 環或雙環。...
- Page 30 使用說明 定時關機 1. 烹調期間,按「定時鍵 」進入定時關機設置,「定時鍵 」左側閃爍顯示「00:00」。 2. 按「滑動欄」上的數字直接輸入時間,可設置1分鐘至12小時定時;例子如下: • 如需定時50分鐘,輸入「0」、「0」、「5」、「0」 • 如需定時5小時30分鐘,輸入「0」、「5」、「3」、「0」; • 如需定時11小時59分鐘,輸入「1」、「1」、「5」、「9」。 注意: 第1位元最大數值為「1」,代表10小時。如第1位元選擇「1」後,第2位元最大數值為「2」,代表 12小時,第3及第4位元必定為「0」,代表12小時(最長定時關機時間為12小時)。 3. 如3秒內無任何操作將自動確認當前設置,顯示屏轉為顯示剩餘倒數時間。倒數完畢後自動關 機。 4. 如需修改定時時間,按「定時鍵 」後重新輸入時間;如需取消定時,輸入「0000」即可。 強制關機功能 在待機或烹調狀態下,當爐面有積水或長按任何兩個或以上的按鍵超過3秒,蜂鳴器會發出急促提 示聲,如3秒內不抹乾或不放手,產品將自動強制關機。 電磁乾燒保護 在使用期間,當爐面溫度大於230℃時,電磁爐將停止加熱,「左爐頭鍵 」左側顯示「E2」,蜂 鳴器持續發出提示聲;如需繼續烹調,待機身冷卻後,手動恢復工作狀態。 P.30...
- Page 31 使用說明 B. 溫度探針及控溫功能 溫度探針 將溫度探針與爐頭配對後,透過溫度探針實時測溫及實現控溫烹調。溫度探針內含鋰電池,使用前 必須先充電,充電方法如下: 1. 將跟機附送的充電座連接USB電源插座。 2. 將溫度探針底部插入充電座中,充電期間溫度探針上的電量指示燈閃爍。 3. 當三個電量指示燈常亮,代表充電完成。 警告! • 溫度探針內含鋰電池,嚴禁擺放在火源或高溫的地方,或將整支溫度探針溫入水中,避免損 壞。 • 使用溫度探針時必須存在介質(食物或水份),嚴禁空鍋使用。 控溫烹調功能 1. 接通電源後,按「開關鍵 」開機,「左爐頭鍵 」及「右爐頭鍵 」左側顯示「-」, 產品進入待機狀態。 2. 按「左爐頭鍵 」選擇電磁爐,或按「右爐頭鍵 」選擇電陶爐。 3. 按「溫度鍵 」設置溫度,「溫度鍵 」左側顯示「000℃」,按「滑動欄」上的數字直接 輸入溫度,可設置最高250℃;例子如下: • 如需設置溫度為50℃,輸入「0」、「5」、「0」 • 如需設置溫度為130℃,輸入「1」、「3」、「0」; • 如需設置溫度為230℃,輸入「2」、「3」、「0」。 注意:...
- Page 32 使用說明 C. 食譜功能 預設食譜 本產品出廠時已內存9個預設食譜(電磁粼及電陶粼通用;火力、時間、溫度不可調),用戶可因應 不同需要選用不同編號的食譜烹調。 食譜編號 名稱 食材 步驟 火力檔位 溫度 時間 60°C 0:20:00 米飯 米及水 85°C 0:05:00 99°C 0:05:00 0:05:00 60°C 1:00:00 99°C 0:00:30 煲水 水 99°C 0:00:30 蒸煮 0:20:00 95°C 0:30:00 粥 米及水 1:00:00 50°C 1:00:00 發酵 53°C 1:00:00 55°C...
- Page 33 使用說明 手動設置食譜 本產品共可儲存9個食譜(電磁爐及電陶爐通用),每個食譜可設置最多9個步驟,包括火力、時間等 皆可自行設置。 1. 接通電源後,按「開關鍵 」開機,「左爐頭鍵 」及「右爐頭鍵 」左側顯示「-」, 產品進入待機狀態。 2. 按「左爐頭鍵 」選擇電磁爐,或按「右爐頭鍵 」選擇電陶爐。 3. 按「食譜鍵 」,「食譜鍵 」左側的數字1-9對應為食譜儲存位置1-9,按「滑動欄」上 的數字可選擇對應的食譜儲存位置。 4. 按「組合鍵 」,「組合鍵 」左側顯示「1」代表步驟1;此時可設置時間、溫度及火力 檔位: • 按「定時鍵 」設置烹調時間(可設置1分鐘00:01至99分鐘59秒99:59); • 按「溫度鍵 」設置烹調溫度(可設置最高230度); • 按「爐頭鍵」後使用「滑動欄」調校火力檔位。 5. 設置完成後按「組合鍵 」,再按「滑動欄」上的數字2,「組合鍵 」左側顯示「2」代 表步驟2。重覆以上操作以設置最多9個步驟。 6. 設置完成後按「組合鍵 」,再長按「食譜鍵 」3秒儲存食譜。...
- Page 34 使用說明 透過烹飪記錄設置食譜 1. 接通電源後,按「開關鍵 」開機,「左爐頭鍵 」及「右爐頭鍵 」左側顯示「-」, 產品進入待機狀態。 2. 按「左爐頭鍵 」選擇電磁爐,或按「右爐頭鍵 」選擇電陶爐。 3. 按「食譜鍵 」,再按「滑動欄」上的0,「食譜鍵 」左側的數字顯示「0」,代表進入 烹調記錄模式。 4. 按「開始/暫停鍵 」開始記錄,此時對爐頭的操作包括調校火力、溫度、暫停烹調等皆會以 步驟的形式記錄入食譜內(最多9個步驟),「組合鍵 」左側的數字會隨操作次數遞增。 5. 烹調完成後,按「開關鍵 」關機,「食譜鍵 」左側的數字閃爍顯示「1」。 6. 如確認儲存當次記錄的食譜,按「滑動欄」上的數字選擇對應的食譜儲存位置,再長按「食譜 鍵 」即可。 注意: 烹調完成後,如無需儲存食譜,再按一次「開關鍵 」關機。 使用已儲存的食譜 1. 接通電源後,按「開關鍵 」開機,「左爐頭鍵 」及「右爐頭鍵 」左側顯示「-」, 產品進入待機狀態。 2. 按「左爐頭鍵...
-
Page 35: 清潔與保養
清潔及保養 警告! • 清潔前必須先關掉本產品電源,並待爐面完全冷卻後方可進行清潔。 • 如本產品出現故障或需要保養維修,先拔掉電源插頭,並聯絡德國寶顧客服務及維修中心。檢 查及維修必須由德國寶專業維修員進行。嚴禁自行拆卸本產品。 注意: • 嚴禁使用粗糙抹布、百潔布、鋼絲球或硬刷清潔本產品,以免刮花玻璃面板。 • 嚴禁使用漂白水、含苯、汽油、天拿水、腐蝕性化學溶劑或有機性溶劑清潔本產品。嚴禁使用 蒸氣清潔器。 • 嚴禁用水直接沖洗或將機身浸入水中清洗,防止水、異物進入爐體。 • 嚴禁用水沖洗本產品的進風口及出風口。 1. 日常清潔,以乾軟布抹拭即可。 2. 每次使用後,立即用微濕軟布抹去玻璃面板上的污漬或食物殘渣,再用乾軟布抹乾。 3. 頑固污漬可以沾上稀釋洗潔精的微濕海綿清潔,再用微濕軟布抹拭,最後以乾軟布抹乾。 4. 進風口及出風口使用柔軟乾布輕拭,清理灰塵時,請使用柔軟毛刷或微型吸塵器。 5. 嚴禁將溫度探針浸入水中或淋水。 6. 若長時間不使用本產品,請拔掉電源插頭,並做好產品的防潮、防塵、防蟲。 注意: 經長時間使用後,玻璃面板或會因以下幾種情況會造成變色,實屬正常,不影響電磁爐正常使用: 爐面長期過熱或鍋具乾燒;湯汁溢瀉後未及時清潔;使用的鍋具底部不潔淨。 P.35... -
Page 36: 故障檢修
故障檢修 現象 問題 解決方法 控制面板無反應 插頭是否脫落? 確保插頭穩妥插入 保險絲或斷路器是否已跳開? 請持牌電工檢查電箱 插座是否不通電? 確保插座正常通電 無法控制溫度 鍋具底部是否凹凸不平,或中心部 選用平底鍋 位凹陷? 中央溫控器故障,是否有故障代碼 聯絡德國寶客戶服務及維修中心 E2/E9? 鍋具是否合適? 選用合適鍋具 顯示錯誤代碼 「U」 鍋具是否置於面板的中央? 將鍋具擺正於面板中央 鍋具底部直徑是否小於12cm? 選用鍋底直徑大於12cm的鍋具 使用期間突然停 四周環境溫度是否很高? 本產品必須在合適溫度環境下使用 止加熱 進風口或出風口是否被堵塞;風扇 移除堵塞物;如風扇仍然不轉動,聯絡 是否轉動? 德國寶客戶服務及維修中心 控溫狀態時,表示溫度已達到所設 正常現象 定溫度 電磁爐安全保護啟動 請等數秒至少20秒後再重新開機 Wi-Fi無法連接 用戶APP版本是否為最新?... -
Page 37: 技術規格
技術規格 GIH-PD50B-SC 型號 220-240 V 電壓 50-60 Hz 頻率 左:電磁爐 2,800W / 右:電陶爐 2,200W 功率 13A x 2 電流 (H) 55 (W)730 (D)430 mm 產品尺寸 (H) ≥250 (W)680 (D)380 mm 嵌入尺寸 9.3 kg 淨重 11.1 kg 總重連包裝 • 產品規格及設計如有變更,恕不另行通知。 • 中英文版本如有出入,一概以中文版為準。 • 本產品使用說明書以www.germanpool.com網上版為最新版本。... - Page 38 如欲獲取更多有關本產品最新資訊,歡迎瀏覽本公司網站 For the lastest information about this product, please visit our website w w w . g e r m a n p o o l . c o m P.38...
-
Page 39: Warranty Terms & Conditions
• the serial number is modified, damaged or removed from • 產品經非認可之技術人員改裝或加裝任何配件; the product. 4. German Pool will, at its discretion, repair or replace any • 機身編號被擅自塗改、破壞或刪除。 defective part. 4. 總代理有權選擇維修或更換配件或其損壞部份。 5. This warranty will be void if there is any transfer of ownership from the original purchaser. - Page 40 Fax:+853 2875 2661 HONG K ONG TOP BRAND TEN YEAR ACHIEVEMENT AWARD © All rights reserved. Copying, reproducing or using the contents of this manual is not allowed without prior authorization from German Pool, violators will be prosecuted. www.germanpool.com GIH-PD50B-M-23(1)
- Page 41 QUICK GUIDE WiFi Smart Built-in GIH-PD50B-SC Induction & Ceramic Hybrid Cooker Please read these instructions before use and keep them handy for future reference. W I F I C O N N E C T I O N Q U I C K G U I D E...
- Page 42 5.0 GHz. A. How To Set Up The APP 1. Connect your phone to 2.4 GHz WiFi then scan the QR Code below, or search “German Pool Smart Control”in App Store or Google Play to download and install the APP.
- Page 43 Download the App C. Register Your Account 1. Open the APP,click “Agree” 2. Click “Sign Up” to register 3. Enter your email address, tick on “User Agreement and your account. “I agree Privacy Policy and Privacy Policy”. User Agreement”, then click “Get Verification Code”.
- Page 44 Pairing Sequence D. Pairing Sequence Method 1: Auto Pairing 1. Tap and hold the cooker’s 2. Click “+” on the upper right 3. Before pairing, user must WiFi Key for 3 seconds corner of the APP homepage, allow the App to access your until buzzer beeps and WiFi then click “Add Device”.
- Page 45 Pairing Sequence WiFi Smart Induction-Ceramic Cooker 10. Tap “Allow While Using App” 11. Select WiFi name and enter 12. APP will show ”Being (if Location is already on, ignore your WiFi password, then Added”, the product and APP this step). click “Next”.
- Page 46 Pairing Sequence Method 2: Bluetooth Pairing 1. Click “+” on the upper right 2. In the “Add Manually “ 3. Follow the instructions on the corner of the APP homepage, column, find the product APP to pair. then click “Add Device”. model that needs to be paired, and click the product to pair.
- Page 47 Pairing Sequence E. Sharing Control WiFi Smart Induction-Ceramic Cooker 1. On the product’s homepage, 2. Click “Share Device” under 3. Click “Add Sharing”. click “ ” on the upper “Others”. right corner. WiFi Smart Induction-Ceramic Cooker WiFi Smart Portable Air Conditioner has been shared with 4.
- Page 48 Using The App Using The App WiFi Smart Induction-Ceramic Cooker Settings Key Induction Ceramic Ceramic (Inner) (Outer) Cloud Recipe Selection Key Induction Ceramic Ceramic (Inner) (Outer) Cooking Time Cooking Temperature Recipe Selection Power Level On/Off Star/Pause Timer Key Description On/Off Key Tap to turn product on or off Start/Pause Key •After setting is completed, tap this key to start cooking...
- Page 49 下載應用程式App 使用WiFi連接本產品 本產品可透過德國寶智能控制應用程式「German Pool Smart Control」APP以智能手機操控。 注意: 必須使用頻率為2.4 GHz的WiFi進行連接,不適用於頻率為5.0 GHz的WiFi。 A.下載應用程式 連接頻率為2.4 GHz的WiFi後,掃描下方二維碼,或於蘋果IOS系統上的App Store或安卓Android系統 上的 Google Play搜尋「German Pool Smart Control」,下載並安裝APP。 蘋果IOS系統 安卓Android系統 App Store Google Play B.設置APP語言 蘋果IOS系統 1. 在手機的設定中搜尋 2. 點擊「偏好的語言」。 3. 在「建議的語言」一欄中選 「Smart Control」。 擇繁體中文或英文(注意 : 選擇「繁體中文(香港)」 APP將會顯示英文)。...
- Page 50 下載應用程式App C.註冊用戶資料 2. 點擊「註冊」註冊用戶資 3. 輸入電郵地址,剔選「我同 1. 打開APP,點擊「用戶協議 料。 意隱私致策與用戶協議」後 與隱私政策」上的「同意」 。 點擊「獲取驗證碼」。 4. 輸入電郵裡的驗證碼。 5. 設定您的登入密碼後點擊 「完成」,完成註冊。 P.10...
- Page 51 進行配對 D.配對本產品 方法1:自動配對 3. 配對前必須先打開藍牙權 1. 長按煮食爐上的「WiFi 2. 點擊APP主頁右上角 「+」 , 限,點擊「打開藍牙」(如 鍵」3秒,直至蜂鳴器發出 再點擊「添加設備」。 已打開,可忽略此步驟)。 提示聲,WiFi指示燈閃爍。 6. APP顯示「正在搜索附近的 4. 點擊「去設定」(如已打 5. 點擊藍牙一欄以打開藍牙 開,可忽略此步驟)。 權限(如已打開,可忽略此 設備…」。 步驟)。 WiFi Smart Induction-Ceramic Cooker 8. 點擊產品名稱右方的 「+」 。 9. 配對時建議開啟位置權限, 7. 數秒後APP顯示「發現設 點擊「立即設置」(如已開 備…」,點擊「添加」。 啟,可忽略此步驟)。...
- Page 52 進行配對 WiFi Smart Induction-Ceramic Cooker 12. APP顯示「正在添加」,產 10. 點擊「使用APP時允許」 11. 輸入手機所連接的WiFi (如已開啟,可忽略此步 名稱及密碼,點擊「下一 品與APP自動配對中。 驟)。 步」。 WiFi Smart Induction-Ceramic Cooker 13. 配對完成後APP顯示「添加 成功」,按右上角「完成」 進入產品主界面。 警告! 如沒有開啟藍牙或沒有打開藍牙權限,將無法配對產品;注意,即使電話已開啟藍牙功能,並不代 表已打開「藍牙權限」。 注意: • 每次只可以一個帳戶進行配對,如由另一帳戶再次進行配對,先前已配對的帳號將失去本產品 的操作權。 • 已配對的帳戶可以分享本產品的操作權予其他帳戶,詳見「E.操作權分享」部份。 注意: 如無法搜索到本產品,或在配對期間APP顯示感嘆號符號,代表配對失敗,請使用下列的方法2進行 配對。 P.12...
- Page 53 進行配對 方法2:藍牙配對 2. 在「手動添加」一欄找到需 1. 點擊APP主頁右上角 「+」 , 3. 按照APP上的指示進行配 要配對的產品型號,點擊該 再點擊「添加設備」。 對。 產品進行配對。 WiFi Smart Induction-Ceramic Cooker WiFi Smart Induction-Ceramic Cooker 4. 點擊產品名稱右方的 「+」 。 5. 輸入手機所連接的WiFi名稱 6. 配對完成後APP顯示「添 及密碼,點擊「下一步」 。 加成功…」,按右上角「完 成」進入產品主界面。 警告! 如沒有開啟藍牙或沒有打開藍牙權限,將無法配對產品;注意,即使電話已開啟藍牙功能,並不代 表已打開「藍牙權限」。 P.13...
- Page 54 進行配對 E.操作權分享 WiFi Smart Induction-Ceramic Cooker 1. 在本產品操作主界面點擊右 2. 在「其他」一欄中點擊「共 3. 點擊下方「添加共用」。 上角「 」。 用設備」。 WiFi Smart Induction-Ceramic Cooker WiFi Smart Portable Air Conditioner 已共享給 4. 在「分享給其他人」一欄 5. 輸入該帳戶的註冊電郵地 6. 重複步驟3-5添加更多其他 中可設定所需分享的人數, 址,再點擊右上角「完成」 帳戶。 再點擊「分享給 即可。 SmartControl賬號」。 注意: 在「共用設備」頁面裡,你可隨時添加或移除帳戶的操作權。 P.14...
- Page 55 使用App操作產品 使用APP操作 WiFi Smart Induction-Ceramic Cooker 設置鍵 Induction Ceramic Ceramic (Inner) (Outer) 雲端食譜 爐頭 選擇鍵 Induction Ceramic Ceramic (Inner) (Outer) 烹調時間 設置 烹調溫度 設置 食譜選擇 火力檔位 設置 開始/暫停鍵 定時鍵 開關鍵 按鍵 說明 按此鍵開機或關機 開關鍵 開始/暫停鍵 • 設置完成後按此鍵開始烹調 • 烹調過程中按此鍵暫停加熱,再按此鍵恢復加熱 定時鍵 •...
- Page 56 Fax:+853 2875 2661 HONG K ONG TOP BRAND TEN YEAR ACHIEVEMENT AWARD © All rights reserved. Copying, reproducing or using the contents of this manual is not allowed without prior authorization from German Pool, violators will be prosecuted. www.germanpool.com GIH-PD50B-SC-QUICKGUIDE-23(1) GIH-PD50B-SC-M-23(1) P.16...
Need help?
Do you have a question about the GIH-PD50B-SC and is the answer not in the manual?
Questions and answers