Table of Contents
Advertisement
Quick Links
Advertisement
Table of Contents

Related Manuals for Avitech Sequoia 2H2U


Summary of Contents for Avitech Sequoia 2H2U
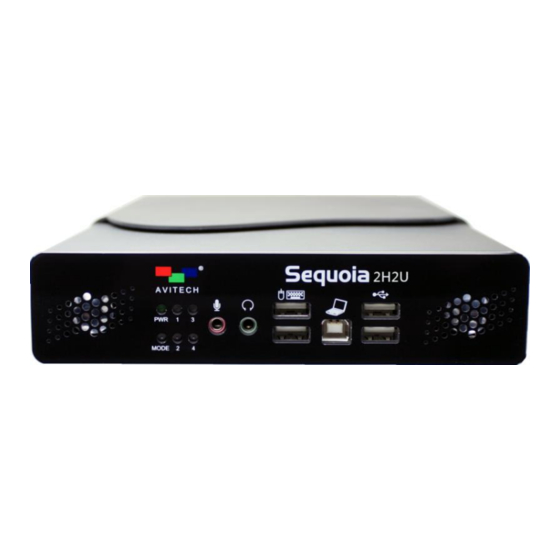
- Page 1 User Manual Sequoia 2H2U One of a kind multiviewing Revision 1.0.0, (May, 2014)
-
Page 2: About This Manual
To assist us in making improvements to this user manual, we welcome any comments and constructive criticism. Email us at: sales@avitechvideo.com. WARNING Do not attempt to disassemble the Sequoia 2H2U. Doing so may void the warranty. There are no serviceable parts inside. Please refer all servicing to qualified personnel. TRADEMARKS All brand and product names are trademarks or registered trademarks of their respective companies. -
Page 3: Table Of Contents
Australia and New Zealand C-Tick Marking and Compliance Notice ........v 1. Phoenix-G Configuration .................... 1 1.1 Connection Method ......................1 1.2 Pinging the Sequoia 2H2U ....................1 1.3 Starting Up the Phoenix-G Software ................1 2. Basic Setup Using the Phoenix-G Software .............. 3 2.1 Group Layout Menu ...................... - Page 4 2.18 Control Video Fade ......................46 Appendix A Setting Up Static IP .................. 47 A.1 Method 1: Change IP Address of Sequoia 2H2U Chassis ........... 47 A.2 Method 2: Change IP Address of the Controlling Computer ........49 For Windows XP ......................49...
-
Page 5: Warranty
Properly shielded and grounded cables and connectors must be used in order to meet FCC emission limits. Avitech is not responsible for any radio or Limitation of Liability television interference caused by using other than recommended Avitech’s liability under this warranty shall not exceed the purchase... -
Page 6: Phoenix-G Configuration
IP, similar range as the Sequoia 2H2U (e.g., ”210.100.100.151” – factory- default setting). Or, change the IP address of the Sequoia 2H2U to a similar range as the controlling computer. See Appendix A for details. - Page 7 Phoenix-G “Control” and “Option” window will appear. “Control” window is for creating and configuring the layout. Logo icon Avitech Phoenix-G (Galaxy): proprietary logo and the name of the software. 1920×1200 (60Hz): shows the output resolution and frequency of the monitor. ...
-
Page 8: Basic Setup Using The Phoenix-G Software
This chapter introduces you to the Phoenix-G (formerly Galaxy) software for setting the features of your Sequoia 2H2U; as well as familiarizes you with the menus appearing on the Phoenix-G software. Some items appearing on the menus of the Phoenix-G software may not be available (grayed-out). -
Page 9: Settings Menu
2.3 Settings Menu Figure 2-3 Phoenix-G Software: Settings Menu By default the Sequoia will automatically detect the optimum display resolution so Set Output Mode will be grayed-out (disabled). When using the Sequoia for the first time or upon setting the device to its factory-default setting, automatic detection of optimum display resolution will occur. - Page 10 Step 3. Click Settings and then click Set Output Mode. Figure 2-5 Phoenix-G Software: “Settings””Set Output Mode” When the Detect Display Resolution option is “on” the Set Output Mode function is not available (grayed-out). Step 4. Set the output resolution to match the monitor’s resolution. Select the Refresh Frequency, select the Mode and then click OK.
- Page 11 When you have unplugged the IP cable and re-connected it, click Reconnect (Network) to continue the configuration process. Figure 2-8 Phoenix-G Software: “Settings””Reconnect (Network)” ® Import/Export (.txt) allows you to import a label from / export label to Microsoft Office Word or Notepad to be edited externally.
- Page 12 Step 2. Edit the text in the file. When you are done editing the label (highlighted as shown below) save the “txt” file and import it. The on screen labels will be updated. Figure 2-11 Phoenix-G Software: Edit the Label Step 3.
-
Page 13: System Parameter Menu
Step 4. Click Save. The next screen shows the text file opened using Notepad. Figure 2-13 Sample Firmware/Hardware Information Text File 2.4 System Parameter Menu Figure 2-14 Phoenix-G Software: “System Parameter” Menu Save System Files to Flash allows you to save all configuration settings to flash memory. If the system configuration has been changed, save the changes first before continuing the other configuration settings. - Page 14 Figure 2-16 Phoenix-G Software: “Advanced” Use Broadcast Load File – is for loading presets / switching resolution / group reset. When enabled (with checkmark), Phoenix-G software will broadcast the command allowing for simultaneous execution of the command. This feature should always be enabled. Automatically Backup Files to Hard Drive –...
- Page 15 Figure 2-17 Phoenix-G Software: “Sequoia Properties” Window Active Window Border – Allows you to set the border color of the active window. Each pixel/line can be set to have a different color; all lines can be set to be the same color (All lines) by clicking the radio button to select the Line #.
- Page 16 Window priority (manual designate) – If enabled (with checkmark) – in case of overlaying windows, upon clicking a window will not cause the window to become the topmost window. Disable (without checkmark) or click the particular button on the “Option” window to change window priority (become topmost window). Figure 2-18 Phoenix-G Software: “Option”...
-
Page 17: Module Parameter Menu
Detect Display Resolution – Sequoia 2H2U can automatically detect the display’s optimum resolution. To enable/disable this feature click Detect Display Resolution to toggle between on (with checkmark) or off. When the Detect Display Resolution option is set to On all the presets will be displayed in the optimum resolution. - Page 18 Label – Adjust the Font Color, B-G (background) Color, and font Size for all labels in the group. Make sure to turn on all labels (see previous item) before setting the label properties. Figure 2-20 Phoenix-G Software: “Label Properties” Window Each window supports one line of text (up to 31 characters).
- Page 19 Borders are turned on by default. Step 1. Upon clicking Border the following screen appears. Remove the Enable checkmark or change the Border Width to 0 to turn off the border. Figure 2-21 Phoenix-G Software: “Border Properties” Window Step 2. You can also change the border color. Each pixel/line/3D border can have a different color.
- Page 20 To change the audio meter properties, perform the following steps: Step 1. Click Meter. The Sequoia is capable of displaying embedded audio as VU (volume unit) meters inside the video window. Embedded audio is divided into four groups, with a master and secondary channel for each group.
- Page 21 Step 3. Use the slider to adjust the Phase (one slider) – 128 (default); When monitoring a stereo signal, the coherence between the 2 channels (i.e., how similar they are) greatly affects its mono compatibility. The phase meter indicate the relative phase of the 2 channels and thereby provide some measure of mono compatibility.
- Page 22 Setting Alarm Properties allows you to setup the notification when a signal is missing. To set the alarm properties, click Alarm. By clicking Module Alarm Switch you will set the Process/Video Alarm Switch and adjust the No Video’s Response Time. By clicking Audio Alarm Switch you will set the No Audio Alarm for Single Meter and adjust the Signal In/Out’s Response Time Figure 2-23 Phoenix-G Software: “Alarm Properties –...
- Page 23 Background Picture allows you to select a BMP picture file to fill up the entire monitor screen in order to prevent the display of dark (empty) patches (e.g., spaces between windows). You can turn on (with checkmark on Enable) or off the display of background picture. Figure 2-25 Phoenix-G Software: “Background Picture”...
- Page 24 To fill the entire screen of monitor, the size (pixel) of the background picture must be the same as the monitor resolution. In case the size of the file is larger than the Sequoia’s output resolution (see Settings Set Output Mode) the system will automatically detect and prevent it from displaying as your background picture (WARNING message will appear).
- Page 25 Step 5. Click the Load button to select another background picture file (in case two background picture files have been saved to flash memory). Figure 2-30 Phoenix-G Software: Load Background Picture Step 6. Click OK upon successfully loading a background picture file. Figure 2-31 Phoenix-G Software: File Loaded Successfully Step 7.
-
Page 26: Gui View Menu
IP Address allows you to change to an IP address different from the default one. Figure 2-33 Phoenix-G Software: “Set IP Address” Window 2.6 GUI View Menu This allows you to set the Phoenix-G control window’s display size. For example, when the resolution under Set Output Mode is 800×600, the GUI View set at 50 % would give you a 400×300 Phoenix-G control window display size;... - Page 27 Step 1. Click Add. Figure 2-36 Phoenix-G Software: “Briefing” Window Step 2. Enter the Process name, specify the Time (H : M : S), then select the previously saved preset File. Click OK to continue. Continue adding new processes as necessary. Figure 2-37 Phoenix-G Software: “Add Process”...
-
Page 28: Help Menu
2.8 Help Menu Figure 2-39 Phoenix-G Software: “Help” Menu To Read the Avitech Sequoia’s BIOS Version, perform the following steps: Step 1. Click Help and then click Read BIOS Version. Step 2. Click Export. Figure 2-40 Phoenix-G Software: “Display BIOS Version” Window Step 3. - Page 29 To update signal type/format, click Update Signal Type/Format and the image’s signal type/format will be shown. Figure 2-42 Phoenix-G Software: “Signal Type/Format” Window To backup a preset, perform the following steps: Step 1. Click Help and then click Backup All Information. Step 2.
- Page 30 To manually restore a preset perform the following steps: Step 1. Set the Sequoia to the factory-default value. Step 2. If the backup content is somewhere else other than at the “c:\Avitech_VCC\Backup\IPxxx.xxx.xxx.xxx\xxxx#_#”, copy the backup data “xxxx#_#” into the “c:\Avitech_VCC\Backup\IPxxx.xxx.xxx.xxx\” location. Step 3.
- Page 31 Step 8. Reboot the module and restart the Phoenix-G software (formerly Galaxy). Figure 2-47 Phoenix-G Software: Restart Phoenix-G If upon clicking Restore Module Information on the Help menu and the error message appears click OK. Figure 2-48 Phoenix-G Software: Module Information Not Found Click Browse.
-
Page 32: Quick Keys - Change Window To/From Full Screen Mode; Swap Window Contents
Click Browse again to specify the correct backup Path. Figure 2-50 Phoenix-G Software: Specify Correct Backup Path To find out the Phoenix-G software version, click Help and then click About. Figure 2-51 Phoenix-G Software: Version Information 2.9 Quick Keys – Change Window to/from Full Screen Mode; Swap Window Contents Two quick keys are available to quickly bring a window to/from full screen mode as well as swap the contents from one window to another by performing the following steps:... -
Page 33: Window Layout
Step 3. Click the capital letter S to select the source window and then click again at a destination window where you want to swap the contents from the source. This will swap all the contents and properties of the source window to the destination window. 2.10 Window Layout 2.10.1 Default Window Layouts Three default window layouts are available:... -
Page 34: Arranging Windows
Figure 2-55 Phoenix-G Software: “layout3.GP1” To switch between the three factory-default presets use the Page Up/Page Down keys. 2.10.2 Arranging Windows To quickly setup the layout for your video windows, right-click the title bar to access the Group Layout menu. Select from 2×2 up to 8×8 as possible grid positions on the monitor. The layout size available for your particular model will depend on the monitor’s resolution as well as the smallest window size limitation. -
Page 35: Mouse Right-Click Menu
To reposition a window, drag the center of a window and drop to a new position and it will update on the monitor. Or, use the Position Fine Adjustment menu to adjust the position of any window on a pixel by pixel basis. -
Page 36: Resizing Window
2.11.1 Resizing Window To resize a single window to one of the preset sizes perform the following steps: Step 1. Right-click a particular window and select Size followed by the desired preset size selection. Figure 2-59 Phoenix-G Software: “Size” Menu Step 2. - Page 37 Full Screen – On a particular window select this to maximize the image and fill up the whole screen. You can click the desired window button to switch windows in full screen mode. Figure 2-61 Phoenix-G Software: “Full Screen Mode” Window Full screen in background –...
-
Page 38: Setting Meter Properties
2.11.2 Setting Meter Properties Upon right-clicking a particular window, select Meter to change the audio meter properties. Refer to a previous section for details on setting the Meter Properties. Figure 2-62 Phoenix-G Software: “Meter Properties – Process” Window 2.11.3 Setting Label Properties Step 1. -
Page 39: Setting Border Properties
Step 2. Each window supports one line of text (up to 31 characters). Figure 2-64 Phoenix-G Software: “Label Properties” Window 2.11.4 Setting Border Properties Borders are turned on by default. To turn off the border perform the following steps: Step 1. Click Border. Figure 2-65 Phoenix-G Software: Set Border Width Step 2. -
Page 40: Setting Alarm
Step 3. You can also change the border color. Each pixel/line can have a different color 3D border 2.11.5 Setting Alarm Upon right-clicking a particular window, select Set Alarm. Figure 2-66 Phoenix-G Software: “Alarm Properties – Module” Window ... -
Page 41: Check Signal
2.11.6 Check Signal To determine if the video signal is being fed into the selected window, right-click a particular window and click Check Signal. One of the following screens may appear: Figure 2-67 Phoenix-G Software: “Signal Type” Window 2.11.7 Auto Remove Black Bar Ever notice those annoying black bars on the sides or along the top and bottom of a video? Oftentimes, the culprit is an incorrectly set aspect ratio. -
Page 42: Quick Cropping An Image On A Window
2.11.8 Quick Cropping an Image on a Window This allows you to crop (cut-out) an image on a particular window. Click Quick Crop Image Box Size to create a starting point and then drag to the desired location. Release the mouse to set the end point. A cropped out image of the former window will be created. -
Page 43: Pan Image
2.11.11 Pan Image Click Pan Image. This allows you to use the mouse (drag using the symbol) to pan (see the NOTE below for description of pan) the cropped image window (zoom in area). You can also click the X– / X+ / Y–... -
Page 44: Aspect Auto Detect
2.11.12 Aspect Auto Detect By default, the image appearing inside a window will be shown in its native aspect ratio. This means that upon dragging the border to enlarge or shrink a window, the aspect ratio will still be maintained. By default, the image is also made to “Fit window size.”... -
Page 45: Turning On/Off The Window/Label
2.12 Turning On/Off the Window/Label Step 1. The Option window has two checkboxes that can be used to close an image window (W) or turn off the label (L) for each window. Figure 2-72 Phoenix-G Software: “Option” Window (W and L) Step 2. - Page 46 To save to flash perform the following steps: Step 1. Click Save File in the Option window. Figure 2-73 Phoenix-G Software: Click “Save File” in “Option” Window Step 2. Click Update to Module Flash and then click OK. Figure 2-74 Phoenix-G Software: “Save File” Window...
-
Page 47: Saving A Preset
Alternatively, close the Phoenix-G software and select Yes when prompted to save. 2.14 Saving a Preset All the presets you create (up to 23) are stored in the Sequoia, not in the computer that is running the Phoenix-G software. In order to write all the presets into the internal flash memory of the Sequoia after creating it you will need to save to flash. -
Page 48: Loading File
2.15 Loading File Step 1. In the Option window click Load File. Step 2. Select a saved file and then click OK to load the preset. 1. When saving your preset do not use the same filename as the system’s default preset filename (layout1.GP1 / layout2.GP1 / layout3.GP1). -
Page 49: Making Adjustments
2.16 Making Adjustments Step 1. In the Option window click Adjustment. Step 2. Select the Image Window then adjust the input signal such as, Brightness (–128 – 127), Saturation (0 – 2047), Contrast (0 – 1023), and Hue (–1024 – 1023) parameters directly by using the sliders or clicking the radio button. -
Page 50: Audio Setup
2.17 Audio Setup Step 1. In the Option window click Check Audio. Step 2. Click the audio Check option. Figure 2-77 Phoenix-G Software: “Check Audio Source” Window Step 3. Select the Process window on the drop-down menu. Step 4. Select the correct Input Source (Analog/Digital (HDMI)). Step 5. -
Page 51: Control Video Fade
2.18 Control Video Fade This allows you to set the speed that an overlaying window will fade into the background when another window becomes the active window. Step 1. In the Option window click Fader Control. Step 2. Adjust Fading Speed directly by using the slider to select Slow (1) – Fast (10). Then click OK. Figure 2-78 Phoenix-G Software: “Fader Control”... -
Page 52: Appendix A Setting Up Static Ip
Appendix A Setting Up Static IP The following two methods allow Sequoia 2H2U to be in same network mask with connected computer. A.1 Method 1: Change IP Address of Sequoia 2H2U Chassis Step 1. Run the Phoenix-G software by double-clicking Phoenix-G.exe. Under IP select User Define if you know the IP address assigned to the Sequoia or select Automatically Search. - Page 53 “Control” window and “Option” window will appear. Figure A-4 Phoenix-G Software: Control and Option Window Step 4. Click Settings then Module Parameter. Then click IP Address. Figure A-5 Phoenix-G Software: Click “Settings””Module Parameter””IP Address”...
-
Page 54: Method 2: Change Ip Address Of The Controlling Computer
Step 5. Enter the new IP address, Subnet mask, and Gateway to match the value of the controlling computer. Then, click OK. Figure A-6 Phoenix-G Software: Set IP Address, Subnet Mask and Gateway Step 6. Click OK and OK. Close the Phoenix-G program and restart the Sequoia. Figure A-7 Phoenix-G Software: Close and Restart Sequoia A.2 Method 2: Change IP Address of the Controlling Computer For Windows XP... - Page 55 Step 2. Click Change Adapter Settings on the left. Step 3. Right-click the Local Area Connection the Sequoia is connected to and select Properties. Step 4. When the next screen appears, click to highlight Internet Protocol Version 4 (TCP/IPv4), and click Properties.
Need help?
Do you have a question about the Sequoia 2H2U and is the answer not in the manual?
Questions and answers