
Subscribe to Our Youtube Channel
Related Manuals for LG MS3242G


Summary of Contents for LG MS3242G
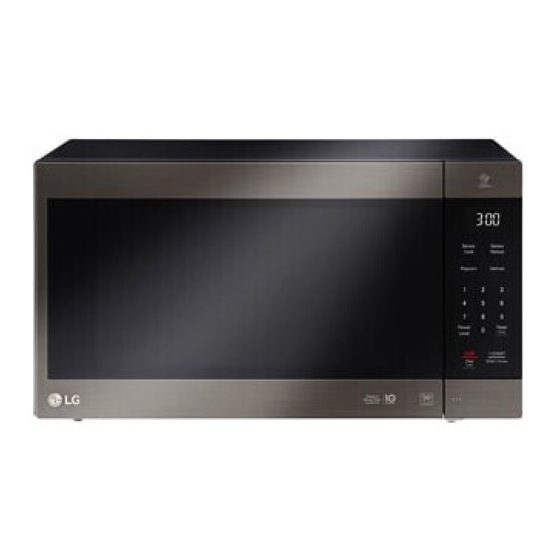
- Page 1 OWNER’S MANUAL MICROWAVE OVEN PLEASE READ THIS OWNER’S MANUAL THOROUGHLY BEFORE OPERATING. MS3242G www.lg.com MFL67571102...
-
Page 3: Precautions
Precautions Precautions to avoid possible exposure to excessive microwave energy. You cannot operate your oven with the door open due to the safety interlocks When heating liquids, e.g. soups, sauces and beverages in your microwave built into the door mechanism. These safety interlocks automatically switch off oven, overheating the liquid beyond boiling point can occur without evidence of bubbling. -
Page 4: Table Of Contents
Contents How the Microwave Oven Works Precautions Contents Microwaves are a form of energy similar to radio and television waves and 4 ~ 5 Unpacking & Installing ordinary daylight. Normally, microwaves spread outwards as they travel Setting the Clock through the atmosphere and disappear without effect. Microwave ovens, Child Lock however, have a magnetron which is designed to make use of the energy in Micro Power Cooking... -
Page 5: Unpacking & Installing 4
Unpacking & By following the basic steps on these two pages you will be able to quickly check that your oven is operating correctly. Please pay particular attention to the guidance on where to install your oven. When unpacking your Installing oven make sure you remove all accessories and packing. - Page 6 Plug your oven into a standard household socket. Open your oven door by pushing the Release Button Release Button. Make sure your oven is the only appliance Place the ROTATING RING inside the oven and place connected to the socket. If your oven does not operate the GLASS TRAY on top.
-
Page 7: Setting The Clock
Setting the You can set either12 hour clock or 24 hour clock. Clock In the following example I will show you how to set the time for 14:35 when using the 24 clock. Make sure that you have removed all packaging from your oven. Make sure that you have correctly installed your oven as described earlier in this book. -
Page 8: Child Lock
Child Lock Press STOP/CLEAR. Your oven has a safety feature that Press and hold STOP/CLEAR until “L” appears on the display and prevents accidental running of the oven. BEEP sounds. Once the child lock is set, you will be The CHILD LOCK is now set. unable to use any functions and no cooking can take place. -
Page 9: Micro Power Cooking
Micro Power Cooking In the following example I will show you how to cook some food on 80% power for 5 minutes and 30 seconds. Make sure that you have correctly installed your oven as described earlier in this book. Press STOP/CLEAR. -
Page 10: Micro Power Level
Micro Power Your microwave oven is equipped with 5 power levels to give you maximum flexibility and control over cooking. Level The table below shows the examples of food and their recommended cooking power levels for use with this microwave oven. POWER LEVEL POWER LEVEL POWER OUTPUT... -
Page 11: Two Stage Cooking
Two stage In the following example I will show you how to cook some food in two stages. The first stage will cook your food Cooking for 11 minutes on HIGH; the second will cook for 35 minutes on 40%. Press STOP/CLEAR. -
Page 12: Quick Start
Quick In the following example I will show you how to set 2 minutes of cooking on high power. Start Press STOP/CLEAR. Press START four times to select 2 minutes on HIGH power. The QUICK START feature allows you to Your oven will start before you have finished the fourth press. -
Page 13: Auto Cook 12
Auto In the following example I will show you how to cook 0.6kg of fresh vegetable. Cook Press STOP/CLEAR. AUTO COOK Press twice AUTO COOK allows you to cook most of your favorite food easily by selecting the food type and entering the weight of the food. - Page 14 FOOD CATEGORY FOOD TEMP. UTENSILS WEIGHT LIMIT INSTRUCTIONS Wash, dry and prick potato with a fork several times. Place the 1. JACKET POTATO potato with three pieces of paper towel in the centre of the glass 0.2 kg ~ 1.0 kg Room temp.
-
Page 15: Auto Defrost 14
Auto The temperature and density of food varies, I would recommend that the food is checked before cooking commences. Pay particular attention to large joints of meat and chicken, some foods should not be completely thawed before cooking. For example fish cooks so quickly that it is sometimes better to begin cooking while still Defrost slightly frozen. - Page 16 AUTO WEIGHT DEFROST GUIDE * Food to be defrosted should be in a suitable microwave proof container and place uncovered on the glass turntable. * If necessary, shield small areas of meat or poultry with flat pieces of aluminum foil. This will prevent thin areas becoming warm during defrosting. Ensure the foil does not touch the oven walls.
-
Page 17: Quick Defrost 16
Quick Use this function to thaw only 0.5kg of Minced meat very quickly. This will require a standing time to allow the center to thaw. In the following example will show you how to defrost 0.5kg of forzen minced meat. Defrost Press STOP/CLEAR. - Page 18 QUICK DEFROST GUIDE Remove the meat completely from its wrapping. Place the mince onto a microwave-safe plate. When beeps, at this point remove the mince from the microwave oven, turn the mince over and return to the microwave oven. Press start to continue. At the end of the program remove the mince from the microwave oven, cover with foil and allow to stand 5-15 minutes or until completely thawed.
-
Page 19: Auto Reheat 18
Auto In the following example I will show you how to cook 0.6kg of Frozen Meal. Reheat Press STOP/CLEAR . Auto Reheat cooking make food Press AUTO REHEAT twice to select Frozen Meal. reheating convient and easy to use. The oven has been pre-programmed to “rh-2”... - Page 20 FUNCTION CATEGORY WEIGHT LIMIT UTENSILS FOOD TEMP. INSTRUCTIONS Pierce using a skewer on the surface. Refrigerated 0.3 kg ~ 0.6 kg Own tray AUTO 1. Chilled Place food on the glass turntable. After cooking, allow to standfor 2-3 minutes REHEAT Meal before serving.
-
Page 21: Energy Saving
Energy Saving Press STOP /CLEAR(ECO ON). “0” appears on the display. Press STOP /CLEAR(ECO ON) or The ECO ON feature allows you After 5 minutes with door open or closing, display off. to save energy through display off during stand-by status, or after 5 minutes with door open or closing, display will off automatically. -
Page 22: More Or Less Cooking
More or Less In the following example I will show you how to change the preset AUTO COOK programmes for a longer Cooking or shorter cooking time. Press STOP/CLEAR. Set the required AUTO COOK programme. If you find that your food is over or undercooked when using the AUTO Select weight of food. -
Page 23: Important Safety Instructions Read Carefully And Keep For Future Reference
WARNING Important safety instructions Please ensure cooking times are correctly set as over cooking may result in FIRE Read carefully and keep for future reference and subsequent DAMAGE to the OVEN. 1 Do not attempt to tamper with, or make any adjustments or repairs to the 11 Be certain to place the oven so the front of the door is 8 cm or more door, control panel, safety interlock switches or any other part of the oven. -
Page 24: Microwave-Safe Utensils
Microwave-safe Utensils Never use metal or metal trimmed utensils in your Paper microwave oven Paper plates and containers are convenient and safe to use in your microwave oven, Microwaves cannot penetrate metal. They will bounce off any metal object in the provided that the cooking time is short and foods to be cooked are low in fat and oven and cause arcing, an alarming phenomenon that resembles lightning. -
Page 25: Food Characteristics & Microwave Cooking 24
Food characteristics & Microwave cooking Moisture content of food Keeping an eye on things Since the heat generated from microwaves tends to evaporate moisture, relatively dry food The recipes in the book have been formulated with great care, but your success in such as roasts and some vegetables should either be sprinkled with water prior to cooking preparing them depends on how much attention you pay to the food as it cooks. - Page 26 Food characteristics & Microwave cooking Stirring To Clean Your Oven Stirring is one of the most important of all microwaving techniques. In conventional cooking, food is stirred for the purpose of blending. Microwaved food, however, is stirred in order to 1 Keep the inside of the oven clean spread and redistribute heat.
-
Page 27: Questions & Answers
Questions & Answers Q What’s wrong when the oven light will not glow? Q Is it possible to pop corn in a microwave oven? A There may be several reasons why the oven light will not glow. A Yes, if using one of the two methods described Light bulb has blown below Door is not closed... -
Page 28: Plug Wiring Information/Technical Specifications
Plug wiring information/ Technical Specifications Warning Technical Specification This appliance must be earthed MS3242G The wires in this mains lead are colored in accordance with the following codes Power Input 230 V~50Hz BLUE ~ Neutral Output 850 W (IEC60705 rating standard) BROWN ~ Live GREEN &... - Page 29 תנור מיקרוגל MS3242G MFL67571102...
- Page 30 אמצעי זהירות אמצעי זהירות למניעת חשיפה אפשרית לאנרגית מיקרו רטבים ומשקאות מרקים כאשר מחממים במיקרוגל נוזלים לא ניתן להפעיל את התנור כשהדלת פתוחה אודות להתקני עלולה להיווצר רתיחה ללא הופעת בועות והדבר יכול לגרום נון הדלת בטיחות הנמצאים המנג על מנת למנוע גלישה יש לנקוט לגלישה...
- Page 32 ‰ ‰ Ê Ê È È ¯ ¯ ‡ ‡ ‰ ‰ Ó Ó † † ‰ ‰ ‡ ‡ ˆ ˆ Â Â ‰ ‰ ‰ Ï Î ‰ † Î Ú Ï Ù Â Ì † Ï Î ˘...
- Page 33 פתחו את דלת התנור על ידי לחיצה על וודאו הכניסו את התקע לשקע ביתי רגיל לחצן פתיחת דלת שהמיקרוגל הוא המכשיר היחיד המחובר לשקע DOOR OPEN תומך המגש והכניסו את החישוק הסובב זה הוציאו את התקע אינו פועל כראוי אם התנור לתנור...
- Page 34 Â Â Ô Ô Î Î È È Â Â Ú Â Ô ˘ ‰...
- Page 35 È È Ù Ù · · † † ‰ ‰ Ï Ï È È Ú Ú Ì „ È È Ï...
- Page 36 Ï Ï Â Â ˘ ˘ È È · · Â ˜ ¯ Ó È È ˙ ¯ ‚ È ‡ · Micro 850W 680W 510W 340W 170W...
- Page 37 ˙ ˙ Ó Ó ˆ ˆ Â Â Ú Ú Â ˜ ¯ Ó È...
- Page 38 Ï Ï Â Â ˘ ˘ È È · · Ì · È Ï ˘ È ˘ · Micro Micro...
- Page 39 ‰ ‰ Ï Ï Á Á ˙ ˙ ‰ ‰ ¯ ‰ ‰ È Ó תכונת ה הפעלה המהירה QUICK START מאפשרת לכם לבצע בישול בעוצמה גבוהה במרווחים של שניות של על ידי מגע על ה לחצן START הפעלה ל את זמן אתם...
- Page 40 Ï Ï Â Â ˘ ˘ È È · · Ë È Ó Ë Â ‡ Â Auto Cook...
- Page 41 Ì Ó È ‰ ˙ † † ‡ ˜ Ê Â † ¯ Ê Æ ‡ Â ‰ ˙ † ‡ Ù Â † Ë ˘ ‰ Â Ï ‚ „ ‰ † Â ˜ Ó Â Ú ‰ † Ú...
- Page 42 ‰ ‰ ¯ ¯ ˘ ˘ Ù Ù ‰ ‰ ˙ Ë È Ó Ë Â ‡ Â לחיצה לחיצה לחיצה לחיצה...
- Page 44 ‰ ‰ ¯ ¯ ˘ ˘ Ù Ù ‰ ‰ ¯ ‰ ‰ È Ó...
- Page 46 ˘ ˘ „ „ Á Á Ó Ó † † Ì Ì Â Â Ó Ó È È Á Á ˜ “ , † ‡ ‰ Ù Â ˜ ‰ † Â Á ‡ ¯ Ï † ˘ ‚ Ï...
- Page 47 Â Â ˙ ˙ ¯ ¯ ‡ ‡ ‰ ‰ Â Â ˜ ˜ Ï Ï ˘ ˘ Ó Ó ˙ ˙ † † · · Ï Ï Ó Ó ‚ ‚ È È Ì Ì Î Î Ï Ï Ï...
- Page 48 חסכון בחשמל .)STOP /CLEAR) ECO ON לחצו על .מופיע על המסך )STOP /CLEAR) ECO ON לחצו על מאפשרת לחסוךECO ON-פונקציית ה .או לאחר דקות מפתיחת או סגירת הדלת, המסך ייכבה ,בחשמל בכיבוי מסך במהלך המתנה או דקות לאחר שהדלת נפתחה או .נסגרה, התצוגה...
- Page 49 Í Í ˘ ˘ Â Â Ó Ó Ó Ó † † Ï Ï Â Â ˘ ˘ È È · · ¯ Â ˙ Ì † È ¯ È ˜ ˆ ‡ Â † Ì † Â Î È ‡...
- Page 50 ˙ ˙ Â Â · · Â Â ˘ ˘ Á Á † † ˙ ˙ Â Â Á Á È È Ë Ë · · † † ˙ ˙ Â Â ‡ ‡ ¯ ¯ Â Â ‰ ‰ ‰...
- Page 51 ˘ ˘ Â Â Ó Ó È È ˘ ˘ Ï Ï † † Ì Ì È È Á Á Â Â Ë Ë · · † † Ì Ì È È Ï Ï Î Î Ï Â ‚ ˜ ¯ Ó...
- Page 52 Ô Ô Â Â Ê Ê Ó Ó † † È È È È È È Ù Ù ‡ ‡ Ó Ó Ï Â ‚ ˜ ¯ Ó È · Ï ˘ Â Â · È Î Î Ï Ï ‡...
- Page 53 Ô Ô Â Â Ê Ê Ó Ó † † È È È È È È Ù Ù ‡ ‡ Ó Ó Ï Â ‚ ˜ ¯ Ó È · Ï ˘ Â Â · È · · ·...
- Page 54 ˙ ˙ Â Â Ï Ï ‡ ‡ ˘ ˘ ˙ · Â ˘ Â Â ˙ ˘ ˘ Ï Ï Â Â ‚ ‚ ˜ ˜ ¯ ¯ Ó Ó È È Â Â ¯ ¯ † † ˙ ˙ ·...
- Page 55 ‡ ‡ Ê Ê È È Ë Ë Î Î Ë Ë † † Ù Ù ¯ ¯ Ó Ó MS3242G ‰ ‰ ¯ ¯ Ê Ê ˘ ˘ È È Ó Ó Î Î È È ˜ ˜ † †...
- Page 56 תעודת אחריות על ידי טכנאי מטעם היבואן במענו של הצרכן / מייבש כביסה יתוקנו / מדיח כלים ,לקוח/ה נכבד/ה ולאחר תיאום עימו. נדרשה מעבדה לשם ביצוע התיקון, יעביר היבואן את המוצר .רבות אנו מברכים אותך על קנייתך ומקווים שהמכשיר שרכשת יהווה מקור הנאה לשנים למענו...
- Page 57 שירות תחנות רשימת תחנות שירות מוצרים קטנים שירות תחנות * 8404 לבנים מוצרים וכו גלים מיקרו מגהצים מיקסרים אבק שואבי קומקומים מרכז פקס טלפון עיר כתובת התחנה שם BRIMAG שירות *8404 04-8492944 חיפה מפרץ ההסתדרות חיפה BRIMAG *8404 03-5589484 חולון הסדן...
- Page 58 MS3242G MFL67571102...
- Page 62 إﺧﺮاج اﻟﻔﺮن ﻣﻦ اﻟﻜﺮﺗﻮن إﺧﺮاج اﻟﻔﺮن ﻣﻦ اﻟﻜﺮﺗﻮن إﺧﺮاج اﻟﻔﺮن ﻣﻦ اﻟﻜﺮﺗﻮن إﺧﺮاج اﻟﻔﺮن ﻣﻦ اﻟﻜﺮﺗﻮن إﺧﺮاج اﻟﻔﺮن ﻣﻦ اﻟﻜﺮﺗﻮن ات اﻷﺳﺎﺳﻴﺔ اﻟﺘﺎﻟﻴﺔ ﺳﺘﺘﻤﻜﻦ ﻣﻦ اﺧﺘﺒﺎر ﺗﺸﻐﻴﻞ اﻟﻔﺮن ﺑﺎﻟﺸﻜﻞ ﻋﻨﺪ اﺗﺒﺎع اﳋﻄﻮ ﻛﻴﺐ اﻟﻔﺮن. ﻋﻨﺪ ﻓﺘﺢ ﺟﺎء اﻷﻫﺘﻤﺎم ﺟﻴﺪا ﺑﺘﻌﻠﻴﻤﺎت ﻣﻜﺎن ﺗﺮ اﻟﺼﺤﻴﺢ.
- Page 63 ≥∞ WO½UŁ automatically.
- Page 64 35 14 ”0”...
- Page 65 ”L” ”L” ”L”...
- Page 67 • • • • • • • • • • • • • • • • • •...
- Page 70 ) MORE...
- Page 71 Æ Æ Æ ¥ Æ Æ ¥ ¥ ¥ ¥ — Æ Æ Æ Æ Æ µ µ µ µ µ œd³*« ≤ ±≥ ±≥ ±≥ ±≥ ±≥...
- Page 72 ”dEF2”...
- Page 76 5 ²Ã« …œUŽ≈ Æœd Ò ³*« r×Kë sÄ rG ∞[¥ a³Þ WOHO rJà ÂbÁ√ ¨wÃU²Ã« ‰U¦*« w WOzUIK²Ã« Æ Ø « * · « ù ¹ — “ Ž K « à ð z O? I? U ²? K « à Ã...
- Page 77 ‹ ‹ L L U U K K O O ¢ ¢ F F   F F U U « « ∞ ∞ ¸ ¸ … … d d « « • • § § W W œ œ ¸ ¸ ∂...
- Page 78 ﺗﻮﻓﻴﺮ ﺍﻟﻄﺎﻗﺔ ."0" اﺿﻐﻂ ﻋﻠﻰ زر إﻳﻘﺎف / ﻣﺴﺢ )ﻣﻮﻓﺮ اﻟﻄﺎﻗﺔ( ﺳﻴﻈﻬﺮ ﻋﻠﻰ اﻟﺸﺎﺷﺔ اﺿﻐﻂ ﻋﻠﻰ زر إﻳﻘﺎف / ﻣﺴﺢ )ﻣﻮﻓﺮ اﻟﻄﺎﻗﺔ( أو ﺑﻌﺪ 5 دﻗﺎﺋﻖ ﻣﻴﺰة )ﻣﻮﻓﺮ اﻟﻄﺎﻗﺔ( ﻋﺎدة ﺗﺴﻤﺢ ﻟﻚ ﺑﺘﻮﻓﻴﺮ .( )إﻏﻼقoff ﻣﻦ ﻓﺘﺢ اﻟﺒﺎب أو إﻏﻼﻗﻪ، ﺳﻴﻈﻬﺮ ﻋﻠﻰ اﻟﺸﺎﺷﺔ ...
- Page 84 • • ٢٦...
- Page 85 “UN'« i¹ MS3242G wŠ ∫ wMÐ Ë dCš√ ©∂∞∑∞µ wÝ t¹ « Ë eð ¥µ∞ n¹ ËËdJ¹U*« œœ dð eM0 wzUÐ WOł —U)« œUFÐ_« · dŠ tOKŽ » n¹ ËËdJ¹U*« Æœ uÝ√ t½ W¹ · dŠ tOKŽ »...
Need help?
Do you have a question about the MS3242G and is the answer not in the manual?
Questions and answers