Table of Contents
Advertisement
Quick Links
Advertisement
Table of Contents

Subscribe to Our Youtube Channel
Related Manuals for Whirlpool AKR4071/IX


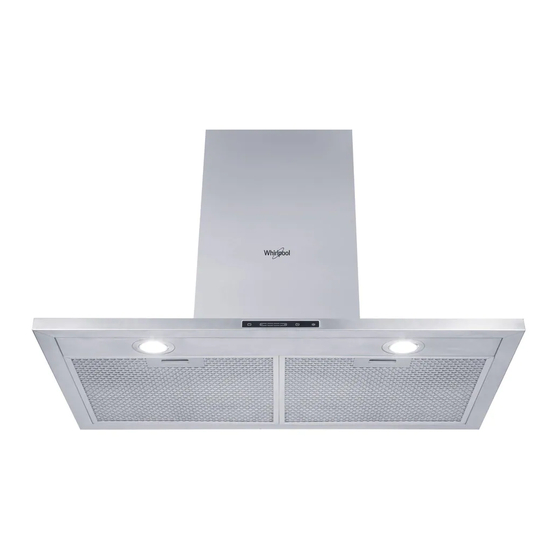
Summary of Contents for Whirlpool AKR4071/IX
- Page 1 Model : AKR4071/IX...
-
Page 2: Table Of Contents
This manual and the appliance itself provide important safety warnings, to be read and observed at all times. CONTENTS IMPORTANT SAFETY INFORMATION INSTALLATION PREPARING FOR INSTALLATION ELECTRICAL CONNECTION GENERAL RECOMMENDATIONS OPERATION NORMAL OPERATION ... -
Page 3: Important Safety Information
IMPORTANT SAFETY INFORMATION Installation must be carried out by a specialized technician, incompliance with the manufacturer’s instructions and local safety regulations. Do not repair or replace any part of the hood unless specifically indicated in the manual. All other maintenance services must be carried out by a specialized technician. Always disconnect the hood from the power supply before carrying out any installation or maintenance operation on the appliance. - Page 4 Children must be supervised so that they do not play with the appliance. The product must be disposed of in compliance with local regulations on waste disposal. For further information on the treatment, recovery and recycling of this product, contact the competent local office, the household waste collection service or the shop where you purchased the appliance.
-
Page 5: Installation
The product is not suitable for outdoor use and is designed for domestic use only. The air sucked by the hood must not be eliminated through the same flue of the heating system or other appliances using gas or other fuels. INSTALLATION After unpacking the appliances, check for any transport damage. -
Page 6: General Recommendations
Turn off electrical power before installation. If the supply cord is damaged, it must be replaced by the manufacturer, its service agent or similarly qualified persons in order to avoid a hazard. Do not use plug and extension cord other than the one provided. Earthing of this hood is compulsory, do not remover ground connection of the plug. - Page 7 Fitting the chimney 1. Arrange the electrical power supply inside the chimney. 2. Adjust the width of the support bracket of the exterior chimney (Fig.3). Then fix it to the ceiling using the screws A (Fig.2) make sure that it is in line with your hood and respecting the distance from the ceiling indicated in Fig.2.
-
Page 8: Normal Operation
Duct Connection When installing the ducted version, connect the hood to chimney using either a flexible or rigid pipe Ø150 to the recess area of the air outlet adapter. Fix the pipe in position using 2 screws from two sides of the air outlet adapter. Make sure the pipe is secured. -
Page 9: Maintenance
MAINTENANCE Make sure appliance is switch off or unplug before carrying out any maintenance work. Grease Filter The filters are washable at least every 2 months of operation, or more frequently for particularly heavy usage. Remove the filter one at a time by supporting them with one hand and push the lock to release the filter. -
Page 10: Light Bulb
Light Blub LED lamps are spare parts which cannot be repaired, LED lamps must be replaced. Please contact service agent for replacements. Hood Cleaning Use soap or mild detergent with hot water to clean the hood. Rinse with water and wipe dry with a dry and clean cloth. For discolorations or deposits that persist, use a non-scratching household cleanser or stainless steel polishing powder with a little water and a soft cloth. -
Page 11: Installation Dimensions
INSTALLATION DIMENSIONS... -
Page 12: Material Supplied
MATERIAL SUPPLIED... - Page 13 Number Components 2 pcs Grease filter 1 pcs Hood body 2 pcs Steel bolt 3 pcs Cross self-drill bolt 1 pcs Exhaust 1 pcs Exterior chimney 1 pcs Inner chimney 2 pcs Cross discal thread bolt 1 pcs Fixing frame 2 pcs Cross discal bolt-big head 2 pcs...
-
Page 14: Trouble Shooting Guide
TROUBLE SHOOTING GUIDE In case if the cooker hood does not work of work improperly, before calling the after sales service, switch off the appliances, unplug the power supply and refer to the guide below to solve the problem. S. No. Status Reasons Solutions Lamp doesn’t... - Page 15 PRODUCT SPECIFICATION & TECHNICAL PARAMETERS Model AKR4071/IX Rated Voltage 220-240V~ Rated Frequency 50Hz Light Power 2 x 2W Motor Power 220W Total Power 224W Maximum suction 1000m Diameter of Exhaust Pipe 150mm Product Dimension (mm) 510-970 H x 760W x 480D Net Weight / Gross Weight 17.5kg / 22kg...
Need help?
Do you have a question about the AKR4071/IX and is the answer not in the manual?
Questions and answers