Table of Contents
Advertisement
Quick Links
Advertisement
Table of Contents

Related Manuals for PACIFIC CYCLE Schwinn S2278C


Summary of Contents for PACIFIC CYCLE Schwinn S2278C
- Page 1 Owner s Manual ’ Folding Bicycle This manual contains important safety, performance and maintenance information. Read the manual before taking your first ride on your new bicycle, and keep the manual handy for future reference. To register your bike visit www.schwinnbikes.com/registerbike...
-
Page 2: Table Of Contents
Contents 1 Safety . . . . . . . . . . . . . . . . . . . . . . . . . . . . . . . . . . . . . . . . . . . . 4 5 Use . - Page 3 4730 E. Radio Tower Lane seconds or less . Enjoy the ride! Olney, IL 62450 About This Manual Do not return this item to the store. Please call Pacific Cycle It is important for you to understand your new bicycle. customer service if you need assistance. You will need your By reading this manual before you go out on your first ride, you’ll model number when calling customer service. See Section 7: know how to get better performance, comfort, and enjoyment Purchase Record for the location of the model number on from your new bicycle. It is also important that your first ride on...
- Page 4 Helmets Save Lives! Correct Fitting Make sure your helmet covers your forehead • ALWAYS WEAr A ProPErLY FITTED hELMET WhEN rIDING Your bICYCLE • Do NoT rIDE AT NIGhT • AvoID rIDING IN WET CoNDITIoNS Incorrect Fitting Forehead is exposed and vulnerable to serious injury Schwinn Folding Bicycle Manual.indb 3 7/1/14 3:58 PM...
-
Page 5: Safety
1 Safety Safety ❶ Safety Signal WordS USer reSponSibility The following safety signal words indicate a safety message. All persons assembling, using, and maintaining the bicycle must The symbol alerts you to potential hazards. Failure to follow the read and understand the safety warnings and operating warning may result in damage to property, injury, or death. -
Page 6: Personal Safety
Safety 1 perSonal Safety • Pants with loose pant legs. If necessary, always tuck pant legs Warning! into a sock or use a leg band to avoid the clothing becoming caught in the drive chain. Riding a bicycle without protective gear, clothing, or a helmet may result in serious injury or death. - Page 7 1 Safety Helmet Use Important! Many states have passed helmet laws regarding children. Make sure you know your states helmet laws. It is your job to enforce these rules with your children. Even if your state does not have a children’s helmet law, it is recommended that everyone wear a helmet when cycling.
-
Page 8: Bicycle Setup
Safety 1 biCyCle SetUp Warning! Wheel Size Riders Approximate Height 12 inch 28 - 38 inches tall Inability to safely reach the handlebars and dismount the 16 inch 38 - 48 inches tall bicycle may result in loss of control of the bicycle. If the bicycle has a top tube on the frame, ensure there is one to 18 inch 42 - 52 inches tall... - Page 9 1 Safety Quick-release Levers Warning! Improper setup or maintenance of the quick-release levers may Handlebar result in an unexpected movement, loss of control, and serious injury or death. Seat post Frame ❶ The frame must be securely locked. Ensure the frame latch is properly seated and the quick-release lever locked in place.
- Page 10 Safety 1 Seat Height and Handlebar Reach Warning! Improperly adjusted seat height could affect the rider’s ability to reach the handlebar and pedals may result in an unexpected movement, loss of control, and serious injury or death. Follow these guidelines when adjusting the seat height. Always ensure the seat post minimum insertion marks are below the seat clamp and cannot be seen.
- Page 11 1 Safety Reflectors Warning! Missing, damaged, or dirty reflectors will affect the ability of others to see and recognize you as a moving bicyclist increasing the risk of being hit, serious injury or death. Always check the reflectors are in place and make sure they are clean, straight, Rear (red) unbroken and securely mounted before riding the bicycle.
-
Page 12: Riding Safety
Safety 1 riding Safety Warning! • Wear proper riding attire, reflective if possible, and avoid open toe shoes. Riding the bicycle in unsafe conditions (ie: at night), in an unsafe • Do not use items that may restrict your hearing and vision. manner, or disregarding traffic laws may result in an unexpected •... - Page 13 1 Safety Night Riding Cornering Technique • Important! Riding a bicycle at night is not recommended. • Brake slightly before cornering and prepare to lean your body Check your local laws regarding night riding. into the corner. • Ensure bicycle is equipped with a full set of correctly •...
-
Page 14: Bicycle Safety Checklist
Safety 1 before yoU ride Safety CheCkliSt Chains Before every ride, it is important to carry out the following safety checks. Do not ride a bicycle that is not in proper □ The chains are oiled, clean and run smoothly. working condition! Cranks and Pedals Accessories... -
Page 15: Parts Identification
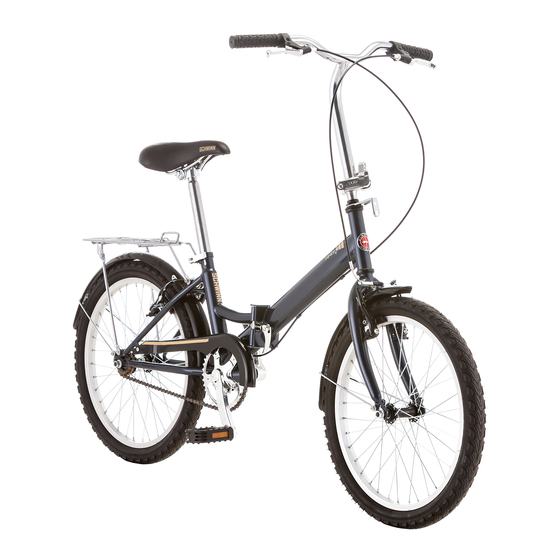
Parts Identification ❷ Folding Bicycle Get to know the parts of your bicycle. This will help with assembly, maintenance, and troubleshooting. Models vary in color and style. Part name Torque (in. lb.) Part name Torque (in. lb.) Handlebar grip Front fork Frame latch Rear brake lever 55 - 70... - Page 16 Parts Identification 2 Schwinn Folding Bicycle Manual.indb 15 7/1/14 3:58 PM...
-
Page 17: Assembly
3 Assembly Assembly ❸ WARNING! If you need replacement parts or have questions pertaining to the assembly of your bicycle, call the service line direct at: 1-800-626-2811. Monday - Friday 8:00 am to 5:00 pm Central • Improper assembly of this product may result in serious Standard Time (CST). -
Page 18: Getting Started
Assembly 3 GeTTING sTARTed Folded ❶ Open the carton from the top and remove the bicycle. bicycle Figure 3.1 ❷ Remove the straps and protective wrapping from the bicycle. ❸ Inspect the bicycle and all accessories and parts for possible shortages. - Page 19 3 Assembly lock the Frame latch ❶ Push on quick-release lever and move the locking pin up. Figure 3.3 ❷ Move the two frame halves together. Release pressure on the quick- release lever. Check that the locking pin is fully Quick-release lever engaged.
- Page 20 Assembly 3 lock the handlebar Post latch ❶ Move the quick-release lever as shown. The locking pin should be completely retracted. Figure 3.4 ❷ Move the handlebar post onto the post latch. ❸ Move the lever up into the slot on the base of the handlebar post.
-
Page 21: Attach The Pedals
3 Assembly ATTAch The PedAls WARNING! Attachment of an incorrect pedal into a crank arm can strip the pedal threads and cause irreparable damage. Before your first ride, check to ensure your pedals are attached correctly. If the bicycle came without the pedals attached follow steps 1 - 6. -
Page 22: Attach The Seat
Assembly 3 ATTAch The seAT WARNING! Improperly adjusted seat height could affect the rider’s ability to reach the handlebar and pedals may result in an unexpected movement, loss of control, and serious injury or death. Follow these guidelines when adjusting the seat height. Always ensure the seat post minimum insertion marks is below the quick-release seat clamp and cannot be seen. -
Page 23: Folding The Bicycle
3 Assembly FoldING The BIcYcle WARNING! The folding bicycle has potential pinch points that may cause injury when you are folding the bicycle. Take your time and be aware the position of body parts before moving parts of the bicycle. ❶... - Page 24 Assembly 3 ❼ Open the frame quick-release lever and rotate the quick- release lever out of the slot. Figure 3.11 ❽ Push up on the quick-release lever to release the locking pin. ❾ Open the frame latch and fold the frame in half by moving the front half of the frame back until the two wheels are Figure 3.11 parallel.
-
Page 25: Adjustments
4 Adjustments Adjustments ❹ WARNING! Tools RequIRed: • Phillips head screw driver • Proper adjustment of the frame latch is critical to your • 5 mm Allen wrench safety. If adjusted too tightly or too loosely, injury to the • Adjustable wrench or 10 mm open end and wrench rider or permanent damage to the hinges may result. -
Page 26: Adjusting The Frame Latch
Adjustments 4 AdjusTING The FRAme lATch cAuTIoN! Your bicycle should arrive with the frame latch properly adjusted. However, the frame latch will need periodic adjustment to keep it functioning optimally. Important! If Some lubricants may damage the paint finish and corrode the you are unsure of how to make these adjustments take the bike frame or hinges. -
Page 27: Adjusting The Handlebar Post Latch
4 Adjustments AdjusTING The hANdle PosT lATch cAuTIoN! Your bicycle should arrive with the handle post latch properly adjusted. However, the handle post latch will need periodic adjustment to keep it working optimally. Some lubricants may damage the paint finish and corrode the frame or hinges. -
Page 28: Adjusting The Seat Height
Adjustments 4 AdjusTING The seAT heIGhT WARNING! Improperly adjusted seat height could affect the rider’s ability to reach the handlebar and pedals may result in an unexpected movement, loss of control, and serious injury or death. Follow these guidelines when adjusting the seat height. Always ensure the seat post minimum insertion marks are below the quick-release seat clamp and cannot be seen. -
Page 29: Brake Adjustment
4 Adjustments BRAke AdjusTmeNT WARNING! Cable adjustment barrel Failure to properly set the brakes may result in the inability to stop the bicycle movement and cause serious injury or death. Be sure the brakes are functioning properly before using the bicycle. Cable nut Brake lever Attaching the Brake Cable to the Brake Lever... - Page 30 Adjustments 4 Attaching the Brake Cable to the Brake Carrier End of “noodle” in the brake carrier ❶ Squeeze the two brake arms together until the brake pads Brake carrier touch the wheel rim. Figure 4.7 Brake cable ❷ With your other hand, pull on the brake cable and insert the Brake arm end of the “noodle”...
- Page 31 4 Adjustments Important! Before riding the bicycle it is important to check the Center the Brake Pads brakes. If you squeeze the brake lever and one brake arm moves more than the other, (or not at all), the brake is not centered. Rotate the wheel and look straight down at the gap between You will need to fine-tune the brake pads.
- Page 32 Adjustments 4 ❷ If the gap between the brake pad and wheel is uneven, adjust the position of the brake pad. • Using a phillips head screwdriver, adjust the brake arm screws on either side of the brake arm. Note: Turning the screw clockwise moves the pad away from the rim.
-
Page 33: Adjusting The Rear Derailleur
4 Adjustments AdjusTING The ReAR deRAIlleuR The low limit screw determines how far the rear derailleur will ❼ Again, shift through each gear several times, checking that travel toward the wheel of the bicycle, while the high limit screw each gear is achieved smoothly. It may take several attempts determines how far the cage will travel away from the wheel. -
Page 34: Use
Use 5 ❺ WarnInG! to best avoid this: • Apply the front and rear brakes simultaneously, while shifting Failure to follow all local and state regulations and laws your body weight back slightly to compensate for braking pertaining to bicycle use as well as the safety warnings in this force. manual may result in serious injury or death. Always follow all • As terrain changes, the rider must practice and learn how the local and state regulations and laws pertaining to bicycle use, bicycle will respond in a new terrain or weather change. The follow the safety warnings in this manual and use common same bicycle will react differently if it is wet, or if there is sense when riding the bicycle. Always conduct a pre-ride gravel on the road etc. check of the bicycle condition before riding. • Always test the brakes and be sure you feel comfortable with the reaction. If the riding conditions are too steep (off road Hand Operated Brakes for example) and you are unsure, dismount the bicycle and walk past the questionable terrain before riding again. WarnInG! • Remember that as you apply the brakes your weight will want to shift forward, and the wheels will want to stop. If the front brake is applied too quickly or too hard, the front wheel can stop turning resulting in a front pitch over or cause • See Section 4: Brake Adjustments if adjustments are needed. the bicycle to lose steering function leading to a crash. -
Page 35: Gear Operation
5 Use Gear OperatIOn WarnInG! wear to the drivetrain. Bicycles with three front chain rings have enough gear “overlaps” that these gears are not needed. • Improper shifting can result in the chain jamming, or becoming derailed resulting in loss of control or a crash Avoid back pedaling on any bicycle with derailleurs. Backpedaling can derail the chain and cause it to jam or fall off • Always be sure the chain is fully engaged in the desired the gears. When shifting gears, make sure you pedal forward gear before pedaling hard. until the gear has completely changed. (At least one full rotation • Avoid shifting while standing up on the pedals or of the pedals.) Failure to do so, may result in the chain not under load. engaging properly the next time you pedal forward, or falling off altogether causing a possible danger when you attempt to pedal Derailleur equipped bicycles all have a rear derailleur. Some may again. Remember always pedal through the gear change on a also have a front derailleur offering more gear choices. The right derailleur equipped bicycle. side shifter will operate the rear derailleur, and the left side (if equipped) will operate the front derailleur. On derailleur Freewheel Front equipped bicycles, it is important to be pedaling forward when cogs derailleur shifting gears. This allows the chain to “derail” from one gear to the next. Operating the shifter while sitting still or not pedaling Derailleur can cause damage to the system, and can be dangerous, as the control cable chain may jam and cause the bike to become unstable. Figure 5.2 To shift properly, pedal the bicycle with little pressure on the Crank arm... -
Page 36: Rear Shifter
Use 5 rear sHIFter • The rear shifter (right) will have an indicator that reads from • Shift only while pedaling forward and seated. 1 and up. Figure 5.3 • When shifting, lessen the pressure exerted on the pedals • 1 is the lowest gear. This is used for slower riding, hill during the shift. climbing, or to allow for easier pedaling. It is recommended to • Once you have successfully shifted gears, it is OK to start to start off in this gear and move through the gears as speed pedal hard if desired. Pedaling hard while shifting can cause increases as needed, or comfortable. the chain to skip and not engage the appropriate gear • It is OK to ride the whole time in only one gear if this is • Backpedaling should be avoided on derailleur bikes because comfortable. the chain can jam and cause the bike to become unstable. • Turn the left gear shifter handlebar grip up or down to shift See Section 4: Adjusting the Rear Derailleur if adjustments into a new gear. are needed. Gear indicator Shifter Figure 5.3 Schwinn Folding Bicycle Manual.indb 35 7/1/14 3:59 PM... -
Page 37: Security
5 Use secUrIty You just bought a new bicycle! Don’t lose it. It is advisable that Model number the following steps be taken to prepare for and help prevent and service sticker possible theft: location • Maintain a record of the bicycle’s model number, located on the frame. Figure 5.4 • Register the bicycle with the local police and/or bicycle registry. • Invest in a high quality bicycle lock that will resist hacksaws and bolt cutters. • Always lock your bicycle to an immovable object if it is left unattended. Keep in mind that individual parts of a bicycle may be stolen. Most commonly, if you lock just a wheel or Figure 5.4 just the frame, other parts may be removed from the bicycle. Although it is impossible to lock all the parts, it is suggested to lock the major components if possible. Figure 5.5 • Use a lock that is long enough to lock the frame and both wheels if possible. Some models with quick-release front wheels allow the front wheel to be placed beside the frame so a smaller lock can be used to lock all 3 components. • Be aware that a quick-release seat post can be stolen. It is recommended to remove the seat post and saddle and carry it with you if you believe that this is a risk. Figure 5.5 Schwinn Folding Bicycle Manual.indb 36 7/1/14 3:59 PM... -
Page 38: Maintenance
Maintenance 6 Maintenance ❻ WARNING! BAsIc MAINteNANce • Failure to conduct maintenance on the bicycle may result The following procedures will help you maintain your bicycle for in malfunction of a critical part and serious injury or death. years of enjoyable riding. Proper maintenance is critical to the performance and safe • For painted frames, dust the surface and remove any loose operation of the bicycle. dirt with a dry cloth. To clean, wipe with a damp cloth soaked in a mild detergent mixture. Dry with a cloth and polish with • The recommended intervals and need for lubrication and car or furniture wax. Use soap and water to clean plastic maintenance may vary depending on conditions the bicycle parts and rubber tires. Chrome plated bikes should be wiped is exposed to. Always inspect the bicycle and conduct over with a rust preventative fluid. necessary maintenance before each use of the bicycle. • Store your bicycle under shelter. Avoid leaving it in the rain or exposed to corrosive materials. This section presents important information on maintenance • Riding on the beach or in coastal areas exposes your bicycle and will assist you in determining the proper course of action to to salt which is very corrosive. Wash your bicycle frequently take if you do have a problem with the operation of the bicycle. and wipe or spray all unpainted parts with an anti-rust If you have questions regarding maintenance please call our treatment. Make sure wheel rims are dry so braking customer service, toll free, at 1-800-626-2811 or see a qualified performance is not affected. After rain, dry your bicycle and bicycle mechanic. Do not call the store where the bicycle was apply anti-rust treatment. If the hub and bottom bracket... -
Page 39: Lubrication Schedule
6 Maintenance LuBRIcAtIoN scheDuLe Component Lubricant Method Weekly Chains Chain lube or light oil Brush on or squirt Brake calipers Three drops from oil can Brake levers Two drops from oil can Freewheel Two drops from oil can Derailleur Systems Light oil or grease All pivot points should be lubricated (more often in severely rainy or muddy conditions). Wipe off any excess oil. Brake cables Lithium based grease Remove cable from casing. Grease entire length. Wipe off excess lubrication from other surfaces. Brake lever and caliper pivot points Light oil Two to three drops from oil can Shifting cables Thin layer of grease Clean and grease Yearly Bottom bracket Lithium based grease Disassemble Pedals Lithium based grease Disassemble Wheel bearings Lithium based grease Disassemble Headset Lithium based grease... -
Page 40: Parts Maintenance
Maintenance 6 PARts MAINteNANce Tires Frequency: Inspect and maintain at least each use. Inspect Action Maintenance Tire Inflation Check tire pressure. Inflate tire to the pressure indicated on the tire sidewall. Check the bead is properly seated while inflating Reduce air pressure in the tube and re-seat the bead. or refitting the tire. Spin wheel and check rotation / alignment Loosen axle nut(s) and adjust until properly seated. If the hub is smooth and even. bearings need repair see a bicycle mechanic for repair. Bead Seating Check for broken or loose spokes. See bicycle mechanic for repair. Tread Inspect for signs of excessive wear, flat spots or Replace tire. cuts and damage. Valves Check that valve caps are fitted and free of dirt. Clean dirt from the valve. Wheels Frequency: Inspect and maintain at least each use. Inspect Action Maintenance Rims Inspect for dirt and grease. Use a clean rag or wash with soapy water, rinse, and air dry. Wheels Check the wheels are securely fastened to the Adjust if necessary and tighten axle nuts. bicycle and axle nuts are tight. - Page 41 6 Maintenance Drivetrain (pedals, chains, chainwheel, crank set, freewheel) Frequency: as noted Inspect Action Maintenance Pedals Every month, check each pedal is securely set and tighten into If necessary, re-set and tighten. the crank arm. Before each ride, check each front and rear pedal reflectors are Clean or replace. clean and in place. Pedal Bearings Every ride, check the pedal bearings are properly adjusted. See bicycle mechanic for repair. Move the pedal up and down, left and right. If looseness or roughness is detected adjustment, lubrication or replacement is required. Chains Every week, check the chain is clean, properly lubricated, Lubricate if necessary. Replace if rusted, rust-free, and is not stretched, broken, or has stiff links. stretched, or broken. Crank Set Every month, check the crank set (crank arms, chain rings, See bicycle mechanic for repair. and bottom bracket axle and bearings) is correctly adjusted and tight. Schwinn Folding Bicycle Manual.indb 40 7/1/14 3:59 PM...
- Page 42 Maintenance 6 Brakes Frequency: Inspect and maintain before each use Inspect Action Maintenance Levers Check the levers are securely fastened to the handlebar. Position the levers to fit the rider’s grip and screw tight to handlebar. Pads Check pad position, gap and pressure. See Section 4: Adjusting the Brakes Cables Check the outer casing for kinks, stretched coils and damage. Replace cable. Check cables for kinks, rust, broken strands or frayed ends. Check the outer casing for kinks, stretched coils and damage. Check the housing is seated properly into each cable stop of It is recommended that the cables and the bicycle. housing be replaced every riding season. Schwinn Folding Bicycle Manual.indb 41 7/1/14 3:59 PM...
-
Page 43: Hub Bearings
6 Maintenance huB BeARINGs INfLAtING the tIRe tuBe WARNING! Hub bearings require special thin wrenches called cone wrenches. If you do not own these tools, do not attempt hub • An unseated tire can rupture unexpectedly and cause bearing adjustments. Have a qualified bicycle mechanic perform the adjustment if you have any doubts. serious injury or death. Be sure the tire is properly seated when inflating the tube. ❶ Check to make sure neither locknut is loose. • Over-inflation or inflating the tube too quickly may result in the tire blowing off the rim and damaging the bicycle or ❷ To adjust, remove wheel from bicycle and loosen the locknut causing injury to the rider. Always use a hand pump to on one side of the hub while holding the bearing cone on inflate the tube. Do not use a gas station service pump to the same side with a cone wrench. inflate the tube. ❸ Rotate the adjusting cone as needed to eliminate free play. Follow these steps to inflate a tire: ❹ Re-tighten the locknut while holding the adjusting cone in ❶ Remove the valve cap and add air. position. ❺ Re-check that the wheel can turn freely without excessive ❷ Check the tire is evenly seated on the rim, both sides. -
Page 44: Repairing A Flat Tire
Maintenance 6 RePAIRING A fLAt tIRe WARNING! ❿ Start at the valve stem and install the first bead onto the rim. Repeat for the second bead. An unseated tire can rupture unexpectedly and cause serious injury or death. Be sure the tire is properly seated when ⓫ Slowly inflate the tire, checking the tire is seated properly inflating the tube. and not pinched as the tire is inflated. Follow these steps to fix a flat tire: ⓬ Inflate to recommended pressure (see tire sidewall). ❶ Match tube size and tire size (see tire sidewall for size). ❷ Remove the wheel from the bicycle. Deflate tire completely. ❸ Squeeze the tire beads into the center of the rim. ❹ Opposite the valve, use a bicycle tire lever to pry the tire bead up and out of the rim. Repeat around the wheel until one bead is off the rim. ❺ Remove tube. Release second tire bead. ❻ Remove tire. ❼ Carefully inspect inside of the rim and tire for the cause of the flat. ❽ Inflate the tube ¼ full and place inside tire. ❾ Insert the valve stem through valve stem hole in rim. Schwinn Folding Bicycle Manual.indb 43 7/1/14 3:59 PM... -
Page 45: Troubleshooting Guide
6 Maintenance tRouBLeshootING GuIDe Problem Possible Cause Remedy Gear shifts not • Derailleur cables sticking/stretched/ damaged • Lubricate/tighten/replace cables working properly • Front or rear derailleur not adjusted properly • Adjust derailleurs • Indexed shifting not adjusted properly • Adjust indexing Slipping chain • Excessively worn/chipped chainring or freewheel sprocket • Replace chainring, sprockets and chain teeth • Replace chain • Chain worn/stretched • Lubricate or replace link • Stiff link in chain • Seek advice at a bicycle shop • Non compatible chain/chainring freewheel Chain jumping off • Chainring out of true • Re-true if possible, or replace... - Page 46 Maintenance 6 Problem Possible Cause Remedy Freewheel does not • Freewheel internal pawl pins are jammed • Lubricate. If problem persists, replace freewheel rotate Brakes not working • Brake pads worn down • Replace brake pads effectively • Brake pads/rim greasy, wet or dirty • Clean pads and rim • Brake cables are binding/stretched/damaged • Clean/adjust/replace cables • Brake levers are binding • Adjust brake levers • Brakes out of adjustment • Center brakes When applying the • Brake pads worn down • Replace pads brakes they squeal/ • Brake pads toe-in incorrect • Correct pads toe-in squeak...
- Page 47 6 Maintenance Problem Possible Cause Remedy Steering not • Wheels not aligned in frame • Align wheels correctly accurate • Headset loose or binding • Adjust/tighten headset • Front forks or frame bent • Take bike to a bike shop for possible frame realignment Frequent • Inner tube old or faulty • Replace inner tube punctures • Tire tread/casing worn • Replace tire • Tire unsuited to rim • Replace with correct tire • Tire not checked after previous puncture • Remove sharp object embedded in tire • Tire pressure too low • Correct tire pressure • Spoke protruding into rim • File down spoke...
-
Page 48: Warranty
Warranty 7 Warranty ❼ Limited Lifetime Warranty and PoLicy on rePLacement Procedures and resPonsibiLities Your purchase includes the following warranty which is in lieu of all other express warranties. This warranty is extended only to the initial consumer purchaser. No warranty registration is required. -
Page 49: Purchase Record
7 Warranty Purchase record fill in immediately and retain as a record of your purchase. Please retain your sales receipt for any possible warranty claims. Your Name: Model number Address: and service sticker location City: State: Date Purchased: Place of Purchase: Model &... - Page 50 WARNING: This product can expose you to chemicals including lead, Service: 1-800-626-2811 which is known to the State of California to cause cancer and birth defects or ©2017 Pacific Cycle, Inc. www.pacific-cycle.com other reproductive harm. For more information go to www.P65Warnings.ca.gov.
Need help?
Do you have a question about the Schwinn S2278C and is the answer not in the manual?
Questions and answers