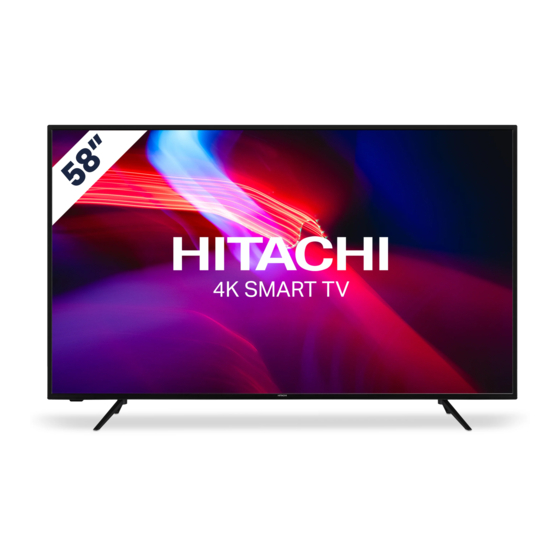
Hitachi 58HK5600 Instruction Manual

Hitachi 58HK5600 Instruction Manual

Flat digital tv
Hide thumbs Also See for 58HK5600:

Advertisement

Quick Links

INSTRUCTION MANUAL
BEDIENUNGSANLEITUNG
MANUAL INSTRCUTIUNI
РЪКОВОДСТВО ЗА ЕКСПЛОАТАЦИЯ
UPUTE ZA UPORABU
UPUTSTVO ZA UPOTREBU
PRIRUČNIK
FLAT DIGITAL TV
DIGITALER FLACHBILDFERNSEHER
TELEVIZOR DIGITAL CU ECRAN PLAT
LCD / LED ТЕЛЕВИЗОР
FLAT DIGITALNI TV PRIJAMNIK
FLAT DIGITALNI TV
ZARAVAN DIGITALNI TELEVISOR

Advertisement

Table of Contents
loading

Summary of Contents for Hitachi 58HK5600

  • Page 1 INSTRUCTION MANUAL BEDIENUNGSANLEITUNG MANUAL INSTRCUTIUNI РЪКОВОДСТВО ЗА ЕКСПЛОАТАЦИЯ UPUTE ZA UPORABU UPUTSTVO ZA UPOTREBU PRIRUČNIK FLAT DIGITAL TV DIGITALER FLACHBILDFERNSEHER TELEVIZOR DIGITAL CU ECRAN PLAT LCD / LED ТЕЛЕВИЗОР FLAT DIGITALNI TV PRIJAMNIK FLAT DIGITALNI TV ZARAVAN DIGITALNI TELEVISOR...
  • Page 2 Some features or functions mentioned in this user manual may vary or may not be available depending on the model you purchased.
  • Page 3: Table Of Contents

    Contents Environmental Information........4 Ultra HD (UHD) ............5 High Dynamic Range (HDR) / Hybrid Log-Gamma (HLG) ............... 5 Dolby Vision ............. 5 OLED TV Operations ..........5 Standby Notifications ..........6 TV Control & Operation ........... 6 TV Control Switch & Operation........ 7 Using Main TV Menu ..........
  • Page 4 • Do not place any heat sources such as electric Safety Information heaters, radiators, etc. near the TV set. • Do not place the TV on the floor and inclined CAUTION surfaces. • To avoid danger of suffocation, keep plastic bags RISK OF ELECTRIC SHOCK out of the reach of the babies, children and domestic DO NOT OPEN...
  • Page 5: Environmental Information

    WARNING WALL MOUNTING WARNINGS Do not ingest the battery, Chemical Burn Hazard • Read the instructions before mounting your TV This product or the accessories supplied with the on the wall. product may contain a coin/button cell battery. If the •...
  • Page 6: Ultra Hd (Uhd)

    • Teletext Dolby Vision • Headphone connection Dolby Vision™ delivers a dramatic visual experience, • Automatic programming system astonishing brightness, exceptional contrast, and vivid colour, that brings entertainment to life. It achieves this • Manual tuning stunning image quality by combining HDR and wide •...
  • Page 7: Standby Notifications

    • Do not do anything during boot-up procedure. Do Standby Notifications not interrupt the process. If the TV does not receive any input signal (e.g. from • It will take about 6 seconds for the first picture to aerial or HDMI source) for 3 minutes, it will go appear on the screen.
  • Page 8: Tv Control Switch & Operation

    To turn the TV off: Press the centre of the joystick in To turn the TV off: Press the middle of the button in and hold it down for a few seconds, the TV will turn and hold it down for a few seconds, the TV will turn into standby mode.
  • Page 9 2. TV recording time may change in practice depending on the broadcast. The reserved and free storage space 2.1. Guide values will change according to this setting. Make You can access the electronic programme guide menu sure that you have enough free space otherwise using this option.
  • Page 10: Inserting The Batteries Into The Remote

    Inserting the Batteries into the Remote Antenna Connection Remove the back cover to reveal the battery compart- Connect the aerial or cable TV plug to the AERIAL ment. Insert two size AAA batteries. Make sure the (+) INPUT (ANT-TV) socket or satellite plug to the and (-) signs match (observe correct polarity).
  • Page 11: Disposal Information

    The Bluetooth word mark and logos are registered [Business users] ® trademarks owned by the Bluetooth SIG, Inc. and If you wish to dispose of this product, please contact any use of such marks by Vestel Elektronik Sanayi ve your supplier and check the terms and conditions of Ticaret A.S.
  • Page 12: Remote Control

    Remote Control Standby: Switches On / Off the TV Numeric buttons: Switches the channel, enters a number or a letter in the text box on the screen. Language: Switches among sound modes (an- alogue TV), displays and changes audio/subtitle language and turns subtitles on or off (digital TV, where available) Mute: Completely turns off the volume of the TV Volume +/-...
  • Page 13: Connections

    Connections To enable PC/YPbPr audio, you will Connector Type Cables Device need to use the back audio inputs with a YPbPr/PC audio cable for audio connection. When using the wall mounting kit (available from Connection a third party in the market, if not (bottom) supplied), we recommend that you plug all your cables into the back of...
  • Page 14 Connections See the illustrations on the left Connector Type Cables Device side. You can use YPbPr to VGA cable to enable YPbPr signal via VGA input. You cannot use VGA and YPbPr at the same time. To Connection enable PC/YPbPr audio, you will (back) need to use the back audio inputs with a YPbPr/PC audio cable for...
  • Page 15: Switching On/Off

    to set and confirm a PIN at this point. The selected PIN Switching On/Off cannot be 0000. You have to enter it if you are asked To Switch the TV On to enter a PIN for any menu operation later. Connect the power cord to a power source such as a Note: M7(*) operator type will be defined according to the wall socket (220-240V AC, 50 Hz).
  • Page 16 clear the checkbox by pressing OK after moving the If you set the Install Type as Standard, you can focus on the desired broadcast type option. continue with regular satellite installation and watch satellite channels. Digital Aerial: If D. Aerial broadcast search option You can start a Fransat installation at any time later is turned on, the TV will search for digital terrestrial from the Settings>Installation>Automatic channel...
  • Page 17: Media Playback Via Usb Input

    You can use USB hubs with your TV’s USB inputs. (*) LCN is the Logical Channel Number system that organizes available broadcasts in accordance with a recognizable External power supplied USB hubs are recommended channel number sequence (if available). in such a case. Notes: It is recommended to use the TV’s USB input(s) To search for M7 channels after the First Time Installation,...
  • Page 18: Media Browser

    Timeshift Recording recording, try restarting the recording. If you still get the same error, it is possible that your USB disk does Press Pause button while watching a broadcast to not meet the speed requirements. Try connecting activate timeshifting mode. In timeshifting mode, the another USB disk.
  • Page 19: Followme Tv

    FollowMe TV With your mobile device you can stream the current broadcast from your smart TV using the FollowMe TV feature. Install the appropriate Smart Center application to your mobile device. Start the application. For further information on using this feature refer to the instructions of the application you use.
  • Page 20 Settings Menu Contents Picture Menu Contents You can change the picture mode to suit your preference or requirements. Picture mode can be set to one of these options: Cinema, Game(optional), Sports, Dynamic and Natural. Mode Dolby Vision Modes: If Dolby Vision content is detected Dolby Vision Dark and Dolby Vision Bright picture mode options will be available instead of Cinema and Natural modes.
  • Page 21 Sets the notification appearance preference for Dolby Vision contents. When set as On, Dolby Vision Dolby Vision logo will be displayed on the lower right side of the screen when Dolby Notification Vision content is detected. PC Position Appears only when the input source is set to VGA/PC. Autoposition Automatically optimizes the display.
  • Page 22 Network Menu Contents Network Type Disable the network connection or change the connection type. Scan Wireless Start a search for wireless networks. This option will be available if the Network Type Networks is set as Wireless Device. If your modem/router device has WPS, you can directly connect to it using this option. Press WPS on your Highlight this option and press OK.
  • Page 23 Displays parental control options. Enter the PIN number you have defined in the initial Parental Control installation to view current settings. System Displays system information. Information Reception Displays current satellite reception information. Information CAS-Module Displays current CAS module information. Upgrade Displays software upgrade options.
  • Page 24 Application Displays current software version. Version This option is used to select which subtitle mode will be on the screen (DVB subtitle / Subtitle Mode Teletext subtitle) if both is available. Default value is DVB subtitle. This feature is available only for the country option of Norway.
  • Page 25: Using The Channel List

    Child Lock: If this option is set to On, the TV can only General TV Operation be controlled by the remote control. In this case the control buttons on the TV will not work. Using the Channel List Internet Lock: If this option is set to ON, the internet The TV sorts all stored stations in the channel list.
  • Page 26: Teletext Services

    Highlight Extras tab and press OK to access below Teletext Services options. Press the Text button to enter. Press again to activate Highlight Genre: Displays Highlight Genre menu. mix mode, which allows you to see the teletext page Select a genre and press OK. The events in the and the TV broadcast at the same time.
  • Page 27: Pc Input Typical Display Modes

    No picture PC Input Typical Display Modes • TV is not receiving any signal. Make sure the correct The following table is an illustration of some of the source has been selected. typical video display modes. Your TV may not support •...
  • Page 28: Av And Hdmi Signal Compatibility

    AV and HDMI Signal Compatibility Source Supported Signals Available SECAM Back AV NTSC4.43 NTSC3.58 480i, 480p 60Hz 576i, 576p 50Hz YPbPr 720p 50Hz,60Hz 1080i 50Hz,60Hz 480i 60Hz 480p 60Hz 576i, 576p 50Hz 720p 50Hz,60Hz 1080i 50Hz,60Hz 24Hz, 25Hz, 1080p 30Hz, 50Hz, HDMI 60Hz...
  • Page 29 Supported File Formats for USB Mode Video File Formats Video Codec Resolution Bit Rate Container MPEG program stream (.DAT, .VOB, .MPG, .MPEG), MPEG MPEG1/2 transport stream (.ts, .trp, .tp), MP4 (.mp4, .mov), 3GPP (.3gpp, .3gp), AVI (.avi), MKV (.mkv), ASF (.asf) MPEG program stream (.MPG, .MPEG), MP4 (.mp4, .mov), 1080Px2@30fps, MPEG4...
  • Page 30 Audio Codec Sample rate Bit Rate Container AAC (.aac), AVI (.avi), Matroska (.mkv, .mka), 3GPP (.3gpp, .3gp), MP4 (.mp4, .mov, m4a), MPEG transport stream (.ts, .trp, AAC, HEAAC 8KHz ~ 48KHz .tp), MPEG program stream (.DAT, .VOB, .MPG, .MPEG), FLV (.flv), RM (.ra) 128bps ~ 8KHz ~ 48KHz...
  • Page 31: Supported Dvi Resolutions

    Supported DVI Resolutions When connecting devices to your TV’s connectors by using DVI converter cable(DVI to HDMI cable - not supplied), you can refer to the following resolution information. 72Hz 75Hz 56Hz 60Hz 66Hz 70Hz 640x480 800x600 1024x768 1280x768 1280x960 1360x768 1366x768 1280x1024...
  • Page 32: Connectivity

    Internet Speed Test Connectivity Highlight Internet Speed Test and press the OK Wired Connectivity button. TV will check the internet connection bandwidth and display the result when complete. To Connect to a Wired Network Advanced Settings • You must have a modem/router connected to an active broadband connection.
  • Page 33 • The location where the transmission is most effective Connect your TV to your router following the steps differs depending on the usage environment. mentioned in the sections above. Afterwards, connect your mobile device to the router • The Wireless feature of the TV supports 802.11 a,b,g and then activate the sharing software on your mobile &...
  • Page 34 Plug the wireless USB dongle to TV first, if the TV image transfer or audio streaming to the TV will not doesn’t have internal WLAN feature. be possible. Then press the Source button on the remote and The images sent by mobile device will be displayed switch to Wireless Display source.
  • Page 35: Apps

    other WLAN compatible devices. Try changing the and press OK to continue. The media browser will active channel on the WLAN router. then be displayed. Internet Connection Not Available / Audio Video Refer to the Media Browser menu section for further Sharing Not Working information on file playback.
  • Page 36: Hbbtv System

    button, the address/search bar, the Speed Dial and HBBTV System the Vewd buttons are available. HbbTV (Hybrid Broadcast Broadband TV) is a new To add a desired website to the Speed Dial list for industry standard that seamlessly combines TV quick access, move the cursor to the top of the page services delivered via broadcast with services delivered or press the Back/Return button.
  • Page 37: Smart Center

    your mobile device. If your TV’s name doesn’t appear on the list, wait a while and tap on the Refresh widget. Select your TV from the list. Mobile Device screen On the main screen you can find tabs to access various features.
  • Page 38: Alexa Ready Feature

    choice. In this case if the selected source is available Voice Recognition it will be used in the application. You can tap on the Microphone( ) widget and Version No: Displays the current version of the manage your application, giving voice commands such as “Volume Up/Down!”, “Programme Up/Down!”.
  • Page 39: Dvb Functionality Information

    • Pair the Smart Center app with your TV. Then tap on Command Function the Amazon logo on the main screen of the Smart Alexa, mute ‘FN’ Mutes sound Center app. You will be directed to a registration page. Follow the on-screen instructions to complete Alexa, unmute ‘FN’...
  • Page 40 www.hitachidigitalmedia.com...

This manual is also suitable for:

55hk5600

Table of Contents