Table of Contents
Advertisement
Quick Links
Advertisement
Table of Contents

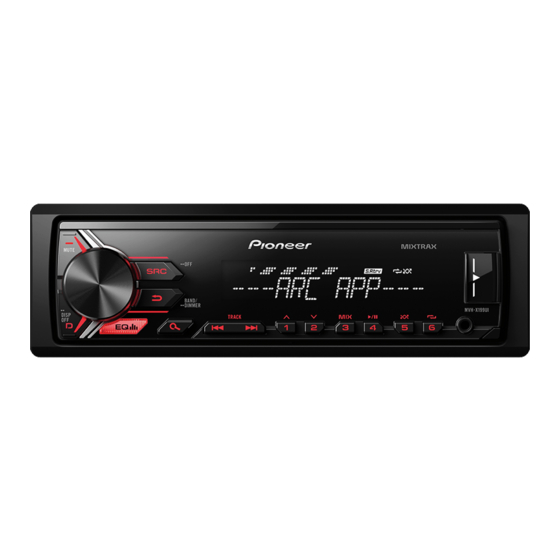
Summary of Contents for Pioneer MVH-X199UI
- Page 1 DIGITAL MEDIA RECEIVER MVH-X199UI Owner’s Manual...
-
Page 2: Table Of Contents
Table of Contents Before You Start Before You Start ................. 2 Thank you for purchasing this PIONEER product To ensure proper use, please read through this manual before using this product. It is Getting Started ................3 especially important that you read and observe WARNINGs and CAUTIONs in this manual. -
Page 3: Getting Started
Turn on the power* Press SRC/OFF to turn Press SRC to turn on the on the power. power. MVH-X199UI Press and hold SRC/OFF Press and hold SRC to to turn off the power. turn off the power. M.C. (multi-control) dial... - Page 4 Indication Description How to replace the battery Appears when the local seek tuning function is set (page 10). Appears when a traffic program is received. Appears when the TA (traffic announcements) function is set (page 11). Appears when the sound retriever function is set (page 11). Appears when the iPod control function is set (page 8).
- Page 5 Setup menu Turn the M.C. dial to select [SYSTEM], then press to confirm. Turn the M.C. dial to select [DEMO OFF], then press to confirm. When you turn the ignition switch to ON after installation, [SET UP :YES] appears in the display. Turn the M.C.
-
Page 6: Radio
Menu Item Description To seek a station manually S/W UPDATE Select to confirm the latest system information on the After selecting the band, press to select a station. unit. [SYSTEM INFO] Press and hold then release to seek an available station. [SYSTEM Select to update the unit to the latest software and Scanning stops when the unit receives a station. -
Page 7: Usb/Ipod/Aux
CAUTION desired file (folder) name or Use an optional Pioneer USB cable (CD-U50E) to connect the USB device as any device category, then press to confirm. connected directly to the unit will protrude out from the unit, which could be dangerous. - Page 8 The selected song/album will be played after the currently playing song. Purpose Operation 1 Press Alphabetical search (iPod only) to display the list. NOTE 2 Turn the M.C. dial to select the The selected song/album may be canceled if you use functions other than those from the desired category list, then press link play mode (e.g.
-
Page 9: App Mode
You can operate the unit from Pioneer ARC APP installed on an iPhone/ ALL THIRD PARTY APPS ARE THE SOLE RESPONSIBILITY OF THE PROVIDERS, INCLUDING WITHOUT LIMITATION COLLECTION AND SECURITY OF USER DATA AND PRIVACY Android device. -
Page 10: Settings
NOTE • ILLUMINATION settings (page 13) If Pioneer ARC APP has not been installed on your Android device yet, a message that • MIXTRAX settings (page 13) prompts you to install the application will appear on your Android device. Select [OFF] Turn the M.C. -
Page 11: Audio Settings
Menu Item Description Menu Item Description PAUSE [ON], [OFF] Receive current traffic information if Pause or resume playback. available. (Available only when FM band is selected.) AUDIO settings [ON], [OFF] Allow the unit to retune to a different Menu Item Description frequency providing the same station. -
Page 12: System Settings
PIONEER Service Station. CLOCK SET *2 Please use a commercially available wiring harness for each car model when [PRESET] Set the clock (page 5). mode is engaged, and use a commercially available adapter when in [PIONEER]. -
Page 13: Illumination Settings
ILLUMINATION settings Connections/Installation Menu Item Description Ground wire POWER AMP Connections DIM SETTING [SYNC CLOCK], [MANUAL] Change the display brightness. WARNING BRIGHTNESS • When speaker output is used by 4 channels, use speakers over 50 W [1] to [10] Change the display brightness. (maximum input power) and The available setting ranges differ Other devices... - Page 14 adhesive tape around wiring that the power terminal of the auto Perform these connections when Connect to the constant 12 V comes into contact with metal antenna. Doing so may result in using a subwoofer without the supply terminal. parts to protect the wiring. battery drain or a malfunction.
- Page 15 Rear speaker or subwoofer Installation Leave ample 5 cm space Important Screw in one screw on each side to hold the unit in place. • Check all connections and systems before final installation. 5 cm • Do not use unauthorized parts as this may cause malfunctions.
-
Page 16: Additional Information
ON again. If the message → Depending on the repeat play remains, contact your dealer or an range, the selected range may authorized Pioneer Service change when another folder or Station for assistance. track is being selected or during fast forwarding/reversing. - Page 17 – Follow the USB device ON. Connect only compliant USB is displayed, reconnect the iPod – The device may cause audible instructions to disable the devices. and reset it. interference when you are listening → The iPod operates correctly but security.
- Page 18 CAUTION CAUTION be supported. interactive), mp3 • Pioneer cannot guarantee Pioneer accepts no responsibility for Made for compatibility with all USB mass data lost on the iPod, even if that data – iPod touch (1st through 6th storage devices, and assumes no is lost while this unit is used.
- Page 19 MIXTRAX is a trademark of the Frequency: 80 Hz/250 Hz/800 Hz/ Frequency range: 531 kHz to 1 602 kHz Apple Inc., registered in the U.S. and PIONEER CORPORATION. 2.5 kHz/8 kHz (9 kHz) other countries. Equalization range: ±12 dB (2 dB...
- Page 20 © 2016 PIONEER CORPORATION. All rights reserved. <QRB3616-A> ID...


Need help?
Do you have a question about the MVH-X199UI and is the answer not in the manual?
Questions and answers