Table of Contents
Advertisement
Quick Links
Advertisement
Table of Contents

Subscribe to Our Youtube Channel
Related Manuals for Bard WH262


Summary of Contents for Bard WH262
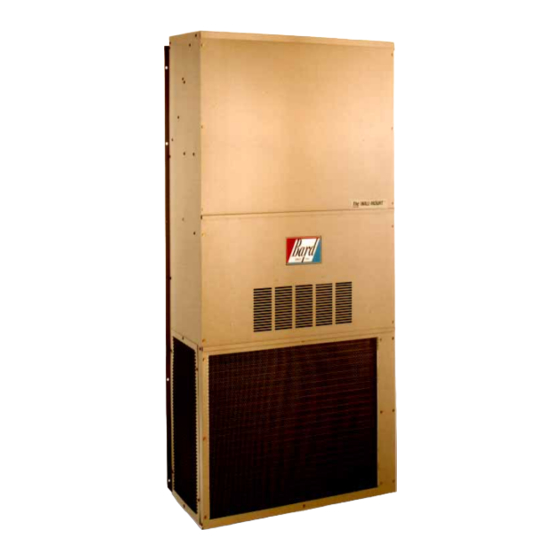
- Page 1 INSTALLATION INSTRUCTIONS WALL MOUNTED PACKAGE HEAT PUMPS Models WH262 WH311 Bard Manufacturing Company, Inc. Manual : 2100-350D Supersedes: 2100-350C Bryan, Ohio 43506 File: Volume III Tab 17 Since 1914...Moving ahead just as planned. Date: 09-26-07 Manual 2100-350D Page 1 of 24...
-
Page 2: Table Of Contents
CONTENTS Getting Other Informations and Publications Start Up Important Installer Note ........17 Wall Mount General Information High Pressure Switch ......... 17 Heat Pump Wall Mount Model Nomenclature ..4 Three Phase Scroll Compressor Start Up ... 17 Shipping Damage ..........7 Phase Monitor ............. -
Page 3: Getting Other Informations And Publications
Getting Other Information and Publications These publications can help you install the air FOR MORE INFORMATION, CONTACT conditioner or heat pump. You can usually find these at THESE PUBLISHERS: your local library or purchase them directly from the publisher. Be sure to consult current edition of each standard. -
Page 4: Wall Mount General Information
WALL MOUNT GENERAL INFORMATION HEAT PUMP WALL MOUNT MODEL NOMENCLATURE 2 – REVISIONS CONTROL MODEL NUMBER MODULES VOLTS & PHASE A – 230/208/60-1 CAPACITY COIL OPTIONS B – 230/208/60-3 26 – 2 Ton X – Standard C – 460/60-3 31 – 2½ Ton 1 –... -
Page 5: Figure 1 Unit Dimensions
Manual 2100-350D Page 5 of 24... -
Page 6: Table 2 Electrical Specifications
Manual 2100-350D Page 6 of 24... -
Page 7: Shipping Damage
Any grille that meets the 5/8 inch louver criteria, may be recommended guide, they do not supersede any national used. It is recommended that Bard Return Air Grille Kit and/or local codes in any way. Authorities having RG-2 through RG-5 or RFG-2 through RFG-5 be jurisdiction should be consulted before the installation is installed when no return duct is used. -
Page 8: Fresh Air Intake
FRESH AIR INTAKE The blank-off plate is available upon request from the factory and is installed in place of the fresh air damper All units are built with fresh air inlet slots punched in shipped with each unit. the service panel. CONDENSATE DRAIN If the unit is equipped with the fresh air damper assembly, the assembly is shipped already attached to... -
Page 9: Installation Instructions
INSTALLATION INSTRUCTIONS WALL MOUNTING INFORMATION 3. Locate and mark lag bolt locations and bottom 1. Two holes, for the supply and return air openings, mounting bracket location. See Figure 4. must be cut through the wall as shown in Figure 3. 2. -
Page 10: Figure 3 Mounting Instructions
Manual 2100-350D Page 10 of 24... -
Page 11: Figure 4 Electric Heat Clearance
FIGURE 4 ELECTRIC HEAT CLEARANCE WARNING A minimum of 1/4" clearance must be maintained between the supply air duct and combustible materials. This is required for the first three (3) feet of ducting. It is important to insure that the 1/4" minimum spacing is maintained at all points. -
Page 12: Figure 5 Wall Mounting Instructions
FIGURE 5 WALL MOUNTING INSTRUCTIONS SEE FIGURE 3 – MOUNTING INSTRUCTIONS FIGURE 6 WALL MOUNTING INSTRUCTIONS SEE UNIT DIMENSIONS, FIGURE 1, FOR ACTUAL DIMENSIONS Manual 2100-350D Page 12 of 24... -
Page 13: Figure 7 Common Wall Mounting Installations
FIGURE 7 COMMON WALL MOUNTING INSTALLATIONS Manual 2100-350D Page 13 of 24... -
Page 14: Wiring - Main Power
WIRING – MAIN POWER FIGURE 8 UNIT 24V TERMINAL BOARD Refer to the unit rating plate for wire sizing information and maximum fuse or “HACR” type circuit breaker size. Each outdoor unit is marked with a “Minimum Circuit Ampacity”. This means that the field wiring used must be sized to carry that amount of current. -
Page 15: Optional Outdoor Thermostats Applications
OPTIONAL COMPRESSOR CUTOFF OPTIONAL OUTDOOR THERMOSTAT THERMOSTAT (See Figures 9 and 10) APPLICATIONS Heat pump compressor operation at outdoor Since most equipment at the time of manufacture is not temperatures below 0°F are neither desirable not designated for any specific destination of the country advantageous in term of efficiency. -
Page 16: Electric Heat Hold-Off
ELECTRIC HEAT HOLD-OFF (See Figures 11 conditioned space temperature up, rather than cycling on the electric heat due a second stage call for heat from and 12) the thermostat on start-up coming off a night set-back In other applications, it is desirable to disable the condition or someone increasing the thermostat set operation of the electric heat until outdoor temperatures point. -
Page 17: Thermostat Indicators
START UP IMPORTANT INSTALLER NOTE PHASE MONITOR For improved start up performance wash the indoor coil All units with three phase compressors are equipped with a dishwashing detergent. with a 3 phase line monitor to prevent compressor damage due to phase reversal. HIGH PRESSURE SWITCH The phase monitor in this unit is equipped with two LEDs. -
Page 18: Pressure Service Ports
There is a cycle speed up jumper on the control. This On “Auto” option a circuit is completed from R-W1 and can be used to reduce the time between defrost cycle R-Y on each heating “on” cycle, energizing reversing operation without waiting for time to elapse. valve solenoid and pulling in compressor contactor starting compressor and outdoor motor. -
Page 19: Figure 13 Defrost Control Board
FIGURE 13 DEFROST CONTROL BOARD Manual 2100-350D Page 19 of 24... -
Page 20: Troubleshooting
TROUBLESHOOTING SOLID STATE HEAT PUMP CONTROL 3. Turn thermostat blower to “auto” position. Indoor TROUBLESHOOTING PROCEDURE blower should stop. NOTE: Many models have a 1-minute blower time delay on “off” command; 1. NOTE: A thorough understanding of the defrost wait for this to time-out. cycle sequence is essential. -
Page 21: Checking Temperature Sensor Outside Unit Circuit
3. Check resistance reading to chart of resistance use CHECKING TEMPERATURE SENSOR OUTSIDE UNIT CIRCUIT sensor ambient temperature. (Tolerance of part is ± 10%) 1. Disconnect temperature sensor from board and from outdoor coil. 4. If sensor resistance reads very low, then sensor is shorted and will not allow proper operation of the 2. -
Page 22: Figure 14 Fan Blade Setting
REFRIGERANT CHARGE FAN BLADE SETTING DIMENSIONS Shown in Figure 14 and Table 6 are the correct fan The correct system R-22 charge is shown on the unit rating plate. Optimum unit performance will occur with blade setting dimensions for proper air delivery across the outdoor coil. -
Page 23: Pressure Tables
TABLE 10 PRESSURE TABLE COOLING Air Temperature Entering Outdoor Coil °F TABLE 11 PRESSURE TABLE HEATING Air Temperature Entering Outdoor Coil °F Low side pressure ± 2 PSIG High side pressure ± 5 PSIG Tables are based upon rated CFM (airflow) across the evaporator coil. If there is any doubt as to correct operating charge being in the system, the charge should be removed, system evacuated and recharged to serial plate instruction. -
Page 24: Optional Accessories
TABLE 12 OPTIONAL ACCESSORIES i t n t a l i t n t a l Manual 2100-350D Page 24 of 24...
Need help?
Do you have a question about the WH262 and is the answer not in the manual?
Questions and answers