Table of Contents
Advertisement
Quick Links
OWNER'S MANUAL
WASHING MACHINE
Before beginning installation, read these instructions carefully. This will simplify
installation and ensure that the product is installed correctly and safely. Leave
these instructions near the product after installation for future reference.
EN
ENGLISH
FWV595**
MFL71445719
Rev.03_080219
Copyright © 2019 LG Electronics Inc. All Rights Reserved
www.lg.com
Advertisement
Table of Contents

Related Manuals for LG FWV595WS


Summary of Contents for LG FWV595WS
- Page 1 Before beginning installation, read these instructions carefully. This will simplify installation and ensure that the product is installed correctly and safely. Leave these instructions near the product after installation for future reference. ENGLISH FWV595** www.lg.com MFL71445719 Rev.03_080219 Copyright © 2019 LG Electronics Inc. All Rights Reserved...
-
Page 2: Table Of Contents
Adding Detergents and Softeners ..............16 Control Panel ....................18 Programme Table ....................19 Extra Options and Functions ................24 SMART FUNCTIONS ..............27 Using LG SmartThinQ Application ..............27 Using Smart Diagnosis..................29 MAINTENANCE ................31 Cleaning After Every Wash ................31 Cleaning the Appliance Periodically ..............31 Tub Clean ......................31 TROUBLESHOOTING ..............34... -
Page 3: Important Safety Instructions
IMPORTANT SAFETY INSTRUCTIONS READ ALL INSTRUCTIONS BEFORE USE The following safety guidelines are intended to prevent unforeseen risks or damage from unsafe or incorrect operation of the appliance. The guidelines are separated into ‘WARNING’ and ‘CAUTION’ as described below. Safety Messages This symbol is displayed to indicate matters and operations that can cause risk. - Page 4 • Children of less than 3 years should be kept away unless continuously supervised. • If the power cord is damaged, it must be replaced by the manufacturer, its service agent or similarly qualified persons in order to avoid a hazard. •...
- Page 5 • Tighten the drain hose to avoid separation. • Do not plug the appliance into multiple outlet sockets, power boards, or an extension power cable. • This appliance must not be installed behind a lockable door, a sliding door or a door with a hinge on the opposite side to that of the appliance, in such a way that a full opening of the appliance door is restricted.
- Page 6 • Never reach into the appliance while it is operating. Wait until the drum has completely stopped. • In case of flood, disconnect the power plug and contact the LG Electronics customer information centre. • Do not push down the door excessively, when the appliance door is open.
- Page 7 • Items that have been soiled with substances such as cooking oil, vegetable oil, acetone, alcohol, petroleum, kerosene, spot removers, turpentine, waxes and wax removers should be washed in hot water with an extra amount of detergent before being dried in the appliance. •...
-
Page 8: Caring For The Environment
• You can take your appliance either to the shop where you purchased the product, or contact your local government waste office for details of your nearest authorised WEEE collection point. For the most up to date information for your country, please see www.lg.com/global/recycling. -
Page 9: Installation
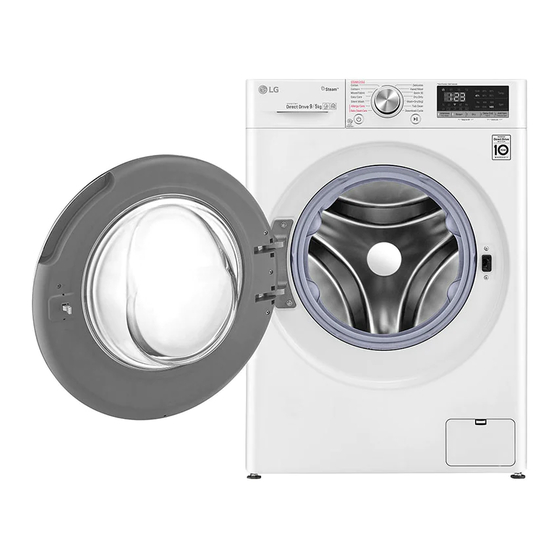
INSTALLATION Parts and Specifications NOTE • Appearance and specifications may change without notice to improve the quality of the appliance. Front View Rear View a Control Panel a Power plug b Detergent dispenser drawer b Transit bolts c Drum c Drain hose d Door e Cover cap f Drain pump filter... -
Page 10: Installation Place Requirements
Specifications Model FWV595** Power Supply 220 - 240 V~, 50 Hz Dimension 600 mm X 560 mm X 850 mm (Width x Depth x Height) Product Weight 68 kg • No further backflow protection required for connection to the water inlet. Installation Place Requirements Before installing the appliance, check the following... - Page 11 • If the appliance is installed on the unstable or serious malfunctioning. Contact your LG floor (e.g. wooden floor), the warranty does not Electronics service centre. cover any damages and cost occured due to the •...
-
Page 12: Unpacking The Appliance
Unpacking the Appliance Remove the bolt assemblies by wiggling them slightly while pulling them out. Lifting the Appliance Off the Foam Install the hole caps. Base • Locate the hole caps b included in the accessory pack or attached on the back. * This feature is only available on some models. -
Page 13: Connecting The Water Inlet Hose
Connecting the Water Inlet Hose Note for Connection • Water pressure must be between 100 kPa and 1000 kPa (1.0 - 10.0 kgf/cm²). If the water pressure is more than 1000 kPa, a decompression device should be installed. Check if the appliance is perfectly level using a •... -
Page 14: Installing The Drain Hose
Installing the Drain Hose Connecting Hose to Water Tap Screw - Type Hose to Tap with Thread For Model with Drain Pump Screw the hose connector to the water supply, The drain hose should not be placed higher than which has ¾” threaded union. 100 cm above the floor. -
Page 15: Operation
OPERATION Operation Overview Preparing the Laundry Sort laundry for best washing results, and then Using the Appliance prepare laundry according to the symbols on the care labels. Before the first wash, select the Cotton wash programme and add a half amount of the detergent. Sorting the Clothes Start the appliance without laundry. -
Page 16: Adding Detergents And Softeners
Checking the Clothes before • Remove items from the flexible gasket to prevent clothing and door seal damage. Loading • Combine large and small items in a load. Load large items first. Large items should not be more than half of total load. •... - Page 17 NOTE Load the laundry into the drum and close the door. • Do not let the detergent harden. Doing so may lead to blockages, poor rinse performance or odour. NOTE • Full load: According to manufacturer’s • Do not put tablets into the drawer. recommendation •...
-
Page 18: Control Panel
Control Panel Control Panel Features a Power Button • Press the Power button to turn on or off the appliance. b Programme Knob • Programmes are available according to the laundry type. • The lamp will light up to indicate the selected programme. c Start/Pause Button •... -
Page 19: Programme Table
Programme Table Washing Programme Programme Cotton Max. Load Rating Description Provides better performance by combining various drum motions. Use for coloured fast items (shirts, nightdresses, pajamas, etc.) and normally soiled cotton load (underwear). Proper Temperature 40 °C (Cold to 95 °C) Max. - Page 20 Programme Allergy Care Max. Load 3 kg Description Helps to remove allergens such as house mites, pollen and fur. Proper Temperature 60 °C Max. Spin Speed 1400 rpm Programme Baby Steam Care Max. Load 4.5 kg Description Provides clothes care with gentle motion and better performance by steam. Proper Temperature 60 °C Max.
- Page 21 Programme Wash+Dry (5 kg) Max. Load Rating (Dry) Description Provides a nonstop process of washing and drying in the same cycle. Use for a small amount of laundry which can be dried. Proper Temperature 40 °C (Cold to 95 °C) Max.
- Page 22 Drying Programme Programme Normal % Description Reduces the drying time and energy usage during dry cycle for cottons. Use for cotton or linen fabrics such as cotton towels, T-shirts. Max. Load Rating Programme Iron - Description Suitable for ironing to dry clothes easily in damp condition. Use for cotton or linen fabrics which is ready to get ironing at the end of programme.
- Page 23 Extra Options Programme Pre Wash Delay End Add Item Rinse+ Intensive Cotton Cotton+ Mixed Fabric Easy Care Silent Wash Allergy Care Baby Steam Care Delicates Hand/Wool Quick 30 Dry Only Wash+Dry(5kg) Tub Clean Download Cycle * This option is automatically inserted in the programme and cannot be deselected.
-
Page 24: Extra Options And Functions
Extra Options and • By pressing the Dry button, you can select: Normal-Time (30-60-120)-Iron-Low Temp.- Functions Normal Eco. • Drying programme can last up to about 7 You can use the extra options and functions to hours. customize the programmes. •... - Page 25 • When you turn off the drying cycle of the When WLAN is connected, the Wi-Fi icon on the washing machine, the drying fan motor can be control panel is lit. operated to save itself for 60 seconds. • Be careful when removing your clothing from the washing machine, as the clothing or washing machine may be hot.
- Page 26 Add Item Beep On/Off q Use this option to add or remove the laundry after This function operates only when the appliance is the washing programme is started. in operation. • Press and hold the Rinse+ and Dry button Press the Add Item button when the LED is simultaneously for 3 seconds to set the this turned on.
-
Page 27: Smart Functions
• The appliance supports 2.4 GHz Wi-Fi networks only. To check your network frequency, contact your internet service provider or refer to your wireless router manual. • LG SmartThinQ is not responsible for any network connection problems or any faults, malfunctions, or errors caused by network connection. - Page 28 Tub Clean Coach Start a cycle from the LG SmartThinQ application on your smartphone. This function shows how many cycles remain before running the Tub Clean cycle. NOTE • Once this function is enabled, you can start a Energy Monitoring...
-
Page 29: Using Smart Diagnosis
In addition to the source code, all referred license terms, warranty disclaimers and copyright notices are available for download. LG Electronics will also provide open source code to you on CD-ROM for a charge covering the cost Press and hold the Temp. button for 3 seconds. - Page 30 Keep the phone in place until the tone transmission has finished. Time remaining for data transfer is displayed. • For best results, do not move the phone while the tones are being transmitted. • If the call centre agent is not able to get an accurate recording of the data, you may be asked to try again.
-
Page 31: Maintenance
MAINTENANCE WARNING • Unplug the appliance before cleaning to avoid the risk of electric shock. Failure to follow this warning may result in serious injury, fire, electric shock, or death. • Never use harsh chemicals, abrasive cleaners, or solvents to clean the appliance. They may damage the finish. - Page 32 Turn on the power, and then select the Clean the filter using a medium bristle tooth Tub Clean. brush. • tcL will be displayed on the display. Press the Start/Pause button to start. After the programme is complete, leave the door open to dry the door opening, gasket, and door glass.
- Page 33 After cleaning the drain pump filter, take the To clean the drawer opening, use a cloth or drain pump filter out and insert the drain plug. small, non-metal brush to clean the recess. • Remove all residue from the upper and lower Close the cover cap.
-
Page 34: Troubleshooting
You can remedy most of the problems by yourself, consequently save time and money, since you do not need to call LG Electronics service centre. The following table should assist you by troubleshooting. - Page 35 Possible Cause & Solution Door sensor malfunctions. dE dE1 dEz dE4 DOOR ERROR • Please call LG Electronics service centre. You can find your local LG Electronics service centre phone number in the warranty card. This is a control error. CONTROL ERROR •...
- Page 36 Symptoms Possible Cause & Solution Vibrating noise Package materials are not removed. • Remove package materials. The laundry may be unevenly distributed in the drum. • Pause the cycle and redistribute the laundry after the door unlocks. Not all leveling feet are resting firmly and evenly on the floor. •...
- Page 37 Symptoms Possible Cause & Solution Appliance does not Controls are not set properly. operate. • Make sure that the cycle should be correctly set. Close the door and press the Start/Pause button. Door is open. • Close the door and make sure that nothing should be caught under the door preventing it from closing completely.
- Page 38 Symptoms Possible Cause & Solution Appliance does not Kinked drain hose. drain water. • Ensure that the drain hose is not kinked. Drain located higher than 1.2 m above the floor. • Make sure that the drain hose should not be higher than 1.2 m above the bottom of the appliance.
- Page 39 Symptoms Possible Cause & Solution Wrinkling Appliance is not unloaded promptly. • Always remove items from the appliance as soon as the cycle is complete. Appliance is overloaded. • The appliance can be fully loaded, but the drum should not be tightly packed with items.
- Page 40 • Find the Wi-Fi network connected to your smartphone and remove it, then not connected to the register your appliance on LG SmartThinQ. Wi-Fi network. Mobile data for your smartphone is turned on. • Turn off the Mobile data of your smartphone and register the appliance using the Wi-Fi network.
- Page 41 Symptoms Possible Cause & Solution The router frequency is not 2.4 GHz. • Only a 2.4 GHz router frequency is supported. Set the wireless router to 2.4 GHz and connect the appliance to the wireless router. To check the router frequency, check with your internet service provider or the router manufacturer.
-
Page 42: Operating Data
OPERATING DATA Product Fiche Commission Directiv (EU) No 96/60/EC Supplier’s name or trade mark Supplier’s model FWV595** Energy efficiency class *1 Energy consumption for washing, spinning and kWh/cycle 6.12 drying *2 Energy consumption for washing and spinning kWh/cycle 1.17 only *3 Washing performance class*4 Water remaining after spin (as a proportion of dry weight of wash)*5... - Page 43 *6: Attained for a standard 60 °C cotton washing cycle. *7: Of appliance for a standard ‘dry cotton’ drying cycle. *8: In liters, using standard 60° C cotton washing cycle and ‘dry cotton’ drying cycle *9: In litres, using standard 60° C cotton washing (and spinning) cycle *10: Programme time for complete operating cycle (60 °C cotton washing and ‘dry cotton’...
Need help?
Do you have a question about the FWV595WS and is the answer not in the manual?
Questions and answers