Table of Contents
Advertisement
Quick Links
Advertisement
Table of Contents
Troubleshooting

Related Manuals for Lenovo Yoga A940WC


Summary of Contents for Lenovo Yoga A940WC
- Page 1 Yoga A940 User Guide...
- Page 2 • Safety and Warranty Guide • Setup Guide • “Important safety information” on page 18 Lenovo makes constant improvements on the documentation of your computer, including this User Guide. To get all the latest documents, go to: https://support.lenovo.com First Edition (October 2018) ©...
-
Page 3: Table Of Contents
Contents Meeting your computer ..........1 Front view ..................1 Rear view ..................3 Left view ..................4 Right view ..................5 Peripheral devices ................6 Touch screen instructions ........10 Touch screen calibration ..............10 Using touch screen ................10 Troubleshooting and confirming setup ....12 Solving problems ................12 Troubleshooting display problems ..........12 Troubleshooting audio problems ............13... - Page 4 Important safety information for service technicians .......38 Service and support information ......49 Downloading publications ..............49 Lenovo limited warranty ........... 50 Part 1 – General terms ..............50 Part 2 – Country-specific terms ............54 Part 3 – Warranty service information ..........58 Notices ..............
- Page 5 Ukraine RoHS statement..............67 India RoHS statement ..............67 Waste electrical and electronic equipment (WEEE) notices .....68 Eurasian compliance mark .............71 ENERGY STAR information ............71 Enabling ErP compliance mode .............72 Export Classification Notice ............73 Legal notices ............74 Trademarks ..................74 -iii-...
-
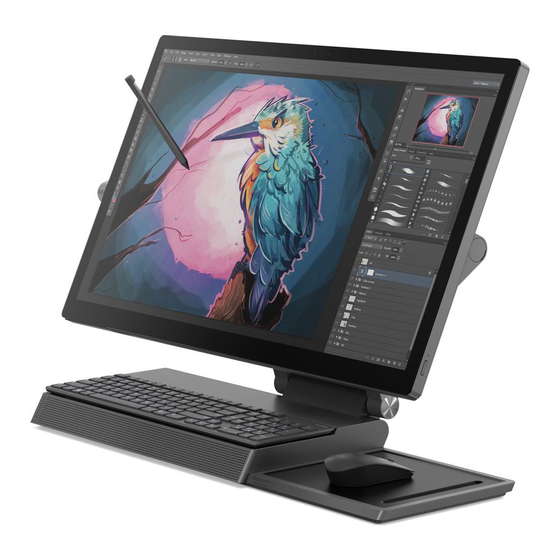
Page 6: Meeting Your Computer
Meeting your computer Front view Microphones Display (with multi-touch function) Camera indicator Speakers Camera cover slider (with Bluetooth connectivity) Camera (standard or Windows Hello compatible) Camera cover slider Move this slider to cover or uncover the camera lens. NOTE: It is designed to protect your privacy. If you see a red dot, the lens is covered. - Page 7 Camera (standard or Windows Hello compatible) Select models include a Windows Hello compatible camera. Speakers (with Bluetooth connectivity) The speakers have separate Bluetooth connection capability. In addition to providing audio output for the computer, the speakers can be paired with Bluetooth-enabled smartphones and provide audio output for them.
-
Page 8: Rear View
Rear view Air vents Ethernet connector Monitor/computer mode switch HDMI in/out connector Power connector USB 3.1 Gen 1 connectors Air vents ATTENTION: Do not block the air vents. Otherwise, the computer might overheat. Monitor/computer mode switch Switches what is displayed on the computer screen (computer/HDMI input). -
Page 9: Left View
Left view USB 2.0 connector Memory card slot Thunderbolt 3 (USB-C) connector Combo audio jack USB 3.1 Gen 2 connector Power button (with indicator) Thunderbolt 3 (USB-C) connector With a compatible cable, it can connect to external display devices. The connector also can be used to connect devices for data transfer. -
Page 10: Right View
Right view USB 2.0 connector LED lamp LED lamp button Speakers LED lamp button Turns on/off or adjusts the brightness of the LED lamp... -
Page 11: Peripheral Devices
Peripheral devices Lenovo Dial Wireless charging pad Wireless mouse and keyboard Lenovo Digital Pen Wireless mouse and keyboard Read the documentation that came with the keyboard and mouse for usage instructions. NOTE: Your computer may not come with all the listed devices. - Page 12 „ Lenovo Dial Designed specifically for Yoga A940, Lenovo Dial includes a press button and two rotating rings. When connected with the computer, it can be used to quickly change certain settings or run certain commands. NOTE: Lenovo Dial is supported by some Adobe and Microsoft Office applications.
- Page 13 Setting up button and ring functions For each of the supported applications, you can set up functions for the dial’s press button and two rotating rings. 1. Insert the dial into either of the two USB 2.0 connectors. 2. Start a supported application. 3.
- Page 14 „ Lenovo Digital Pen Lenovo Digital Pen uses AAAA battery. The battery may or may not ship with the pen. If the pen ships with an AAAA battery, check and remove an insulation pad before first use. ATTENTION: Use and replace with the correct battery type.
-
Page 15: Touch Screen Instructions
Touch screen instructions ATTENTION: Touch screens are only available on some models. The monitor is touch-sensitive thanks to its touch-sensitive screen. A touch screen is an input device just like a mouse or a keyboard, and the user’s fingers transmit position information via the touch screen to the computer. - Page 16 „ Precautions when using the touch screen 1. When using the touch screen, be careful not to tear the surface with any sharp objects. 2. To ensure normal use of the touch screen, ensure that both the screen surface and your fingers are clean and dry.
-
Page 17: Troubleshooting And Confirming Setup
Troubleshooting and confirming setup Solving problems Follow these tips when troubleshooting your computer: • If you added or removed a part before the problem started, review the installation procedures to ensure that the part is correctly installed. • If a peripheral device does not work, ensure that the device is properly connected. •... -
Page 18: Troubleshooting Audio Problems
UPS systems, regulators, fluorescent lamps or other computers that may be generating magnetic interference. 2. Move any interfering devices away from the computer. 3. If the problem persists, contact Lenovo Service. Troubleshooting audio problems Problem: No sound from the integrated speakers. -
Page 19: Troubleshooting Software Problems
1. Check to see if there is an optical drive icon in the resource manager of the operating system. If not, restart your computer. If there is still no icon, contact Lenovo Service. Otherwise, continue with the next step of this procedure. -
Page 20: Special Considerations For Troubleshooting Windows
4. If the CD/DVD cannot be read, replace it with a known good CD/DVD such as one that was shipped with the computer. 5. If the known good CD cannot be read, visually check the operating side of the CD/ DVD for defects. -
Page 21: Windows Help System
Windows help system The Windows help system provides you with detailed information about using the Windows operating system. To access the Windows help system, do the following: Open the Start menu and then click or tap Get Started to get more details. You also can enter Get Started or what you’re looking for in the search box on the taskbar. -
Page 22: Performing Daily Maintenance Tasks
When do I need to change the boot mode? The default boot mode for your computer is the UEFI mode. If you need to install a legacy Windows operating system (any operating system before Windows 8.1) on your computer, you must change the boot mode to Legacy support. The legacy Windows operating system cannot be installed if you don’t change the boot mode.
Need help?
Do you have a question about the Yoga A940WC and is the answer not in the manual?
Questions and answers