LG LMWC23626 Series Owner's Manual
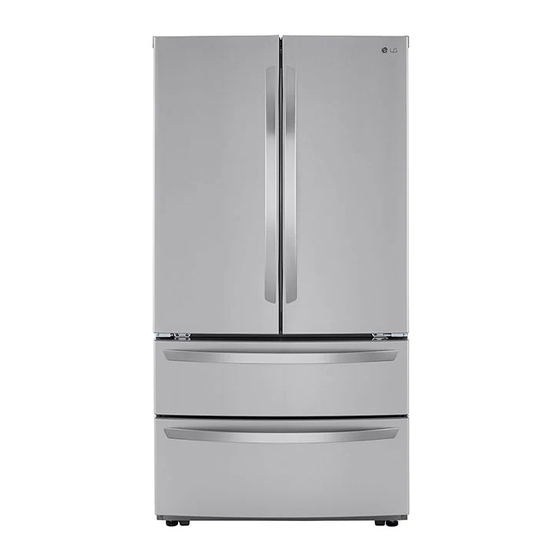
French door refrigerator
Hide thumbs
Also See for LMWC23626 Series:
- Owner's manual (164 pages) ,
- Owner's manual (56 pages) ,
- Owner's manual (56 pages)
Table of Contents
Advertisement
Quick Links
Advertisement
Table of Contents

Related Manuals for LG LMWC23626 Series


Summary of Contents for LG LMWC23626 Series
- Page 1 OWNER'S MANUAL FRENCH DOOR REFRIGERATOR Read this owner's manual thoroughly before operating the appliance and keep it handy for reference at all times. ENGLISH LMWS27626* / LMWC23626* www.lg.com MFL70761724 Copyright © 2019-2021 LG Electronics Inc. All Rights Reserved. Rev.06_061821...
-
Page 2: Table Of Contents
Control Panel Sabbath Mode Water Dispenser Automatic Icemaker Storing Food Humidity Controlled Crispers Glide‘N’Serve Refrigerator Shelves Door Bins Durabase 31 SMART FUNCTIONS LG ThinQ Application Smart Diagnosis™ Feature 32 MAINTENANCE Cleaning Water Filter 37 TROUBLESHOOTING FAQs Before Calling for Service... -
Page 3: Important Safety
IMPORTANT SAFETY INSTRUCTIONS IMPORTANT SAFETY INSTRUCTIONS READ ALL INSTRUCTIONS BEFORE USE Safety Messages Your safety and the safety of others are very important. We have provided many important safety messages in this manual and on your appliance. Always read and follow all safety messages. - Page 4 IMPORTANT SAFETY INSTRUCTIONS • Do not bend or pinch the power cord excessively or place heavy objects on it. Operation • This appliance is intended to be used in household and similar applications such as: - staff kitchen areas in shops, offices and other working environments; - farm houses and by clients in hotels, motels and other residential type environments;...
- Page 5 IMPORTANT SAFETY INSTRUCTIONS Maintenance • Do not use a hair dryer to dry the inside of the refrigerator. • Do not light a candle to remove odors in the refrigerator. • In the event of a refrigerant leak, move flammable objects away from the refrigerator. Ensure the area is adequately ventilated and contact an authorized service center.
-
Page 6: Caution
IMPORTANT SAFETY INSTRUCTIONS Risk of Fire and Flammable Materials This appliance contains a small amount of isobutane refrigerant (R600a), which is combustible. When transporting and installing the appliance, care should be taken to ensure that no parts of the refrigerating circuit are damaged. Refrigerant squirting out of the pipes could ignite or cause an eye injury. -
Page 7: Product Overview
PRODUCT OVERVIEW PRODUCT OVERVIEW Product Features The images in this guide may be different from the actual components and accessories, which are subject to change by the manufacturer without prior notice for product improvement purposes. Exterior Refrigerator Fresh food compartment Freezer Handle Opens the freezer drawer. - Page 8 PRODUCT OVERVIEW Interior LMWS27626* LMWC23626* LED Interior Lighting Lights up the inside of the refrigerator. Water Filter Purifies water. Water Dispenser Dispenses purified water. Door Mullion Prevents the cold air in the refrigerator from escaping when the doors are closed. CAUTION •...
- Page 9 PRODUCT OVERVIEW Control Panel Sets the refrigerator and freezer temperatures. Modular Door Bin Interchangeable bins can be arranged to suit storage needs. Adjustable Refrigerator Shelf The refrigerator shelves are adjustable to meet individual storage needs. Glide'N'Serve Stores food items at a different temperature than the regular refrigerator area. Ice Bin Stores ice from the freezer icemaker.
-
Page 10: Installation
10 INSTALLATION INSTALLATION Before Installing Installation Overview Please read the following installation instructions first after purchasing this product or transporting it to another location. Unpacking the Refrigerator Choosing the Proper Location Disassembling/Assembling Connecting the Water Line Leveling and Door Alignment WARNING •... -
Page 11: Choosing The Proper Location
INSTALLATION Unpacking the Refrigerator install a booster pump to compensate for the low pressure. WARNING • Use two or more people to move and install the refrigerator. Failure to do so can result in back Electricity injury or other injury. Use an individual, grounded outlet:115 Volts, 60 •... - Page 12 12 INSTALLATION Dimensions and Clearances • Check the dimensions of the appliance and the installation path to ensure there is sufficient room to move the refrigerator through doors or narrow openings. • If an opening is too narrow to fit the refrigerator through, remove the refrigerator doors. See Removing/ Assembling the Doors and Drawers in this manual.
-
Page 13: Removing/Assembling Handles
INSTALLATION Removing/Assembling Assembling Refrigerator Handles Handles If needed, reassemble the mounting fasteners on the door with a 1/4 in. Allen These instructions are for models which ship with wrench. the handles assembled. For models shipped with the handles disassembled, follow the instructions included in the handle package. -
Page 14: Removing/Assembling Doors And Drawers
14 INSTALLATION Place the handle on the door by fitting the handle footprints over the mounting fasteners and tightening the set screws with a 1/8 in. Allen wrench. • For models shipped with the handlesdisassembled, use a 3/32 in. Allen wrench. - Page 15 INSTALLATION CAUTION NOTE • Place the door, inside facing up, on a • The number of wire harnesses may vary nonscratching surface. depending on the model. Place the hinge cover in place. Insert and Assembling the Left Refrigerator tighten the cover screw Door CAUTION •...
- Page 16 16 INSTALLATION Rotate the hinge lever clockwise. Lift the Fit the hinge over the hinge lever latch top hinge free of the hinge lever latch and slot it into place. Rotate the lever counterclockwise to secure the hinge. CAUTION • When lifting the hinge free of the latch, be careful that the door does not fall forward.
- Page 17 INSTALLATION Pull the drawer open to full extension. Removing the basket and ice bin from the rails. Assembling the Freezer Drawer Assembling the lower freezer drawer in the same way. Remove the screws from the rails at both Pull out both rails simultaneously, until they ends.
-
Page 18: Connecting The Water Line
18 INSTALLATION • Wear eye protection during installation to prevent injury. Water Pressure You will need a cold water supply. Water Pressure • Models with water filter: - 20 - 120 psi (138 - 827 kPa) Insert the basket into the frame, and push the •... - Page 19 INSTALLATION tubing to the shutoff valve and the refrigerator Choose the valve location. water valve. • Choose a location for the valve that is easily accessible. It is best to connect into the side of a vertical water pipe. When it is necessary to connect into a horizontal water pipe, make the connection to the top or side, rather than at the bottom, to avoid drawing...
- Page 20 20 INSTALLATION diameter) to allow the refrigerator to move out from the wall after installation. Connect the tubing to the valve. • Place the compression nut and ferrule (sleeve) for copper tubing onto the end of the tubing and connect it to the shutoff valve.
-
Page 21: Leveling And Door Alignment
INSTALLATION • Insert the end of the copper tubing into the Turn the leveling leg to the left to raise that connection as far as possible. While holding the side of the refrigerator or to the right to lower tubing, tighten the fitting. it. -
Page 22: Turning On The Power
22 INSTALLATION Turning on the Power • After installing, plug the refrigerator’s power cord into a 3-prong grounded outlet and push the refrigerator into the final position. CAUTION • Connect to a rated power outlet. • Have a certified electrician check the wall outlet and wiring for proper grounding. -
Page 23: Operation
OPERATION OPERATION Before Use Checklist Clean the refrigerator. Clean the refrigerator thoroughly and wipe off all dust that accumulated during shipping. CAUTION • Do not scratch the refrigerator with a sharp object or use a detergent that contains alcohol, a flammable liquid or an abrasive when removing any tape or adhesive from the refrigerator. -
Page 24: Control Panel
24 OPERATION Control Panel Depending on the model, some of the following functions may not be available. The actual control panel may differ from model to model. Control Panel Features Freezer Indicates the set temperature of the freezer compartment in Celsius (°C) or Fahrenheit (°F). The default freezer temperature is 0°F (-18 °C). -
Page 25: Sabbath Mode
Once on, the display remains on for 20 seconds. Sabbath Mode • If water dispenses unexpectedly, turn off the water supply and contact an LG Electronics This feature is only available on some models. Customer Information Center. -
Page 26: Storing Food
26 OPERATION Normal Sounds You May Hear NOTE • Keeping the power turned on to the icemaker • Throw away the first bin full of ice after before the water line is connected can damage installation. This is also necessary if the the icemaker. - Page 27 OPERATION throughout the refrigerator. For dated products, NOTE check date code to ensure freshness. • Do not store food with high moisture content CAUTION towards the top of the refrigerator. The moisture could come into direct contact with the cold air •...
-
Page 28: Humidity Controlled Crispers
28 OPERATION • Heavy-duty aluminum foil • Plastic-coated paper • Non-permeable plastic wraps • Specified freezer-grade self-sealing plastic bags Follow package or container instructions for proper freezing methods. Do not use • Bread wrappers • Non-polyethylene plastic containers • Containers without tight lids •... -
Page 29: Glide'n'serve
OPERATION Line up the tabs on the Door-in-Door case To assemble, slightly tilt up the front, insert with the slots on the door and push down the drawer into the frame and push it back until it snaps into place. into place. -
Page 30: Door Bins
30 OPERATION Durabase Lower the front of the shelf so that the hooks drop into the slots. Using the Durabase CAUTION The Durabase divider allows you to organize the • Make sure that shelves are level from one side to Durabase area into 2 sections. -
Page 31: Smart Functions
SMART FUNCTIONS SMART FUNCTIONS LG ThinQ Application • Launch the LG ThinQ application and select the Smart Diagnosis feature in the menu. Follow the instructions for audible diagnosis provided This feature is only available on models with the in the LG ThinQ application. -
Page 32: Maintenance
32 MAINTENANCE MAINTENANCE Cleaning To help remove odors, wash the inside of the refrigerator with a mixture of baking soda and warm water. Mix 2 tablespoons of baking soda to 1 WARNING quart of water (26 g soda to 1 liter water.) Be sure the baking soda is completely dissolved so it does •... - Page 33 MAINTENANCE without adequate disinfection before or after the • Search using "water filter" on lg.com system. Systems certified for cyst reduction may • Use replacement cartridge: LT1000P, LT1000PC be used on disinfected water that may contain or LT1000PCS filterable cysts.
- Page 34 After changing the filter, press and hold the Water Filter button for three seconds to reset the indicator light. CAUTION • LG strongly recommends that you use LG- authorized water filters to prevent water quality issues, water leakage and appliance malfunction.
- Page 35 MAINTENANCE Performance Data Sheet Model: LT1000P, LT1000PC, LT1000PCS NSF System Trade Name Code: MDJ64844601 The concentration of the indicated substances in water entering the system was reduced to a concentration less than or equal to the permissible limit for water leaving the system as specified in NSF/ ANSI Standard 42, Standard 53 and Standard 401.
- Page 36 NOTE • While the testing was performed under standard laboratory conditions, actual performance may vary. For replacement filters, visit your local dealer or distributor or search under "water filters" on the lg.com website. For further assistance, contact the LG Electronics Customer Information Center.
-
Page 37: Troubleshooting
TROUBLESHOOTING TROUBLESHOOTING FAQs Frequently Asked Questions What are the best temperature settings for my refrigerator and freezer? The default setting for the refrigerator is 37° Fahrenheit (3° Celsius). The default setting for the freezer is 0° Fahrenheit (-18° Celsius). Adjust these settings as necessary to keep food at desired temperatures. -
Page 38: Before Calling For Service
38 TROUBLESHOOTING Before Calling for Service Review this section before calling for service; doing so will save you both time and money. Cooling Problem Possible Cause & Solution Refrigerator is not A fuse in your home may be blown or the circuit breaker tripped. Or the appliance is cooling or has no connected to a GFCI (Ground Fault Circuit Interrupter) outlet, and the outlet's circuit power. - Page 39 TROUBLESHOOTING Problem Possible Cause & Solution Cooling system runs Refrigerator is replacing an older model. too much. • Modern refrigerators require more operating time but use less energy due to more efficient technology. Refrigerator was recently plugged in or power restored. •...
- Page 40 40 TROUBLESHOOTING Problem Possible Cause & Solution Refrigerator or Incorrect temperature control settings. Freezer section is too • If the temperature is too cold, adjust the control one increment at a time and wait for the cold. temperature to stabilize. Refer to the Control Panel for more information. Frost or ice crystals Condensation from food with a high water content has frozen inside of the food form on frozen food...
- Page 41 TROUBLESHOOTING Problem Possible Cause & Solution Icemaker is not Demand exceeds ice production capacity. making enough ice. • Refer to the Automatic Icemaker section for ice production capacity to check the amount of ice produced in a 24 hour period. House water supply is not connected, valve is not turned on fully, or valve is clogged.
- Page 42 42 TROUBLESHOOTING Problem Possible Cause & Solution Icemaker is not Refrigerator was recently installed or icemaker recently connected. making ice • It may take up to 24 hours for each compartment to reach the desired temperature and for the icemaker to begin making ice. Icemaker is not turned on.
- Page 43 TROUBLESHOOTING Problem Possible Cause & Solution Ice is not dispensing. Unable to hear the sound of ice coming out? • In the control panel, select the modes for cubed ice and crushed ice alternately to dispense the ice. Doors are not closed completely. •...
- Page 44 44 TROUBLESHOOTING Problem Possible Cause & Solution Water is not New installation or water line recently connected. dispensing. • Dispense 2.5 gallons of water (flush for approximately 5 minutes) to remove trapped air and contaminants from the system. Do not dispense the entire 2.5 gallon amount continuously.
- Page 45 TROUBLESHOOTING Problem Possible Cause & Solution Water has bad taste Water supply contains minerals such as sulfur. or odor. • A water filter may need to be installed to eliminate taste and odor problems. Water filter has been exhausted. • Replacing the water filter is recommended: - Approximately every six months.
- Page 46 46 TROUBLESHOOTING Problem Possible Cause & Solution The interior of the The refrigerator is located near a fire source, such as a fireplace, chimney, or candle. refrigerator is • Make sure that the refrigerator is not located near a fire source, such as a fireplace, covered with dust or chimney or candle.
- Page 47 Should your LG Refrigerator ("Product") fail due to a defect in materials or workmanship under normal and proper use, during the warranty period set forth below, LG will, at its option, repair or replace the Product. This limited warranty is valid only to the original retail purchaser of the Product ("You") and applies only when purchased lawfully and used within the United States including U.S.
- Page 48 Or by mail: LG Electronics Customer Service P.O. Box 240007 Huntsville, AL 35813 ATTN: CIC PROCEDURE FOR RESOLVING DISPUTES: ALL DISPUTES BETWEEN YOU AND LG ARISING OUT OF OR RELATING IN ANY WAY TO THIS LIMITED WARRANTY OR THE PRODUCT SHALL BE RESOLVED EXCLUSIVELY THROUGH BINDING ARBITRATION, AND NOT IN A COURT OF GENERAL JURISDICTION.
- Page 49 Notice of Dispute. In the event you intend to commence an arbitration proceeding, you must first notify LG in writing at least 30 days in advance of initiating the arbitration by sending a letter to LG at LG Electronics, USA, Inc. Attn: Legal Department- Arbitration 111 Sylvan Avenue, Englewood Cliffs, NJ 07632.
- Page 50 (b) the date on which the product was purchased; (c) the product model name or model number; and (d) the serial number (the serial number can be found (i) on the product; or (ii) online by accessing https:// www.lg.com/us/support/repair-service/schedule-repair-continued and clicking on “Find My Model & Serial Number”).
- Page 51 ARE NOT PERMITTED. PLEASE SEE THE SECTION TITLED “PROCEDURE FOR RESOLVING DISPUTES” BELOW. Should your LG Refrigerator ("Product") fail due to a defect in materials or workmanship under normal and proper use, during the warranty period set forth below, LG Electronics Canada, Inc. ("LGECI") will, at its option, repair, replace or pro rate the Product upon receipt of proof of the original retail purchase.
- Page 52 (ASC), as determined by LG Canada. If your Product is located outside a 150 km radius from a ASC, as determined by LG Canada, it will be your responsibility to bring the Product, at your sole expense, to the ASC for in-warranty repair.
- Page 53 If you and LG are unable to resolve the dispute within 30 days of LG’s receipt of the Notice of Dispute, the dispute shall be resolved by binding arbitration in accordance with the procedure set out herein.
- Page 54 Limited Warranty. Opt Out. You may opt out of this dispute resolution procedure. If you opt out, neither you nor LG can require the other to participate in an arbitration proceeding. To opt out, you must send notice to LG no later than 30 calendar days from the date of the first consumer purchaser’s purchase of the product by...
- Page 55 Memo...
- Page 56 LG Customer Information Center For inquiries or comments, visit www.lg.com or call: U.S.A. 1-800-243-0000 1-888-542-2623 CANADA Register your product Online! www.lg.com...
Need help?
Do you have a question about the LMWC23626 Series and is the answer not in the manual?
Questions and answers