Table of Contents
Advertisement
Quick Links
TRAINING MANUAL
LMX28983ST
IMPORTANT SAFETY NOTICE
The information in this training manual is intended for use by persons possessing an adequate background in
electrical equipment, electronic devices, and mechanical systems. In any attempt to repair a major appliance,
personal injury and property damage can result. The manufacturer or seller maintains no liability for the
interpretation of this information, nor can it assume any liability in conjunction with its use. When servicing this
product, under no circumstances should the original design be modified or altered without permission from LG
Electronics. Unauthorized modifications will not only void the warranty, but may lead to property damage or user
injury. If wires, screws, clips, straps, nuts, or washers used to complete a ground path are removed for service, they
must be returned to their original positions and properly fastened.
CAUTION
To avoid personal injury, disconnect the power before servicing this product. If electrical power is required for
diagnosis or test purposes, disconnect the power immediately after performing the necessary checks. Also be aware
that many household appliances present a weight hazard. At least two people should be involved in the installation
or servicing of such devices. Failure to consider the weight of an appliance could result in physical injury.
ESD NOTICE
Some of the electronic components in appliances are electrostatic discharge (ESD) sensitive. ESD can weaken or
damage the electronics in these appliances in a manner that renders them inoperative or reduces the time until their
next failure. Connect an ESD wrist strap to a ground connection point or unpainted metal in the appliance.
Alternatively, you can touch your finger repeatedly to a ground connection point or unpainted metal in the
appliance. Before removing a replacement part from its package, touch the anti-static bag to a ground connection
point or unpainted metal in the appliance. Handle the electronic control assembly by its edges only. When
repackaging a failed electronic control assembly in an anti-static bag, observe these same precautions.
REGULATORY INFORMATION
This equipment has been tested and found to comply with the limits for a Class B digital device, pursuant to Part
15 of the FCC Rules. These limits are designed to provide reasonable protection against harmful interference when
the equipment is operated in a residential installation. This equipment generates, uses, and can radiate radio
frequency energy, and, if not installed and used in accordance with the instruction manual, may cause harmful
interference to radio communications. However, there is no guarantee that interference will not occur in a particular
installation. If this equipment does cause harmful interference to radio or television reception, which can be
determined by turning the equipment off and on, the user is encouraged to try to correct the interference by one or
more of the following measures: Reorient or relocate the receiving antenna; Increase the separation between the
equipment and the receiver; Connect the equipment to an outlet on a different circuit than that to which the
receiver is connected; or consult the dealer or an experienced radio/TV technician for help.
DISCLAIMER
The information in this training manual was accurate at the time of publication. Every effort has been made to
ensure accuracy. Updates, changes, etc. are available via GCSC and LGCSacademy. The information in this manual is
intended for persons with adequate backgrounds in electronics, mechanical, and electronic servicing. The
manufacturer and seller are not to be held responsible for any liability incurred from its use.
COMPLIANCE
The responsible party for this device's compliance is LG Electronics Alabama, Inc.; P O BOX 240007, Huntsville, AL,
35813.
LMX28983ST
Page 1
FOUR DOOR REFRIGERATOR
Advertisement
Table of Contents
Troubleshooting

Related Manuals for LG LMX28983ST


Summary of Contents for LG LMX28983ST
-
Page 1: Important Notices (The Small Print Page)
The manufacturer and seller are not to be held responsible for any liability incurred from its use. COMPLIANCE The responsible party for this device’s compliance is LG Electronics Alabama, Inc.; P O BOX 240007, Huntsville, AL, 35813. LMX28983ST... -
Page 2: Table Of Contents
TRAINING MANUAL LMX28983ST Contents Important Notices (The Small Print Page) Contents Specifications Dimensions Parts Identification Installation Water Line Connection Connecting the Water Line Flooring Requirements Handle Removal Water Tube Connection Door Removal Door Heater Assembly Refrigerator Door Switch Freezer Door Switch... - Page 3 TRAINING MANUAL LMX28983ST Contents, continued Troubleshooting Chart (with error codes) Schematic Wire / Color / Circuit Scheme Troubleshooting Flow Charts Freezer Sensor Error Refrigerator Sensor Error Defrost Sensor Error Icemaker Compartment Sensor Error Pantry Sensor Error Defrost Heater Error Freezer Fan Error...
- Page 4 TRAINING MANUAL LMX28983ST NOTES LMX28983ST Page 4 FOUR DOOR REFRIGERATOR...
-
Page 5: Specifications
TRAINING MANUAL LMX28983ST SPECIFICATIONS ITEM SPECIFICATION ITEM SPECIFICATION Door Design Rounded Sides Vegetable Tray Clear Drawer Dimensions (in.) Compressor Reciprocal 35¾ X 35⅜ X 69¾ Net Weight 359 lbs. (163 kg) Evaporator Fin Tube Type Cooling System Fan Forced Air... -
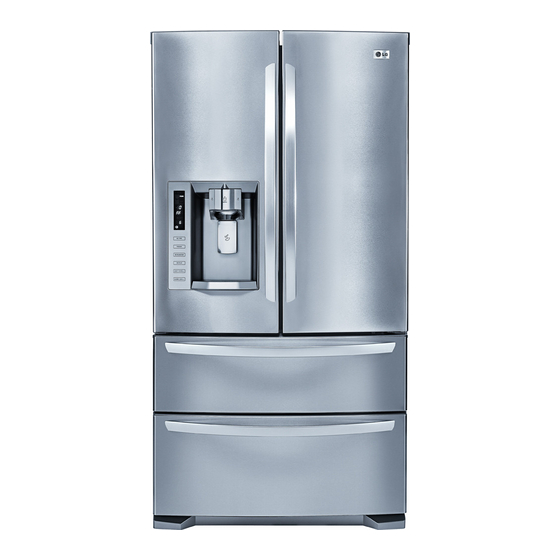
Page 6: Parts Identification
TRAINING MANUAL LMX28983ST PARTS IDENTIFICATION The 28 cubic foot LMX28983ST four- door refrigerator, with a two-drawer freezer compartment, a two-door (French door) refrigerator compartment, and an in-door ice and water dispenser. Adjustable Refrigerator Shelving for flexible storage needs Gallon Storage Bins... -
Page 7: Installation
TRAINING MANUAL LMX28983ST INSTALLATION WEIGHT HAZARD! The refrigerator weighs as much as 359 pounds (163 kg). We recommend a minimum of two people for moving and servicing this refrigerator. LEVELING Be sure the floor is level and strong enough to support the refrigerator. Unstable installation or unleveled flooring may cause vibration, noise, and poor door operation. -
Page 8: Water Line Connection
Often, these kits include a piercing saddle-type valve that allows connection to the water line without the need for plumbing skills. LG does not recommend the use of this type valve because it often fails to provide sufficient water flow for the icemaker and... -
Page 9: Connecting The Water Line
These illustrations show a saddle valve with the water line connected using a compression fitting at each end. LG does not recommend the use of this type valve because it often fails to provide sufficient water flow for the icemaker and... -
Page 10: Flooring Requirements
TRAINING MANUAL LMX28983ST FLOORING REQUIREMENTS The refrigerator must be installed on a solidly constructed floor to minimize noise and vibration. The refrigerator must be level. If necessary, adjust the leveling legs under the front of the refrigerator to compensate for variations in the flooring. This is easier if the refrigerator is tipped slightly backward to take the weight off the legs. -
Page 11: Water Tube Connection
TRAINING MANUAL LMX28983ST WATER TUBE CONNECTION The water tube connections must be properly assembled to avoid leaking. Insert the tube into the connector until only one of the printed lines is visible. Pull on the tube slightly to ensure proper insertion and retention. - Page 12 TRAINING MANUAL LMX28983ST Follow these steps to remove and replace the refrigerator doors. Refer to the drawings above. RIGHT DOOR Open the door to 90°. Remove the top hinge cover (1) screw. Lift the cover (2). Disconnect the wire (3) harness.
- Page 13 TRAINING MANUAL LMX28983ST LEFT DOOR Disconnect the hose at the top right corner (facing the back) by removing the release clip and pressing the release ring. The tube will be pulled out with the door when it is removed. Open the door to 90°.
-
Page 14: Door Heater Assembly
TRAINING MANUAL LMX28983ST DOOR HEATER ASSEMBLY The doors have heaters on the opening edge; that is, the edges that face each other in the center of the refrigerator. These small, 2-watt heating elements keep condensation from forming along the opening where cold air escapes when the doors are open. -
Page 15: Refrigerator Door Switch
TRAINING MANUAL LMX28983ST REFRIGERATOR DOOR SWITCH Remove the switch from its housing by pressing the tabs on either end of the switch and pulling it out. Disconnect it from the wiring harness. The door switches determine whether the doors are opened or closed. When a door... - Page 16 TRAINING MANUAL LMX28983ST The normally closed (NC) Upper Freezer Door Monitor 5v Orange to Orange Connects to black and sky blue (BK and SB) at CON 6 Pins 5 and 6 on the main board. With the switch pressed, orange to orange should show infinite resistance.
-
Page 17: Door Gasket Removal
TRAINING MANUAL LMX28983ST DOOR GASKET REMOVAL Remove the door frame cover. Starting at the top of the cover and working down, snap the cover out and away from the door. Remove the gasket bracket clips. There are two clips per door. Start the bracket removal near one of the clips. -
Page 18: Door Gasket Replacement
TRAINING MANUAL LMX28983ST DOOR GASKET REPLACEMENT Insert the gasket bracket clips beneath the door frame edge. Turn the upper gasket bracket spring so the spring ends are in the door channel. Push the clip until you hear it snap securely into place. -
Page 19: Door Self-Closing Mechanism
TRAINING MANUAL LMX28983ST DOOR CLOSER The refrigerator doors have automatic closing mechanisms built into the hinge. To remove it, remove the two screws on the base plate of the hinge. (The right hinge is shown; the left is similar.) Remove the end screw that holds the hinge in the door. -
Page 20: Pullout Freezer Drawer
TRAINING MANUAL LMX28983ST PULLOUT FREEZER DRAWER Open the drawers (one at a time) and remove the bins or baskets. Remove the two screws from the guide rails (one from each side.) Lift the freezer door up to unhook it from the rail support and remove. - Page 21 TRAINING MANUAL LMX28983ST FOLLOW THESE STEPS TO REINSTALL Reinstall the right side gear into the clip. Insert the rail into the right side gear. The gears do not need to be perpendicular to each other. Insert the rail into the left side gear, and insert the gear into the clip.
- Page 22 TRAINING MANUAL LMX28983ST REINSTALLATION, continued The rail system will align itself by pushing the rails all the way into the freezer section. Pull the rails back out to full extension. Reinstall the freezer door by inserting the rail tabs into the guide rail.
-
Page 23: Defrost Control, Evaporator, And Fan Motor (Freezer)
TRAINING MANUAL LMX28983ST DEFROST CONTROL, EVAPORATOR, and FAN MOTOR (FREEZER) Remove the freezer drawers. Do NOT remove the center support bar. It contains refrigerant lines and should not be removed. The lines are easily damaged and removal of the bar serves no purpose. All service operations can be completed with the bar in place. - Page 24 TRAINING MANUAL LMX28983ST Disconnect the icemaker fan connector and the freezer fan connector. Unplug the thermistor (connector on the left, blue wires.) The remaining connectors (on the right) are for the defrost heater and need not be disconnected unless you are servicing the heater.
- Page 25 TRAINING MANUAL LMX28983ST Remove the connector and measure the resistance of the defrost sensor. It should be approximately 12 Ω. Remove the connector and measure the resistance of the defrost heater element. It should be approximately 38 Ω ± 4 Ω...
- Page 26 TRAINING MANUAL LMX28983ST With the freezer back panel removed, the opening for the icemaker fan is visible. The duct allows the icemaker fan to circulate cold air (0°F / -18° C) through the icemaker compartment in the refrigerator door. If the temperature is higher than this, the icemaker may not work.
-
Page 27: Multi-Duct (Refrigerator)
TRAINING MANUAL LMX28983ST MULTI-DUCT (REFRIGERATOR) The multi-duct in the back of the refrigerator includes air ducts, vents, LEDs for the crisper drawers, and a thermistor. To remove the multi-duct, pry the covers off both ends of the bracket channel. Then remove the two Phillips screws (but not the silver one attaching the rack to the duct.) -
Page 28: Lamp (Led Array)
TRAINING MANUAL LMX28983ST The bottom of the duct is inserted into the opening at the base of the refrigerator to ensure proper air flow and cold air distribution. LAMP (LED ARRAY, REFRIGERATOR) The light in the refrigerator is provided by an LED array which is switched on when either refrigerator door is opened. - Page 29 TRAINING MANUAL LMX28983ST DAMPER, continued There are two damper motors; one to control the flow of cold air into the refrigerator compartment and one to control the flow of cold air into the pantry, excluding the crisper and vegetable drawers. Air flow throughout the crisper drawers is controlled by opening or closing the vents on the drawers.
-
Page 30: Pantry Damper (Meat, Deli, And Produce)
TRAINING MANUAL LMX28983ST DAMPER (Pantry,) continued The pantry damper has a control panel of its own to allow adjusting the temperature in it independently. This drawer can be kept colder or warmer than the remainder of the refrigerator. The pantry drawer runs across the entire... -
Page 31: Icemaker
TRAINING MANUAL LMX28983ST ICEMAKER To remove the icemaker, first lift the ice bin slightly. Pull the bottom outward as you continue to lift. When the bin is clear of any obstruction, pull it away from the icemaker. Replacement is the opposite of this. Put the ice bin back into the icemaker and lower it into its place. -
Page 32: Icemaker Compartment And Door
TRAINING MANUAL LMX28983ST ICEMAKER and DOOR If it is necessary to remove the icemaker door, loosen the front screw (nearest the hinge) of the bracket. Lift the hinge with one hand. It might be necessary to loosen the rear screw slightly. - Page 33 TRAINING MANUAL LMX28983ST ICEMAKER, continued Remove two screws (A) to remove the icemaker. Remove the four screws (B) that secure the back wall of the icemaker. Take it out of the icemaker room. It is slightly heavy because it includes the cubed / crushed solenoid and the auger motor.
-
Page 34: Water Filter
Because of the valve built into the filter base, the water can still flow (unfiltered) to the icemaker and dispenser when the filter is removed. LG recommends using the refrigerator with the filter in place. Filter Part N . 5231JA2006A. -
Page 35: Icemaker (Test)
TRAINING MANUAL LMX28983ST ICEMAKER (Test) The icemaker can be reset by turning the switch OFF and then ON. Powering it ON causes a forced harvest operation. If the water in the mold hasn’t frozen, the cubes cannot be ejected. Then, opening the solenoid will overfill the mold and cause spillage. -
Page 36: Cube Size Setting
TRAINING MANUAL LMX28983ST ICEMAKER, continued CUBE SIZE SETTING TEST MODE MALFUNCTION INDICATOR LMX28983ST Page 36 FOUR DOOR REFRIGERATOR... -
Page 37: Dispenser
TRAINING MANUAL LMX28983ST DISPENSER To remove the dispenser, start by removing the drain tray. Pull it forward and lift at the back. Slide it forward out of the plastic guide. Use your thumbs to press down the black base and pop the bottom of the dispenser loose. - Page 38 TRAINING MANUAL LMX28983ST DISPENSER, continued Removing the dispenser reveals the actuating lever and switch, display board, and associated wiring. Remove the connector from the dispenser solenoid (that controls the flap over the ice chute) and check for voltage. The solenoid is a 12 V...
-
Page 39: Auger Motor And Solenoid
TRAINING MANUAL LMX28983ST AUGER MOTOR and SOLENOID The temperature sensor is marked (A). The auger motor rotates the ice dispenser and crusher assembly. Separate the electrical connector marked B on the photo and measure the resistance across the terminals of the geared motor. -
Page 40: Water Valves
TRAINING MANUAL LMX28983ST WATER VALVES There are two electrically operated water valves (solenoids) in the refrigerator. The single valve is the main valve for incoming water. It is located in the mechanical area of the refrigerator, on the right when facing the back. It has a single input from the house water supply and a single output to water filter. -
Page 41: Compressor
TRAINING MANUAL LMX28983ST COMPRESSOR The compressor inputs the low-pressure, low-temperature gas from the evaporator and compresses it to high-temperature, high-pressure gas to feed the condenser. The refrigerant completes its circuit through the sealed system to repeat the cycle. Follow the usual rules for handling and replacing a compressor. Keep it dry. Do not expose it to over- or under-current or -voltage. -
Page 42: Troubleshooting Chart (With Error Codes)
TRAINING MANUAL LMX28983ST TROUBLESHOOTING When checking resistance values, unplug the refrigerator and allow time for the voltage to discharge. LMX28983ST Page 42 FOUR DOOR REFRIGERATOR... -
Page 43: Schematic
TRAINING MANUAL LMX28983ST SCHEMATIC Wires are identifiable by color, by connector, and are marked on the board in most cases. LMX28983ST Page 43 FOUR DOOR REFRIGERATOR... -
Page 44: Troubleshooting Flow Charts
TRAINING MANUAL LMX28983ST FREEZER SENSOR ERROR LMX28983ST Page 44 FOUR DOOR REFRIGERATOR... -
Page 45: Refrigerator Sensor Error
TRAINING MANUAL LMX28983ST REFRIGERATOR SENSOR ERROR LMX28983ST Page 45 FOUR DOOR REFRIGERATOR... -
Page 46: Defrost Sensor Error
TRAINING MANUAL LMX28983ST DEFROST SENSOR ERROR LMX28983ST Page 46 FOUR DOOR REFRIGERATOR... -
Page 47: Icemaker Compartment Sensor Error
TRAINING MANUAL LMX28983ST ICEMAKER COMPARTMENT SENSOR ERROR LMX28983ST Page 47 FOUR DOOR REFRIGERATOR... -
Page 48: Pantry Sensor Error
TRAINING MANUAL LMX28983ST PANTRY SENSOR ERROR LMX28983ST Page 48 FOUR DOOR REFRIGERATOR... -
Page 49: Defrost Heater Error
TRAINING MANUAL LMX28983ST DEFROST HEATER ERROR LMX28983ST Page 49 FOUR DOOR REFRIGERATOR... - Page 50 TRAINING MANUAL LMX28983ST DEFROST HEATER ERROR, continued LMX28983ST Page 50 FOUR DOOR REFRIGERATOR...
-
Page 51: Freezer Fan Error
TRAINING MANUAL LMX28983ST FREEZER FAN ERROR LMX28983ST Page 51 FOUR DOOR REFRIGERATOR... -
Page 52: Condenser Fan Error
TRAINING MANUAL LMX28983ST CONDENSER FAN ERROR LMX28983ST Page 52 FOUR DOOR REFRIGERATOR... -
Page 53: Icemaker Compartment Fan Error
TRAINING MANUAL LMX28983ST ICEMAKER COMPARTMENT FAN ERROR LMX28983ST Page 53 FOUR DOOR REFRIGERATOR... -
Page 54: Refrigerator Fan Error
TRAINING MANUAL LMX28983ST REFRIGERATOR FAN ERROR LMX28983ST Page 54 FOUR DOOR REFRIGERATOR... -
Page 55: Communication Error
TRAINING MANUAL LMX28983ST COMMUNICATION ERROR LMX28983ST Page 55 FOUR DOOR REFRIGERATOR... - Page 56 TRAINING MANUAL LMX28983ST COMMUNICATION ERROR, continued LMX28983ST Page 56 FOUR DOOR REFRIGERATOR...
-
Page 57: Cube Mode Fails
TRAINING MANUAL LMX28983ST CUBE MODE FAILS LMX28983ST Page 57 FOUR DOOR REFRIGERATOR... - Page 58 TRAINING MANUAL LMX28983ST CUBE MODE FAILS, continued LMX28983ST Page 58 FOUR DOOR REFRIGERATOR...
- Page 59 TRAINING MANUAL LMX28983ST CUBE MODE FAILS, continued LMX28983ST Page 59 FOUR DOOR REFRIGERATOR...
-
Page 60: Crush Mode Fails
TRAINING MANUAL LMX28983ST CRUSH MODE FAILS LMX28983ST Page 60 FOUR DOOR REFRIGERATOR... - Page 61 TRAINING MANUAL LMX28983ST CRUSH MODE FAILS, continued LMX28983ST Page 61 FOUR DOOR REFRIGERATOR...
-
Page 62: Water Mode Fails
TRAINING MANUAL LMX28983ST WATER MODE FAILS LMX28983ST Page 62 FOUR DOOR REFRIGERATOR... - Page 63 TRAINING MANUAL LMX28983ST WATER MODE FAILS, continued LMX28983ST Page 63 FOUR DOOR REFRIGERATOR...
-
Page 64: Not Enough Ice Or No Ice
TRAINING MANUAL LMX28983ST NOT ENOUGH ICE or NO ICE If the complaint is NO ICE or NOT ENOUGH ICE or ICE MELTING, check the temperature settings first. The default settings are 37° F (0° C) in the refrigerator section and 0° F (-18° C) in the freezer. - Page 65 TRAINING MANUAL LMX28983ST Check the dryer’s auxiliary fill pipe for signs of oil or refrigerant leakage. If there is evidence of a leak, replace the dryer. Then evacuate and recharge the system. The system should run to specification now. While replacing the dryer and repairing the system, check all the solder joints and usual places for leaks.
-
Page 66: Freezer Led Module Fails
TRAINING MANUAL LMX28983ST FREEZER LED MODULE FAILS LMX28983ST Page 66 FOUR DOOR REFRIGERATOR... - Page 67 TRAINING MANUAL LMX28983ST FREEZER LED MODULE FAILS, continued LMX28983ST Page 67 FOUR DOOR REFRIGERATOR...
-
Page 68: Refrigerator Led Module Fails
TRAINING MANUAL LMX28983ST REFRIGERATOR LED MODULE FAILS LMX28983ST Page 68 FOUR DOOR REFRIGERATOR... - Page 69 TRAINING MANUAL LMX28983ST REFRIGERATOR LED FAILS, continued LMX28983ST Page 69 FOUR DOOR REFRIGERATOR...
- Page 70 TRAINING MANUAL LMX28983ST POOR COOLING IN REFRIGERATOR SECTION LMX28983ST Page 70 FOUR DOOR REFRIGERATOR...
- Page 71 TRAINING MANUAL LMX28983ST POOR COOLING IN REFRIGERATOR SECTION, continued LMX28983ST Page 71 FOUR DOOR REFRIGERATOR...
- Page 72 TRAINING MANUAL LMX28983ST POOR COOLING IN REFRIGERATOR SECTION LMX28983ST Page 72 FOUR DOOR REFRIGERATOR...
- Page 73 TRAINING MANUAL LMX28983ST POOR COOLING IN REFRIGERATOR SECTION, continued LMX28983ST Page 73 FOUR DOOR REFRIGERATOR...
-
Page 74: Overcooling In Refrigerator
TRAINING MANUAL LMX28983ST OVERCOOLING IN REFRIGERATOR SECTION LMX28983ST Page 74 FOUR DOOR REFRIGERATOR... -
Page 75: Terminal Protectors (Assembly, Disassembly, And Testing)
TRAINING MANUAL LMX28983ST OVERCOOLING IN REFRIGERATOR SECTION, continued LMX28983ST Page 75 FOUR DOOR REFRIGERATOR... - Page 76 TRAINING MANUAL LMX28983ST TERMINAL PROTECTOR You can get the meter probes in to the correct wires more easily if you remove the protective strip along the wired end of the connector by prying up one end and then the other. Be sure to replace the strip when testing is complete.
-
Page 77: Test Mode
TRAINING MANUAL LMX28983ST TEST MODE Press the TEST button on the MAIN PWB to start the test mode. Pressing the TEST button one time will turn on the compressor, all fan motors, all dampers, and all items on the display. -
Page 78: Fan Error Test
TRAINING MANUAL LMX28983ST TEST MODE, continued Pressing the TEST button a second time will force the damper closed. The display will show 22 22. Pressing the TEST button a third time will force the defrost mode. The display will show 33 33. -
Page 79: Master Troubleshooting Chart
TRAINING MANUAL LMX28983ST TROUBLESHOOTING CHARTS LMX28983ST Page 79 FOUR DOOR REFRIGERATOR... - Page 80 TRAINING MANUAL LMX28983ST TROUBLESHOOTING CHARTS, continued LMX28983ST Page 80 FOUR DOOR REFRIGERATOR...
- Page 81 TRAINING MANUAL LMX28983ST TROUBLESHOOTING CHARTS, continued LMX28983ST Page 81 FOUR DOOR REFRIGERATOR...
- Page 82 TRAINING MANUAL LMX28983ST TROUBLESHOOTING CHARTS, continued If the icemaker fails to produce ice, produced it very slowly, or if the ice tends to melt when it has been produced, check the temperature in the freezer and in the icemaker compartment. It should be close to 0°...
- Page 83 TRAINING MANUAL LMX28983ST TROUBLESHOOTING CHARTS, continued LMX28983ST Page 83 FOUR DOOR REFRIGERATOR...
-
Page 84: Exploded Views
TRAINING MANUAL LMX28983ST EXPLODED VIEW LMX28983ST Page 84 FOUR DOOR REFRIGERATOR... - Page 85 TRAINING MANUAL LMX28983ST EXPLODED VIEW LMX28983ST Page 85 FOUR DOOR REFRIGERATOR...
- Page 86 TRAINING MANUAL LMX28983ST EXPLODED VIEW LMX28983ST Page 86 FOUR DOOR REFRIGERATOR...
- Page 87 TRAINING MANUAL LMX28983ST EXPLODED VIEW LMX28983ST Page 87 FOUR DOOR REFRIGERATOR...
- Page 88 TRAINING MANUAL LMX28983ST EXPLODED VIEW LMX28983ST Page 88 FOUR DOOR REFRIGERATOR...
- Page 89 TRAINING MANUAL LMX28983ST EXPLODED VIEW LMX28983ST Page 89 FOUR DOOR REFRIGERATOR...
- Page 90 TRAINING MANUAL LMX28983ST EXPLODED VIEW LMX28983ST Page 90 FOUR DOOR REFRIGERATOR...
-
Page 91: Parts List
TRAINING MANUAL LMX28983ST PARTS LIST Loc # Part No Description 103A 3650JA2061X Handle, Rear 103B 3650JA2061W Handle, Rear 103C ACQ55957504 Cover Assembly, Lower 105A 5251JA3003E Tube Assembly, Drain 106A AFC72909201 Leg Assembly, Adjust 120A ADJ72909801 Duct Assembly, Multi 120B MCZ61845001... - Page 92 TRAINING MANUAL LMX28983ST Loc # Part No Description 200B ADC71691204 Door Assembly, Freezer (Lower) 201A ADD71077404 Door Foam Assembly, Freezer 201B ADD71077504 Door Foam Assembly, Freezer 203A 4987JA1022X Gasket Assembly, Door 203B 4987JA1022Y Gasket Assembly, Door 203C MDS42267903 Gasket, Door...
- Page 93 TRAINING MANUAL LMX28983ST Loc # Part No Description 249H 6600JB1010K Switch, Push Button 249J MCD61841001 Connector, Rail 249K MCD61841002 Connector, Rail 249L MEG61845501 Holder, Rail 249M MEG61845502 Holder, Rail 249T AEC72910402 Guide Assembly, Rail 249V AEC72910502 Guide Assembly, Rail 250A...
- Page 94 TRAINING MANUAL LMX28983ST Loc # Part No Description 303B EBG60658602 Thermistor Assembly, PTC 303C 6750C-0005D Overload Protect 304A 3550C-0042C Cover, Relay 309B 5040JJ2001A Damper, Motor Support 310B 4J00977P Pipe, Compressor Sealing 312A 5040JA3071A Damper, Compressor 312B MCK42342101 Cover, Front 312C...
- Page 95 TRAINING MANUAL LMX28983ST Loc # Part No Description 407A ABA72913401 Bracket Assembly, Motor 408A 5300JK1005D Heater, Sheath 409D EAV48995104 LED Assembly 409E EAV60663404 LED Assembly 410G 0CZZJB2014H Capacitor, Electric Appliance Film, Box 411A 6411JB1042X Power Cord Assembly 420A 4681JB1029D Motor, DC...
- Page 96 TRAINING MANUAL LMX28983ST Loc # Part No Description 623B 5006JJ2009A Cap, Cover 624A 5231JA2006A Filter Assembly, Water 624C 3550JD1128C Cover, Filter 624D 5230JA2003A Filter, Head 625A 3550JA2184B Cover, Tube 626A 3550JA2279A Cover, Filter 627A 4930JA3054A Holder, Pipe 627B MEG42758601 Holder, Pipe...
-
Page 97: Touch-Up Paint
TRAINING MANUAL LMX28983ST Loc # Part No Description TOUCH-UP PAINT (Brush-in-lid) TUP-3796BK Black TUP-3796WH White TUP-3796BB Bahama Blue TUP-3796BQ Bisque TUP-3796DG Dark Green TUP-3796NN Navy Blue TUP-3796PG Pearl Gray TUP-3796RR Candy Red TUP-3796TG Titanium Gray (Refrigerators Only) TUP-3796TT Titanium (Laundry Only) -
Page 98: Serial Number Identification
TRAINING MANUAL LMX28983ST SERIAL NUMBER IDENTIFICATION The serial number is unique to each product. It gives information concerning the time and place of manufacture. The serial number is required to be paid for warranty service and to get the correct part in the event a running production change was made. Some models may have four (4) letters instead of two (2) for the product code number. -
Page 99: Supplementary Materials
TRAINING MANUAL LMX28983ST OHM’S LAW and WATT’S LAW P = WATTS I = AMPERES Watts = Volts / Ohms Amperes = Volts / Ohms Watts = Amperes x Ohms Amperes = Watts / Volts Watts = Volts x Amperes Amperes = E I •... -
Page 100: Temperature Conversion Information (° C / ° F)
TRAINING MANUAL LMX28983ST CONVERSION INFORMATION FORMULAE °F = (9/5) °C + 32 °C = (5/9) x (°F – 32) WIRE COLOR CODES BLACK BROWN ORANGE YELLOW GREEN BLUE PURPLE GRAY SKY BLUE BRIGHT ORANGE CUMQUAT BL/WH BLUE and WHITE WH/RD... -
Page 101: Service Bulletins
TRAINING MANUAL LMX28983ST SERVICE BULLETINS LMX28983ST Page 101 FOUR DOOR REFRIGERATOR... - Page 102 TRAINING MANUAL LMX28983ST LMX28983ST Page 102 FOUR DOOR REFRIGERATOR...
- Page 103 TRAINING MANUAL LMX28983ST LMX28983ST Page 103 FOUR DOOR REFRIGERATOR...
- Page 104 TRAINING MANUAL LMX28983ST LMX28983ST Page 104 FOUR DOOR REFRIGERATOR...
Need help?
Do you have a question about the LMX28983ST and is the answer not in the manual?
Questions and answers