Advertisement
Quick Links
Advertisement

Related Manuals for Archos AC80CP


Summary of Contents for Archos AC80CP
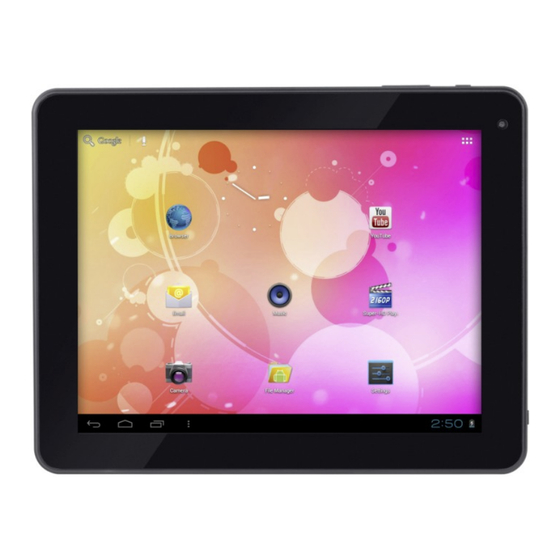
- Page 1 Model:AC80CP User manual...
- Page 2 Note: This manual includes some important safety method and some information about how to use the product correctly to avoid the unnecessary troubles.Before you use the product,please refer to the manual carefully. ● Don’t put the product in high temperature ,humid amd dusty environment ●...
-
Page 3: Installation
2.First usage 2.1 battery management and charge 2.2 Connect the PC 3.Operation Model 3.1 Main Model description 3.2 Status bar describe 3.3 The usage of touch screen 3.4 basic setting 3.5 sound and realistic setting ring,inform and screen brightness 3.6 application 3.7 privacy 3.8 device memory 3.9 language and keyboard... - Page 4 1.1 Touch screen 9.7Inch touch screen:to click、drag and other operation within the touch area 1.2 POWER Power on : Press the button and the player show the start-uping picture then the machine show the menu: Power off:Press the button MENU for 5 seconds,the system shows “Power off”,click the “Power Off”to end system operation.
- Page 5 【Note】:1、If no usage for a long time,please recharge within a month to avoid damage to the machine resulted from the ion of battery. exhaust 2、After Power off,insert the charge,if the machine showes low battery、charging,a short time is needed before the battery can support the machine to start up. 2.2 Connect PC Connect the PC and this machine by USB cable,then the machine shows USB has been connecting, Press the 'Turn on USB storage”...
- Page 6 Delete icon:drag the icon to bin then the icon becomes red after press ing the software icon for 3 seconds Press the touch screen then popup:add to “main page”window Widgets;Wallpapers: 3.2 Status bar describe ● status bar is on the bottom of the screen It shows main screen software、T-Flash card、the status of USB connection, the capacity of battery 、the time 、return key, home key, etc.
- Page 7 3.5 sound and realistic Settings ring, inform and screen brightness Set up voice: adjust the media volume. Also can press and key to adjust the volume Animation: open and close window display animations Brightness: adjustment screen brightness, in stripes around the northeast high click to adjust brightness Settings Screen standby: in the screen off automatically adjust delay before.
- Page 8 File Management Choose the file and than the software or file ,if you want to delete the icon or the file,please long press to delete Management application: management and delete the installation of applications Development: set the application's development options 【...
- Page 9 【 note 】 : please through the option of the "delete SD card" to remove security SD card, avoid hot plug pulled by the equipment damage. 3.9 language and keyboard Set up regional (language and regional), text input and automatic correction option; Choose regional: 54 species of national languages are available Note: android system support of 54 species of language, the menu interface support and kind of language.
- Page 10 Set the date, time, time zone and format Set the date: into the date set interface set the date Set time zone: in the select time zone interface set time zone Set a time: in the time of show format Choose date format: choose different date format to display the date 3.11 USB mode choice Choose the USB work mode: OTG/HOST/SLAVE..
- Page 11 Choose the inside of the APK format the installer, click on the installation, operation after the completion of the return to the main interface, namely the corresponding software menu. 3.13 Settings application icon. Tap “WIFI”to select the wifi address, Then enter the password...
- Page 12 If the appears,which shows the wifi is on,and you can use the wifi freely. 3.14 Play Store 1. the speed of network require over 1M 2 you should connect the network 3 you should sign in a Google account 4 click the , you will see the picture...
- Page 13 4.1 Sign your E-mail account and password. 4.2 Then you will see the picture...
- Page 14 4.3 Chose and download any of them you would like to play. 3.15 how to use G-mail 1. the speed of network require over 1M 2 .you should connect the network 3. click the G-mail on the desktop ,you will see the picture...
- Page 15 4 if you have not G-mail account , you should create an account, click if you have an account, do it like the picture...
- Page 16 5 when you go into the G-mail, then you can send the mail you want 6 when you do not use your G-mail, Exit G -mail account, enter setup-privacy-click restore the factory Settings will delete your G-mali account...
- Page 17 4.Installation of the update tool 1Steps: 1. Obtain LiveSuitPack100_ex.exe file first. Then locate it to direction “D:\test”. As followed picture. 2 Double click LiveSuitPack100_ex.exe, which will install LiveSuit software automatically at the current directory, please see the picture followed: 3 You can see a file named “LiveSuit.exe”. It is just “LiveSuit”, the software we need. 4.Double click LiveSuit.exe, it will run, please see the picture as below:...
-
Page 18: Basic Function
Note: You’d better install “LiveSuit” in the hard disk of your PC than in memory disk.eg :U disk. 14.1. Basic function 21 backup and query device information 2 Firmware upgrade 3 Upgrade LiveSuit itself (depends on network and server) 14.2. Software interface Picture1: Software interface 4.3. -
Page 19: Progress Bar
4.5. File path 6Display the firmware path information you selected. 4.6. Progress bar 7Indicating the current upgrade progress Installing the update tool 15.1. Steps 81 open the LiveSuit software. 2 select the firmware. (*.img) 3 the machine must be closed, press any key for a long time (except the power button, volume button and HOME button),then connect the machine to PC, press the power button several times constantly for a long time until the computer indicate that it find new equipment(the first time) or appear the window of clear machine internal documents , then loosen any keys, according to the tips of the PC operation... - Page 20 The problem maybe that device is not inserted to PC, or you should wait for a while. 2. You’d better backup the data in your device to a reliable memory device before upgrade. 3. The upgrade process may destroy the data in your device, please backup them first. 4.
- Page 21 Select “Install from a list or specific location(Advanced), then click “ next”: Click”brouse” to select location to search drivers , then Click “ next” :...
- Page 22 Click :”Continue Anyway”: Then...
- Page 23 Click”Finish” About 2 second later, Install Driver again Click “Next”:...
- Page 24 Select “Install from a list or specific location(Advanced), then click “ next”: Click”brouse” to select location to search drivers , then Click “ next” :...
- Page 25 Click “Continue Anyway”: Click “Finish”...
- Page 26 【 note 】 : some third party applications must have access to a TF card to run normally Management: click on management, into the third party software interface Click on the icon of the software and put into action interface: Click on the icon of the software and put into Action (Action) interface: Start: run the software Export: export software to TF card...
- Page 27 FCC Statement This device complies with part 15 of the FCC Rules. Operation is subject to the following two conditions: (1) This device may not cause harmful interference, and (2) this device must accept any interference received, including interference that may cause undesired operation Changes or modifications not expressly approved by the party responsible for compliance could void the user's authority to operate the equipment.
Need help?
Do you have a question about the AC80CP and is the answer not in the manual?
Questions and answers