Table of Contents
Advertisement
Quick Links
Advertisement
Table of Contents

Related Manuals for Optoma HD243x


Summary of Contents for Optoma HD243x
- Page 1 Projector ® User manual...
-
Page 2: Table Of Contents
TABLE OF CONTENTS SAFETY ....................4 Important Safety Instruction....................... 4 3D Safety Information ........................ 5 Copyright ........................... 6 Disclaimer ..........................6 Trademark Recognition ......................6 FCC ............................7 Declaration of Conformity for EU countries ................7 WEEE ............................7 INTRODUCTION .................. 8 Package Overview........................ - Page 3 Compatible resolutions ......................43 Image size and projection distance ..................44 Projector dimensions and ceiling mount installation ..............45 IR remote control codes ......................46 Troubleshooting ........................48 Warning indicators ........................50 Specifications ........................... 52 Optoma global offices ....................... 53 English...
-
Page 4: Safety
SAFETY The lightning flash with arrow head within an equilateral triangle is intended to alert the user to the presence of uninsulated "dangerous voltage" within the product's enclosure that may be of sufficient magnitude to constitute a risk of electric shock to persons. The exclamation point within an equilateral triangle is intended to alert the user to the presence of important operating and maintenance (servicing) instructions in the literature accompanying the appliance. -
Page 5: 3D Safety Information
‡ Do not attempt to service the unit yourself. Opening or removing covers may expose you to dangerous voltages or other hazards. Please call Optoma before you send the unit for repair. ‡ See projector enclosure for safety related markings. -
Page 6: Copyright
‡ If you experience any of the following symptoms, stop viewing 3D pictures immediately and consult a medical specialist: (1) altered vision; (2) light-headedness; (3) dizziness; (4) involuntary movements such as eye or muscle twitching; (5) confusion; (6) nausea; (7) loss of awareness; (8) convulsions; (9) cramps;... -
Page 7: Fcc
This device has been tested and found to comply with the limits for a Class B digital device pursuant to Part 15 of the FCC rules. These limits are designed to provide reasonable protection against harmful interference in a residential installation. This device generates, uses and can radiate radio frequency energy and, if not installed and used in accordance with the instructions, may cause harmful interference to radio communications. -
Page 8: Introduction
INTRODUCTION Package Overview Carefully unpack and verify that you have the items listed below under standard accessories. Some of the items under optional accessories may not be available depending on the model, specification and your region of purchase. Please check with your place of purchase. Some accessories may vary from region to region. The warranty card is only supplied in some specific regions. -
Page 9: Product Overview
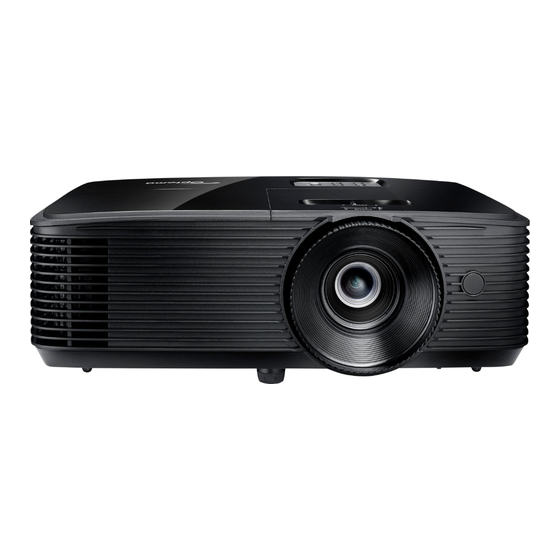
INTRODUCTION Product Overview Notee: Keep a minimum distance of 20 cm between the “inlet” and “outlet” labels. Item Item Lens Zoom Lever IR Receiver Lamp Cover Keypad 10. Ventilation (outlet) Lens Cap 11. Kensington Lock Port Tilt-Adjustment Foot 12. Power Socket Focus Ring 13. -
Page 10: Connections
INTRODUCTION Connections Item Item HDMI Connector 12V OUT Connector HDMI 2 / MHL Connector AUDIO OUT Connector USB Power Out (5V 1A) Connector Kensington Lock Port / MOUSE / SERVICE Connector 3D SYNC OUT Connector Power Socket Notee: Remote mouse requires special remote control. English... -
Page 11: Keypad
INTRODUCTION Keypad Item Item On/Standby LED IR Receiver Lamp LED Enter Temp LED Keystone Correction Information 10. Menu Re-Sync 11. Source Four Directional Select Keys 12 Power English... -
Page 12: Remote Control
INTRODUCTION Remote control User2 User1 User3 Contrast Brightness Mode Aspect ratio Keystone Mute Sleep Timer Volume Source Re-sync Menu Volume HDMI1 HDMI2 VGA1 VGA2 Video YPbPr Item Item Power On 15. User 3 User 2 16. Contrast User 1 17. Display Mode Brightness 18. -
Page 13: Setup And Installation
Do not operate the projector in any orientation other that table top or ceiling mount. The projector should be horizontal and not tilted either forwards/backwards or left/right. Any other orientation will invalidate the warranty and may shorten the lifetime of the projector lamp or the projector itself. For none standard installation advise please contact Optoma. English... - Page 14 SETUP AND INSTALLATION Projector installation notice ‡ Place the projector in a horizontal position. The tilt angle of the projector should not exceed 15 degrees, nor should the projector be installed in any way other than the desktop and ceiling mount, otherwise lamp life could decrease dramatically, and may lead to other unpredictable damages.
-
Page 15: Connecting Sources To The Projector
SETUP AND INSTALLATION Connecting sources to the projector MOLEX Item Item HDMI Cable USB Cable HDMI / MHL Cable USB Power Cable 3D Emitter Cable HDMI Dongle 12V DC Jack Power Cord Audio Out Cable English... -
Page 16: Adjusting The Projector Image
SETUP AND INSTALLATION Adjusting the projector image Image height The projector is equipped with elevator feet for adjusting the image height. Locate the adjustable foot you wish to adjust on the underside of the projector. Rotate the adjustable foot clockwise or counterclockwise to raise or lower the projector. Tilt-Adjustment Feet Tilt-Adjustment Ring Zoom and focus... - Page 17 SETUP AND INSTALLATION Installing / replacing the batteries Two AAA size batteries are supplied for the remote control. Remove the battery cover on the back of the remote control. Insert AAA batteries in the battery compartment as illustrated. Replace back cover on remote control. Notee: Replace only with the same or equivalent type batteries.
- Page 18 SETUP AND INSTALLATION Effective range Infra-Red (IR) remote control sensor is located on top of the projector. Ensure to hold the remote control at an angle within 30 degrees perpendicular to the projector’s top IR remote control sensor to function correctly. The distance between the remote control and the sensor should not be longer than 6 meters (~ 20 feet).
-
Page 19: Using The Projector
USING THE PROJECTOR Powering on / off the projector User2 User1 User3 Contrast Brightness Mode Aspect ratio Keystone Mute Sleep Timer User2 User1 User3 Contrast Brightness Mode Volume Aspect ratio Keystone Mute Sleep Timer Source Re-sync Volume Source Re-sync Menu Volume HDMI1 HDMI2... -
Page 20: Selecting An Input Source
USING THE PROJECTOR User2 User1 User3 Contrast Brightness Mode Selecting an input source Aspect ratio Keystone Turn on the connected source that you want to display on the screen, such as computer, notebook, video player, etc. The projector will automatically detect the source. If multiple sources are connected, push the source button on Mute Sleep Timer the projector keypad or the remote control to select the desired input. -
Page 21: Menu Navigation And Features
USING THE PROJECTOR Menu navigation and features The projector has multilingual on-screen display menus that allow you to make image adjustments and change a variety of settings. The projector will automatically detect the source. To open the OSD menu, press on the remote control or the projector keyboard. -
Page 22: Osd Menu Tree
USING THE PROJECTOR OSD Menu tree Main Sub Menu Sub Menu 2 Sub Menu 3 Sub Menu 4 Values Menu Cinema Vivid Game Reference Bright Display Mode [Video] USER ISF Day ISF Night ISF 3D Off [Default] Blackboard Light Yellow Wall Color Light Green Light Blue... - Page 23 USING THE PROJECTOR Main Sub Menu Sub Menu 2 Sub Menu 3 Sub Menu 4 Values Menu Hue or R -50~50 [Default: 0] Saturation or G -50~50 [Default: 0] Gain or B -50~50 [Default: 0] Color Matching Cancel [Default] Reset Exit Red Gain -50~50...
- Page 24 USING THE PROJECTOR Main Sub Menu Sub Menu 2 Sub Menu 3 Sub Menu 4 Values Menu 16:9 Aspect Ratio LBX [except SVGA XGA models] Native Auto Display Edge Mask 0~10 [Default: 0] Zoom -5~25 [Default: 0] -50~50 [Default: 0] Image shift -50~50 [Default: 0] Keystone...
- Page 25 USING THE PROJECTOR Main Sub Menu Sub Menu 2 Sub Menu 3 Sub Menu 4 Values Menu Off [Default] Quick Resume Power Settings USB Power Auto [Default] Security Month Security Security Timer Hour Change Password HDMI Link Inclusive of TV HDMI Link Mutual Settings...
- Page 26 USING THE PROJECTOR Main Sub Menu Sub Menu 2 Sub Menu 3 Sub Menu 4 Values Menu HDMI 2 Test Pattern Brightness Contrast Sleep Timer Color Matching User2 Color Temperature Gamma Projection Lamp Settings Zoom Freeze Remote Settings MHL [Default] [depends on HDMI 2 remote]...
- Page 27 USING THE PROJECTOR Main Sub Menu Sub Menu 2 Sub Menu 3 Sub Menu 4 Values Menu 한국어 Русский Magyar Čeština ไทย Language Türkçe Tiếng Việt Bahasa Indonesia Română Slovenčina Top left Top right Menu Location Center [Default] Menu Settings Bottom left Bottom right Setup...
- Page 28 USING THE PROJECTOR Main Sub Menu Sub Menu 2 Sub Menu 3 Sub Menu 4 Values Menu None [Default] Blue Background Options Color Green Grey Setup Logo Cancel [Default] Reset OSD Reset Cancel [Default] Reset to Default Regulatory Serial Number Source Resolution 00x00...
-
Page 29: Display Image Settings Menu
USING THE PROJECTOR Display menu Display image settings menu Display Mode (Video mode) There are many factory presets optimized for various types of images. ‡ Cinema: Provides the best colors for watching movies. ‡ Vivid: In this mode, the color saturation and brightness are well-balanced. Choose this mode for playing games. -
Page 30: Display Enhanced Gaming Menu
USING THE PROJECTOR Color Settings Configure the color settings. BrilliantColor ‡ : This adjustable item utilizes a new color-processing algorithm and enhancements to enable higher brightness while providing true, more vibrant colors in picture. ‡ Color Temperature (Video mode): Select a color temperature from Warm, Standard, Cool, or Cold. Color Matching: Select the following options: ‡... -
Page 31: Display 3D Menu
USING THE PROJECTOR Display 3D menu 3D Mode Use this option to disable the 3D function or select the appropriate the 3D function. ‡ Off: Select “Off” to turn off 3D mode. DLP-Link: Select to use optimized settings for DLP 3D Glasses. ‡... -
Page 32: Display Aspect Ratio Menu
USING THE PROJECTOR Display aspect ratio menu Aspect Ratio Select the aspect ratio of the displayed image between the following options: ‡ 4e:3: This format is for 4:3 input sources. ‡ 16e:9: This format is for 16:9 input sources, like HDTV and DVD enhanced for Wide screen TV. ‡... -
Page 33: Display Edge Mask Menu
USING THE PROJECTOR 1080P scaling table: 16e:9 screen 480i/p 576i/p 1080i/p 720p Scale to 1440x1080. 16x9 Scale to 1920x1080. Scale to 1920x1440, then get the central 1920x1080 image to display. Native mode -1:1 mapping centered. -No scaling will be made; the image is displayed with the resolution based on input source. Superwide Scale to 2534 x 1426 (132% Enlarge), then get the central 1920x1080 image to display Ps: End-user can use this format to see non-subtitle of 2.35:1 source to fulfill 100% of 1080p... -
Page 34: Audio Mute Menu
USING THE PROJECTOR Audio menu Audio mute menu Mute Use this option to temporarily turn off the sound. ‡ One: Choose the “On” to turn mute on. Offe: Choose the “Off” to turn mute off. ‡ Notee: ‡ “Mute” function affects both internal and external speaker volume. ‡... -
Page 35: Setup Power Settings Menu
USING THE PROJECTOR Filter Reminder Choose this function to show or hide the warning message when the changing filter message is displayed. The available options include Off, 300hr, 500hr, 800hr, and 1000hr. Filter Reset Reset the dust filter counter after replacing or cleaning the dust filter. Setup power settings menu Direct Power On Choose “On”... -
Page 36: Setup Security Menu
USING THE PROJECTOR Setup security menu Security Enable this function to prompt for a password before using the projector. ‡ One: Choose “On” to use security verification when the turning on the projector. ‡ Offe: Choose “Off” to be able to switch on the projector without password verification. Security Timer Can be select the time (Month/Day/Hour) function to set the number of hours the projector can be used. -
Page 37: Setup Test Pattern Menu
USING THE PROJECTOR Setup test pattern menu Test Pattern Select the test pattern from green grid, magenta grid, white grid, white or disable this function (off). Setup remote settings menu IR Function Set the IR function setting. ‡ One: Choose “On”, the projector can be operated by the remote control from top IR receiver. ‡... -
Page 38: Setup Reset Menu
USING THE PROJECTOR Input Name Use to rename the input function for easier identification. The available options include HDMI1 and HDMI2/MHL. High Altitude When “On” is selected, the fans will spin faster. This feature is useful in high altitude areas where the air is thin. Display Mode Lock Choose “On”... -
Page 39: Info Menu
USING THE PROJECTOR Info menu Info menu View the projector information as listed below: ‡ Regulatory ‡ Serial Number ‡ Source ‡ Resolution ‡ Refresh Rate ‡ Display Mode ‡ Lamp Hours ‡ Filter Hours ‡ Brightness Mode ‡ FW Version English... -
Page 40: Maintenance
MAINTENANCE Replacing the lamp The projector automatically detects the lamp life. When the lamp life is nearing the end of use, a warning message will appear on the screen. Warning Lamp Warning Lamp life exceeded. When you see this message, please contact your local reseller or service center to change the lamp as soon as possible. - Page 41 MAINTENANCE Replacing the lamp (continued) Procedure: Switch off the power to the projector by pressing the " " button on the remote control or the projector keypad. Allow the projector to cool down for at least 30 minutes. Disconnect the power cord. Unscrew the screw on the cover.
-
Page 42: Installing And Cleaning The Dust Filter
MAINTENANCE Installing and cleaning the dust filter Installing the dust filter Notee: Dust filters are only required/supplied in the selected regions with excessive dust. Cleaning the dust filter We recommend you to clean the dust filter every three months. Clean it more often if the projector is used in a dusty environment. -
Page 43: Additional Information
If 3D input is 1080p@24Hz, the DMD should replay with integral multiple with 3D mode. ‡ Support NVIDIA 3DTV Play if there is no patent fee from Optoma. ‡ 1080i@25Hz and 720p@50Hz will run in 100Hz; 1080p@24Hz will run in 144Hz; other 3D timing will run in 120Hz. -
Page 44: Image Size And Projection Distance
ADDITIONAL INFORMATION Image size and projection distance Screen size Screen size (Min zoom) (Max zoom) Desired From base to From base to Distance (m) Diagonal (inch) W (cm) x H (cm) top of image Diagonal (inch) W (cm) x H (cm top of image (cm) (cm) -
Page 45: Projector Dimensions And Ceiling Mount Installation
ADDITIONAL INFORMATION Projector dimensions and ceiling mount installation To prevent damage to your projector, please use the Optoma ceiling mount. If you wish to use a third party ceiling mount kit, please ensure the screws used to attach a mount to the projector meet the following specifications: ‡... -
Page 46: Ir Remote Control Codes
ADDITIONAL INFORMATION IR remote control codes User2 User1 User3 Contrast Brightness Mode Aspect ratio Keystone Mute Sleep Timer Volume Source Re-sync Menu Volume HDMI1 HDMI2 VGA1 VGA2 Video YPbPr Data Custom code Printing-key code Description definition Byte 1 Byte 2 Byte 3 Power on Press to turn on the projector. - Page 47 ADDITIONAL INFORMATION Data Custom code Printing-key code Description definition Byte 1 Byte 2 Byte 3 Manually select a 3D mode that matches your 3D content. Volume + Volume + Adjust to increase volume. ▲ ◄ Four direction ▲, ◄, ►, or ▼ to select items or make keys adjustments to your selection.
-
Page 48: Troubleshooting
ADDITIONAL INFORMATION Troubleshooting If you experience a problem with your projector, please refer to the following information. If a problem persists, please contact your local reseller or service center. Image problems No image appears on-screen ‡ Ensure all the cables and power connections are correctly and securely connected as described in the "Installation"... - Page 49 ADDITIONAL INFORMATION Two images, side-by-side format ‡ Press "3D" button and switch to "SBS" for input signal is HDMI 1.3 2D 1080i side-by-side. Image does not display in 3D ‡ Check if the battery of 3D glasses is drained. ‡ Check if the 3D glasses is turned on.
-
Page 50: Warning Indicators
ADDITIONAL INFORMATION Warning indicators When the warning indicators (see below) light up or flash, the projector will automatically shutdown: ‡ "LAMP" LED indicator is lit red and if "On/Standby" indicator flashes red. ‡ "TEMP" LED indicator is lit red and if "On/Standby" indicator flashes red. This indicates the projector has overheated. - Page 51 ADDITIONAL INFORMATION ‡ Lamp warning: Warning Lamp Warning Lamp life exceeded. ‡ Temperature warning: Warning TEMPERATURE TOO HIGH Please: 1. Make sure air in and outlets are not blocked. 2. Make sure the environment temperature is under 45 degree C. If the problem persists in spite of the above.
-
Page 52: Specifications
ADDITIONAL INFORMATION Specifications Optical Description Native resolution 1080p Lens Manual zoom and manual focus Image size (diagonal) 28”~301” Projection distance 1m ~ 10m (focus range) Electrical Description - HDMI 1.4b Inputs - HDCP 1.4 Color reproduction 1073.4 Million color - Horizontal scan rate: 15.375~91.146 KHz Scan rate - Vertical scan rate: 50~ 85 Hz (120Hz for 3D feature projector) Built-in speaker... -
Page 53: Optoma Global Offices
ADDITIONAL INFORMATION Optoma global offices For service or support, please contact your local office. Japan 3178 Laurelview Ct. 888-289-6786 東京都足立区綾瀬3-25-18 Fremont, CA 94538, USA 510-897-8601 info@os-worldwide.com 株式会社オーエス www.optomausa.com services@optoma.com 0120-380-495 www.os-worldwide.com コンタクトセンター: Canada Taiwan 3178 Laurelview Ct. 888-289-6786 12F., No.213, Sec. 3, Beixin Rd.,... - Page 54 *36.7AY01G001-A* P/N:36.7AY01G001-A www.optoma.com...
Need help?
Do you have a question about the HD243x and is the answer not in the manual?
Questions and answers