Table of Contents
Advertisement
Quick Links
CONTENTS
Usage Notice ....................................................................... 2
Safety Instructions .......................................................................................... 2
Introduction ......................................................................... 5
Projector Features .......................................................................................... 5
Package Contents .......................................................................................... 6
Projector Overview ......................................................................................... 7
Using the Product ............................................................... 9
Control Panel .................................................................................................. 9
Connection Ports .......................................................................................... 10
Remote Control ............................................................................................ 12
Installing the Batteries .................................................................................. 15
Remote Control Operation ............................................................................ 16
Connection ........................................................................ 17
Connecting a computer ................................................................................ 19
Connecting Video source devices ................................................................ 20
Operation ........................................................................... 23
Powering On/Off the Projector ...................................................................... 23
Adjusting the Projector Height ...................................................................... 24
Adjusting the Projector Zoom and Focus ..................................................... 24
Adjusting Projection Image Size ................................................................... 25
Menu Operation ............................................................................................ 27
Appendix ............................................................................ 50
Installing the Dust Filter (Optional accessory) .............................................. 50
Replacing the Lamp ...................................................................................... 51
Ceiling mount installation .............................................................................. 53
Compatibility Modes ..................................................................................... 54
RS232 Commands and Protocol Function List ............................................. 59
Troubleshooting ............................................................................................ 64
Optoma Global Offices ................................................................................. 66
Regulation & Safety Notices ......................................................................... 69
EN-1
Advertisement
Table of Contents

Subscribe to Our Youtube Channel
Related Manuals for Optoma S310


Summary of Contents for Optoma S310
-
Page 1: Table Of Contents
Installing the Dust Filter (Optional accessory) ..........50 Replacing the Lamp ..................51 Ceiling mount installation ................53 Compatibility Modes ..................54 RS232 Commands and Protocol Function List ..........59 Troubleshooting .................... 64 Optoma Global Offices ................. 66 Regulation & Safety Notices ................. 69 EN-1... -
Page 2: Usage Notice
Usage Notice Safety Instructions Read all of these instructions before you operate your projector and save for future reference. 1. Read instructions All the safety and operating instructions should be read before the appliance is operated. 2. Notes and warnings All notes and warnings in the operating instructions should be adhered 3. - Page 3 8. Replacement parts When replacement parts are required, be sure that the replacement parts are specified by the manufacture. Unauthorized substitutions may result in fire, electric shock or other hazards. 9. Moisture Condensation Never operate this projector immediately after moving it from a cold location to a warm one.
- Page 4 Notes on the AC Power Cord AC Power Cord must meet the requirement of countries where you use this projector. Please confirm your AC plug type with the graphics below and ensure that the proper AC Power Cord is used. If the supplied AC Power Cord does not match your AC outlet, please contact your sales dealer.
-
Page 5: Introduction
Introduction Projector Features The projector integrates high-performance optical engine projection and a user - friendly design to deliver high reliability and ease of use. The projector offers the following features: ® technology SVGA (800 x 600 pixels) XGA (1024 x 768 pixels) WXGA (1280 x 800 pixels) Equipped with VGA connector Equipped with HDMI connector... -
Page 6: Package Contents
Package Contents When you unpack the projector, make sure you have all these components: *VGA Cable Projector AC Power Cord (D-SUB to D-SUB) Remote Control (IR) & *HDMI Cable *Carry Bag batteries (AAA *2 PCS) User's Manual Warranty Card Quick Start Card *Dust filter Documentation Note... -
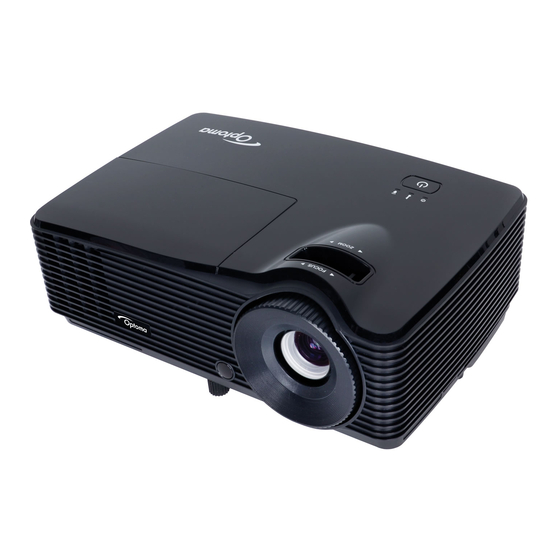
Page 7: Projector Overview
Projector Overview Front View Airflow Out Airflow In Elevator foot Ventilation holes Front IR remote control sen- Control panel Projection lens Zoom ring Focus ring Lamp cover Security bar EN-7... - Page 8 Bottom View Ceiling mount holes Note This projector can be used with a ceiling mount for support. The ceiling mount is not included in the package. Contact your dealer for information to mount the projector on a ceiling. EN-8...
-
Page 9: Using The Product
Using the Product Control Panel Power Turn the projector on or off. (Power LED indicator) Refer to “LED Indicator Messages” on page (Temperature LED indicator) Refer to “LED Indicator Messages” on page (Lamp LED indicator) Refer to “LED Indicator Messages” on page EN-9... -
Page 10: Connection Ports
Connection Ports MOUSE SERVICE VIDEO RS-232C (Type 1-SVGA) VGA / YPbPr MOUSE SERVICE AUDIO-IN VIDEO RS-232C (Type 2-XGA) VGA / YPbPr VGA/YPbPr/ Connect image input signal (analog RGB or component) to this jack. Support wireless dongle via internal power of VGA. RS-232C When operating the projector via a computer, connect this to the controlling computer's RS-232C port. - Page 11 MOUSE RS-232C SERVICE (Type 3-SVGA) HDMI1 HDMI2 USB Power Out(5V MOUSE RS-232C SERVICE (Type 4-WXGA) HDMI1 HDMI2 USB Power Out(5V AUDIO HDMI1 Connect HDMI output from video equipment to this jack. HDMI2 Connect HDMI output from video equipment to this jack. RS-232C When operating the projector via a computer, connect this to the controlling computer's RS-232C port.
-
Page 12: Remote Control
Remote Control Power Turn the projector on or off. Blank & Audio mute Momentarily blanks video and mutes audio. Left mouse Perform the left button of the mouse when mouse mode is activated. Four directional buttons Use four directional buttons to select items or make adjustments to your selection. - Page 13 Format Selects the display aspect ratio. Display VGA signal. HDMI Display HDMI signal. User1 User1 definable key for customized function. Source Switch between input signals. User2 User2 definable key for customized function. Switch Activate/de-activate remote mouse function. Freeze Freeze the projected image. Mute Momentarily turns off/on the audio.
- Page 14 Numbered keypad Press 0 to 9 to enter a password when required. Note Remote Control (IR) or Remote Control with Laser Pointer (depending on region). See Appendix for the Remote with Laser Pointer. Using the remote mouse control The capability of operating your computer with the remote control gives you more flexibility when delivering presentations.
-
Page 15: Installing The Batteries
Installing the Batteries 1. Open the battery cover in the direction shown. 2. Install batteries as indicated by the diagram inside the compartment. 3. Close the battery cover into position. Caution Risk of explosion if battery is replaced by an incorrect type. Dispose of used batteries according to the instructions. -
Page 16: Remote Control Operation
Remote Control Operation Point the remote control at the infrared remote sensor and press a button. Operating the projector from the front Note The remote control may not operate when there is sunlight or other strong light such as a fluorescent lamp shining on the remote sensor. Operate the remote control from a position where the remote sensor is visible. -
Page 17: Connection
Connection When connecting a signal source to the projector, be sure to: 1. Turn all equipment off before making any connections. 2. Use the correct signal cables for each source. 3. Ensure the cables are firmly inserted. MOUSE SERVICE VIDEO RS-232C (Type 1-SVGA) VGA / YPbPr... - Page 18 MOUSE RS-232C SERVICE HDMI1 HDMI2 USB Power (Type 3-SVGA) Out(5V MOUSE RS-232C SERVICE HDMI1 HDMI2 USB Power (Type 4-WXGA) Out(5V AUDIO 1....................*HDMI cable 2....................*USB cable 3..............USB port for power charging 4....................*Audio cable Note Due to the difference in applications for each country, some regions may have different accessories.
-
Page 19: Connecting A Computer
Connecting a computer Connecting a computer The projector provides two VGA input sockets that allow you to connect them to both IBM compatible and Macintosh computers. A Mac adapter is ® ® needed if you are connecting legacy version Macintosh computers. To connect the projector to a notebook or desktop computer: 1. -
Page 20: Connecting Video Source Devices
Connecting Video source devices You can connect your projector to various Video source devices that provide any one of the following output sockets: HDMI Component Video Video (composite) You need only connect the projector to a Video source device using just one of the above connecting methods, however each provides a different level of video quality. - Page 21 Connecting an HDMI source device Examine your Video source device to determine if it has a set of unused HDMI output jacks available: If so, you can continue with this procedure. If not, you will need to reassess which method you can use to connect to the device.
- Page 22 Connecting a composite Video source device Examine your Video source device to determine if it has a set of unused composite Video output sockets available: If so, you can continue with this procedure. If not, you will need to reassess which method you can use to connect to the device.
-
Page 23: Operation
Operation Powering On/Off the Projector Powering On the Projector: 1. Connect the AC power cord and relevant peripheral signal cable(s) to the projector. 2. Press to turn on the projector. The projector takes a minute or so to warm up. 3. -
Page 24: Adjusting The Projector Height
Adjusting the Projector Height Tilt-adjustment foot Elevator foot The projector is equipped with an elevator foot to adjust the image height. 1. To raise or lower the image, turn the elevator foot. 2. To level the image on the screen, turn the tilt-adjustment foot to fine-tune the height. -
Page 25: Adjusting Projection Image Size
Adjusting Projection Image Size Refer to the graphic and table below to determine the screen size and projection distance. Maximum zoom Minimum zoom Screen Center of lens Vertical offset Projection distance SVGA/XGA 4 : 3 Screen Screen size Diagonal Projection distance [feet (m)] Image height Vertical offset [inch (cm)]... - Page 26 WXGA 16:10 Screen Screen size Diagonal Projection distance [feet (m)] Image height Vertical offset [inch (cm)] [inch (cm)] [inch (cm)] (min. zoom) (max. zoom) 30 (76) 3.08 (0.94) 3.92 (1.19) 16 (40) 2.4 (6) 40 (102) 4.12 (1.27) 5.17 (1.57) 21 (54) 3.2 (8) 60 (152)
-
Page 27: Menu Operation
Menu Operation The projector has multilingual on-screen display menus that allow you to make image adjustments and change a variety of settings. How to operate 1. To open the OSD menu, press “Menu” on the Remote Control. 2. When OSD is displayed, use key to select to select any item in the main menu. - Page 28 Menu tree Single-Item Main Menu Sub-Menu Menu SVGA/XGA: Presentation / Bright / Movie / sRGB / Blackboard / User / 3D WXGA: Display Mode Presentation / Bright / Movie / sRGB / Blackboard / User / 3D/ Game / ISF day / ISF night Brightness Contrast...
- Page 29 Hue / Cyan Saturation / Gain Hue / Magenta Saturation / Gain Hue / Color Settings Yellow Saturation / Gain Red / Green / White Blue Reset Exit Not HDMI Input: Auto / Advanced RGB / YUV IMAGE Color Space HDMI Input: Auto / RGB (0~255) / RGB...
- Page 30 SVGA/XGA: 4:3 / 16:9 / Native / Auto Format WXGA: 4:3 / 16:9 or 16:10 / LBX / Native / Auto Edge Mask Zoom Image Shift DISPLAY V Keystone 3D Mode Off / DLP-Link 3D--->2D 3D / L / R Auto / SBS / Top and 3D Format...
- Page 31 Language Projection Menu Location Screen Type 16: 10/16:9 (WXGA) SETUP Security On / Off Month / Day / Security Timer Hour Security Change Password Exit Projector ID Mute On / Off Audio Settings (Type 2/3/4) Volume Default / Logo Neutral Advanced Closed Off / CC1 /...
- Page 32 (Type1/2): VGA/Video Input Source (Type3/4): HDMI1/ HDMI2 Source Lock On / Off High Altitude On / Off Information Hide On / Off Keypad Lock On / Off None / Grid / Test Pattern White HDMI Link On / Off OPTIONS Inclusive of TV Yes / No Mutual / PJ ->...
- Page 33 (Type1/2): Brightness/ Contrast/ Zoom/Test pattern User 1 (Type3/4): Brightness/ Contrast/ Zoom/Test pattern/HDMI 2/HDMI Link (Type1/2): Brightness/ Contrast/ Zoom/Test pattern OPTIONS Remote Settings User 2 (Type3/4): Brightness/ Contrast/ Zoom/Test pattern/HDMI 2/HDMI Link (Type1/2): Brightness/ Contrast/ Zoom/Test pattern User 3 (Type3/4): Brightness/ Contrast/ Zoom/Test pattern/HDMI...
- Page 34 Direct Power On On / Off Auto Power Off (min.) Sleep Timer Advanced (min.) Quick Resume On / Off Power Mode Active / Eco (Standby) Lamp Hour Lamp Reminder On / Off Bright / Eco / Brightness Mode Dynamic / Lamp Settings OPTIONS Lamp SPA Mode...
- Page 35 IMAGE Display Mode There are many factory presets optimized for various types of images. Presentation: Good color and brightness from PC input. Bright: Maximum brightness from PC input. Moive: For home theater. sRGB: Standardised accurate color. Blackboard: This mode should be selected to achieve optimum color settings when projecting onto a blackboard (green).
- Page 36 Contrast Set the difference between light and dark areas. Sharpness Sharpen or soften the image. Color Adjust a video image from black and white to fully saturated color. Tint Shift colors toward red or green. Note “Color” and “Tint” functions are only supported under Video mode. Advanced Gamma This allows you to choose a degamma table that has been fine-tuned to bring...
- Page 37 vibrant colors in picture. The range is from “1” to “10”. If you prefer a stronger enhanced image, adjust toward the maximum setting. For a smoother, more natural image, adjust toward the minimum setting. Color Temp. If set to cold temperature, the image looks more blue. (cold image) If set to medium temperature, the image maintains normal colorings for white.
- Page 38 Reset Return the display parameters on IMAGE menu to the factory default set- tings. EN-38...
- Page 39 DISPLAY Format Use this function to choose your desired aspect ratio. For SVGA/XGA: Source 480i/p 576i/p 1080i/p 720p 1024x768 center 16:9 1024x576 center Native Displays the original image without any scaling. If source is 4:3, auto resize to 1024 x 768 If source is 16:9 auto resize to 1024 x 576 Auto (Default) If source is 15:9 auto resize to 1024 x 614...
- Page 40 Input source will be fit into 1280x800 display area and be kept its original aspect ratio. If source is 4:3, auto resize to 1066 x 800 Auto (Default) If source is 16:9 auto resize to 1280 x 720 If source is 15:9 auto resize to 1280 x 768 If source is 16:10 auto resize to 1280 x 800 16:9 Screen 16 : 9 screen...
- Page 41 Off: Select “Off” to turn off 3D mode. DLP Link: Select “DLP Link” to use optimized settings for DLP Link 3D glasses. 3D--->2D 3D: Select 3D format. L: Select left eye data. R: Select right eye data. 3D Format SBS: Use this mode for “Side-by-side” format 3D content. Top and Bottom: Use this mode for “Top and Bottom”...
- Page 42 SETUP Language Select the language used by the on-screen menu. Press /“Enter” key to enter the sub menu and then use the key to select your preferred language. Press “Enter” to finalize the selection. Projection Adjust the picture to match the orientation of the projector: upright or upside- down, in front of or behind the screen.
- Page 43 Security Timer Use this function to set the how long (Month/Day/Hour) the projector can be used. Once this time has elapsed you will be requested to enter your pass- word again. Change Password First time: 1. Press “Enter” to set the password.
- Page 44 Advanced Logo Use this function to set the desired startup screen. If changes are made they will take effect the next time the projector is powered on. Default: The default startup screen. Neutral: Neutral startup screen. Closed Captioning Use this function to set the desired startup screen. If changes are made they will take effect the next time the projector is powered on.
- Page 45 OPTIONS Input Source Use this option to enable / disable input sources. Press /“Enter” key to enter the sub menu and select which sources you require. Press “Enter” to finalize the selection. The projector will not search for inputs that are not selected.
- Page 46 Keypad Lock When the keypad lock function is “On”, the control panel will be locked how- ever, the projector can be operated by the remote control. By selecting “Off”, you will be able to reuse the control panel. Note To turn off the keypad lock, press and hold “Enter” key on top of the projector for 5 seconds.
- Page 47 If the setting is set to "Yes", both TV and projector will be automatically turned off at the same time. To prevent both devices to be turned off at the same time, set the setting to "No". Power On Link CEC power on command Mutual: Both projector and CEC device will be turned on simultaneously.
- Page 48 Quick Resume If the projector is accidentally turned off, this feature allows the projector to be instantly powered on again within 100 seconds of power down. Power Mode (Standby) Set whether the Device -> PJ function works when the projector is in standby (powered off but connected to AC power).
- Page 49 Choose “Yes” if an optional dust filter is installed. Filter Usage Hours Display the dust filter’s elapsed operating time (in hours). Filter Reminder Sets a filter reminder if timer is up. Filter Reset Reset the dust filter hour counter after replacing the dust filter. Reset Choose “Yes”...
-
Page 50: Appendix
Appendix Installing the Dust Filter (Optional accessory) Be sure to follow the steps to install the dust filter. 1. Align the filter with the side of the projector. 2. Stick the filter to the ventilation holes until it hooked.. 3. Turn on the projector, then press “Menu”, go to OPTIONS >... -
Page 51: Replacing The Lamp
Replacing the Lamp Over time, the brightness on the lamp is expected to decrease gradually. It is recommended to replace the lamp when the warning message pops up on the projected image. If somehow the lamp has shattered, it is recommended to get the lamp replaced by a qualified service personal. - Page 52 1. Turn off the projector. 2. Unplug the power cord. 3. Remove the screw in the side of the lamp cover. 4. Lift the cover. 5. Loosen the screws from the lamp module. 6. Raise the handle and pull out the lamp module slowly and carefully. 7.
-
Page 53: Ceiling Mount Installation
Ceiling mount installation 1. To prevent damage to your projector, please use the Optoma ceiling mount. 2. If you wish to use a third party ceiling mount kit, please ensure the screws used to attach a mount to the projector meet the following specifications:... -
Page 54: Compatibility Modes
Compatibility Modes Computer Compatibility Signal Resolution Refresh Rate(Hz) Notes for Mac 640 X 480 60/67/72/85 Mac 60/72/85 SVGA 800 X 600 60(*2)/72/85/120(*2) Mac 60/72/85 60(*2)/70/75/85/ 1024 X768 Mac 60/70/75/85 120(*2) HDTV(720P) 1280 X 720 50/60(*2)/120(*2) Mac 60 1280 X768 60/75/85 Mac 60/75/85 WXGA 1280 X800... - Page 55 Input Signal for HDMI Signal Resolution Refresh Rate(Hz) Notes for Mac 640 X 480 Mac 60/72/85 SVGA 800 X 600 60(*2)/72/85/120(*2) Mac 60/72/85 60(*2)/70/75/85/ 1024 X 768 Mac 60/70/75/85 120(*2) SDTV(480I) 640 X 480 SDTV(480P) 640 X 480 SDTV(576I) 720 X 576 SDTV(576P) 720 X 576 WSVGA(1024X600)
- Page 56 True 3D Video Compatibility table Input timing 1280 X 720P @ 50Hz Top - and - Bottom 1280 X 720P @ 60Hz Top - and - Bottom 1280 X 720P @ 50Hz Frame packing HDMI 1.4a 1280 X 720P @ 60Hz Frame packing 3D Input 1920 X 1080i @50 Hz...
- Page 57 IR Code Customer code: 32CD Key code Printing-key definition Power on/off Switch Freeze Mute Up arrow Left arrow Right arrow Down arrow EN-57...
- Page 58 Enter Enter Mode Page- Page+ Keystone+ Keystone- Volume + Volume - Menu/2 3D/3 HDMI1/4 VGA/5 Video/6 User 1/7 User 2/8 User 3/9 Source Re-Sync The IR codes below are for user-defined remote only. Power off (single push) Power off Power on VGA2 Component EN-58...
-
Page 59: Rs232 Commands And Protocol Function List
RS232 Commands and Protocol Function List RS232 Pin Assignments D-Sub 9 pin Wire List (from the projector side) (from the cable side) 1 CD COLOR Black Brown Orange Yellow Green Blue Purple White SHELL SHELL RS232 Protocol Function List Baud Rate : 9600 XX=01-99, projector's ID, Data Bits: 8 XX=00 is for all projectors... - Page 60 ----------------------------------------------------------------------------------------------------------------------------------------------------------------------------------- SEND to projector ----------------------------------------------------------------------------------------------------------------------------------------------------------------------------------- Function 232 ASCII Code HEX Code Description ----------------------------------------------------------------------------------------------------------------------------------------------------------------------------------- ~XX00 1 7E 30 30 30 30 20 31 0D Power ON ~XX00 0 7E 30 30 30 30 20 30 0D Power OFF (0/2 for backward compatible) ~XX00 1 ~nnnn 7E 30 30 30 30 20 31 20 a 0DPower ON with Password ~nnnn = ~0000 (a=7E 30 30 30 30)
- Page 61 --------------------------------------------------------------------------------------------------------------------------------------------------------------------------------- ~XX61 n 7E 30 30 36 31 20 a 0D Edge mask n = 0 (a=30) ~ 10 (a=31 30) ~XX62 n 7E 30 30 36 32 20 a 0D Zoom n = -5 (a=2D 35) ~ 25 (a=32 35) ~XX63 n 7E 30 30 36 33 20 a 0D H Image Shift...
- Page 62 ~XX82 1 7E 30 30 38 32 20 31 0D Logo Default ~XX82 3 7E 30 30 38 32 20 33 0D Neutral ~XX88 0 7E 30 30 38 38 20 30 0D Closed Captioning ~XX88 1 7E 30 30 38 38 20 31 0D ~XX88 2 7E 30 30 38 38 20 32 0D ----------------------------------------------------------------------------------------------------------------------------------------------------------------------------------...
- Page 63 ----------------------------------------------------------------------------------------------------------------------------------------------------------------------------------- SEND from projector automatically ----------------------------------------------------------------------------------------------------------------------------------------------------------------------------------- Function Projector Return Description 232 ASCII Code HEX Code ----------------------------------------------------------------------------------------------------------------------------------------------------------------------------------- when Standby/Warming/Cooling/Out of Range/Lamp fail/Fan Lock/Over Temperature/ Lamp Hours Running Out/Cover Open INFOn n : 0/1/2/3/4/6/7/8/9 = Standby/Warming/Cooling/Out of Range/Lamp fail/Fan Lock/Over Temperature/Lamp Hours Running Out/Cover Open/Lamp SPA mode ----------------------------------------------------------------------------------------------------------------------------------------------------------------------------------- READ from projector...
-
Page 64: Troubleshooting
Troubleshooting Refer to the symptoms and measures listed below before sending the projec- tor for repairs. If the problem persists, contact your local reseller or service center. Please refer to "LED Indicator Messages" as well. Start-up If no lights turn on: Be sure that the power cord is securely connected to the projector and the other end is plugged into an outlet with power. - Page 65 LED Indicator Messages Power LED Power LED Temp LED Lamp LED Message (Red) (Green) (Red) (Red) Standby State Steady light (Input power cord) Flashing Power on 0.5 sec off (Warming) 0.5 sec light Power on & Lamp Steady light lighting Flashing 0.5 sec off 0.5 sec light...
-
Page 66: Optoma Global Offices
Optoma Global Offices For service or support please contact your local office. 3178 Laurelview Ct. Fremont, CA 94538, USA 888-289-6786 www.optomausa.com services@optoma.com Canada 3178 Laurelview Ct. Fremont, CA 94538, USA 888-289-6786 www.optomausa.com services@optoma.com Europe 42 Caxton Way, The Watford Business... - Page 67 Scandinavia Lerpeveien 25 +47 32 98 89 90 3040 Drammen +47 32 98 89 99 Norway info@optoma.no PO.BOX 9515 3038 Drammen Norway Latin America 3178 Laurelview Ct. Fremont, CA 94538, USA 888-289-6786 www.optoma.com.br www.optoma.com.mx Korea WOOMI TECH.CO.,LTD. 4F,Minu Bldg.33-14, Kangnam-Ku,...
- Page 68 中国 +86-21-62947376 上海市长宁区 +86-21-62947375 凯旋路 1205 号 5 楼 www.optoma.com.cn 琉璃奥图码 EN-68...
-
Page 69: Regulation & Safety Notices
Regulation & Safety Notices This appendix lists the general notices of your projector. FCC Notice This equipment has been tested and found to comply with the limits for a Class B digital device, pursuant to part 15 of the FCC Rules. These limits are designed to provide reasonable protection against harmful interference in residential installation. - Page 70 Operation conditions This device complies with Part 15 of the FCC Rules. Operation is subject to the following two conditions: 1. This device may not cause harmful interference and 2. This device must accept any interference received, including interference that may cause undesired operation. Notice: Canadian users This Class B digital apparatus complies with Canadian ICES-003.
Need help?
Do you have a question about the S310 and is the answer not in the manual?
Questions and answers